
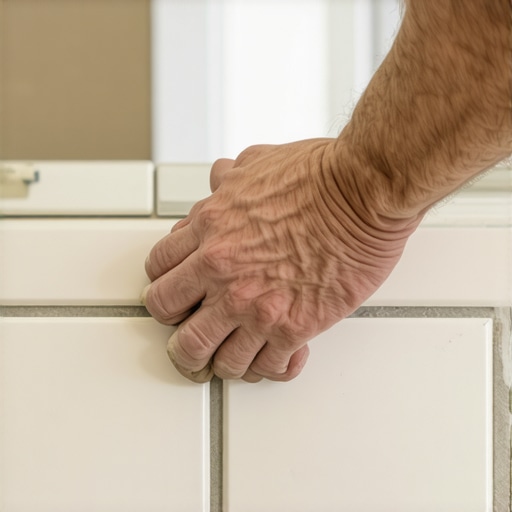
I spent six hours on my knees, meticulously preping the subfloor, convinced I was the next Michelangelo of masonry. I had even studied how to achieve flawless floor leveling before tile laying until I could recite the steps in my sleep. But then I hit the wall—literally. As I started the bullnose trim around the shower niche, my ‘perfect’ layout turned into a mess of uneven gaps and visible factory edges. It was a humbling moment that taught me one vital truth: the edge is where the amateur is separated from the artist. Most people focus on the big field tiles, but it is those final inches of trim that actually define the room. Today, I am going to show you exactly how to stop fighting your trim and start making it look like you hired a high-end contractor. We are going to solve the mystery of the wonky transition and the visible grout line once and for all. [IMAGE_PLACEHOLDER]
Why your tile trim usually looks like a DIY project
My biggest mistake early on was thinking that bullnose tile was a ‘set it and forget it’ product. I used to just butter the back and slap it on. This led to massive lippage because I didn’t realize bullnose is often a hair thinner or thicker than the field tile. If you do not compensate for that depth difference with your trowel, you are going to have a bad time. I have learned that you need to be just as obsessed with the substrate as you are with the tile. Sometimes that means using tile installation pointers that save time and money, like dry-fitting the entire trim row before a drop of thinset touches the wall. According to the Tile Council of North America (TCNA), improper substrate preparation and lack of planning for trim thickness are the leading causes of cosmetic failures in residential bathrooms. Have you ever finished a row of tile only to realize your trim looks like a jagged afterthought? I want to hear about your most frustrating tile moment below!
Is custom-mitered bullnose actually worth the extra sweat?
Many people ask me if they should just skip the bullnose and miter the field tiles at a 45-degree angle. While mitering looks sleek, it is incredibly fragile. One accidental bump with a heavy shampoo bottle and you have a permanent chip. Bullnose exists for a reason: it provides a durable, rounded shoulder that can take a beating. The trick is making that transition look seamless. If you are struggling with height differences between your floor and the wall trim, you might even need to consider why you need a transition strip between different flooring heights to keep everything flush. It’s about more than just aesthetics; it’s about structural integrity and a finish that doesn’t scream ‘I did this on a Saturday after three coffees.’
Fix the Wall Before You Touch the Tile
If your substrate is wavy, your trim will be a rollercoaster. I remember a kitchen backsplash project in 2021 where I ignored a slight bulge in the drywall. By the time I reached the bullnose edge, that ‘slight’ bulge forced the trim out so far it looked like a mistake rather than a feature. I ended up having to grind down the drywall behind the tile—a dusty nightmare you want to avoid. Before you spread any thinset, you must ensure your surface is dead flat. Using precise floor leveling techniques to achieve flawless surfaces is not just for the ground; the same logic of checking for high spots with a straightedge applies to your walls. If your wall is bowing, use a shim or a bit of extra thinset on the field tile to bring everything into a single, cohesive plane.
The Secret to Back-Buttering for a Flush Finish
Most bullnose tiles have a slightly different profile than the field tile. Even if they come from the same box, the manufacturing process for the rounded edge can result in a thinner body. If you use the same notched trowel for both, the trim will sit recessed, creating a lip that catches dust and looks amateur. The fix is simple: back-butter every piece of trim. Think of back-buttering like spreading peanut butter on toast; you want a thin, even layer that fills the ridges of the tile. This adds just enough thickness to bring the trim flush with the field tile. Utilizing the trowel notch secret for getting full thinset coverage ensures there are no hollow spots behind that vulnerable edge, which is critical since trim takes the most physical impact from vacuums or shoulders.
Stop the Sag with These Pro Stability Tricks
Gravity is the enemy of a vertical bullnose. Because trim is often installed last, it doesn’t always have the support of a tile underneath it to keep it from sliding down. I once walked away from a shower niche to grab lunch, only to return to a bullnose that had slid half an inch, ruining the alignment. Now, I never install trim without blue painter’s tape. Once you set the piece, stretch a piece of tape from the trim to the adjacent wall or field tile. This acts like a temporary strap, holding the tile in its ‘perfect’ spot while the thinset cures. 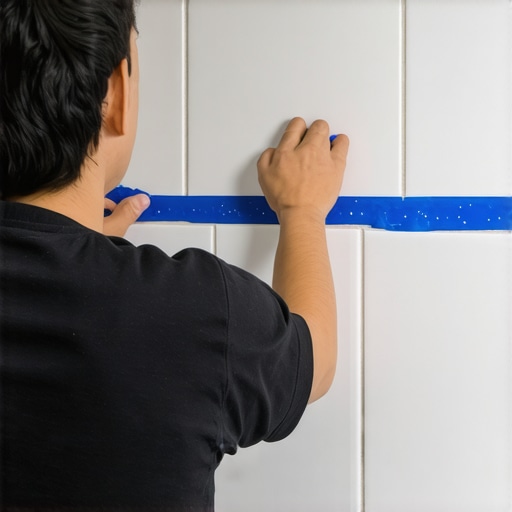
How to Manage Difficult Transitions and Gaps
When your tile meets another material, like a hardwood floor or a different wall texture, the trim needs to act as a bridge. If you find yourself with a gap that’s too wide for grout, you may need to look into why you need a transition strip between different flooring heights to mask the jump. For the grout lines themselves, keep them consistent with the rest of the project. If you are struggling with tiles that want to kick out at the corners, use how to fix a lippage problem in your new tile layout strategies by using leveling clips specifically designed for edges. These clips keep the faces of the tiles locked together until the adhesive is rock hard. Finally, when you are ready to grout, use the painters tape secret for perfectly straight grout lines along the wall side of the bullnose. This prevents the grout from bleeding onto your painted wall, giving you that sharp, professional line that distinguishes a master’s work from a weekend warrior’s first attempt.
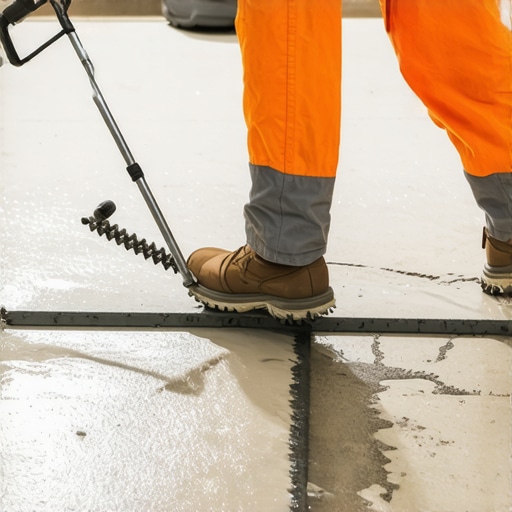
Even with the perfect trim and a solid plan, there is a dangerous myth floating around the DIY world: that self-leveling underlayment actually ‘self-levels’ on its own. It is a marketing term, not a physical law. Many homeowners pour a bag and expect it to behave like water, but in reality, it has the consistency of pancake batter and a very short working time. If you do not help it along, you will end up with a series of humps and valleys that are harder to fix than the original floor. In my experience, mastering floor leveling pro secrets for perfect installations means realizing that the product needs mechanical help from a spiked roller or a gauge rake to break surface tension and ensure a truly flat plane.
The Pinhole Trap That Ruins a Smooth Pour
One of the most frustrating ‘oops’ moments happens an hour after you have finished a pour. You look down and see hundreds of tiny craters or bubbles marring your work. This is not a bad batch of product; it is outgassing. If you skip the primer or use a cheap substitute, the dry subfloor literally sucks the moisture out of the leveler, pushing air up through the wet mix. I have seen entire projects ruined because the installer thought they could save twenty dollars on primer. To get that pro look, you need the secret to mixing leveler for a glass smooth finish, which includes a slow, methodical mix to avoid whipping air into the bucket. According to the National Wood Flooring Association (NWFA), ignoring subfloor porosity leads to a significantly higher chance of bond failure and surface defects in the first year. Have you ever had a beautiful pour turn into a bubbly nightmare? Let me know your ‘oops’ stories in the comments—I have probably been there too!
Does your subfloor need a moisture barrier or just a better primer?
This is the question that separates the weekend warriors from the experts. If you are working on a slab-on-grade or in a basement, the answer is almost always a moisture barrier. Many people mistake surface dampness for a ‘bad mix,’ but the real culprit is often hydrostatic pressure pushing through the concrete. Before you even think about the decorative layer, you must know how to use a moisture meter before installing wood floors or tile. If the readings are high, a standard primer won’t save you; you need an epoxy-based moisture vapor mitigator. I see people make these flooring installation mistakes to avoid for lasting results constantly by assuming a dry-to-the-touch floor is a safe floor. It is a nuance that costs thousands if ignored.
Beat the Clock Before the Leveler Sets
The biggest stressor in any large floor project is the clock. Most levelers give you about 15 to 20 minutes of ‘flow’ time. If you are mixing one bag at a time with a single bucket, you are already behind. You need a ‘station’ setup where one person mixes while the other pours and spreads. If the ‘wet edge’ of your pour starts to skin over before the next bucket arrives, you will get a cold joint—a visible ridge that will telegraph through your luxury vinyl or hardwood. This is often why your self-leveler is bubbling over plywood or setting up in chunks; the substrate is too thirsty or the room is too hot. Always check your water-to-powder ratio with surgical precision. Even a half-cup too much water can significantly weaken the structural integrity of the floor, leading to cracks that eventually make your new tile sound hollow when you walk on it.
Once you have conquered the rush of the pour, your focus must shift from survival to perfection. If you want that glass-like finish, you absolutely need to know how to use a spiked roller for the perfect leveling pour. I personally use a roller with 1.25-inch plastic spikes because it does more than just pop surface bubbles; it mechanically breaks the surface tension of the leveler, allowing it to knit together at the ‘cold joints’ where two different buckets meet. Without this tool, you are essentially gambling that your pancake batter-consistency mix will move on its own. It rarely does. I have found that spending those extra ten minutes rolling the wet surface is the difference between a floor that looks okay and one that is ready for large-format tile without a single shim.
The tools that make or break your finish
Beyond the roller, I never step onto a job site without my digital moisture meter. I have seen too many beautiful projects succumb to flooring installation mistakes to avoid for lasting results, and 90% of them start with moisture. Before you even think about laying a single plank, you must understand how to use a moisture meter before installing wood floors. If your subfloor is holding onto 12% moisture and your hardwood is at 6%, you are building a ticking time bomb of cupping and gaps. I also highly recommend investing in a 10-foot straightedge. While a 4-foot level is great for hanging pictures, it is useless for finding the long-wave dips in a subfloor that cause luxury vinyl to bounce. Checking for these gaps early allows you to patch specific areas rather than pouring a whole room of expensive leveler.
How do I keep these floors looking brand new for a decade?
The biggest heartbreak is seeing a perfect installation ruined by a bad cleaning routine. I tell all my clients to memorize hardwood floor care secrets to longevity and shine. For starters, throw away the steam mop. Seriously. If you want to know why you should never use a steam mop on click-lock floors, it is because that pressurized moisture is forced directly into the joints, causing the HDF core to swell like a sponge. Instead, stick to a pH-neutral cleaner and a barely damp microfiber pad. In the winter months, you also need to manage your humidity. Knowing how to keep your hardwood floors from gapping in the winter by using a whole-house humidifier will prevent the wood from shrinking and pulling away from your beautiful trim work. Maintenance is not just about cleaning; it is about environment control.
Faster drying times and the future of levelers
According to technical data from Schluter-Systems, neglecting to provide a 1/4-inch movement joint at the perimeter is a primary cause of ‘tenting’ in tile installations—where the floor literally lifts itself off the substrate due to thermal expansion. This is why I always emphasize why your bathroom floor needs a waterproofing membrane that also acts as an uncoupling layer. Looking toward 2025, the industry is moving toward fiber-reinforced self-levelers that eliminate the need for metal lath over plywood. This is a game-changer for DIYers because it reduces the thickness required for a stable base. If your floor has already seen better days, don’t panic; mastering hardwood floor refinishing expert tips for 2025 can save a floor you thought was a goner. My advice? Start small. Try the 10-foot straightedge test on your flattest room tonight—you might be surprised what you find hiding under the carpet.
[IMAGE_PLACEHOLDER]
The Hardest Lessons Learned Between the Subfloor and the Finish Line
After years of getting my hands dirty, I have realized that the most expensive mistakes aren’t usually the big ones; they are the tiny oversights that compound over time. Here are the core truths that changed how I approach every project:
- Layout is more than just math: I used to start in the center of the room because every book told me to. Now, I start where the most visible wall is. I would rather have a slightly off-center layout in a hidden corner than a sliver of tile right at the main entryway.
- Cleanliness is a structural requirement: A single handful of drywall dust left on a slab can prevent your leveler from bonding, leading to that dreaded ‘hollow’ sound three months later. Vacuum twice, then damp-mop once more.
- The ‘Finger Test’ for Leveler: Don’t trust the timer on the bag. Environment matters. I always touch a small overflow area first; if it leaves a residue on my glove, it is not ready for footsteps, regardless of what the instructions say. Many floor leveling challenges stem from simply being too impatient with the curing process.
My Personal Survival Kit for a Professional Finish
You do not need every tool in the aisle, but you do need these four to move from ‘DIY look’ to ‘Contractor grade.’ I swear by these every single time I step on a job site:
- A 10-foot Straightedge: This is the only way to truly see the ‘waves’ in a subfloor. Before you pour, you must know how to measure subfloor flatness before you start installing to avoid wasting product on areas that are already fine.
- The Spiked Roller: As we discussed, this is the secret to the ultimate guide to floor leveling for a perfect finish. It removes bubbles and knits your pours together seamlessly.
- A High-Quality Suction Cup: If you are laying large format tile, you cannot accurately check for coverage without lifting the tile back up. A suction cup allows you to peek under the hood without ruining your adjacent layout.
- Blue Painter’s Tape: It is not just for painting; it is the best clamp you have for holding bullnose trim in place while it sets.
Your Path to a Floor That Lasts Decades
It is easy to feel overwhelmed when you are standing in the middle of a gutted room with a pile of bags and a thousand square feet to cover. But remember: every master was once a beginner who just refused to ignore the details. By focusing on the substrate, respecting the chemistry of your levelers, and taking the time to back-butter your trim, you are already ahead of 90% of the ‘pros’ out there. Your home deserves a foundation that is as solid as it is beautiful. Following a step-by-step guide to flooring installation and leveling success isn’t about following rules; it’s about giving yourself the peace of mind that your work will look just as good in ten years as it does today. Don’t be afraid of the learning curve—the results are worth every drop of sweat. What is the one part of floor leveling or tiling that has you feeling stuck right now? Let me know in the comments below!