
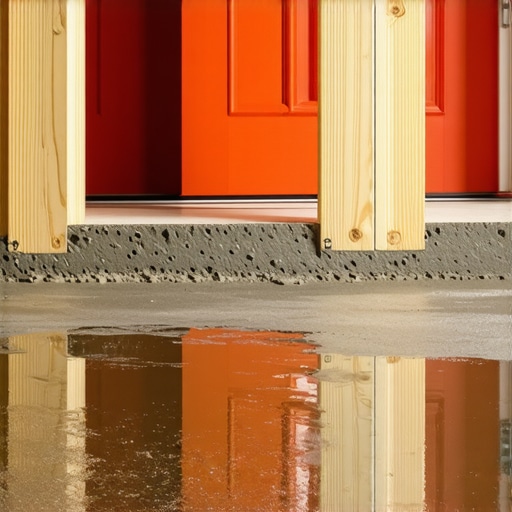
I was standing there, heart pounding, holding an empty five-gallon bucket while watching a hundred dollars worth of liquid stone disappear under my bedroom door like a gray, vengeful ghost. I had spent hours prepping the subfloor, mixing the perfect consistency, and feeling like a real pro. But within thirty seconds of the pour, I realized I’d made the ultimate rookie mistake: I didn’t dam the doorway. That ‘river of regret’ flowed right onto the hallway carpet, and let me tell you, cleaning up wet self-leveler from shag pile is a special kind of hell.
The Night I Turned My Hallway into a Gray Lake
If you’re here, you’re likely staring at a subfloor that looks more like a topographical map of the Ozarks than a flat surface. You know you need that perfectly flat base for your perfect finish, but the thought of that soup running wild is terrifying. I learned the hard way that common mistakes in floor leveling usually start with poor containment. My early failure wasn’t just messy; it was expensive. I had to rip out the dried leveler with a hammer and chisel because I didn’t take ten minutes to build a proper barrier. Today, I’m going to make sure you never have to experience that sinking feeling in your gut. We’re going to walk through exactly how to bottle that liquid up so it stays exactly where it belongs.
Is a simple piece of wood actually enough to hold back the tide?
You might be thinking that a 2×4 and some luck are all it takes, or perhaps you’re skeptical that any DIY solution can truly seal off a room. I used to think a bit of masking tape would do the trick—spoiler alert: it won’t.
Why Your Entire Flooring Project Depends on This One Barrier
Precision is everything when you’re preparing for flooring installation success. If your leveler leaks out, you lose the depth you need to hide those subfloor dips, and you’re left with a slope that makes furniture wobble and hardwood floors creak. It’s not just about the mess; it’s about the structural integrity of your finished floor. According to the Tile Council of North America (TCNA), substrate preparation—which includes proper leveling—is the single most critical factor in preventing grout cracks and tile failure. You have to treat that liquid with respect. If you don’t, you’ll find your leveler is setting up in all the wrong places before you can even move it around. Have you ever started a pour only to see it start escaping through a gap you swore wasn’t there? Drop a comment and tell me your horror story—it makes me feel better about my own disasters. Now, let’s get into the nitty-gritty of how we build a dam that’s tighter than a drum.
Seal Every Gap Like Your Security Deposit Depends on It
Think of self-leveler as a liquid that has the survival instincts of a mouse; if there is a hole even a fraction of an inch wide, it will find it and escape. Before you even think about cracking open a bag, you need to go on a search-and-destroy mission for gaps. I learned this when I poured a bathroom floor and forgot to seal the gap around the toilet flange. I heard a rhythmic thwack-thwack-thwack and realized the leveler was dripping through the subfloor and onto my workbench in the garage below. It was a literal ‘money pit’ situation. You must treat the room like a swimming pool. Use a high-quality silicone caulk or even a bead of hot glue to seal the joint where the wall meets the floor. This is especially vital if you are worried about why your self-leveler didnt bond to the wood subfloor properly because any movement or leakage will ruin the adhesion process before it starts.
Turn Scraps of Wood into a Watertight Fortress
For doorways and open transitions, a simple piece of lumber is your best defense, but only if you prep it right. I like to use a 1×2 strip of pine wrapped in clear packing tape. The tape acts as a ‘bond breaker,’ meaning the leveler won’t stick to the wood, and you can pop the dam off easily the next day without chipping your beautiful new surface. Secure the wood to the subfloor with just a few small finish nails or even heavy-duty double-sided tape if you’re working over concrete and don’t want to drill. Once the wood is down, run a bead of caulk along the inside edge where the wood meets the floor. This creates a gasket that blocks the liquid from creeping underneath. If you are dealing with a massive height difference, such as how to level a floor that has a 2 inch drop across the room, you might need to stack your dams or use a taller piece of pressure-treated lumber to handle the weight and pressure of that much wet stone.
Use Foam Sills to Protect Your Walls and Your Sanity
While a rigid dam is great for doorways, your perimeter walls need something a bit more flexible. I always recommend using foam expansion strips—often called sill seal—around the entire edge of the room. This serves two purposes: it prevents the leveler from leaking into the wall cavities, and it provides a ‘cushion’ that allows your house to naturally expand and contract without cracking the leveler. If you skip this, you might find why your self-leveler developed spiderweb cracks overnight because the material had nowhere to go as it cured. Just staple the foam to the drywall so it sits flush against the floor. This is a foundational step for how to achieve flawless floor leveling before tile laying, as it ensures your substrate remains isolated and stable.
The Final Check Before the Big Pour
Once your dams and foam are in place, do one final walkthrough with a bright flashlight. Shine it along the base of your dams. If you see even a sliver of light passing through to the other side, the leveler will see it too. I once used a handful of plumber’s putty to plug a last-minute hole I found near a radiator pipe, and it saved the entire project. This level of detail is what separates a DIY disaster from a professional-grade base for hardwood floors. You’ve worked hard to learn the secret to mixing the perfect bucket of self leveler every time; don’t waste that perfect mix by letting it run out the door and into the abyss.
The ‘Self-Leveling’ Label is a Total Lie
Most DIYers—and honestly, a fair share of pros—believe that self-leveling compound works like water, finding its own level by magic. In reality, these products are ‘self-smoothing,’ not truly self-leveling. If you simply dump the bucket and wait, you’ll end up with a series of connected mounds rather than a flat plane. To achieve precise floor leveling techniques, you must use a gauge rake to physically move the material into position. I once thought I could skip this step on a small laundry room, only to find the center was a quarter-inch higher than the walls because the surface tension held the ‘puddle’ in place.
Is your subfloor actually flat or just ‘smooth’?
There is a massive difference between a smooth floor and a flat one. You can have a surface as smooth as glass that still has a massive hump in the middle. Before you pour, you must check for high spots with a 10-foot straightedge. According to the National Wood Flooring Association (NWFA), a subfloor for hardwood floors must be flat to within 3/16 of an inch over a 10-foot radius. If you ignore this technical threshold, your expensive planks will eventually separate or ‘bounce.’
The Fatal Mistake of Adding ‘Just a Splash’ More Water
We’ve all been there: the mix feels a little too thick, and you’re worried it won’t flow. The temptation to add an extra cup of water is overwhelming. Don’t do it. This is exactly why your floor leveler pitted during the drying process. Excess water causes the sand and cement to separate; the water rises to the top, creating a weak, chalky surface that will eventually flake off. If your leveler is setting up too fast, it’s usually a temperature or priming issue, not a water ratio problem. Before you start, always how to use a moisture meter before you lay wood floors to ensure the subfloor isn’t sucking the hydration out of your mix too quickly. Have you ever fallen into this trap of ‘eye-balling’ the water? Let me know in the comments below.
Why the Spiked Roller is Your Best Friend
If you want that mirror-like finish you see in the pro videos, you need a spiked roller. This tool isn’t just for show; it breaks the surface tension and releases trapped air bubbles that lead to tiny pinholes. These pinholes are the enemy of flooring installation fundamentals, especially if you’re planning on a thin-set application later. Without rolling, you risk poor coverage, which is the cousin of the trowel notch secret for getting full thinset coverage. It’s these small, ‘unnecessary’ steps that determine if your floor lasts five years or fifty.
Stop Mixing Like a Hobbyist
If you’re still using a standard handheld drill and a single bucket, you’re playing a dangerous game with your floor’s future. I remember the day I upgraded to a dedicated mixing station—it changed everything. When you’re managing mastering floor leveling pro secrets, consistency is your only friend. I personally use the Collomix LevMix because it allows me to mix three bags at once without the lumps that ruin a pour. If the mix isn’t homogenous, you’ll end up with soft spots that eventually lead to detecting a hollow tile months after you’ve finished. According to the technical data sheets from Mapei, even a 5% variation in water-to-powder ratio can reduce the compressive strength of the cured leveler by up to 20%. That is the difference between a floor that lasts a lifetime and one that crumbles under a heavy refrigerator.
How do I maintain a leveled floor over time?
Maintenance starts long before the leveler is dry. Once you’ve achieved that perfect finish, the real work is managing environmental factors. In my experience, the biggest threat is humidity. If you are preparing for hardwood floors, you must keep the ambient moisture stable. I always use hardwood floor care secrets like maintaining a consistent HVAC setting to prevent the subfloor from expanding and putting pressure on the leveling layer. If the subfloor moves too much, you’ll see flooring installation mistakes to avoid manifesting as hairline fractures in your leveler. Check your work periodically with a high-quality moisture meter—this is a non-negotiable step for flooring installation and leveling success.
Why 3D Scanning is the Next Big Thing in Leveling
I’ve started seeing a massive shift toward digital precision in the flooring world. I recently experimented with a LiDAR-based scanning app on my smartphone to map out a kitchen floor before the pour. This tech isn’t just for architects anymore; it allows you to see exactly how many bags of material you need, down to the pound. In the next five years, I predict that precise floor leveling techniques will be fully automated with laser-guided screeds. This will eliminate the human error of ‘eyeballing’ the height and ensure that every flawless floor leveling project is perfectly flat, not just smooth. It’s an exciting time to be a DIYer because these tools are becoming more accessible every day.
The Dust-Free Secret Every Pro Swears By
Nothing ruins a bonding surface faster than fine concrete dust. I spent years trying to sweep my way to a clean subfloor until I invested in the vacuum attachment that actually picks up fine sawdust and silica particles. If you leave even a thin film of dust, your leveler will float right on top of it rather than bonding. This is one of those common mistakes that you won’t realize you’ve made until the floor starts to ‘crunch’ under your feet. Before you pour, try the ‘Blue Tape Test’: press a piece of blue painter’s tape onto your cleaned subfloor and pull it up. If there is any dust on the tape, you aren’t ready to prime yet. I challenge you to try this on your next project; you’ll be shocked at what your broom left behind.
Lessons from the Trenches: What Every Floor Leveler Taught Me
After years of wrestling with liquid stone, I’ve realized that the ‘pour’ is only 10% of the job. The real magic happens in the hours of silence before the buckets are ever cracked. One major lightbulb moment for me was discovering why your subfloor primer is bubbling on old concrete; it’s almost always because the slab wasn’t cleaned with the right pH-neutral solution, causing the primer to off-gas. Another hard-won truth is that you can never have enough help. Even if you think you’re fast, why your self-leveler is drying faster than you can pour it usually comes down to the lack of a ‘bucket runner’ keeping the flow constant. If you stop moving for even two minutes, you’ll lose that vital wet edge.
The Gear That Separates Pro Finishes from DIY Disasters
I don’t believe in buying every gadget on the shelf, but three specific tools changed my life. First, spiked shoes allow you to walk through the wet material to address low spots without leaving permanent footprints. Second, I cannot stress the importance of the vacuum attachment that actually picks up fine sawdust and silica; without a hospital-clean floor, your bond is a gamble. Finally, a decent laser level is worth its weight in gold. While a straightedge is great for spot checks, a 360-degree laser helps you visualize the entire room’s topography before you spend a dime on material. These precise floor leveling techniques transform a stressful project into a predictable science.
Trust Your Prep and Take the Plunge
It’s natural to feel a bit of ‘pour anxiety’ when you’re standing over a hundred pounds of wet cement. But if you’ve sealed your dams, primed twice, and checked your levels, you are already ahead of 90% of the people who attempt this. You aren’t just dumping mud; you are creating a foundation for the ultimate guide to floor leveling for a perfect finish. Take a deep breath, trust the process, and remember that every pro started with a messy bucket and a dream. Your future floor—and your knees—will thank you for the extra effort you put in today. Have you ever started a pour only to realize you forgot to seal a tiny gap under the baseboard? Share your story in the comments so we can all learn from the ‘river of regret’ together!