
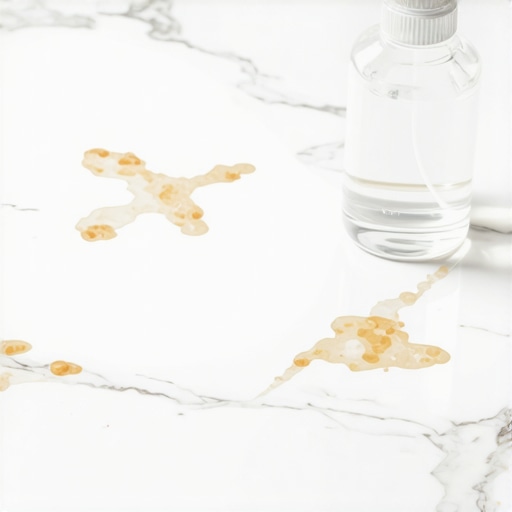
I still remember the smell of fresh lemon and white vinegar from that Saturday morning three years ago. I was so proud of my brand-new marble entryway. I thought I was being the ultimate “green” homeowner by skipping the harsh chemicals. I poured a little homemade solution onto a stubborn smudge, wiped it away, and watched in horror as the polished shine literally vanished before my eyes. It didn’t just clean the dirt; it ate the stone. If you’ve spent any time researching hardwood floor care secrets to longevity and shine, you might think those same gentle, natural rules apply to your stone. They don’t. In fact, following common “DIY” advice is the fastest way to turn your expensive investment into a dull, splotchy mess. Today, I’m going to share exactly why your favorite cleaning hacks are actually your floor’s worst nightmare and how you can save your surfaces from a permanent chemical scar.
Stop Reaching for the Vinegar Bottle
When I first started out, I made a massive mistake: I assumed “natural” meant “safe.” I used a vinegar-heavy mix on my travertine, and it left behind what looked like permanent water spots. This wasn’t just a stain; it was the vinegar mistake that eats through your natural stone tiles by dissolving the calcium carbonate within the material. It’s a gut-wrenching feeling to realize you’ve essentially “burned” your floor. We often worry about things like why your white marble tiles are turning yellow from the bottom up, but the damage we do from the top down with the wrong spray is far more common. In fact, according to the Natural Stone Institute, acid-based cleaners create a chemical reaction that removes the surface layer of the stone almost instantly. This is why you should never treat your stone floors with the same generic products you use for your countertops or windows.
Is my stone really that sensitive to a little acid?
The short answer is a resounding yes. This isn’t like a spill you can just scrub away; it is a permanent change to the stone’s texture known as etching. Even if you’ve mastered the wet rag trick for cleaning up wet grout haze, chemical etching requires a professional to polish out. Have you ever grabbed a “multi-purpose” cleaner only to realize it left a permanent mark on your expensive backsplash? I’d love to hear your horror stories so we can all learn what to avoid. Before you think about grabbing that bottle again, let’s look at the science of why this happens and how you can spot hidden acids in your cleaning cabinet.
Run a Simple Test to Save Your Surfaces
Before you even think about mopping, you need to verify your stone’s tolerance for your chosen cleaner. Think of your natural stone floor like a sponge that has been frozen in time; it is porous and reactive. I remember helping a friend with a kitchen remodel in a tight space. We were so focused on flooring installation fundamentals leveling for a seamless look that we almost forgot to check the stone’s reaction to her ‘organic’ citrus spray. I insisted on a test patch in the pantry where it would be hidden. Within minutes, the glossy finish turned chalky. To avoid this, find an inconspicuous corner and apply a single drop of your cleaner. Wait ten minutes. If the area looks dull or feels rough, that product is banned from your house. This simple check is as vital as knowing how to check for high spots with a 10-foot straightedge before laying your first tile; it prevents structural regrets.
Neutral pH is the Only Number That Matters
Most people assume that if a cleaner doesn’t have bleach, it’s fine. That’s a dangerous gamble. You need a pH-neutral cleaner specifically formulated for stone. Imagine the surface of your marble as a delicate ecosystem. High-acid cleaners (like lemon) or high-alkaline cleaners (like ammonia) disrupt the chemical bond of the stone’s surface. When I finally switched to a true neutral cleaner, the difference was night and day. The floor didn’t just look cleaner; it felt smoother. If you are dealing with deeper issues, like how to remove rust stains from a light colored tile floor, you might need a specialized poultice, but for daily maintenance, ‘neutral’ is your mantra.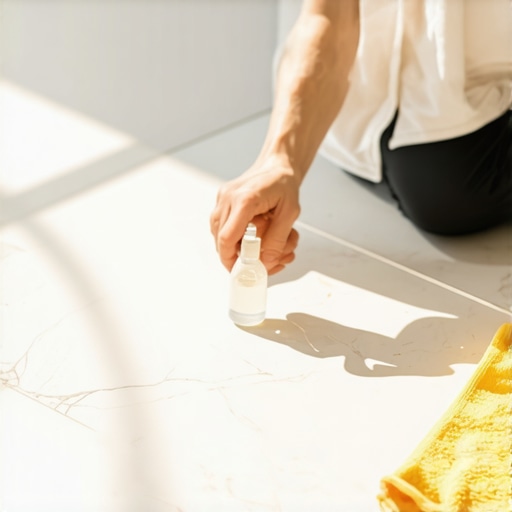
Stop the Sandpaper Effect Before You Mop
One of the biggest mistakes I see is people jumping straight to the wet mop. Every grain of sand on your floor acts like a piece of 80-grit sandpaper under the pressure of a mop head. If you drag those particles across the floor, you are micro-scratching the finish. You need to remove the abrasive grit first. Forget the heavy-duty shop vacs that might scuff the stone; instead, look for the vacuum attachment that actually picks up fine sawdust or soft debris without dragging a plastic head across the floor. A clean microfiber dust mop is even better. I make it a rule to sweep three times more often than I mop. It’s the same logic as the rule where why you should never mop new hardwood for at least two weeks; you have to let the environment stabilize and keep physical abrasives at bay to protect the integrity of the surface.
Master the Damp Wipe Method for a Streak-Free Finish
When it is finally time for moisture, the ‘damp’ part is non-negotiable. You shouldn’t see standing water on your stone at any point. I use a two-bucket system: one for the diluted neutral cleaner and one with plain water for rinsing the mop head. By keeping the rinse water separate, you aren’t just moving dirty water around the room. I once tried to rush a job by using one bucket, and the result was a cloudy film that took twice as long to buff out. Dunk the mop, wring it until it’s barely cool to the touch, and work in small three-foot sections. This controlled application ensures the stone doesn’t drink too much water, which can lead to subsurface issues over time.Beyond the daily cleaning routine, there’s a deeper layer to floor longevity that most homeowners ignore until it’s too late. Most people believe that if a floor looks flat to the eye, it’s ready for the next stage of installation. In my experience, ‘flat’ is a dangerous illusion. You can have a floor that is perfectly flat but tilted at a three-degree angle, which will cause your expensive kitchen cabinets to sit crooked and your hallway doors to swing open on their own. I’ve seen countless DIYers try to solve subfloor issues by blindly pouring bags of liquid cement, only to end up wondering why your self-leveler developed spiderweb cracks overnight. The truth is, self-leveling is a chemical race against time, not a simple ‘set it and forget it’ solution. If you don’t prime the surface correctly, the dry concrete will suck the moisture out of the leveler before it can bond, leaving you with a brittle, peeling mess.
The Difference Between Flat and Level Matters
When I talk to advanced contractors, they focus on ‘FF’ and ‘FL’ numbers—Floor Flatness and Floor Levelness. Everyone says a flat floor is enough, but for large-format tiles, the industry standard is surprisingly strict. The Tile Council of North America (TCNA) Handbook specifies that for tiles with at least one edge 15 inches or longer, the substrate must not vary more than 1/8 of an inch over a 10-foot span. This is much tighter than the standard 1/4 inch most people aim for. If you ignore this, you’ll struggle to understand the secret to getting a flat floor for large format tiles without creating massive ‘lippage’—those tiny vertical edges where one tile is higher than its neighbor.
Why does my perfectly flat floor still show shadows at night?
This is a question I get from homeowners who have just finished a high-end remodel. They followed every step, used the best thinset, and yet, under their new recessed LEDs, the floor looks like a series of small waves. This is known as optical lippage. It happens because even a perfectly ‘legal’ installation (within TCNA tolerances) can look terrible if the lighting is placed too close to the floor or wall. This is exactly why your porcelain tile looks wavy under recessed lighting. The low angle of the light creates long shadows from even the smallest deviation in height. 
Stop the Moisture Before It Stops Your Progress
One of the most expensive ‘oops’ moments I’ve witnessed happened because a homeowner assumed a concrete slab was dry just because it ‘looked’ grey. If you are installing hardwood or even high-end tile, surface appearance means nothing. You must learn how to use a moisture meter before you lay wood floors to check the internal relative humidity. Even if you’ve mastered how to achieve flawless floor leveling before tile laying, trapped moisture will eventually force its way out, causing tiles to delaminate or wood planks to cup and buckle. This invisible pressure is what usually leads to structural failures six months after the job is ‘done.’ Furthermore, the way you apply your adhesive can make or break the bond. Most people use a ‘swirl’ pattern with their trowel, but that actually traps air pockets that prevent full contact. Mastering the trowel notch secret for getting full thinset coverage involves pulling your trowel in straight lines to allow air to escape. Have you ever fallen into this trap where a ‘simple’ installation turned into a structural nightmare? Let me know in the comments so we can troubleshoot your specific floor issues together. Remember, installing tiles like a pro requires a chemist’s mindset as much as a craftsman’s hands.I’ve spent thousands on tools over the years, but if I had to pick one that actually pays for itself, it’s a high-quality pinless moisture meter. According to the technical documentation from the National Wood Flooring Association (NWFA), wood is hygroscopic, meaning it is constantly gaining or losing moisture to reach an equilibrium with its environment. This is why you need to learn how to use a moisture meter before you lay wood floors—because an 8% reading in the morning could jump to 12% after the HVAC kicks on. If you’re dealing with a nasty renovation, you also need the best tool for scraping glue off a concrete slab to ensure your new leveler or adhesive is bonding to the substrate and not to fifty-year-old residue. 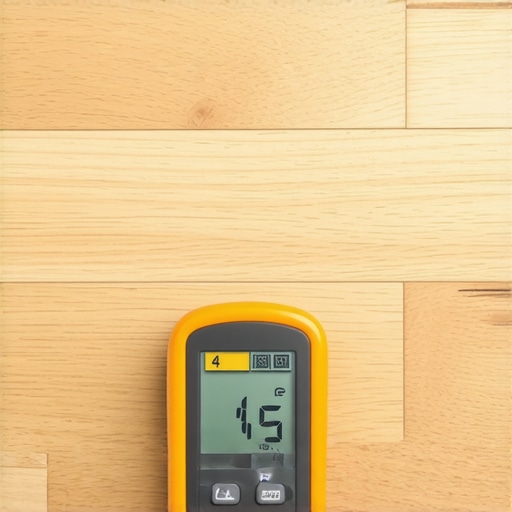 Looking toward the future, I predict we will see more ‘smart’ subfloors with embedded humidity sensors that alert your smartphone the moment a pipe leak begins under your boards. For now, though, staying disciplined with a step-by-step guide to flooring installation and leveling success remains your best defense against structural failure.
How do I maintain my floor’s level and shine over the next decade?
The secret isn’t found in a magic cleaning bottle; it is found in your maintenance habits. Use heavy-duty felt pads on every piece of furniture, and replace them every six months. Even a tiny grain of salt can act like a diamond-tipped drill bit under the leg of a dining chair. If you truly want to master hardwood floor care secrets to longevity and shine, you have to prioritize physical protection over chemical fixes. I challenge you to go out and grab a moisture meter today and check three different areas of your home—under a window, near the fridge, and in the center of the room. You will be shocked at the variance. Start tracking these numbers now so you can spot potential subfloor issues before they turn into expensive repairs.
The Hardest Lesson I Learned While Watching My Marble Erode
Over the years, I have realized that stone isn’t just a static building material; it is a reactive surface that demands respect. My biggest ‘lightbulb moment’ happened when I stopped looking for the strongest cleaner and started looking for the most chemically compatible one. I also learned that skipping the ultimate guide to floor leveling for a perfect finish makes even the most expensive tiles look poorly installed within months. Finally, I discovered that moisture is the invisible enemy that ruins more floors than foot traffic ever will; always check your subfloor levels before committing to a permanent adhesive or sealer.
Gear That Separates the Pros from the Amateurs
I don’t go to any job site without a few specific resources that ensure a flawless finish. First, the TCNA Handbook is my ‘bible’ for ensuring every installation meets industry standards and avoids liability. Second, I highly recommend investing in a high-quality suction cup for handling large-format tiles to prevent back strain and expensive breakage. Third, I keep my guide on installing tiles like a pro bookmarked for quick reference whenever I encounter a tricky herringbone or layout shift. These tools provide the confidence needed to handle complex renovations without the usual guesswork.
Your Path to a Lifetime of Beautiful Floors
Don’t let the technical details paralyze your progress. Whether you are working with natural stone or trying to master hardwood floor care secrets to longevity and shine, the goal remains the same: protecting your investment through consistent knowledge and the right products. Take it one room at a time, and don’t be afraid to ask for help or run a test patch when the substrate looks questionable. You have the power to create a space that looks as good in twenty years as it does today. Have you ever noticed a ‘hollow’ sound when walking across your tiles? Learning how to detect a hollow tile before the grout starts cracking is a skill every homeowner should have—let me know in the comments if you’ve found a soft spot or an uneven plank!