
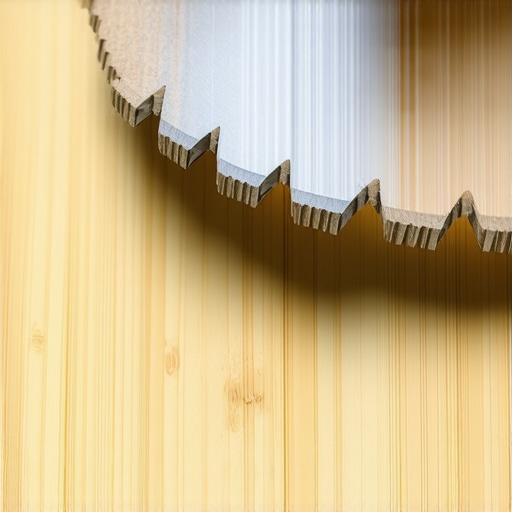
The smell of scorched sugar filled my garage, and my table saw sounded like it was trying to chew through a lead pipe. I was three planks into my “quick” weekend bamboo floor install, and every single cut looked like it had been handled by a caffeinated beaver. I’d used my favorite 40-tooth general-purpose blade—the one that had never let me down on oak or maple—and it was failing me spectacularly. I didn’t realize back then that bamboo is a totally different beast. It’s actually a grass, packed with silica, which acts like nature’s sandpaper for your tools. I ruined nearly $100 worth of material before I finally admitted I needed a different approach. Every time I tried to force the plank through, the blade would wander or, worse, kick back with a violent shudder that made my heart skip a beat. I was frustrated, my wife was wondering why the “simple” project was taking so long, and my workshop was a mess of charred fibers. Today, we’re going to fix that. I’m going to tell you exactly why that “all-purpose” blade is your enemy when it comes to bamboo and which specific blade you actually need to get those factory-clean cuts. We’ll solve the splintering issue, save your saw motor from burning out, and make sure your floor looks professional. [image_placeholder_1]
Why My First Bamboo Project Looked Like a Beaver Chewed It
If you’re standing over a pile of splintered grass wondering where you went wrong, don’t worry. I’ve been there. The biggest mistake most of us make is treating bamboo like regular hardwood. When you’re trying to revamp your home with expert flooring installation tips, you quickly learn that bamboo’s density is its greatest strength and its most annoying trait during installation. Unlike traditional wood where the fibers are relatively soft and porous, strand-woven bamboo is compressed under immense pressure with resins that make it incredibly tough. According to data from the Forest Products Laboratory, strand-woven bamboo can reach a Janka hardness rating of over 3,000, making it significantly harder than Brazilian Cherry or Domestic Oak. That hardness means heat builds up fast. If your blade isn’t designed to evacuate that heat and slice through those dense fibers cleanly, you’re going to get “burn” marks and “tear-out.” I learned the hard way that the secret to cutting laminate without a splintered mess often applies to bamboo too: you need a higher tooth count and a specialized grind. Standard blades have a “hook angle” that is too aggressive for bamboo, causing the blade to grab and rip the fibers rather than slicing them.
Is a specialty blade really worth the extra money?
I used to be the guy who thought specialty blades were just a marketing gimmick to get me to spend an extra fifty bucks at the big-box store. I thought I could just slow down my feed rate and make it work. Spoiler alert: I couldn’t. Slowing down actually made the burning worse because the blade stayed in contact with the silica-rich fibers longer, dulling the carbide tips in seconds. It’s not just about the money; it’s about the safety and the final look. Today, we’re going to look at why a high-tooth-count, carbide-tipped blade isn’t just a “nice-to-have” for bamboo; it’s the only way to avoid flooring installation mistakes to avoid for lasting results. We’ll talk about the specific TCG (Triple Chip Grind) that prevents splintering and why you should always follow the dry fit rule that prevents costly cutting mistakes before you even turn the saw on. Using the wrong blade doesn’t just ruin the plank; it puts unnecessary strain on your saw’s motor, which can lead to expensive repairs down the line. Have you ever had a project where the material seemed to fight your tools every step of the way? Tell me about your most frustrating “why won’t this cut?!” moment in the comments—I’d love to know I wasn’t the only one struggling in my garage. Before we dive into the specific blade brands I trust, we need to understand the structural “personality” of bamboo. It’s not just about the cut; it’s about how that cut interacts with the environment, especially since we know the real reason your bamboo floors are shrinking in the winter relates to its unique cellular structure. Let’s get into the nitty-gritty of why your standard blade is failing you and what to look for when you’re shopping for its replacement.
Stop the Splintering Before the Blade Hits the Plank
The first rule of bamboo cutting is accepting that the factory finish is incredibly brittle. If you just drop the blade onto the plank, you’re going to shatter the top layer of resin. To prevent this, I use a high-quality painter’s tape and wrap the entire circumference of the board where the cut will occur. It sounds like a tedious chore, but the tape provides the necessary surface tension to keep the fibers from exploding outward when the teeth exit the material. I remember a humid Tuesday in July when I was rushing through a hallway. I skipped the blue tape because I was in the zone, and within minutes, I had ruined a fifteen-dollar plank with a splinter that looked like a lightning bolt. Since then, I always stick to a step-by-step guide to flooring installation and leveling success to keep myself disciplined.
Why the Triple Chip Grind Wins Every Time
You need a blade with a Triple Chip Grind (TCG). This isn’t just marketing fluff for professional contractors. A TCG blade alternates between a flat raker tooth and a trapezoidal chipping tooth. The trapezoid tooth cuts a narrow groove first, and the flat tooth cleans out the shoulders. This configuration is like a specialized surgical tool designed for dense, abrasive materials. It significantly reduces the strain on each individual tooth and minimizes the heat buildup that turns your bamboo into charcoal. I once tried to finish a living room with a standard crosscut blade, and by noon, my saw was smoking and the blade was essentially a dull metal disc. If you are also interested in mastering hardwood floor refinishing expert tips for 2025, you will realize that the cleaner your initial cuts, the less patching you have to do later. When you combine this specialized blade with the dry fit rule that prevents costly cutting mistakes, you are treating your materials with the respect they deserve.

Listen to Your Saw to Prevent Heat Damage
Feeding the material through the saw is more of a dance than a shove. You want a pace that is deliberate and constant—like you are walking across a frozen pond. If you hesitate, the spinning blade will dwell on the bamboo, generating enough friction to cook the wood into a dark brown mess. On the other hand, forcing it through causes the blade to deflect, resulting in a cut that isn’t square. This balance is as delicate as how to achieve flawless floor leveling before tile laying because consistency is the hallmark of a professional job. Listen to the motor of your saw; it should stay at a constant, high-pitched hum. If the pitch drops, you are pushing too hard and risking a kickback.
Get the Subfloor Right or Your Precision Cuts Won’t Matter
No matter how perfect your miter joints are, they will eventually open up if the floor underneath them isn’t dead flat. Bamboo has a high density but very little vertical flexibility. If there is a dip in the subfloor, the plank will bridge over it, and every time you walk on it, that joint will flex until the tongue snaps off. I’ve seen DIYers try to compensate with extra glue or longer nails, but the real solution is flooring installation fundamentals: leveling for a seamless look. Much like the secret to getting a flat floor for large format tiles, you need to use a ten-foot straightedge to find your high and low spots before the first plank is ever laid. You should also use precise floor leveling techniques to achieve flawless surfaces if you find more than a quarter-inch of variance. Cutting for a crooked floor is a losing game that even the most expensive specialty blade can’t win.
There is a massive misconception in the DIY world that I have to debunk: your floor does not actually need to be ‘level.’ Most beginners spend hours with a laser level, panicking because one corner of the room is half an inch lower than the other. In my experience, level is a luxury, but ‘flat’ is a requirement. You can install a beautiful bamboo floor on a slight slope, and nobody will ever notice. However, if you have a 1/8-inch hump in the middle of that slope, your floor will fail. This is where precise floor leveling techniques to achieve flawless surfaces become your best friend. Bamboo is incredibly rigid; it doesn’t ‘settle’ into dips like carpet or thin vinyl might. If the subfloor isn’t a perfect plane, the clicking mechanism will eventually fatigue and snap. According to the National Wood Flooring Association (NWFA), the industry standard for subfloor flatness is 3/16 of an inch over a 10-foot radius. If you ignore this, you’re building on a foundation of sand. Have you ever fallen into this trap where you prioritized the bubble on the level over the actual flatness of the board? Let me know in the comments.
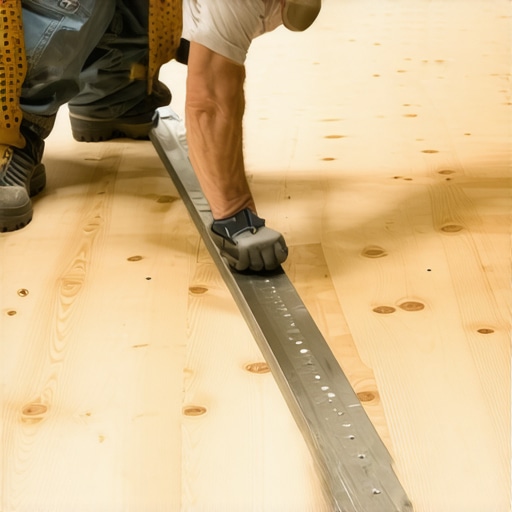
Why does a 10-foot straightedge reveal more than a laser level?
While lasers are great for cabinetry, they often hide the local dips and peaks that ruin a floor. I always tell people that you need to learn how to check for high spots with a 10-foot straightedge manually. You are looking for ‘planarity.’ If you can slide a nickel under your straightedge at any point, you have work to do. This is especially true if you are planning to the secret to getting a flat floor for large format tiles in an adjacent room, as the transition between different materials requires both surfaces to exist on the same geometric plane to avoid tripping hazards.
The Liquid Gold Trap You Need to Avoid
When people realize their floor isn’t flat, they usually run to the store and buy five bags of self-leveler. Here is the ‘oops’ factor that ruins most projects: adding too much water. It is so tempting to make the mix extra soupy so it runs into the corners easier, but that is a recipe for disaster. Over-watering the mix causes the polymers to separate, leading to a brittle surface that will eventually turn to dust under your bamboo. This is often why your self-leveler developed spiderweb cracks overnight. If the mixture is too thick, on the other hand, you’ll find 5 reasons your self-leveler is sticking to the bucket instead of the floor, leaving you with a sticky mess and a floor that’s even lumpier than when you started. You also have to move fast. If you don’t understand why your self-leveler is drying faster than you can pour it, you’ll end up with ‘cold joints’ where one pour doesn’t blend into the next. Precision in the prep phase is what separates a floor that lasts thirty years from one that starts squeaking after thirty days.
The Moisture Meter is My Secret Weapon
I learned the hard way that you can’t trust your eyes when it comes to bamboo. Even if the planks feel bone-dry, their internal moisture content can be wildly different from your subfloor. That’s why I never start a job without my Lignomat moisture meter. Most people skip this, but knowing how to use a moisture meter before you lay wood floors is the difference between a floor that stays flat and one that cups like a Pringles chip. According to the National Wood Flooring Association (NWFA) technical guidelines, bamboo should typically be within 2-4% moisture content of the subfloor before installation begins. If I see a wider gap, I stop everything and let the wood acclimate for another week. It’s a hard pill to swallow when you’re on a deadline, but it prevents the heartbreak of seeing your hard work warp after the first big rainstorm.
Stop Your Bamboo from Singing the Winter Blues
Bamboo is notorious for its ‘voice’—that sharp cracking sound it makes when the humidity drops. I used to think why your bamboo floor is making a loud cracking sound was just part of the material’s charm, but it’s actually a cry for help. To maintain the structural integrity of these dense fibers, I recommend keeping your home’s relative humidity between 35% and 55% year-round. I personally use a dedicated hygrometer in the room to monitor this. If the air gets too dry, especially during the colder months, you’ll start to see the real reason your bamboo floors are shrinking in the winter: the cellular structure literally pulls apart. A simple humidifier can save you from expensive mastering hardwood floor refinishing expert tips for 2025 down the road because you won’t have to sand out gaps that shouldn’t have been there in the first place.

How do I keep my bamboo floor looking new for a decade?
Maintenance isn’t just about cleaning; it’s about protection. I always tell my clients that hardwood floor care secrets to longevity and shine apply doubly to bamboo. Avoid the temptation to use a steam mop; the localized heat can actually break down the resins used in strand-woven bamboo. Instead, I use a micro-static mop and a pH-neutral cleaner. For the fine dust that inevitably finds its way into the grain, I use the vacuum attachment that actually picks up fine sawdust to ensure I’m not just grinding grit into the finish with my shoes. If you do notice a small blemish, knowing how to remove permanent marker from a finished wood floor or other stains without harsh chemicals is vital for preserving that factory sheen.
The Future of High-Density Flooring Installations
Looking ahead, I see the industry moving toward ‘smart’ underlayments that can actually regulate small amounts of moisture and AI-driven floor mapping tools. We are already seeing handheld scanners that can map the planarity of a room in seconds, which will make precise floor leveling techniques to achieve flawless surfaces much easier for the average DIYer. As bamboo continues to grow in popularity due to its sustainability, the tools we use will become even more specialized to handle its extreme hardness. My advice? Don’t wait for the technology to catch up—try the 10-foot straightedge test on your current project today. It’s a low-tech habit that delivers high-tech results and ensures you avoid flooring installation mistakes to avoid for lasting results.
Lessons from the Scorched Sugar Incident
Reflecting on my own workshop disasters, there are three truths I wish someone had shouted at me before I made that first cut into strand-woven bamboo. First, silica is the invisible enemy; it doesn’t just dull your blade, it changes the way metal interacts with material. Second, if you think your blade is ‘sharp enough’ for one more board, it isn’t. Change it or sharpen it the moment you feel resistance. Third, the quality of your cut is often determined five feet away from the saw by how you support the plank. When I finally mastered the material, I realized that avoiding flooring installation mistakes to avoid for lasting results wasn’t just about the tool, but about the patience I brought to the bench. It’s also vital to identify any how to fix a soft spot in the middle of a laminate floor or bamboo floor before you lock the planks in, as the rigidity of bamboo won’t hide subfloor flaws.
The Gear That Survives the Bamboo Battle
You don’t need a massive industrial shop, but you do need these specific items to ensure your flooring installation goes smoothly. I personally trust a 10-inch or 12-inch Triple Chip Grind (TCG) blade with at least 80 teeth—it is the only way to slice through the dense resin without causing a localized fire. I also never start a project without a pinless moisture meter to ensure the environment is stable. For the prep phase, refer to the ultimate guide to floor leveling for a perfect finish to ensure your base is ready for such a stiff material. Finally, a high-quality micro-static mop is essential for post-install care, following hardwood floor care secrets to longevity and shine to keep that bamboo looking like it was installed yesterday.
Build a Floor That Outlasts the Seasons
Bamboo is one of the most rewarding materials to work with because it offers a level of durability and sustainability that traditional hardwoods simply can’t match. By choosing the right blade and respecting the unique properties of this grass, you are setting yourself up for a successful flooring installation that will look professional for decades. Don’t let the hardness intimidate you; let it be the reason you take pride in the precision of your work. Have you ever experienced that heart-stopping moment when an expensive plank splintered right at the end of a cut? Let me know about your DIY saves or stumbles in the comments below!