
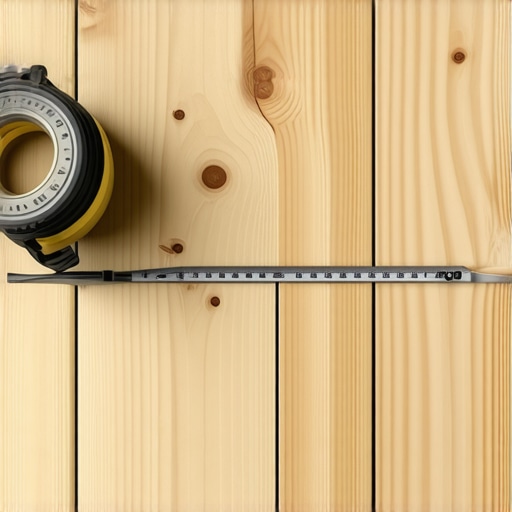
I stood there, sweat dripping onto my brand new white oak planks, staring at a gap that shouldn’t exist. My wife was coming home in two hours, and I had just realized that my ‘perfect’ herringbone pattern was drifting away from the wall like a boat unmoored. It’s a gut-wrenching feeling. You spend thousands on materials, follow a step-by-step guide to flooring installation, and yet, the lines just don’t line up. I used to think I was just bad at math, but the truth was much simpler and far more annoying: I was trusting my tape measure hook. That little bit of play in the metal tip? It’s meant for hook-on vs. butt-against measurements, but in the world of high-precision herringbone, it’s a recipe for disaster. Today, I’m going to show you exactly why your pattern is failing and the one trick—burning an inch—that saved my sanity and my subfloor.
Why Your Pattern Looks Like a Drunken Sailor Laid It
Herringbone is the prima donna of flooring patterns. It is completely unforgiving. If you are off by even a hair on the first row, that error multiplies with every successive plank. By the time you reach the other side of the room, you aren’t looking at a floor; you’re looking at a geometry nightmare. I learned the hard way that flooring installation mistakes to avoid start with the layout, not the glue. When I first started, I didn’t realize that a tiny 1/32-inch error per plank could result in a massive misalignment. According to the National Wood Flooring Association (NWFA), layout precision is the single most common point of failure for patterned installs because these small discrepancies compound geometrically. You might think your subfloor is the culprit, and while precise floor leveling techniques are vital, even a perfectly flat floor won’t save a crooked line. Have you ever felt that ‘sinking feeling’ when you realize your rows aren’t parallel to the wall?
Is Herringbone Actually Worth the Hype?
You’re probably wondering if you should just give up and lay the boards straight. It’s a lot of work, and the precision required is enough to make anyone reach for a bottle of aspirin. But when it’s done right, there is nothing that elevates a room quite like it. It adds a level of sophistication that standard planks just can’t match. The trick is to stop ‘eyeballing’ and start obsessing over your center line. I’ll walk you through why you should always start your tile layout from the center, even for wood, and how to verify your ‘burn’ before the first plank hits the adhesive. We’re going to fix your process so you never have to rip up a row of sticky planks ever again.
Get Your Center Line Right Before Anything Else
The biggest mistake people make is starting their herringbone against a wall. Unless you live in a house built by a robot, your walls aren’t square. If you start there, your pattern will telegraph every imperfection in the framing of your home. Instead, you need to find the dead center of the room and snap a chalk line. This is your north star. I’ve learned that you should always start your tile layout from the center because it allows you to balance the pattern on both sides, ensuring that your border pieces are consistent. Think of it like a zipper; if the teeth don’t meet perfectly at the bottom, the whole thing catches.
Stop Trusting the Hook and Start Burning an Inch
Remember that sweat-dripping moment I mentioned? It happened because I was using the metal hook on my tape measure for precision work. Those hooks are designed to slide to account for the thickness of the metal itself, but they get bent, loose, or gummed up with sawdust. To ‘burn an inch,’ you align the 1-inch mark of your tape measure with the edge of your plank or your center line, then subtract one from your final measurement. It sounds simple, but it removes the variable of a shaky metal tip and is the only way to how to get a straight line for your first row of tile or wood with absolute certainty. 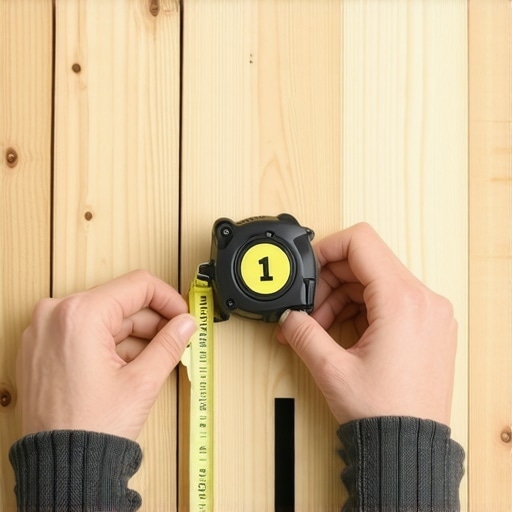
Flatten Your World to Save Your Pattern
You cannot hide a hump in the floor with a herringbone pattern. In a standard plank install, a slight dip might go unnoticed, but with the intersecting angles of herringbone, a low spot will cause the ‘points’ of your planks to dive, creating a gap in the next row. I spent a grueling weekend in a 1920s bungalow once trying to force boards together before I realized the subfloor had a 3/4-inch valley. I had to stop and dive into the ultimate guide to floor leveling for a perfect finish just to make the room workable. If you want a professional look, you must master the secret to getting a flat floor for large format tiles and wood alike. If the floor isn’t flat, your pattern will eventually ‘stair-step’ and look amateur.
The 10-Minute Dry Fit That Saves 10 Hours of Regret
Before you even open a bucket of adhesive, you must perform a dry fit of your first ‘V’ or lead row. I remember rushing a kitchen install back in 2019; I was so confident in my math that I started gluing immediately. By the time I reached the far wall, I ended up with a tiny, fragile 1/4-inch sliver that was impossible to cut and looked hideous. If I had just followed the dry-fit rule that prevents costly cutting mistakes, I would have seen that shift coming from ten feet away. Layout your first five rows without glue. See how they interact with the transitions and the door frames. This extra step is the difference between a floor that looks like a custom masterpiece and one that looks like a DIY disaster. Use these expert flooring installation tips to visualize the end before you begin.
Self-Leveling Compound is a Liar
Most people assume that ‘self-leveling’ means you just pour it out and watch the magic happen like a pancake on a griddle. In reality, that is the fastest way to ruin a room. I have seen countless homeowners deal with why your self-leveler is drying faster than you can pour it because they didn’t realize it requires mechanical help. You have to move the product with a gauge rake and then use a spiked roller to release trapped air. If you don’t, you’ll end up with ‘waves’ that are invisible to the eye but will make your herringbone planks pop and click every time you step on them. According to the Tile Council of North America (TCNA), subfloor flatness shouldn’t deviate more than 1/8 inch over 10 feet for large format or patterned installs, but ‘flat’ and ‘level’ are two very different things. Your floor can be perfectly flat but sloped, and while your furniture might slide, your pattern will at least stay tight. 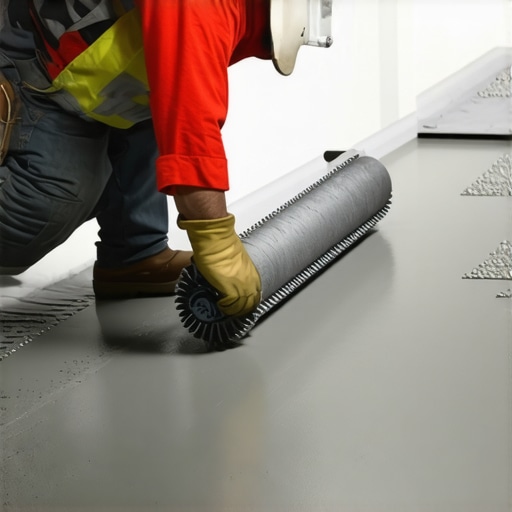
The Primer Mistake That Destroys Your Bond
I used to think primer was just a ‘suggestion’ for professional installers with too much time on their hands. Then I watched a $5,000 floor fail because the leveler didn’t stick to the plywood. If you skip the prep, you’ll eventually see why your floor primer is peeling off like a sunburn. Without that chemical bridge, the thirsty wood subfloor sucks the moisture out of the leveler too fast, preventing a proper cure. This leads to spiderweb cracks and delamination. Before you even think about the layout, you must ensure you have mastering floor leveling pro secrets for perfect installations by using the correct substrate-specific primer.
Can You Really Trust Your Moisture Meter on a Concrete Slab?
This is where the ‘experts’ often get it wrong. Many think a single reading on the surface is enough to green-light an install. However, moisture in concrete is like a sponge; the middle stays wet long after the surface feels dry. If you don’t how to use a moisture meter before you lay wood floors correctly—specifically by using calcium chloride tests or in-situ probes—you are gambling with your investment. If that moisture moves up, you will find why your hardwood floor is crowning and how to dry it out becomes your new full-time job. I’ve seen beautiful white oak expand so forcefully it actually popped the baseboards off the wall.
Stop Over-Clearing Your Expansion Gaps
There is a common myth that ‘more is better’ when it comes to expansion gaps. While you need room for the wood to breathe, a massive 3/4-inch gap is often impossible to cover with standard molding. The key is consistency, not size. If your subfloor prep was solid, you shouldn’t need excessive gaps. If you find yourself struggling with movement, it’s usually an environmental issue, not a mechanical one. Learn the hardwood floor care secrets to longevity and shine to keep your humidity stable, and your floor won’t try to escape the room. Have you ever fallen into this trap of over-correcting for a problem that could have been solved with better prep? Let me know in the comments.
Stop Guessing and Start Measuring With a Pinless Meter
I cannot count the times I have seen a beautiful herringbone project ruined because the installer didn’t realize the subfloor was still ‘breathing’ moisture. If you want to avoid the heartbreak of seeing your planks buckle, you need to invest in a high-quality pinless moisture meter, like the Wagner Orion series. Unlike pin meters that mar the surface of your expensive wood, pinless technology uses electromagnetic signals to scan deep into the wood and subfloor without leaving a mark. If you are wondering how to use a moisture meter before you lay wood floors, the secret is to take readings at multiple points across the room and compare them to your acclimated planks. According to the National Wood Flooring Association (NWFA) Technical Publication No. A100, maintaining a relative humidity between 30% and 50% is the gold standard for preventing structural failure. If you ignore this, you’ll eventually be searching for why your hardwood floor is crowning and how to dry it out. 
The Tool That Makes Door Jambs Look Professional
If there is one tool I refuse to go without, it is the oscillating multi-tool with a flush-cut blade. When you are installing a pattern as complex as herringbone, you cannot simply ‘gap’ your door casings and fill them with caulk; that looks amateur. You need to use a scrap piece of your flooring as a height guide and undercut the jamb perfectly. This allows the floor to slide underneath, maintaining your expansion gap while looking like the house was built around the floor. It is a small detail, but when you are mastering floor leveling pro secrets for perfect installations, these mechanical transitions are where the pros separate themselves from the weekend warriors.
How do I maintain my floor to ensure it lasts decades?
The biggest threat to your floor isn’t foot traffic; it is the hidden grit that acts like sandpaper. I always recommend using the vacuum attachment that actually picks up fine sawdust and microscopic debris before it can be ground into the finish. Once the install is done, you must commit to hardwood floor care secrets to longevity and shine, which starts with banning the steam mop. Steam forces moisture into the seams of your wood, causing the edges to swell and eventually peel. Instead, use a pH-neutral cleaner and a microfiber pad. If you notice the finish becoming dull after five or six years, don’t panic. You can often perform a ‘screen and recoat’ rather than a full sand and finish, which is one of the most important mastering hardwood floor refinishing expert tips for 2025.
Laser Layouts and the Future of DIY Precision
The industry is moving toward high-tech layout solutions. I recently tested a prototype Augmented Reality (AR) app that projects your herringbone pattern onto the floor through your smartphone. While we aren’t quite at the point where robots lay the boards, laser levels have already become indispensable. In the next few years, I predict we will see laser-guided cutting stations that automatically calculate the miter for your ‘V’ based on the real-time dimensions of your room. Until then, you have to rely on the manual precision we’ve discussed. I strongly encourage you to buy a pinless moisture meter today; it is the single most important tool in your arsenal to protect your investment from the day you pour the leveler to the decade you decide to refinish.
The Brutal Truth About Pattern Drift and Why I Stopped Chasing the Wall
I used to think that a laser level was a luxury, but after my third failed attempt at a herringbone hallway, I realized that my own bias was the biggest obstacle. One of the most floor leveling challenges common mistakes and how to avoid them is assuming your eyes are better than your tools. I learned that you must check your pattern every five rows against your original chalk line, not the neighboring wall. If you feel the need to ‘fudge’ a joint, stop immediately; that 1/32nd of an inch will become a half-inch gap before you reach the transition strip. Another lightbulb moment was realizing that precise floor leveling techniques to achieve flawless surfaces are actually about creating a predictable canvas, not just a flat one. When the subfloor is predictable, your pattern becomes effortless.
Invest in Tools That Save Your Sanity
If you are serious about this, don’t skimp on the prep tools. I swear by my pinless moisture meter because it’s the only way to truly know how to use a moisture meter before you lay wood floors without ruining the finish. For the layout itself, a high-visibility green beam laser is worth every penny—it stays visible even in bright rooms where chalk lines can fade underfoot. Finally, never underestimate the power of cleanliness; I always keep the vacuum attachment that actually picks up fine sawdust within arm’s reach. A single piece of grit under a herringbone plank can cause a ‘telegraphing’ bump that ruins the sleek aesthetic of the entire room.
#IMAGE_PLACE_HOLDER_E#
Start Your Journey Toward a Timeless Home Today
Don’t let the complexity of herringbone scare you away from creating something beautiful. Yes, it requires more patience than a standard plank install, but the pride you’ll feel every time you walk across that room is incomparable. Remember that hardwood floor care secrets to longevity and shine start with a solid foundation. If you take the time to prep your subfloor and respect your center line, you are building more than just a floor; you are building a legacy. Whether you are planning a future renovation or mastering hardwood floor refinishing expert tips for 2025, start with the precision we’ve discussed today. Have you ever found yourself fighting a pattern that just wouldn’t stay straight? Drop your horror stories or wins in the comments below!