

I’ll never forget the first time I stood back to admire a finished living room, only to have my eyes glued to a glaring, jagged vertical line right in the middle of the longest wall. I’d spent weeks revamping my home with expert flooring installation tips, but that one baseboard seam made the whole project look like a DIY disaster. I had simply butt-jointed two pieces of trim together, thinking some caulk would hide my sins. It didn’t. In fact, as the humidity dropped that winter, the wood shrank and the caulk cracked, leaving a dark, dusty void that mocked me every time I walked past. We’ve all been there, right? You put in the work to achieve flawless floor leveling, you pick the perfect planks, and then the finishing touches let you down. My biggest early mistake was assuming trim was static. It isn’t. Wood is alive, and if you don’t treat it with respect, it will reveal every shortcut you took. Have you ever spent hours on a project only to have a tiny detail like a baseboard seam ruin the vibe? I’d love to hear your trim-work horror stories in the comments. Today, I’m sharing the professional’s approach to splicing baseboards so they look like one continuous piece of wood, forever.
Stop Settling for Those Ugly Gaps in Your Trim Work
The problem with a standard butt joint—where two flat ends meet—is that there is nothing to hide the movement. According to the Forest Products Laboratory, wood trim can expand and contract significantly based on seasonal relative humidity, which means those tight joints in July will almost certainly be eyesores by January. If your floor isn’t perfectly flat, which is common if you didn’t follow a step-by-step guide to flooring installation and leveling success, the boards will also want to kick out at different angles. This makes a seamless look nearly impossible with basic cuts. We aren’t just slapping wood against the wall; we are engineering a joint that masks the natural behavior of the material. By using a scarf joint—a 45-degree overlapping cut—you create more surface area for glue and a physical overlap that prevents light from passing through even if the wood shrinks. This is the same level of precision you’d use when mastering a perfect miter cut on baseboard corners, and it’s the difference between a house that looks “built” and one that looks “crafted.”
Is a Scarf Joint Really Worth the Extra Effort?
You might be thinking that a simple 45-degree overlap sounds like a lot of extra trips to the miter saw. It is. But skipping this step is one of those flooring installation mistakes to avoid if you want professional results. When you use a scarf joint, the eye naturally glides over the seam because the grain of the wood overlaps rather than crashing into a dead end. Even if you eventually have to hide a bad cut under the baseboard later, starting with a solid splicing technique ensures the long runs look flawless. It’s about building for the long haul, not just for the day you finish the job. Let’s get into the actual mechanics of how to set your saw and glue these pieces so they never pull apart.
Set Your Miter Saw to 45 Degrees and Don’t Look Back
The secret to a seam that disappears starts at the miter saw. Instead of cutting your boards straight at 90 degrees, you need to cut both ends at a 45-degree angle so they overlap. This is called a scarf joint. Think of it like shingles on a roof; the overlap ensures that even if the boards move, you aren’t looking at a dark gap. When you are working on a long wall that requires two or more pieces of trim, always follow the dry-fit rule that prevents costly cutting mistakes. Lay your first board out, mark the stud location where the joint will live, and make your first 45-degree cut facing ‘away’ from the starting corner. The second board will have a matching 45-degree cut that sits right on top of it. I remember a job in a drafty old Victorian where I thought I could get away with just pin nailing a scarf joint without checking the wall’s plumb. Two months later, the homeowner called me back because the boards had pulled apart so far you could see the drywall behind them. It was a mess. Now, I never click the trigger on my nailer until I’ve seen a bit of glue squeeze-out and confirmed the pieces are locked together.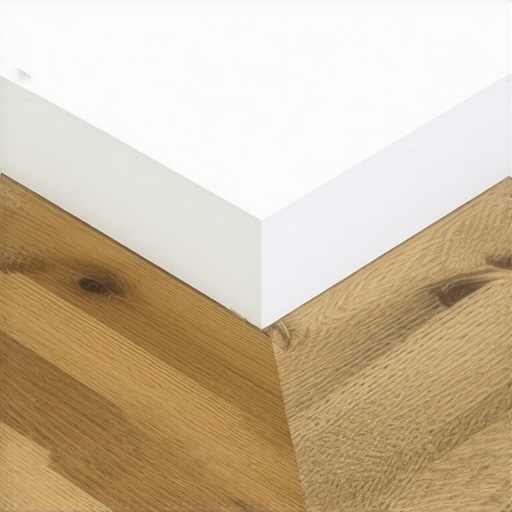
Always Place the Joint Over a Stud
A scarf joint is only as strong as the wood behind it. If you splice two boards together in the ‘hollow’ space between studs, the joint will flex every time someone bumps it with a vacuum cleaner. This movement eventually breaks the wood glue and cracks your paint. Before you even pull out the saw, use a stud finder to locate the framing. Your goal is to have the overlapping 45-degree ‘fingers’ of the wood meet directly over a solid 2×4. This allows you to drive your finish nails through both pieces of trim and deep into the stud, clamping the joint shut mechanically. If you are dealing with a wall that is particularly bowed, you might need to use precise floor leveling techniques to achieve flawless surfaces just to get the baseboard to sit at the right height. A flat floor makes a vertical seam much easier to align because the boards aren’t fighting different elevations.
Use Wood Glue Like Your Reputation Depends on It
If you take only one thing away from this, let it be this: never install a trim joint dry. Wood glue creates a chemical bond that is actually stronger than the wood fibers themselves. Apply a thin, even layer of quality wood glue to both faces of the 45-degree cut. When you press the boards together, the glue fills the microscopic gaps in the grain. This is especially important if you didn’t how to use a moisture meter before you lay wood floors, as high moisture content in the air or the wood will cause significant movement later. Once the boards are joined and glued, wipe away the excess with a damp rag immediately. If the glue dries on the surface, it will block your paint or stain, creating a shiny spot that screams ‘DIY mistake.’ By combining the mechanical hold of the nail into the stud with the chemical bond of the glue, you create a single, continuous piece of trim that resists the seasonal shifts that lead to common flooring installation mistakes to avoid.While that scarf joint will keep your trim looking sharp, it can’t save you from a subfloor that’s fighting the installation. Many DIYers—and even some pros—fall into the trap of thinking that ‘level’ and ‘flat’ are the same thing. They aren’t. You can have a floor that is perfectly level (meaning it follows the horizontal plane of the earth) but is still a wavy mess that will cause your planks to click, creak, and eventually fail. In my experience, chasing a ‘level’ floor in an old house is a fool’s errand that leads to massive piles of wasted compound. Instead, you need to focus on flatness. The National Wood Flooring Association (NWFA) sets a clear standard: for most installations, the subfloor should be flat to within 3/16 of an inch over a 10-foot radius. If you ignore this and just pour bags of self-leveler without a plan, you’re setting yourself up for heartbreak.
Stop Obsessing Over Level and Start Measuring Flatness
The biggest contrarian truth in the flooring world is that a slightly sloped floor is perfectly fine, as long as it is flat. If you try to make a 100-year-old subfloor perfectly level, you might end up with a 4-inch lift at one end of the room, creating massive transitions at every doorway. I’ve seen homeowners spend thousands trying to achieve a level surface when they really just needed to master floor leveling pro secrets for perfect installations focused on the dips and humps. This is where the secret to getting a flat floor for large format tiles comes into play; it’s about the plane, not the gravity. If the surface isn’t planar, your tile will have ‘lippage,’ where one edge sticks up higher than the next, creating a tripping hazard that ruins the aesthetic.
Why does your expensive LVP feel like a trampoline?
This is the advanced question I get most often from people who ‘did everything right.’ They bought the premium underlayment and the thickest planks, yet the floor still feels hollow. The culprit is almost always telegraphing or subfloor voids. If you’ve noticed why your LVP floor feels like it’s bouncing when you walk, it’s because the flooring is bridging a valley in the subfloor. When you step on it, the plank flexes down to meet the wood, then springs back up. Over time, this repetitive motion will snap the locking mechanisms. This is why you must achieve flawless floor leveling before tile laying or plank installation. Another common ‘trap’ is skipping the primer. I’ve seen entire floors ruined because the installer didn’t understand why your self-leveler didn’t bond to the wood subfloor. Without primer, the dry wood sucks the moisture out of the leveler too fast, preventing a chemical bond and leaving you with a sheet of brittle ‘potato chips’ under your expensive new floor. Also, be mindful of the clock; understanding why your self-leveler is drying faster than you can pour it is the difference between a smooth finish and a lumpy disaster. Have you ever fallen into the ‘level vs. flat’ trap and had to pull up planks you just laid? Let me know in the comments below; let’s learn from those expensive mistakes together.Once you’ve conquered the leveling compound and the scarf joints, the real challenge begins: preventing the environment from destroying your hard work. I see too many people spend thousands on choosing the right hardwood floors for your home only to treat them like an old laminate floor from the 90s. If you aren’t using a digital moisture meter, you’re flying blind. I personally swear by the Wagner Orion series for my projects. It’s non-destructive, meaning no pins in your expensive planks, and it helps you avoid the heartbreak of why your hardwood floor is crowning three months later. It’s also crucial to have the vacuum attachment that actually picks up fine sawdust during the final cleanup, because trapped grit under a transition or baseboard acts like sandpaper every time the house shifts. 
Invest in These Tools to Save Your Knees and Your Sanity
I’ve learned the hard way that your body is your most important tool. A pair of professional-grade gel kneepads isn’t a luxury; it’s a career-extender. Beyond personal gear, I recommend using a high-quality laser level for every single run. It’s far more accurate than a bubble level for long spans. When you are flooring installation fundamentals, a laser line ensures that your first row of tile or wood is dead straight across the entire house. If you start crooked, you stay crooked, and no amount of clever trim work can hide a floor that runs off-parallel by two inches at the far wall.
How do I keep my floors looking brand new for the next decade?
Longevity is about chemistry, not just elbow grease. The biggest mistake is the ‘clean-all’ mentality. The National Wood Flooring Association (NWFA) warns in their Technical Publication No. C100 that using generic steam mops or vinegar solutions can strip the finish and cloud the surface over time. That’s why your hardwood floor turned cloudy after cleaning—you literally etched the protective layer with acid. Instead, focus on pH-neutral cleaners specifically designed for your finish type. For tile, you need to be proactive about grout. If you didn’t use the blue tape trick for grouting to keep the surface clean during install, you’re already fighting an uphill battle. Apply a high-quality penetrating sealer annually to prevent why your white grout turned orange in the shower or in high-traffic entryways.
Look out for Self-Healing Surfaces and Smart Underlayments
We are moving toward a world where flooring is more than just a surface. I’m already seeing the rise of smart underlayments with built-in sensors that can detect a slow leak behind a baseboard before it causes rot. In the next few years, installing tiles like a pro will likely involve augmented reality (AR) glasses that project your layout lines and cut patterns directly onto the slab in real-time. This is the inevitable evolution of the craft, blending old-school muscle with high-tech precision. Before you start your next big layout, go grab a high-quality moisture meter; it is the single best investment you can make to ensure you aren’t dealing with common flooring installation mistakes to avoid.
Why I Stopped Relying on Caulk to Fix My Mistakes
I used to think caulk was a magic eraser for bad trim cuts. It’s not; it’s a temporary band-aid for a structural problem. The biggest lightbulb moment for me was realizing that every gap is a failure of geometry, not a lack of filler. When you finally utilize the ultimate guide to floor leveling for a perfect finish, you see that the trim work is just the final frame on a well-prepped canvas. Wood is always going to move, and trying to fight it with nails alone is a losing battle. You have to engineer the joint to hide the movement rather than trying to prevent it entirely. That shift in perspective changed everything about how I approach a room.
The Gear That Separates Amateurs from Craftsmen
To really nail these details, I rely on a few non-negotiables that I never leave the truck without. First, a dedicated moisture meter—because guessing the wood’s stability is how you end up investigating the reason your vinyl plank is separating at the thresholds months later. I also swear by a high-quality wood glue with a longer open time for those complex scarf joints. For your personal health, don’t overlook professional-grade gel kneepads; they are the difference between finishing the job with a smile or a limp. Finally, keeping up with hardwood floor care secrets to longevity and shine ensures that once the installation is done, it actually stays looking like a showroom for years.
#IMAGE_PLACE_HOLDER_E#
Build a Floor That Outlasts the Mortgage
There is a profound sense of pride in walking across a finished room and knowing that the floor beneath you is perfectly planar and the corners are locked tight. This level of flooring installation isn’t about speed; it’s about the legacy of your home and the craftsmanship you leave behind. You’ve got the techniques, you know the common traps, and you have the right mindset to avoid the “good enough” mentality. Now, it’s time to grab that miter saw and make those seams disappear for good.
Have you ever had a baseboard joint open up on you months after the project was finished? Let me know what happened in the comments!