
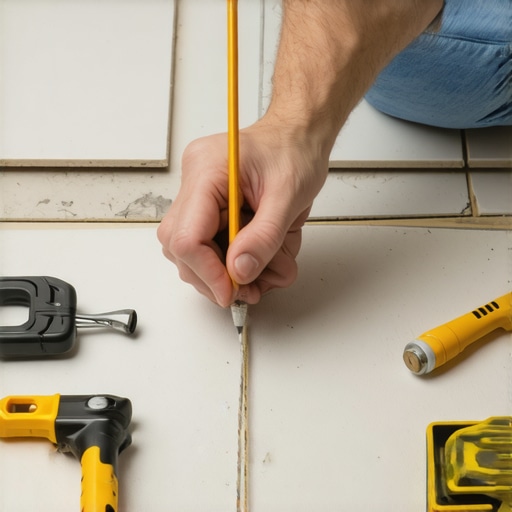
I remember standing in the middle of my kitchen, clutching a piece of scrap cardboard and trying to “feel” the curve of the transition between my new tile and the living room oak. It was a total mess. I was trying to create an elegant, sweeping arc, but every time I thought I had a smooth line, the wet saw revealed the ugly truth: my “curve” was actually a series of jagged, uneven straight lines. I wasted three full boxes of porcelain that afternoon. It was the kind of gut-wrenching frustration that makes you want to just install tile over an old vinyl floor and give up entirely. But I knew that if I could just nail that one radius, the whole room would look like a professional masterpiece. Have you ever stood over a project and felt like your tools were working against you?
Stop Guessing and Start Swinging Your Pencil
The secret to those high-end, magazine-ready floors isn’t a specialized tool that costs five hundred dollars at a big-box store. It’s the same geometry that built the ancient world. Whether you are choosing the right hardwood floors for a renovation or trying to figure out how to transition from wood to a curved carpet edge, the pencil and string method is your absolute best friend. I’m going to show you exactly how to pivot your way to a flawless arc so you don’t end up with a jagged layout that ruins the visual flow of your home. It’s about making sure your flooring installation fundamentals are rock solid before you ever mix a bag of thinset.
Can a simple piece of twine really replace high-tech templates?
You might be skeptical. In an era where we have apps and lasers for everything, relying on a string feels like building a skyscraper with a stone hammer. But a string is a literal radius; it cannot lie. If you keep it taut, the distance from your center point is always identical. One of the biggest mistakes I made early on—and trust me, it was embarrassing—was using a flexible piece of PVC pipe as a guide. It shifted mid-trace, and I ended up with a wavy line that looked more like a heart monitor than a floor transition. This mistake made my hardwood floor and tile combinations feel “off” to anyone who walked into the room. According to research from the Journal of Light Construction, even a tiny 1/8-inch deviation in a long-span curve can be detected by the human eye as a “flat spot,” instantly screaming “amateur hour.” By using the pencil and string method, you’re creating a compass on a grand scale, ensuring that your tile installation pointers actually translate into a professional finish. Let me know—have you ever lost a battle with a jagged transition line?
Find Your Pivot Point and Lock It Down
To create a perfect radius, you first need to identify your center point. Think of this like the sun in a solar system; everything else revolves around it. When I was working on a laundry room remodel three years ago, I tried to wing it by holding the string down with a heavy brick. Big mistake. The brick shifted about half an inch halfway through my swing, and I didn’t notice until I’d already cut five pieces of expensive slate. I had to pull everything up and start over, which is why I now tell everyone to drive a small screw directly into the subfloor at your center point. This ensures that your radius never changes, not even by a hair. Before you even think about marking your curve, you must ensure your subfloor is perfectly flat. If you have dips or humps, your string will rise and fall, which actually changes the length of the radius as you move. This is where precise floor leveling techniques to achieve flawless surfaces become your best friend. A flat floor is the only way to get a true geometric arc.
Why a Screw is Better Than a Helping Hand
Don’t ask your spouse or a buddy to hold the end of the string. No matter how still they think they are, they will move. A screw is a permanent, unmoving anchor. Once that screw is in, loop your string around it. I prefer using a non-stretch mason’s line or even thin aircraft cable if it’s a massive room. Typical kitchen twine has a bit of ‘give’ to it, and that elasticity is exactly what causes those frustrating flat spots in your curve. When you are choosing the right hardwood floors to pair with a curved tile inlay, that precision is what makes the transition look intentional rather than accidental.
Keep the Tension Consistent or Suffer the Consequences
The most common error I see—and I’ve done it myself more times than I care to admit—is varying the tension on the string as you swing the pencil. You want to pull just hard enough to keep the line straight, but not so hard that you’re stretching the fibers. Imagine you’re drawing a bow and arrow; you want that steady, firm resistance. As you move the pencil across the floor, keep your hand at the same angle. If you tilt the pencil forward at the start and backward at the end, you’ve just changed your radius by the thickness of the pencil itself. This attention to detail is part of the flooring installation fundamentals that separate a DIY look from a pro-grade finish.
Transfer the Curve to Your Materials Without Losing Your Mind
Once your subfloor is marked, you have two choices: cut the floor in place or create a template. For tile, I always recommend a ‘dry fit’ first. Lay your tiles out past the line, then use your string and pencil to draw the curve directly onto the face of the tile. This is the heart of the dry fit rule that prevents costly cutting mistakes. If you are transforming your space with expert hardwood floor tile combinations, you want to cut the tile first, set it, and then bring the wood up to meet it. It is much easier to scribe a wood board to a fixed tile edge than it is to try and make two moving targets meet in the middle. If you find your subfloor is too bouncy during this process, you might need to learn how to stop your subfloor from squeaking before you finalize the layout, as any movement will eventually crack your grout lines.
Why Trying to Make Your Floor Perfectly Level Might Be a Mistake
Most DIYers—and even some pros who should know better—obsess over the word “level.” They think if the bubble isn’t dead center on a six-foot spirit level, the job is a failure. But here is a contrarian truth: Your floor doesn’t need to be level; it needs to be flat. If you try to force an old, settling house to be perfectly level by pouring inches of material on one side, you are adding thousands of pounds of dead weight that the structure was never designed to carry. In my early days, I once saw a contractor pour so much self-leveler to “fix” a slope that the floor actually started to sag further under the weight. This is where learning how to level a floor that has a 2-inch drop across the room becomes more about structural integrity than just a bag of mix. You have to know when to chase a bubble and when to just create a smooth, flat plane for your tile to live on.
Does Your Self-Leveler Look Like a Dried Lake Bed?
This is the ultimate “Oops” factor that ruins a high-end transition. I see it constantly: people add just a “splash” more water to the mixing bucket because the leveler feels too thick and they want it to flow like water. Stop. Over-watering is the primary reason why your self-leveler developed spiderweb cracks overnight. According to data from the Tile Council of North America (TCNA), altering the water-to-powder ratio by as little as 10% can reduce the compressive strength of the underlayment by nearly half. You end up with a chalky, brittle surface that will eventually delaminate under the weight of your furniture. Mastering the secret to mixing the perfect bucket of self-leveler every time is about following the chemistry, not your “gut feeling.”
The Hidden Trap of Large Format Tiles on Curved Transitions
When you are choosing the best tile for your hardwood floor upgrade, keep in mind that the bigger the tile, the less forgiving the curve. Most people buy those beautiful 24×48 porcelain slabs and then try to cut a tight radius into them. This creates a massive amount of internal stress in the tile. If your thinset isn’t specifically rated for large formats, you’ll experience “lippage” where one edge of the curve sits higher than the other. This isn’t just an eyesore; it’s a tripping hazard. You must account for the hidden cost of using cheap thinset on large format tiles because budget mortars simply can’t hold the weight of those heavy pieces while they cure. This is especially true when you’re trying to match the height of your wood. If you’re not using a moisture meter before you lay wood floors, you might find that your wood expands and pushes against your perfectly cut tile curve, causing the whole transition to buckle months later. It’s a high-stakes game of physics that requires more than just a good eye. Have you ever fallen into this trap of over-watering your leveler or choosing the wrong mortar for the job? Let me know in the comments below!I’ve learned the hard way that a project isn’t truly finished just because the last tile is laid and the wood is snapped into place. If you’ve gone through the trouble of revamping your home with expert flooring installation tips, the last thing you want is a gap opening up six months later because you didn’t account for long-term shifting. I remember a client calling me in a panic because her transition felt ‘spongy’ near the radiator. The culprit? We hadn’t left enough of an expansion gap for the humidity changes. This is where your maintenance and tool game needs to be top-tier.
The One Tool That Saves Your Sanity
If you’re going to invest in one piece of power equipment for these intricate layouts, make it a high-quality oscillating multi-tool. I call it the ‘problem solver.’ When you need to undercut a door casing so your curved wood piece slides perfectly underneath, or when you realize your tile is exactly 1/16th of an inch too wide, this tool allows for surgical precision that a circular saw or a jigsaw simply can’t match. It’s the backbone of installing tiles like a pro in 2025. I personally use it with a diamond-grit blade to shave down hardened thinset from the edges of a curve without vibrating the whole floor and breaking the bond of the surrounding tiles.
How do I keep these transitions from falling apart next year?
Maintenance starts with understanding that your floor is a living, breathing thing. For your hardwood sections, you need to be religious about hardwood floor care secrets to longevity and shine. This isn’t just about mopping; it’s about humidity control. According to the National Wood Flooring Association (NWFA) Technical Manual, wood flooring must reach ‘equilibrium moisture content’ within its environment to prevent crowning or gapping. If you ignore this, that beautiful curve you spent hours on will eventually develop a gap that collects dirt and crumbs. If you do find a gap forming, don’t just shove wood filler in there; look into how to fix a transition strip that won’t stay glued down or use a flexible color-matched caulk that can move with the seasons.
Why Lasers are Taking Over the String-and-Pencil World
While the string-and-pencil method is timeless, we are moving into an era where LIDAR technology on our smartphones is becoming scarily accurate. I predict that within the next two years, we’ll be using AR (Augmented Reality) overlays to project our curved cut lines directly onto the floor through our glasses. This will make flooring installation and leveling success accessible to even the most novice DIYer. However, technology is only as good as the surface it’s measuring. You still need to master flooring installation fundamentals to ensure that your high-tech layout actually stays put.
The Secret to a Seamless Long-Term Result
If you want that ‘wow’ factor that lasts for decades, you have to think about refinishing before you even finish the first coat. Learning mastering hardwood floor refinishing is crucial because at some point, you’ll want to refresh the wood without damaging the adjacent tile. My pro tip: always use a high-quality, non-yellowing water-based finish that won’t leave a nasty residue on your grout lines. Before you wrap up your next project, I challenge you to try ‘back-buttering’ every single tile on your transition line. It might take an extra hour, but the bond strength it provides is the only way to ensure your curved edges never pop loose.
Hard Lessons from a Decade of Curved Layouts
After years of wrestling with transitions, I’ve realized that the small details determine whether a project looks like a DIY attempt or a high-end architectural feature. One lightbulb moment for me was realizing that masking tape is your best friend. When you are marking a curve on dark or textured porcelain, a pencil line disappears. Applying a layer of blue painter’s tape first allows you to see your radius clearly and prevents the saw from chipping the glaze. Also, never underestimate the power of a practice run on scrap material. If you are worried about flooring installation mistakes to avoid for lasting results, take thirty minutes to cut a piece of cardboard to your exact radius. If the cardboard doesn’t fit the curve of the room, your tile won’t either. Finally, always account for the thickness of your grout joint. Many people cut their tile exactly to the line, forgetting that they need 1/16th or 1/8th of an inch of space for the grout or caulk, which can throw off the entire visual flow. Following the dry fit rule that prevents costly cutting mistakes is the only way to ensure your spacing remains consistent through the arc.
The Gear That Actually Lives in My Truck
I don’t believe in buying every gadget on the shelf, but three specific items have saved my sanity more times than I can count. First is a non-stretch mason’s line. Unlike standard twine, it has zero elasticity, which is vital for keeping a radius true across a large room. Second is a high-quality oscillating multi-tool with a diamond-grit blade. It is the surgical scalpel of the flooring world, allowing you to trim a sliver of wood or tile without removing the entire piece. This tool is essential for installing tiles like a pro in 2025. Lastly, I always keep a copy of the NWFA technical manual nearby. It’s the gold standard for understanding how wood reacts to humidity, ensuring that your hardwood floor care secrets to longevity and shine start with a proper installation. I trust these tools because they focus on precision and physics rather than just speed.
Step Into Your New Masterpiece
Creating a curved transition is more than just a technical challenge; it’s a way to break the grid of a standard home and add a sense of organic movement to your space. Don’t let the fear of a wasted tile hold you back from trying something bold. When you master the flooring installation fundamentals and take the time to anchor your pivot point correctly, the results are always worth the effort. You are building something that will be the focal point of your home for decades to come. By slowing down and respecting the geometry of the room, you ensure a professional-grade result that feels both modern and timeless. Have you ever attempted a curved transition, or has the fear of wasting material kept you on the straight and narrow? Let me know in the comments below!