
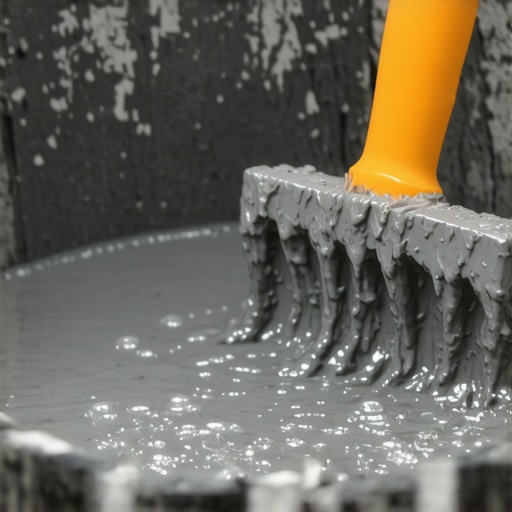
I’ll never forget the sound of my drill motor screaming as it fought against a bucket of half-cured sludge that was supposed to be my ‘self-leveling’ miracle. There I was, sweat dripping off my nose, staring at a subfloor that looked more like a topographical map of the Ozarks than a flat surface ready for tile. I had followed the bag’s directions—or so I thought—but within ten minutes, I was literally chiseling a grey mountain off my floor. It is a humbling moment when you realize that ‘self-leveling’ is a bit of a marketing lie; the product needs a partner who knows the rhythm of the pour.
The Day My Guest Bathroom Became a Concrete Mountain Range
In those early days, I made the classic rookie mistake: I guesstimated the water. I figured a little extra splash would make it flow better. Instead, I learned the hard way that why your self-leveler developed spiderweb-cracks overnight often boils down to that very first gallon of water. If the ratio is off by even a few ounces, you are either looking at a soup that never achieves strength or a clumpy mess. I have even seen cases where self-leveler is sticking to the bucket instead of the floor because the mixing speed was so high it essentially ‘cooked’ the polymers before they even hit the ground.
Getting a truly flat surface is the unsung hero of any flooring renovation. Whether you are hunting for the secret to getting a flat floor for large format tiles or just trying to stop a floating floor from clicking, the bucket mix is where you win or lose the war. Today, I am going to share the exact workflow I use to ensure every single bag flows like glass and gives you that professional, mirror-finish subfloor you have been dreaming of. It starts with the right tools and a bit of patience.
Does this stuff actually work as easily as the bag says?
Short answer: No. Long answer: It works beautifully if you respect the chemistry. Many DIYers fear that the leveler will just run out the door or dry too fast to work with. And honestly? They are not wrong. According to the Tile Council of North America (TCNA), proper substrate preparation and precise water-to-powder ratios are non-negotiable for polymer-modified products to achieve their rated compressive strength and bond. If you wing it, you are just pouring expensive mud that will eventually fail. Before you start, it is vital to understand floor leveling challenges and how to avoid them to save your sanity.
Have you ever had a bucket of leveler turn into a brick while you were still trying to find your rake? Or maybe you have watched in horror as it seeped through a hole in the subfloor you forgot to plug? Drop a comment or reach out—I have made every mistake in the book, and I promise we can get your project back on track. Let’s get that drill ready and dive into the mechanics of the perfect pour.
Seal the Room Tight Before You Pour a Drop
Before you even crack open a bag of compound, you have to treat your room like a swimming pool. If there is a hole the size of a dime in your subfloor, the leveler will find it. I learned this the hard way during a 2018 kitchen remodel when I ignored a small gap around a radiator pipe. Within ten minutes, I heard a wet splat from the basement; I had successfully ‘leveled’ my furnace instead of my floor. Now, I use spray foam or a high-quality caulk to dam up every vent, pipe penetration, and doorway. If you are dealing with significant slopes, knowing how to level a floor that has a 2-inch drop across the room requires building sturdy temporary dams out of scrap 2x4s and weatherstripping.
Use the Right Primer to Avoid a Peeling Disaster
Think of primer as the glue that keeps your project from becoming a floating sheet of brittle glass. Leveler is incredibly thirsty; if you pour it over raw wood or concrete, the substrate will suck the moisture out of the mix before it can bond. This leads to the nightmare scenario where your floor primer is peeling off like a sunburn, taking your expensive leveler with it. Always check that you are using the correct product for your subfloor, especially if you are working on the plywood grade you need for a stable tile underlayment, which often requires a specific latex-based primer to prevent delamination.
The Two-Bucket Method for Continuous Flow
Self-leveling is a race against the clock. Once you add water, the ‘open time’ is usually only 15 to 20 minutes. The biggest mistake you can make is trying to be a one-man show with a single bucket. You need a rhythm: one person mixing while the second person pours and spreads. This ensures a ‘wet edge’—meaning the new pour blends seamlessly into the previous one. If you stop to mix a second bag and the first one has already started to skin over, you’ll end up with a visible ridge that ruins your chances of getting the secret to getting a flat floor for large format tiles right. 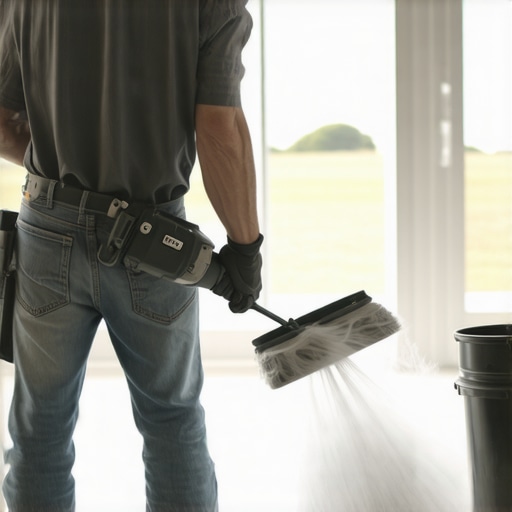
Control the Bubbles with a Spiked Roller
Mixing leveler at high speeds introduces thousands of tiny air bubbles into the slurry. If they stay there, your finished floor will look like the surface of a Swiss cheese. This is where the roller selection that prevents air bubbles in leveler becomes your most valuable tool. A spiked roller doesn’t just push the material around; it pops those micro-bubbles and helps the polymers knit together. I once skipped the roller on a laundry room floor, and by the next morning, the surface was covered in tiny pinholes that made it impossible for my adhesive to grab properly. If you want that mirror finish, you have to break the surface tension as soon as the liquid hits the floor.
Keep Your Drill Speed Low and Your Water Precise
Precision is your best friend when handling polymer-modified cements. We are not mixing garden-variety concrete here; we are conducting a chemistry experiment. Using too much water is the fastest way to ensure why your self-leveler developed spiderweb-cracks overnight because the excess moisture evaporates and causes the material to shrink too rapidly. Use a dedicated measuring bucket and never ‘eyeball’ the water line. Keep your mixing drill under 650 RPM to avoid ‘cooking’ the mix, which happens when friction heat triggers the catalysts too early, leaving you with a bucket of rocks before you can even reach the far corner of the room.
Everyone says that a self-leveler is a ‘cure-all’ for a wavy floor, but in my experience, the biggest mistake is treating the symptom instead of the cause. If your joists are bouncing, no amount of polymer-modified cement will stop your tiles from cracking down the road. You have to address the structural integrity first, often consulting a step-by-step guide to flooring installation and leveling success to ensure your foundation is rock solid before the liquid hits the plywood. I have seen too many DIYers pour four inches of leveler onto a 100-year-old subfloor, only to have the weight cause the house to settle further. Always check your load-bearing limits before you turn your floor into a heavy concrete slab.
Watch Out for the Invisible Moisture Trap
The most common ‘trap’ I see isn’t the mixing; it is the moisture lingering in the substrate. Even if the floor looks bone-dry, concrete slabs can hold massive amounts of vapor that will eventually push your leveler right off the surface. If you ignore this, you’ll find that why your self-leveler didn’t bond to the wood subfloor or concrete often comes down to hydrostatic pressure. The Resilient Floor Covering Institute (RFCI) notes that moisture vapor emission rates (MVER) must be tested using ASTM F2170 standards to prevent delamination. If you skip the moisture test, you are basically gambling with your entire budget. Have you ever fallen into this trap where you thought the floor was ready only to have it peel up a week later? Let me know in the comments—I have a few tricks for moisture barriers that can save a project.
Can I Pour Leveler Over My Old Tiles Without Tearing Them Out?
This is the ‘holy grail’ question for many renovators. The answer is yes, but only if the existing tile is perfectly bonded and you use a specialized ‘non-porous’ primer. Standard primers will bead up on glazed ceramic like water on a waxed car. If you want to know how to install tile over an old vinyl floor without tearing it out or over existing ceramic, you must abrade the surface first. I usually hit the old tile with a diamond cup wheel to create ‘tooth’ for the leveler to grab. Without that mechanical bond, the new layer is just a floating sheet of glass waiting to shatter under the weight of your furniture.
Don’t Let Your New Floor Mirror Your Old Mistakes
One nuance that even experienced pros sometimes miss is the ‘telegraphing’ effect. This happens primarily with Luxury Vinyl Plank (LVP). Even if a floor is technically ‘level,’ tiny ridges or grit left in the dried compound will show through the vinyl over time as the material settles. This is why your lvp floor is showing telegraphing from the subfloor, and it is incredibly difficult to fix once the planks are locked together. 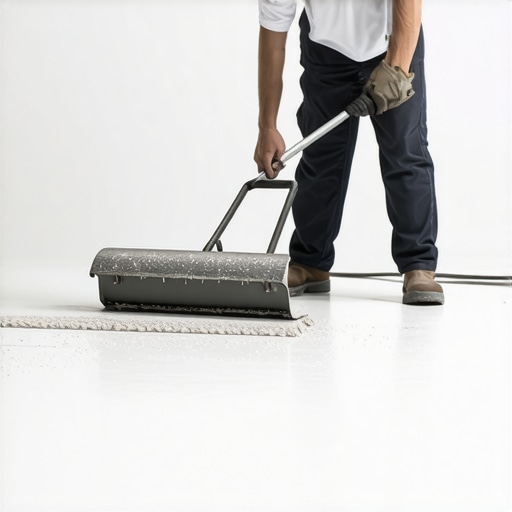
To avoid this, I always do a ‘feather-finish’ scrape once the leveler is dry. I take a large floor scraper and walk the entire room, knocking down any tiny drips or bubbles. Then, I vacuum like my life depends on it. If you are worried about the finish, knowing how to choose a floor leveler that wont crack over radiant heat or high-traffic areas is essential, as different formulas have different flexural strengths. Taking an extra hour to sand and prep the dried surface is what separates a ‘good enough’ DIY job from a floor that looks like it belongs in a showroom.
The Gear That Actually Makes Leveling Stress-Free
I used to think I could get away with a standard cordless drill and a garden rake, but that is a recipe for a burnt-out motor and a wavy floor. My absolute non-negotiable tool today is a high-torque, low-RPM dedicated mixer, like the Milwaukee M18 FUEL Mud Mixer. I use it specifically because it maintains a steady speed even when the compound starts to thicken, which prevents the ‘flash-setting’ that happens with high-speed friction. For smaller areas, I always reach for a heavy-duty scraper; knowing the best tool for scraping glue off a concrete slab before you even start mixing is half the battle. If you leave old adhesive behind, your leveler will never bond correctly.
How do I keep my leveled floor from cracking years later?
Maintenance starts before the finish is even dry. Once your pour is complete and you have used precise floor leveling techniques to achieve flawless surfaces, the real work is managing the environment. I tell all my clients that the first 48 hours are the most critical. You must avoid drafts and direct sunlight, which can cause uneven drying. Long-term, you want to maintain a consistent indoor humidity level. According to the Laticrete Technical Data Sheet for premium underlayments, maintaining a consistent ambient temperature between 50°F and 90°F during the first 24 hours is critical for proper crystalline formation. If you are moving toward a wood finish, following hardwood floor care secrets to longevity and shine will ensure that your beautiful, level subfloor remains protected from moisture from above.
The Tech Revolution in Subfloor Prep
Looking ahead, I see a massive shift toward digital precision. We are already seeing the emergence of LiDAR-equipped apps that can map a subfloor’s highs and lows to within a millimeter. In the next few years, I expect ‘smart’ leveling compounds that change color to indicate they are cured and ready for traffic. For now, we rely on our eyes and the right tools. If you are planning a big project, especially for 2025, you should be looking at installing tiles like a pro step-by-step strategies for 2025 to see how these materials are evolving. Avoiding flooring installation mistakes to avoid for lasting results is much easier when you have a digital map of your floor’s problem spots.
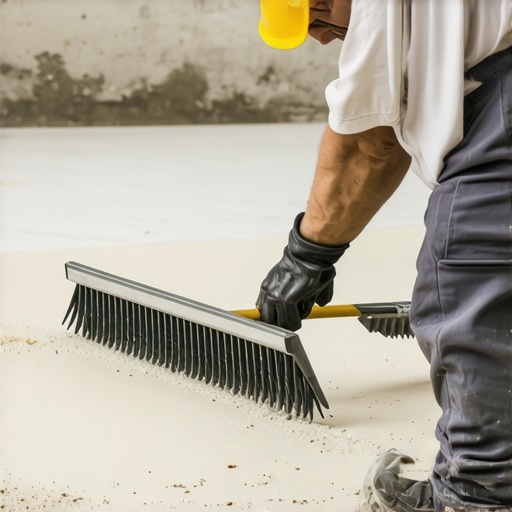
My best advice for anyone tackling this? Invest in a gauged rake. It allows you to set a specific depth—say, 1/4 inch—and pull the material across the room with mechanical consistency. This is how to achieve flawless floor leveling before tile laying without the guesswork. Stop ‘eyeballing’ your depth and start measuring it. Go out and buy a set of metal-cleat spiked shoes before your next pour; being able to walk right back into the middle of the ‘lake’ to pop a bubble or smooth a ridge will change your DIY life forever.
I’ll never forget the sound of my drill motor screaming as it fought against a bucket of half-cured sludge that was supposed to be my ‘self-leveling’ miracle. There I was, sweat dripping off my nose, staring at a subfloor that looked more like a topographical map of the Ozarks than a flat surface ready for tile. I had followed the bag’s directions—or so I thought—but within ten minutes, I was literally chiseling a grey mountain off my floor. It is a humbling moment when you realize that ‘self-leveling’ is a bit of a marketing lie; the product needs a partner who knows the rhythm of the pour.
The Day My Guest Bathroom Became a Concrete Mountain Range
In those early days, I made the classic rookie mistake: I guesstimated the water. I figured a little extra splash would make it flow better. Instead, I learned the hard way that why your self-leveler developed spiderweb-cracks overnight often boils down to that very first gallon of water. If the ratio is off by even a few ounces, you are either looking at a soup that never achieves strength or a clumpy mess. I have even seen cases where self-leveler is sticking to the bucket instead of the floor because the mixing speed was so high it essentially ‘cooked’ the polymers before they even hit the ground.
Getting a truly flat surface is the unsung hero of any flooring renovation. Whether you are hunting for the secret to getting a flat floor for large format tiles or just trying to stop a floating floor from clicking, the bucket mix is where you win or lose the war. Today, I am going to share the exact workflow I use to ensure every single bag flows like glass and gives you that professional, mirror-finish subfloor you have been dreaming of. It starts with the right tools and a bit of patience.
Does this stuff actually work as easily as the bag says?
Short answer: No. Long answer: It works beautifully if you respect the chemistry. Many DIYers fear that the leveler will just run out the door or dry too fast to work with. And honestly? They are not wrong. According to the Tile Council of North America (TCNA), proper substrate preparation and precise water-to-powder ratios are non-negotiable for polymer-modified products to achieve their rated compressive strength and bond. If you wing it, you are just pouring expensive mud that will eventually fail. Before you start, it is vital to understand floor leveling challenges and how to avoid them to save your sanity.
Have you ever had a bucket of leveler turn into a brick while you were still trying to find your rake? Or maybe you have watched in horror as it seeped through a hole in the subfloor you forgot to plug? Drop a comment or reach out—I have made every mistake in the book, and I promise we can get your project back on track. Let’s get that drill ready and dive into the mechanics of the perfect pour.
Seal the Room Tight Before You Pour a Drop
Before you even crack open a bag of compound, you have to treat your room like a swimming pool. If there is a hole the size of a dime in your subfloor, the leveler will find it. I learned this the hard way during a 2018 kitchen remodel when I ignored a small gap around a radiator pipe. Within ten minutes, I heard a wet splat from the basement; I had successfully ‘leveled’ my furnace instead of my floor. Now, I use spray foam or a high-quality caulk to dam up every vent, pipe penetration, and doorway. If you are dealing with significant slopes, knowing how to level a floor that has a 2-inch drop across the room requires building sturdy temporary dams out of scrap 2x4s and weatherstripping.
Use the Right Primer to Avoid a Peeling Disaster
Think of primer as the glue that keeps your project from becoming a floating sheet of brittle glass. Leveler is incredibly thirsty; if you pour it over raw wood or concrete, the substrate will suck the moisture out of the mix before it can bond. This leads to the nightmare scenario where your floor primer is peeling off like a sunburn, taking your expensive leveler with it. Always check that you are using the correct product for your subfloor, especially if you are working on the plywood grade you need for a stable tile underlayment, which often requires a specific latex-based primer to prevent delamination.
The Two-Bucket Method for Continuous Flow
Self-leveling is a race against the clock. Once you add water, the ‘open time’ is usually only 15 to 20 minutes. The biggest mistake you can make is trying to be a one-man show with a single bucket. You need a rhythm: one person mixing while the second person pours and spreads. This ensures a ‘wet edge’—meaning the new pour blends seamlessly into the previous one. If you stop to mix a second bag and the first one has already started to skin over, you’ll end up with a visible ridge that ruins your chances of getting the secret to getting a flat floor for large format tiles right.
Control the Bubbles with a Spiked Roller
Mixing leveler at high speeds introduces thousands of tiny air bubbles into the slurry. If they stay there, your finished floor will look like the surface of a Swiss cheese. This is where the roller selection that prevents air bubbles in leveler becomes your most valuable tool. A spiked roller doesn’t just push the material around; it pops those micro-bubbles and helps the polymers knit together. I once skipped the roller on a laundry room floor, and by the next morning, the surface was covered in tiny pinholes that made it impossible for my adhesive to grab properly. If you want that mirror finish, you have to break the surface tension as soon as the liquid hits the floor.
Keep Your Drill Speed Low and Your Water Precise
Precision is your best friend when handling polymer-modified cements. We are not mixing garden-variety concrete here; we are conducting a chemistry experiment. Using too much water is the fastest way to ensure why your self-leveler developed spiderweb-cracks overnight because the excess moisture evaporates and causes the material to shrink too rapidly. Use a dedicated measuring bucket and never ‘eyeball’ the water line. Keep your mixing drill under 650 RPM to avoid ‘cooking’ the mix, which happens when friction heat triggers the catalysts too early, leaving you with a bucket of rocks before you can even reach the far corner of the room.
Everyone says that a self-leveler is a ‘cure-all’ for a wavy floor, but in my experience, the biggest mistake is treating the symptom instead of the cause. If your joists are bouncing, no amount of polymer-modified cement will stop your tiles from cracking down the road. You have to address the structural integrity first, often consulting a step-by-step guide to flooring installation and leveling success to ensure your foundation is rock solid before the liquid hits the plywood. I have seen too many DIYers pour four inches of leveler onto a 100-year-old subfloor, only to have the weight cause the house to settle further. Always check your load-bearing limits before you turn your floor into a heavy concrete slab.
Watch Out for the Invisible Moisture Trap
The most common ‘trap’ I see isn’t the mixing; it is the moisture lingering in the substrate. Even if the floor looks bone-dry, concrete slabs can hold massive amounts of vapor that will eventually push your leveler right off the surface. If you ignore this, you’ll find that why your self-leveler didn’t bond to the wood subfloor or concrete often comes down to hydrostatic pressure. The Resilient Floor Covering Institute (RFCI) notes that moisture vapor emission rates (MVER) must be tested using ASTM F2170 standards to prevent delamination. If you skip the moisture test, you are basically gambling with your entire budget. Have you ever fallen into this trap where you thought the floor was ready only to have it peel up a week later? Let me know in the comments—I have a few tricks for moisture barriers that can save a project.
Can I Pour Leveler Over My Old Tiles Without Tearing Them Out?
This is the ‘holy grail’ question for many renovators. The answer is yes, but only if the existing tile is perfectly bonded and you use a specialized ‘non-porous’ primer. Standard primers will bead up on glazed ceramic like water on a waxed car. If you want to know how to install tile over an old vinyl floor without tearing it out or over existing ceramic, you must abrade the surface first. I usually hit the old tile with a diamond cup wheel to create ‘tooth’ for the leveler to grab. Without that mechanical bond, the new layer is just a floating sheet of glass waiting to shatter under the weight of your furniture.
Don’t Let Your New Floor Mirror Your Old Mistakes
One nuance that even experienced pros sometimes miss is the ‘telegraphing’ effect. This happens primarily with Luxury Vinyl Plank (LVP). Even if a floor is technically ‘level,’ tiny ridges or grit left in the dried compound will show through the vinyl over time as the material settles. This is why your lvp floor is showing telegraphing from the subfloor, and it is incredibly difficult to fix once the planks are locked together.
To avoid this, I always do a ‘feather-finish’ scrape once the leveler is dry. I take a large floor scraper and walk the entire room, knocking down any tiny drips or bubbles. Then, I vacuum like my life depends on it. If you are worried about the finish, knowing how to choose a floor leveler that wont crack over radiant heat or high-traffic areas is essential, as different formulas have different flexural strengths. Taking an extra hour to sand and prep the dried surface is what separates a ‘good enough’ DIY job from a floor that looks like it belongs in a showroom.
The Gear That Actually Makes Leveling Stress-Free
I used to think I could get away with a standard cordless drill and a garden rake, but that is a recipe for a burnt-out motor and a wavy floor. My absolute non-negotiable tool today is a high-torque, low-RPM dedicated mixer, like the Milwaukee M18 FUEL Mud Mixer. I use it specifically because it maintains a steady speed even when the compound starts to thicken, which prevents the ‘flash-setting’ that happens with high-speed friction. For smaller areas, I always reach for a heavy-duty scraper; knowing the best tool for scraping glue off a concrete slab before you even start mixing is half the battle. If you leave old adhesive behind, your leveler will never bond correctly.
How do I keep my leveled floor from cracking years later?
Maintenance starts before the finish is even dry. Once your pour is complete and you have used precise floor leveling techniques to achieve flawless surfaces, the real work is managing the environment. I tell all my clients that the first 48 hours are the most critical. You must avoid drafts and direct sunlight, which can cause uneven drying. Long-term, you want to maintain a consistent indoor humidity level. According to the Laticrete Technical Data Sheet for premium underlayments, maintaining a consistent ambient temperature between 50°F and 90°F during the first 24 hours is critical for proper crystalline formation. If you are moving toward a wood finish, following hardwood floor care secrets to longevity and shine will ensure that your beautiful, level subfloor remains protected from moisture from above.
The Tech Revolution in Subfloor Prep
Looking ahead, I see a massive shift toward digital precision. We are already seeing the emergence of LiDAR-equipped apps that can map a subfloor’s highs and lows to within a millimeter. In the next few years, I expect ‘smart’ leveling compounds that change color to indicate they are cured and ready for traffic. For now, we rely on our eyes and the right tools. If you are planning a big project, especially for 2025, you should be looking at installing tiles like a pro step-by-step strategies for 2025 to see how these materials are evolving. Avoiding flooring installation mistakes to avoid for lasting results is much easier when you have a digital map of your floor’s problem spots.
My best advice for anyone tackling this? Invest in a gauged rake. It allows you to set a specific depth—say, 1/4 inch—and pull the material across the room with mechanical consistency. This is how to achieve flawless floor leveling before tile laying without the guesswork. Stop ‘eyeballing’ your depth and start measuring it. Go out and buy a set of metal-cleat spiked shoes before your next pour; being able to walk right back into the middle of the ‘lake’ to pop a bubble or smooth a ridge will change your DIY life forever.
The Hardest Lessons I Learned While Chasing the Perfect Pour
After years of trial and error, I realized that the environment is your biggest variable. If you are working on a hot day with the windows open, your self-leveler will set up before you even finish the first bag. I have learned to keep the room cool and use cold water to buy those precious extra minutes. Also, never underestimate the power of a second set of eyes; having someone stand across the room with a flashlight at floor level helps you spot those tiny ripples that you simply can’t see from directly above. Finally, remember that the ‘self’ in self-leveling is a suggestion—you are the one who has to guide the liquid to its final destination.
The Toolkit That Turns a Sloped Subfloor into Glass
You don’t need a truckload of tools, but you do need the right ones. My non-negotiable list includes a dedicated measuring pitcher—never use an old bucket with faded markings. For the most consistent results, I point people toward precise floor leveling techniques to achieve flawless surfaces which often highlight the use of a gauged rake to maintain depth. I also recommend checking out installing tiles like a pro step-by-step strategies for 2025 to stay ahead of the curve on new polymer-modified products that are hitting the market. These resources have been my personal bibles for keeping projects on schedule and under budget.
Stop Dreaming of Flat Floors and Start Making Them
Starting your first major pour is nerve-wracking, but there is nothing quite like the feeling of watching a wavy, cracked subfloor transform into a perfectly flat plane. By avoiding common flooring installation mistakes to avoid for lasting results and respecting the chemistry of your mix, you are setting your home up for a floor that will last for decades. Floor leveling is truly the foundation of every high-end renovation, and once you master this rhythm, you will never look at a subfloor the same way again. Have you ever had a bucket of leveler set up faster than you expected? Let me know in the comments how you handled the panic!