
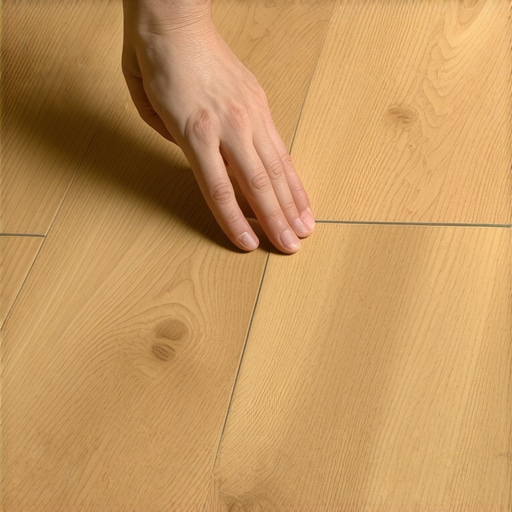
I’ll never forget that 2:00 AM trip to the kitchen. I was trying to be a ninja, sneaking a slice of leftover pizza, when click-clack-pop. It sounded like I was stepping on bubble wrap made of plastic timber. My cat jumped, my wife stirred, and my pride as a DIYer took a massive hit. That rhythmic snapping under my feet wasn’t just a noise; it was the sound of my floating floor protesting. If you’re here, you probably know that sound all too well. It’s annoying. It feels cheap. But mostly, it’s a sign that something underneath isn’t quite right.
Stop the Snap and Reclaim Your Quiet Home
I spent weeks thinking the boards just needed to “settle.” Spoiler alert: they didn’t. The truth is, that clicking is usually the locking mechanism rubbing together because the floor is moving more than it should. Today, we are going to silence those planks for good. Whether you’ve got luxury vinyl or laminate, I’m going to show you how to identify the culprit and fix it without ripping up your entire living room. We’ll look at everything from friction issues to the dreaded subfloor dips. I learned the hard way that common installation blunders often come back to haunt you in the form of these auditory nightmares.
Is my floor actually ruined forever?
You’re probably worried that you’ll have to spend a fortune or start from scratch. I get it. When I first heard my floor acting up, I panicked and thought the tongue-and-groove joints were snapped. Most of the time, they aren’t! Usually, it’s just a bit of friction or a minor lack of support. According to the National Wood Flooring Association, even a 1/8-inch deviation over six feet can cause significant vertical movement in floating systems. That tiny gap is all it takes to turn your floor into a percussion instrument. Early in my DIY journey, I made the classic mistake of thinking “it’s just a floating floor, it’ll bridge the gaps.” I ignored a slight slope near the hallway. Big mistake. I ended up with a floor that sounded hollow and clicked every time I walked to the bathroom. I should have focused on achieving a flawless surface before the first plank ever went down. [image placeholder: A DIYer injecting floor lubricant into a clicking seam] Have you ever had a “perfect” installation suddenly start talking back to you after a few months? Drop a comment below and let me know—I bet we’ve made the same mistakes.
Pinpointing the Source of the Noise
Before you reach for the pry bar, we need to play detective. Not all clicks are created equal. Some are sharp snaps, others are dull creaks. Often, it’s a matter of the floor being “pinched” against a wall or a cabinet, preventing it from expanding. When the floor can’t move horizontally, it bows vertically, and that’s when the clicking starts.
Check the Perimeter Before You Blame the Boards
The most common reason for that annoying snap is that your floor is claustrophobic. Floating floors need room to move. If you didn’t leave a 1/4 to 1/2-inch gap between the planks and the wall, the floor will eventually hit the drywall and buckle. This pressure stresses the locking joints, and when you walk on them, they click as they struggle to shift. I learned this lesson the hard way in a cramped hallway where I was too lazy to undercut the door casings. I just shoved the laminate tight against the wood. By mid-summer, the humidity caused the floor to expand, and it sounded like I was walking on popcorn. I had to spend an entire Saturday pulling up baseboards to trim the edges. If your floor feels tight at the edges, you might need to learn how to cut a doorway notch in a hardwood plank without a jigsaw to retroactively create that vital breathing room. Ensure your expansion gaps are clear of debris or stray nails that might be pinning the floor down.
Fill the Voids That Cause the Bounce
If the perimeter is fine but the clicking persists in the middle of the room, you’re likely dealing with a subfloor dip. Imagine your floor as a bridge. If the ground underneath drops away, the bridge will flex every time a car passes over it. In flooring terms, this flex causes the tongue-and-groove joints to rub together. When I first started, I thought I could bridge a half-inch low spot with extra underlayment. Wrong. Within a month, I was wondering why your lvp floor feels like its bouncing when you walk. The answer was a lack of solid support. To fix this without a total teardown, you can use a floor repair kit. You drill a tiny hole in the clicking seam and inject a specialized, pressure-sensitive adhesive or thinset into the void. This creates a solid ‘pillar’ under the plank, stopping the movement and the noise. For larger issues, you really should have followed the ultimate guide to floor leveling for a perfect finish before the install, but for localized clicks, injection is a lifesaver.#IMAGE_PLACE_HOLDER_B#
Slide Without the Squeak Using Dry Lubricants
Sometimes the floor is perfectly level and has plenty of room to expand, but the joints themselves are just dry and friction-heavy. This is common with cheaper laminate or older vinyl. Instead of ripping things up, try a ‘dry’ lubricant like WD-40 Specialist Dirt & Dust Resistant Dry PTFE Spray or even simple carpenter’s graphite. These won’t damage the wood or the core material. You spray a small amount into the clicking joint and walk over it several times to work the lubricant into the locking mechanism. It’s like putting oil on a squeaky door hinge. If you have a particularly stubborn area, knowing how to fix a soft spot in the middle of a laminate floor can help you decide if you need a structural fix or just a bit of lubrication. I once used this trick on a client’s floor that sounded like a haunted house, and ten minutes of ‘walking it in’ saved them a thousand dollars in labor.
Keep the Humidity in Check
Wood and composite materials are basically sponges. If your home’s humidity swings wildly, your floor will constantly change shape, putting stress on the joints. Keep your home between 35% and 55% humidity. I once visited a house where the homeowner complained of clicking only in the winter. It turned out their furnace was drying the air so much the planks were shrinking and pulling the joints apart. Consistent climate control is one of those flooring installation fundamentals that people often forget once the tools are put away. Controlling the environment is often the difference between a silent floor and a noisy one.I’ll never forget that 2:00 AM trip to the kitchen. I was trying to be a ninja, sneaking a slice of leftover pizza, when click-clack-pop. It sounded like I was stepping on bubble wrap made of plastic timber. My cat jumped, my wife stirred, and my pride as a DIYer took a massive hit. That rhythmic snapping under my feet wasn’t just a noise; it was the sound of my floating floor protesting. If you’re here, you probably know that sound all too well. It’s annoying. It feels cheap. But mostly, it’s a sign that something underneath isn’t quite right.
Stop the Snap and Reclaim Your Quiet Home
I spent weeks thinking the boards just needed to “settle.” Spoiler alert: they didn’t. The truth is, that clicking is usually the locking mechanism rubbing together because the floor is moving more than it should. Today, we are going to silence those planks for good. Whether you’ve got luxury vinyl or laminate, I’m going to show you how to identify the culprit and fix it without ripping up your entire living room. We’ll look at everything from friction issues to the dreaded subfloor dips. I learned the hard way that common installation blunders often come back to haunt you in the form of these auditory nightmares.
Is my floor actually ruined forever?
You’re probably worried that you’ll have to spend a fortune or start from scratch. I get it. When I first heard my floor acting up, I panicked and thought the tongue-and-groove joints were snapped. Most of the time, they aren’t! Usually, it’s just a bit of friction or a minor lack of support. According to the National Wood Flooring Association, even a 1/8-inch deviation over six feet can cause significant vertical movement in floating systems. That tiny gap is all it takes to turn your floor into a percussion instrument. Early in my DIY journey, I made the classic mistake of thinking “it’s just a floating floor, it’ll bridge the gaps.” I ignored a slight slope near the hallway. Big mistake. I ended up with a floor that sounded hollow and clicked every time I walked to the bathroom. I should have focused on achieving a flawless surface before the first plank ever went down. [image placeholder: A DIYer injecting floor lubricant into a clicking seam] Have you ever had a “perfect” installation suddenly start talking back to you after a few months? Drop a comment below and let me know—I bet we’ve made the same mistakes.
Pinpointing the Source of the Noise
Before you reach for the pry bar, we need to play detective. Not all clicks are created equal. Some are sharp snaps, others are dull creaks. Often, it’s a matter of the floor being “pinched” against a wall or a cabinet, preventing it from expanding. When the floor can’t move horizontally, it bows vertically, and that’s when the clicking starts.
Check the Perimeter Before You Blame the Boards
The most common reason for that annoying snap is that your floor is claustrophobic. Floating floors need room to move. If you didn’t leave a 1/4 to 1/2-inch gap between the planks and the wall, the floor will eventually hit the drywall and buckle. This pressure stresses the locking joints, and when you walk on them, they click as they struggle to shift. I learned this lesson the hard way in a cramped hallway where I was too lazy to undercut the door casings. I just shoved the laminate tight against the wood. By mid-summer, the humidity caused the floor to expand, and it sounded like I was walking on popcorn. I had to spend an entire Saturday pulling up baseboards to trim the edges. If your floor feels tight at the edges, you might need to learn how to cut a doorway notch in a hardwood plank without a jigsaw to retroactively create that vital breathing room. Ensure your expansion gaps are clear of debris or stray nails that might be pinning the floor down.
Fill the Voids That Cause the Bounce
If the perimeter is fine but the clicking persists in the middle of the room, you’re likely dealing with a subfloor dip. Imagine your floor as a bridge. If the ground underneath drops away, the bridge will flex every time a car passes over it. In flooring terms, this flex causes the tongue-and-groove joints to rub together. When I first started, I thought I could bridge a half-inch low spot with extra underlayment. Wrong. Within a month, I was wondering why your lvp floor feels like its bouncing when you walk. The answer was a lack of solid support. To fix this without a total teardown, you can use a floor repair kit. You drill a tiny hole in the clicking seam and inject a specialized, pressure-sensitive adhesive or thinset into the void. This creates a solid ‘pillar’ under the plank, stopping the movement and the noise. For larger issues, you really should have followed the ultimate guide to floor leveling for a perfect finish before the install, but for localized clicks, injection is a lifesaver.#IMAGE_PLACE_HOLDER_B#
Slide Without the Squeak Using Dry Lubricants
Sometimes the floor is perfectly level and has plenty of room to expand, but the joints themselves are just dry and friction-heavy. This is common with cheaper laminate or older vinyl. Instead of ripping things up, try a ‘dry’ lubricant like WD-40 Specialist Dirt & Dust Resistant Dry PTFE Spray or even simple carpenter’s graphite. These won’t damage the wood or the core material. You spray a small amount into the clicking joint and walk over it several times to work the lubricant into the locking mechanism. It’s like putting oil on a squeaky door hinge. If you have a particularly stubborn area, knowing how to fix a soft spot in the middle of a laminate floor can help you decide if you need a structural fix or just a bit of lubrication. I once used this trick on a client’s floor that sounded like a haunted house, and ten minutes of ‘walking it in’ saved them a thousand dollars in labor.
Keep the Humidity in Check
Wood and composite materials are basically sponges. If your home’s humidity swings wildly, your floor will constantly change shape, putting stress on the joints. Keep your home between 35% and 55% humidity. I once visited a house where the homeowner complained of clicking only in the winter. It turned out their furnace was drying the air so much the planks were shrinking and pulling the joints apart. Consistent climate control is one of those flooring installation fundamentals that people often forget once the tools are put away. Controlling the environment is often the difference between a silent floor and a noisy one.
Stop Treating Self-Leveler Like Magic Water
One of the biggest myths in modern flooring is that self-leveling compound is a “set it and forget it” solution. Most DIYers think it flows like water, magically filling every low spot. In reality, self-leveler has high surface tension and a very short working time. If you just pour it and walk away, you’ll end up with hardened humps that create even worse floor-leveling challenges. You must use a spiked roller to break the tension and release air bubbles. #IMAGE_PLACE_HOLDER_C# Without this, the compound won’t flatten properly, and you’ll be left wondering why your self-leveler is drying faster than you can pour it.
The Math Matters More Than Your Gut Feeling
The “Oops” factor usually hits when you mess with the mix. It’s incredibly tempting to add an extra quart of water to make the compound runnier, but this is a fatal mistake for your floor’s longevity. According to the Tile Council of North America (TCNA) Handbook, over-watering destroys the polymer chain, leading to a surface that is soft, chalky, and prone to cracking. This is exactly why your self-leveling compounds bubbled over your subfloor or failed to bond. Always use a dedicated measuring bucket. I learned the hard way that “eyeballing it” results in a floor that turns into dust under your new vinyl planks within six months.
Can you actually install new flooring over those old tiles?
This is a question I get constantly from homeowners wanting to save time on demolition. The answer is yes, but only if you use the leveling secret for installing plank flooring over tiles. You must ensure the existing tile is structurally sound and then use a high-quality primer. If you skip the primer on a non-porous surface like ceramic or paint, you’ll see why most floor levelers fail on top of painted concrete or tile—they simply peel off like a bad sunburn. Have you ever fallen into this trap and had a floor fail before it even started? Let me know in the comments below!
It’s one thing to get the floor down; it’s another to keep it from failing two seasons later. I always tell my friends that a $50 tool can save a $5,000 floor. Specifically, I never start a job without my Wagner Orion pinless moisture meter. I use the pinless version because it doesn’t leave unsightly holes in expensive oak or exotic walnut. If you don’t know how to use a moisture meter before you lay wood floors, you’re basically gambling with your bank account. Moisture is the silent killer of all flooring, causing expansion that leads to that clicking sound we’re trying to eliminate. For the leveling phase, you also need to be meticulous about the roller selection that prevents air bubbles in leveler. Using a standard paint roller instead of a dedicated spiked roller is a rookie move that leads to pinholes and a brittle surface.
How can I maintain my floor’s silence over time?
Maintenance isn’t just about sweeping; it’s about absolute consistency in your home’s environment. You need to implement hardwood floor care secrets to longevity and shine that focus on climate stability rather than just surface cleaning. I’ve seen homeowners ruin their luxury vinyl by following bad advice. For instance, the truth about using steam mops on luxury vinyl planks is that the concentrated heat can actually warp the locking joints, creating the very clicks you were trying to avoid. Stick to a pH-neutral cleaner and a microfiber pad. I also suggest keeping a standalone hygrometer in your main living space. According to the Radiant Professionals Alliance (RPA) Guidelines, the surface temperature of a floor should never exceed 81°F (27°C) to prevent structural degradation. If you push the heat too high or let the humidity drop below 30%, those joints will eventually protest.
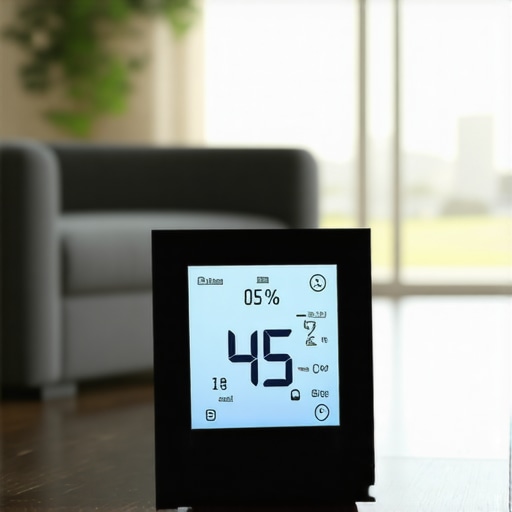
Looking ahead, I predict we will soon see “smart subfloors” becoming the industry standard—underlayments with embedded sensors that alert your smartphone the second they detect a moisture spike or a structural shift. Until then, we have to rely on good old-fashioned precision. If you are dealing with a larger room, remember that precise floor leveling techniques to achieve flawless surfaces are your only insurance policy against long-term wear. I’ve seen too many people try to scale their projects too fast without mastering these fundamentals. Go check your home’s humidity reading right now—if it’s swinging wildly, it’s time to intervene before your floors start talking back to you!
What Your Flooring Manual Doesn’t Actually Tell You About Quiet Planks
After years of wrestling with noisy boards, I realized that the instructions inside the box only cover the ‘how,’ not the ‘why.’ Here are the lightbulb moments that finally gave me a silent home. First, acclimation isn’t just about leaving boxes in a room; it’s about balancing moisture levels so the material stops moving before it’s locked down. Second, sound is a deceiver. Sometimes a click in the kitchen is actually caused by tension in the hallway where the floor is pinched. If you find gaps appearing alongside the noise, you need to learn how to stop hardwood floors from gapping in the hallway to relieve that mechanical stress. Finally, remember that your subfloor is the ‘heart’ of the system. If it’s noisy, the surface will be too. I’ve found that sometimes how to stop your subfloor from squeaking with one screw is a more effective fix than anything you do to the actual laminate or vinyl.
My ‘Secret Weapon’ Tool Bag
You don’t need a massive workshop to fix these issues, but you do need precision. These are the four items I never tackle a repair without:
- Digital Hygrometer: To monitor that 35-55% humidity sweet spot I mentioned earlier.
- Pressure-Sensitive Injection Resin: The only way to fill subfloor dips without pulling up the whole floor.
- Spiked Rollers: If you are starting fresh, these are non-negotiable for the roller selection that prevents air bubbles in leveler.
- HEPA Vacuum: Dust is the enemy of any fix, and knowing the best way to prep a dusty concrete floor for adhesive or leveler will determine if your repair actually sticks.
#IMAGE_PLACEHOLDER_E#
Reclaim Your Peaceful Home Today
Fixing a clicking floor might seem like a daunting task, but it is one of the most rewarding DIY wins you can achieve. You don’t have to live with a home that ‘talks back’ every time you go for a midnight snack. By following a step-by-step guide to flooring installation and leveling success, you ensure that your next project—or your current repair—stands the test of time. Take it one plank at a time, check your humidity, and don’t be afraid to use a little lubricant where it counts. Your peaceful, silent home is just a few adjustments away. Have you ever successfully silenced a stubborn floor click with a DIY trick? Let me know your secrets in the comments below!