
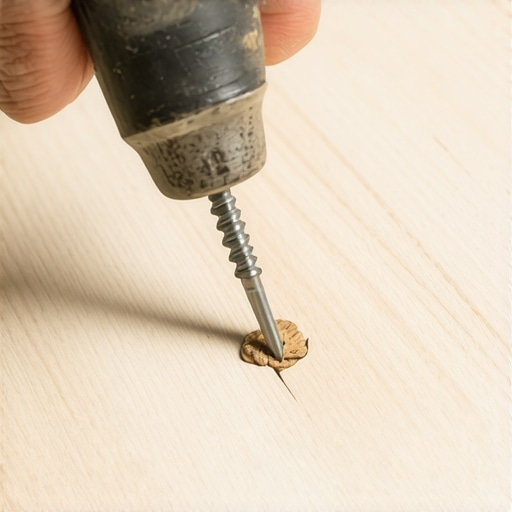
I’ll never forget the night I almost threw a perfectly good rug out the window. It was 3 AM, I was thirsty, and every single step I took on my bedroom carpet sounded like I was walking on a bag of dry chips. My dog would look up, I’d freeze, and we’d repeat the dance three times before I even hit the hallway. I felt like a prisoner in my own home, held hostage by a subfloor that just wouldn’t stay quiet. For years, I thought my only option was a full-scale renovation, but I’ve learned a few tricks since then that don’t involve a sledgehammer. Today, I’m going to show you how to silence those ‘screams’ from beneath your feet without spending a fortune.
The Real Reason Your Hallway Screams Every Time You Step on It
Most of the time, that annoying chirp isn’t coming from the carpet itself but from the wood subfloor underneath. Specifically, it’s usually a gap between the subfloor and the floor joists. When you step down, the wood rubs against the nail, creating that high-pitched friction sound. I made a massive flooring installation mistake early on by trying to ‘lubricate’ the squeak by spraying stuff through the carpet fibers. Big mistake. All I got was a greasy stain and a floor that still chirped at me every morning. The secret lies in re-securing that subfloor. You don’t have to live with it, and you certainly don’t have to tear everything down to the studs. According to the International Association of Certified Home Inspectors (InterNACHI), floor squeaks are one of the most common complaints in homes over ten years old, often caused by the natural drying and shrinking of wood joists over time. If you’ve dealt with this, you might also want to check out how to fix a squeak in a second-story subfloor if the noise is coming from above your head.
Can You Really Fix This Without Pulling Up the Carpet?
I know what you’re thinking because I thought it too: ‘There’s no way a screw going through my plush carpet won’t leave a visible hole or a nasty snag.’ It’s a valid fear. Nobody wants to trade a noise problem for a visual disaster. But modern kits are designed with breakaway screws that disappear right into the nap of the rug. I’ve used them in my own living room, and even my wife—who has eyes like a hawk for home repairs—couldn’t find where I’d worked my magic. Sometimes, the issue is even simpler, like needing the simple shim trick for wobbly baseboards to stop a perimeter rattle. Before we get into the heavy lifting, have you ever found yourself walking on the very edges of your stairs or hallway just to avoid that one specific ‘hot spot’ that wakes up the whole house? If so, you are definitely not alone. Once you’ve identified the spot using the hammer test for finding loose subfloor nails, we can finally get to work on the permanent fix.
Hunt Down the Joist Like a Pro
Hunting for the source of a squeak is like playing a high-stakes game of ‘Hot or Cold’ where the prize is finally getting a full night’s sleep. To start, you need to find the floor joists—those sturdy wooden ribs that support your home’s weight. If you miss the joist, you’re just putting a useless hole in your carpet. I always use the hammer test for finding loose subfloor nails; you tap the floor and listen for a solid ‘thud’ versus a hollow, drum-like ‘ring.’ Once you’ve located the joist, mark it with a small piece of painter’s tape right on the carpet nap.
Master the Art of the Secret Screw
Once you’ve marked the spot, it’s time to use the breakaway screw kit. Think of these screws like secret agents: they go in, do the heavy lifting of pulling the subfloor tight against the joist, and then the head snaps off below the carpet line so you never see or feel it. When the screw hits the joist, you will actually see the carpet pull down slightly as the gap between the wood layers disappears. This is far more effective than just hoping for the best, and it prevents the long-term damage that occurs when wood is allowed to rub together. 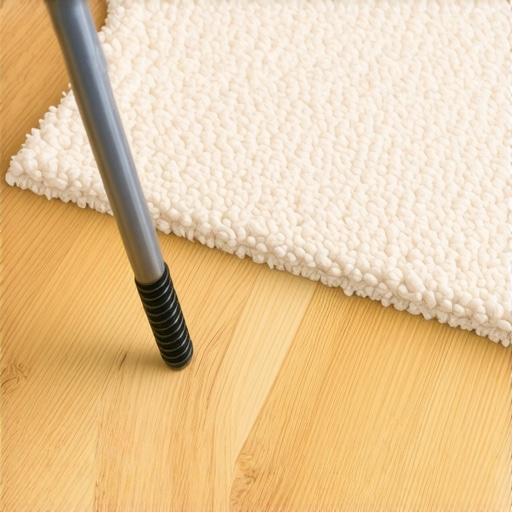
Don’t Skip the Depth Control Tripod
My first attempt at this years ago was a complete disaster. I thought I could eyeball the depth in my dining room without using the plastic alignment tool. I ended up driving a screw so deep it didn’t snap, and when I tried to back it out, the threads caught a loop of the carpet and pulled a six-inch ‘run’ right through the middle of the room. It looked like a permanent scar on an expensive rug. Always use the tripod tool that comes with the kit; it ensures the screw snaps at exactly the right height every single time. This level of caution is just as important as knowing the mixing paddle speed that ruins your leveling compound—precision is what separates a successful DIY from an expensive repair bill.
Wait, Is Your Subfloor Wavy or Just Loud?
Sometimes a squeak is a symptom of a much larger structural pout. If you find that the floor isn’t just noisy but actually feels like a rolling sea, you might be dealing with more than a loose nail. Achieving a truly flat surface is critical, especially if you ever plan to switch from carpet to something more rigid like hardwood or tile. I’ve seen many homeowners ignore a slight dip, only to realize later they need the ultimate guide to floor leveling for a perfect finish before they can even think about new flooring. If the subfloor is bouncing because of a gap, you’re also likely to encounter why floating floors sound hollow when you walk on them if you choose LVP or laminate down the road. Fixing the squeak now by securing the subfloor to the joists prevents the friction that causes the noise and adds years of life to your current carpet by reducing internal fiber abrasion.
Check for Utilities Before You Drill
Before you go driving screws into every square inch of your hallway, you have to be mindful of what’s beneath the wood. I suggest checking the basement or crawlspace to ensure no plumbing or electrical lines are tucked tight against the subfloor right where you’re aiming. It only takes one stray screw to turn a twenty-dollar DIY project into a massive plumbing emergency. It’s a bit like precise floor leveling techniques to achieve flawless surfaces; it’s all about the preparation and the ‘feel’ of the materials. When you drive the screw, you’ll feel the resistance change as it bites into the joist. If the screw keeps spinning without resistance, you’ve missed your target. Back it out, move over an inch, and try again until you feel that satisfying clinch that signals the floor is finally at peace.
Let’s dig deeper because most people treat self-leveling compound like a ‘pour and forget’ magic potion. The biggest myth I see is the belief that gravity does all the work. If you just dump a bucket and walk away, you’re going to end up with a mess that’s thicker on one side and full of surface tension ripples. The National Wood Flooring Association (NWFA) notes that subfloor flatness—not just being ‘level’—is the actual requirement for a successful install, as even a level floor can have dips that cause hardwood to fail.
Why Self-Leveling is the Biggest Misnomer in Flooring
Everyone says you just need to pour it out, but in my experience, the prep work is where the battle is won or lost. Most DIYers skip the mechanical bonding stage. If you don’t use precise floor leveling techniques to achieve flawless surfaces, like mechanical grinding of high spots or proper priming of the wood, you’re just wasting expensive compound that will eventually delaminate.
Stop Chasing the Bubble Trap
One of the most common ‘oops’ factors that separates the pros from the amateurs is the speed of your drill. I’ve seen countless homeowners use a high-speed mud mixer, which whips air into the mix like a meringue. This is exactly the mixing paddle speed that ruins your leveling compound because those tiny air bubbles turn into thousands of pinholes once the floor dries. To get that glass-like surface, you need the spiky roller secret for a mirror-smooth pour. It breaks the surface tension and lets the air escape before the compound sets. 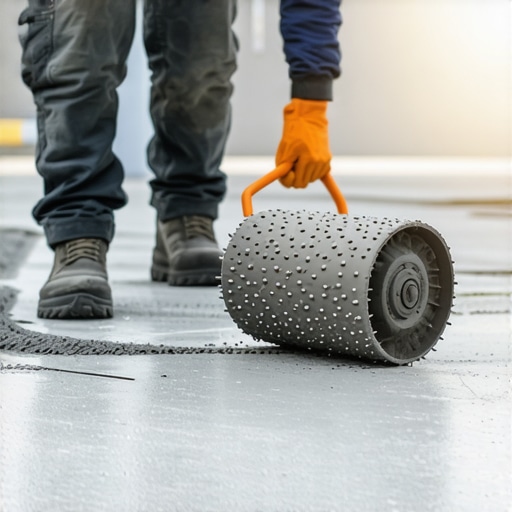
Don’t Ignore the Moisture Math
Another advanced mistake is failing to check the moisture content of the subfloor before you pour. If the wood is too dry, it will suck the water out of the leveler too fast, leading to why self-leveling compounds bubbled over your subfloor or even spiderweb cracks. I always use a primer that acts as a moisture barrier to ensure the chemical cure happens at the right rate. The ‘flash setting’ trap is another hazard; if the room is too hot or the water is too warm, the material sets before it can flow, leaving you with a topographical map instead of a floor.
Can Your Subfloor Actually Handle the Extra Weight?
Advanced installers always ask this question because self-leveler is deceptively heavy—roughly 5 to 10 pounds per square foot depending on thickness. If your joists are already at their limit, adding a massive pour could cause more sagging, which ironically creates the very dips you were trying to fix. If you’re unsure, always consult the ultimate guide to floor leveling for a perfect finish to see if your structure needs reinforcement. Have you ever fallen into this trap where the ‘fix’ made things heavier? Let me know in the comments.I’ve spent thousands of dollars on gadgets that ended up gathering dust in my garage, but when it comes to a subfloor that stays flat and silent, two items are absolutely non-negotiable. First, you need to ditch the ‘eyeball method’ and start using mechanical level pegs. These are small, adhesive plastic sticks that you trim to the exact height of your laser line across the room. It creates a literal forest of height markers that tells you exactly where the pour needs to stop. This is the cornerstone of mastering floor leveling pro secrets for perfect installations. Second, I never start a job without my pinless moisture meter. I’ve seen beautiful floors ruined because someone assumed a slab was dry. According to the technical specifications from Mapei regarding subfloor preparation, failing to account for the Calcium Chloride test results or internal relative humidity is the leading cause of debonding. 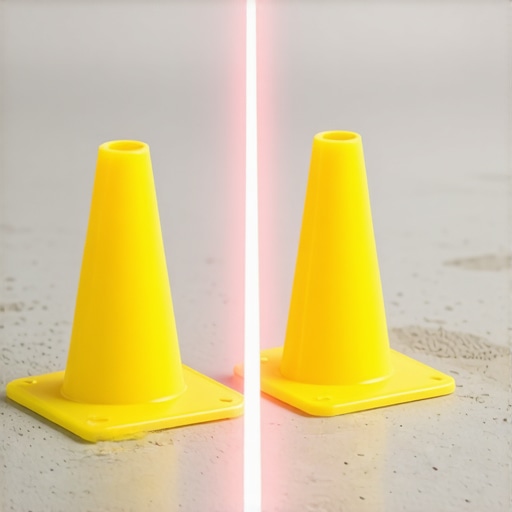
How can I make sure my leveled floor stays perfect for years?
The secret to longevity isn’t in the leveler itself, but in how you treat the perimeter. One trick I swear by is the ‘foam tape’ technique. Before you pour, wrap the bottom of your walls with a thin foam expansion strip. This prevents the leveling compound from locking the subfloor to the wall studs. If the house settles or shifts—which it will—the floor has room to breathe without cracking. This simple step is vital for flooring installation fundamentals leveling for a seamless look. If you are moving toward a final finish, you also need to be obsessed with climate control. I tell all my clients that hardwood floor care secrets to longevity and shine start with a high-quality hygrometer to keep your home’s humidity between 30% and 50%. Looking toward the future, I’m already seeing pros transition to LiDAR-based scanning apps on their phones to create 3D heat maps of floor variations. It’s making the step-by-step guide to flooring installation and leveling success more accurate than ever before. If you want to avoid the headache of a ‘wavy’ floor, I challenge you to try the level peg method on your next small bathroom project—it’s a total game changer for achieving a professional-grade surface.
What the Pros Don’t Share About Perfect Subfloors
Over the years, I’ve realized that a silent floor isn’t just about driving screws; it’s about understanding the physics of your home. First, wood is seasonal and essentially alive. If you fix a squeak in the dead of winter without considering expansion, it might return once the humidity hits. Second, ‘level’ is often a luxury, but ‘flat’ is a non-negotiable necessity. You can have a slightly slanted floor that takes tile beautifully as long as it is perfectly flat, but even a perfectly level floor with one tiny hump will crack your grout. This is one of the most overlooked floor leveling challenges common mistakes and how to avoid them. Finally, never trust your eyes alone. Always use a straightedge of at least six feet to identify the ‘valleys’ that remain invisible to the naked eye until the light hits your finished floor.
The Toolkit That Saved My Sanity
If I were starting a project from scratch today, I would refuse to move a single piece of furniture without these three items. I never skip the moisture check anymore; learning how to use a moisture meter before you lay wood floors is the very first skill I teach any new DIYer. Next, invest in a dedicated breakaway screw kit for carpeted areas; it is the only professional way to kill noise without a full teardown. Lastly, I always keep a bag of mechanical leveling pegs in my truck. They remove the guesswork from how to achieve flawless floor leveling before tile laying by providing a physical, 3D target for your pour, ensuring you never over-pour or leave a dip.
Stop Walking on Eggshells and Start Leveling
You don’t have to be a master carpenter to enjoy a home that doesn’t groan every time you walk to the kitchen at midnight. By taking the time to secure your joists and prep your surface using the ultimate guide to floor leveling for a perfect finish, you are protecting your investment and your peace of mind. A quiet, flat floor is the hidden foundation of every high-end renovation. Now that you have the blueprint, it is time to stop avoiding those ‘hot spots’ and finally fix them for good. Have you ever tried to fix a floor squeak only to have it pop up six inches away the next day? Let me know your floor frustrations in the comments below!