
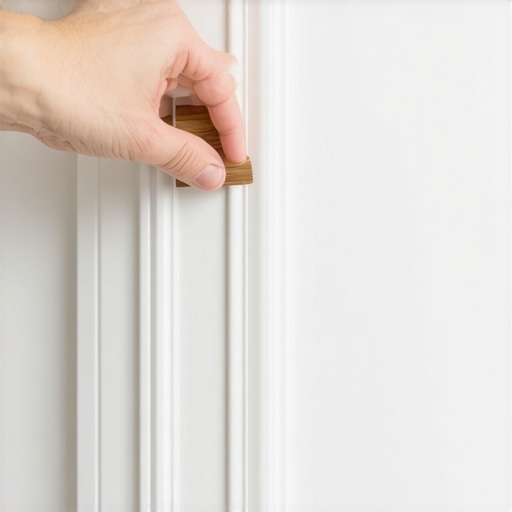
I remember standing in my living room, chest puffed out with pride after finishing my first real flooring project. The hardwood floors looked spectacular, and I thought the hard part was over. Then I went to install the baseboards. I pressed a long piece of trim against the wall and my heart sank. Right in the middle, there was a gap so wide a mouse could have run a marathon through it. My subfloor wasn’t flat, and the baseboard was stiff. I tried to force it down with a heavy-duty nailer, but that only ended in disaster: I split the expensive wood and pulled a chunk of drywall right out of the stud. It was a mess. If you have ever stared at a wobbly, floating baseboard and felt like throwing your hammer through a window, I promise you are not alone.
Stop Fighting Your Wavy Subfloors
The truth is that no house is perfectly level. Even in high-end new builds, subfloors are rarely like a sheet of glass. I learned the hard way that you cannot win a wrestling match against a piece of kiln-dried molding. You need a strategy that works with the imperfections of your home. Today, I am going to show you how a handful of five-cent cedar shims can save a five-hundred-dollar trim job. We are going to bridge that gap without ruining your flooring installation and leveling success or causing future squeaks. It is a technique very similar to the shimming hack for leveling subfloors under cabinets, but with a few refined twists for visible trim. Have you ever struggled with baseboards that just refuse to sit flush against your beautiful new floor?
Is This Trick Actually Stable Long Term?
I know what you are thinking because I thought it too. You are worried that over time, the shims will slide out or the baseboard will start to rattle. This is where most DIYers get nervous. However, when done correctly, the shim becomes a permanent part of the wall’s structure. My early mistake was just shoving them in and hoping for the best. Now, I use a specific sequence of gluing and pinning that locks everything into place. According to the National Wood Flooring Association (NWFA), standard industry tolerances allow for floor deviations of up to 3/16 of an inch over a 10-foot span. That might sound small, but in the world of finish carpentry, that is a canyon. Mastering the flooring installation fundamentals means knowing how to mask those inevitable gaps so they look intentional and professional. We are not just hiding a problem; we are creating a solid foundation for the finishing touches of your room.
Finding the Hidden Canyons in Your Subfloor
Before you even pick up the nail gun, you have to find where the floor betrays you. I call this the ‘dry run of truth.’ Take your longest piece of baseboard and set it against the wall. Don’t nail anything yet. Walk the length of the board and look for the light coming through the bottom. If you see a gap, you’ve found a low spot. I remember a particularly nasty hallway renovation where the subfloor looked like a rolling sea. I tried to skip the prep and just ‘nail it tight,’ but all I did was create a visible bow in the top of the trim. To avoid this, you need to understand precise floor leveling techniques to achieve flawless surfaces before the trim even arrives, but since we are already at the finish stage, we have to bridge that gap manually.
The Glue and Pin Dance
This is where the magic happens. Grab a pack of cedar shims—the kind you use for doors—and a bottle of high-quality wood glue. Slide a shim under the baseboard until the board sits level. I like to use two shims facing opposite directions if the gap is especially deep; it creates a flat ‘platform’ rather than a wedge. Once the board is perfectly positioned, pull the shim out just enough to apply a bead of glue to its top surface. Slide it back in. Now, drive your finish nail through the baseboard and the shim, straight into the wall stud. This creates a sandwich that won’t move. You are essentially extending the reach of your wall down to meet the floor. This is much more effective than the common flooring installation mistakes to avoid for lasting results where people try to caulk a half-inch gap. Caulk shrinks; wood and glue don’t.
Keep Your Nails Away from the Floor
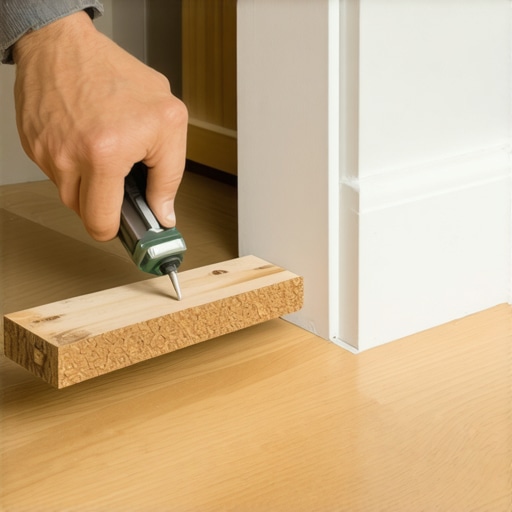
One mistake I see constantly is DIYers trying to nail the baseboard into the floor itself to close the gap. Never do this. Whether you are dealing with hardwood floors or tile, the floor needs to be able to move independently of the walls. If you pin the trim to the floor, you risk buckling when the seasons change. I once had a client whose expensive walnut floor started tenting because the previous installer nailed the baseboards into the planks. It sounded like a gunshot when the wood finally gave way. Instead, rely on your shims to provide the support and nail exclusively into the studs. This is one of the 7 tools you actually need for a professional diy hardwood install—a reliable stud finder—so you aren’t just firing nails into the abyss of the drywall.
The Art of the Flush Cut
Once the glue is dry, you’ll have shim ‘tails’ sticking out like sore thumbs. Don’t try to snap them off with your hands; you’ll splinter the wood and likely scuff your new flooring. I use a sharp flush-cut pull saw. Lay the blade flat against the floor—use a piece of thin cardboard as a shield if you’re nervous—and saw the shim off. If you’ve followed the right way to undercut baseboards for a clean flooring finish for your door jambs, you already know the value of a clean, horizontal cut. This leaves the shim invisible, tucked perfectly under the trim. If there’s still a tiny hairline gap, a thin bead of color-matched caulk will disappear, because the structure is now rock solid. You won’t have to worry about how to fix a hollow sound under your luxury vinyl caused by trim that bounces when you walk past it.
Stop Aiming for Level When You Really Need Flat
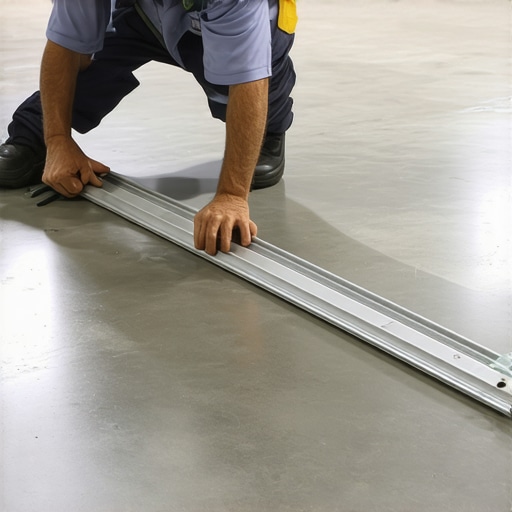
The biggest myth in the flooring world is that a floor needs to be ‘level’ to be successful. I have seen pros waste thousands of dollars in self-leveling compound trying to make a 100-year-old house level with the horizon. Unless you are installing a pool table, ‘level’ doesn’t matter nearly as much as ‘flat.’ A floor can be sloped like a ski hill, but as long as it is flat, your hardwood floors will look perfect. It’s when you have dips and humps—the ‘waves’—that you run into trouble. This is why your subfloor patching compound is cracking under pressure; it wasn’t designed to bridge a structural sag, only to smooth out the surface. I always tell my clients to put away the 4-foot bubble level and grab a 10-foot straightedge instead. If you can’t find a gap larger than 1/8th of an inch under that straightedge, you are golden.
Why Does Everyone Ignore the Subfloor Primer?
I’ve watched countless weekend warriors pour out a bag of expensive leveler directly onto old concrete. Within six months, they are calling me because the floor sounds like a bowl of Rice Krispies when they walk on it. You must prime concrete before every leveling job because concrete is incredibly thirsty. It will suck the moisture out of your leveler so fast that the product won’t have time to bond. It’s a classic ‘oops’ moment that turns a perfect finish into a crumbling mess. Think of primer as the glue that keeps your hard work from floating away.
Can Your Concrete Slab Actually Be Too Wet for Hardwood?
This is the question that separates the amateurs from the experts. Even if a slab looks dry, it might be exhaling moisture like a marathon runner. According to the ASTM F1869 standard, which is the industry’s go-to for Calcium Chloride testing, a slab should ideally emit no more than 3 pounds of moisture per 1,000 square feet over 24 hours for many wood installations. If you ignore this, you’ll soon realize why your basement floor needs a moisture barrier. Without it, that moisture gets trapped under your flooring, leading to cupping or even mold. I highly recommend learning how to use a moisture meter to prevent floor failure before you commit to a high-end material. It is better to spend fifty bucks on a meter now than five thousand on a replacement floor next year. Another nuance often missed is the trowel size error that leads to hollow sounding tiles; using the wrong notch depth can create air pockets that trap moisture and weaken the bond. Have you ever fallen into the trap of assuming a subfloor was ‘good enough’ only to regret it later? Let me know in the comments!
I used to think that once the last nail was driven and the final transition strip was snapped into place, my job was done. I was wrong. The real test of a flooring pro isn’t how the room looks on day one; it’s how it sounds and feels on day one thousand. After years of callbacks and ‘mystery squeaks,’ I’ve refined a toolkit and a maintenance routine that keeps hardwood floors and tiles in peak condition. It starts with moving away from the ‘eyeball method’ and embracing tools that offer objective data.
Get the Gear That Actually Saves Your Knees
If you are still using a bubble level for long hallways, you are working too hard. I switched to a high-end 360-degree green beam laser about four years ago, and it changed everything. The laser level move for perfectly straight hallways isn’t just about aesthetics; it’s about ensuring your layout doesn’t drift into a disaster zone three rooms away. I also never step onto a job site without my pinless moisture meter. I personally swear by the Wagner Orion series because it lets me scan the density of the wood without leaving unsightly puncture marks. According to the National Wood Flooring Association (NWFA) Technical Manual, using a pinless meter is the industry-preferred non-destructive method for verifying that your wood has reached equilibrium with its environment. If you skip this, you’re just guessing, and guessing leads to flooring installation mistakes to avoid for lasting results.
How can I keep my floors looking brand new for decades?
The secret to longevity isn’t a magic chemical; it’s controlling the environment. Wood is a living, breathing material. If your home’s humidity swings wildly between summer and winter, those boards will move. I tell my clients that hardwood floor care secrets to longevity and shine start with a hygrometer. It’s a ten-dollar device that tells you the humidity in the room. Keep it between 30% and 50%, and your floor will stay tight. For those stubborn spots where the adhesive just won’t grab, I always keep a few gym weights in the van. Using the weight plate trick for bonding stubborn vinyl corners ensures that the edges of your LVP don’t curl up six months later when the sun hits them through a south-facing window.
#IMAGE_PLACE_HOLDER_D#
Smart Tech is Coming for Your Living Room
Looking ahead, I predict we are going to see a massive shift toward ‘active’ subfloors. We are already seeing the beginning of this with smart underlayments that can detect moisture leaks before they ruin your perfect finish. Within the next decade, augmented reality (AR) will likely be the standard for installing tiles like a pro, allowing DIYers to project their exact cut lines directly onto the slab. But until that tech becomes affordable, we rely on the mastering floor leveling pro secrets that have worked for generations: patience, the right primer, and a refusal to settle for ‘close enough.’ I want you to try one thing on your next project: go buy a pinless moisture meter. Spend the afternoon scanning different areas of your house. You’ll be shocked at how much the moisture levels vary from the kitchen to the basement, and it will completely change how you approach expert flooring installation tips in the future.
Stop Chasing Perfection and Start Managing Gaps
Reflecting on my years in the field, I’ve had three major lightbulb moments that changed how I work. First, I realized your hands are often better sensors than your eyes; if you can feel a hump through your work boots, you will definitely feel it through the finished floor. Second, I learned that using the chalk dust secret for finding low spots in subfloors is often faster and more accurate than a laser for pinpointing localized dips. Finally, I stopped trying to ‘nail out’ a problem that should have been ‘shimmed out.’ Tension in a board is a ticking time bomb for squeaks. If your subfloor still feels a bit loose, it is worth learning how to fix a bouncy floor with a few well-placed screws before the first plank is ever laid.
Gear That Earned a Permanent Spot in My Van
When it comes to recommendations, I only trust tools that have survived the grind. I swear by the Japanese flush-cut pull saw for trimming shims because its flexible blade won’t mar your new finish. I also highly recommend digging into the National Wood Flooring Association technical manuals for the ‘why’ behind the ‘how.’ For the actual finish work, mastering the secret to a perfect miter cut on hardwood quarter round makes a budget-friendly trim look like a custom architectural feature. If you are just starting your collection, check out the 7 tools you actually need for a professional diy hardwood install to avoid wasting money on fluff.
#IMAGE_PLACEHOLDER_E#
Build a Floor That Lasts Generations
Installing hardwood floors is more than just a home improvement project; it is an act of creation that provides the literal foundation for your home life. Don’t let a wavy subfloor or a tricky baseboard corner steal your momentum. Take your time, use your shims, and remember that every expert was once a beginner struggling with their first gap. Once you master these small adjustments, you will look down at your floor with a level of pride that only comes from doing the job right. What was the most frustrating gap or dip you have ever had to bridge in your home? Let me know in the comments below!