
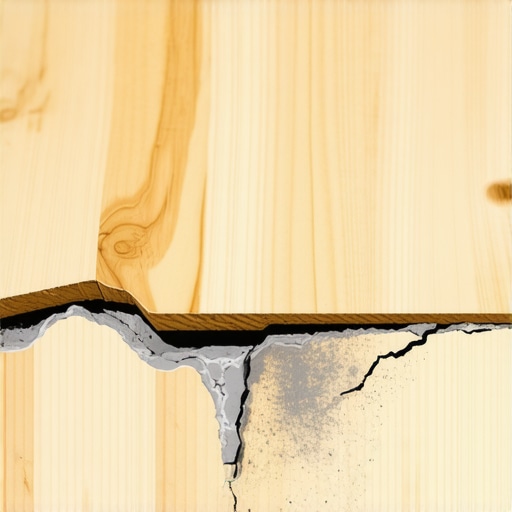
I’ll never forget the sound of that first “crack.” It wasn’t the house settling. It was the sound of three hundred dollars’ worth of self-leveling compound deciding it didn’t want to be friends with my subfloor anymore. I had spent all weekend prepping, or so I thought, only to find that my “perfectly flat” floor was now a series of loose, crunchy plates. If you’re reading this, you’re probably staring at a similar mess—or you’re terrified of making one.
That Time I Turned My Subfloor into a Giant Brittle Pancake
I made a classic rookie mistake during my first big renovation. I thought that “clean enough” was good enough for the plywood. I skipped the specialized primer because the guy at the big-box store said the leveler was “self-priming.” Spoiler alert: it wasn’t. Within 48 hours, the edges started curling. This is a common heartache when people try the ultimate guide to floor leveling. Wood is a living, breathing material that sucks the moisture right out of your wet compound before it can even think about sticking. Today, I’m going to show you exactly how to avoid that “crunch” and get a bond that survives the test of time.
Can you actually trust self-leveler on a flexible wood surface?
It’s a valid fear. You’re pouring a cement-like product over something that bends and breathes. You might be wondering if it’s all just a marketing gimmick that leads to why your self-leveling pour looks like a topographical map instead of a floor. The truth is, self-leveler is incredible, but only if you respect the physics of the plywood grade you need for a stable tile underlayment. According to research by the Tile Council of North America (TCNA), wood subfloors are prone to “deflection”—a fancy word for bouncing—which is the number one enemy of a rigid bond. If you don’t use a lath or a specific primer designed for wood, you’re essentially pouring a layer of glass on top of a sponge. Have you ever tried to peel up a section of leveler only to find the wood underneath looks perfectly dry and untouched? That’s the “thirst” of the wood at work. We’re going to fix that today.
Before we dive into the grit, have you already seen some of those suspicious hairline fractures appearing in your recent pour?
Stop the Bounce Before You Start the Pour
Think of your plywood subfloor like a giant, wooden cracker. If it flexes even a fraction of an inch, the rigid ‘topping’ you’re about to pour will eventually snap. This is what professionals call deflection. Before you even open a bag of compound, you need to be certain your joists are sturdy and your sheets are fastened tight. I learned this the hard way when I tried to level a 1920s kitchen without checking the fasteners; every time I walked near the fridge, the floor groaned.
Run the Hammer Test First
Take a heavy rubber mallet and tap around the floor. You aren’t trying to break it; you’re listening for ‘hollow’ sounds or watching for movement at the seams. If it moves, screw it down. I recommend using 2-inch deck screws every six inches along the joists. This simple prep is the foundation of any step-by-step guide to flooring installation and leveling success. Using the hammer test for finding loose subfloor nails will save you from that dreaded ‘crunch’ six months down the road.
Quench the Thirst of Your Wood Subfloor
Plywood is essentially a stack of dried-out sponges glued together. If you pour wet cement on it, the wood will instantly suck the moisture out of the bottom of the mix. This causes the compound to dry too fast, lose its ability to flow, and result in why your self-leveler developed spiderweb-cracks overnight.
Apply the Primer Like You Mean It
You need a high-solids acrylic primer specifically rated for wood. Don’t just ‘dust’ it on; you want to work it into the pores with a soft-bristled broom. I once thought a quick paint-roller pass was enough. Halfway through the pour, I watched the leveler stop dead in its tracks because the wood had already robbed it of its fluidity. You want the floor to look shiny and ‘plasticized’ once the primer dries. 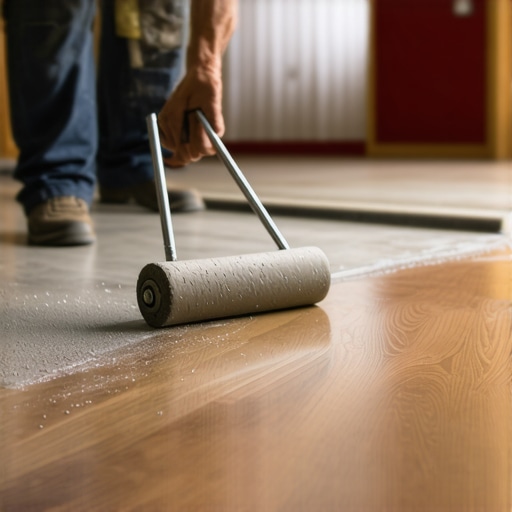
Avoid the Mixing Errors That Kill Your Flow
Once you start pouring, the clock is ticking. You usually have about 10 to 15 minutes before the product begins to ‘gel.’ If you aren’t ready, you’ll end up with ridges that are a nightmare to sand down. I remember one frantic afternoon where my drill battery died mid-mix, and by the time I found a replacement, my first bucket was already turning into a lumpy mess.
Watch Your Drill Speed
Speed matters more than you think. If you crank your drill to the max, you’ll whip air into the mixture, creating tiny bubbles that leave your floor looking like Swiss cheese. Keep your RPMs low and steady. Understanding the mixing paddle speed that ruins your leveling compound is the difference between a smooth finish and a porous disaster. After the pour, use the spiky-roller secret for a mirror-smooth pour to release any trapped air and help the material bridge the gaps between your buckets. If you’re working over heated elements, make sure you know how to choose a floor leveler that wont crack over radiant heat to accommodate the thermal expansion.Let’s dig deeper into a nuance that even some “pros” overlook. I’ve seen countless projects where the prep was decent, the primer was right, but the floor failed anyway. Why? Because of a fundamental misunderstanding of what self-leveling compound actually is. It is a surface tension tool, not a structural reinforcement.
Stop treating self-leveler like structural steel
Many people believe that a thick pour will “stiffen” a subfloor. This is a dangerous myth. In reality, adding a heavy, rigid layer to a floor that has too much “give” only accelerates cracking. You aren’t reinforcing the house; you’re just adding “dead load.” The National Wood Flooring Association (NWFA) specifically warns that unless your joists meet an L/360 deflection standard—meaning they don’t bend more than 1/360th of their span—no amount of leveler will save your tile. If your floor bounces when you walk, you need to address the joists, not just use precise floor leveling techniques to achieve flawless surfaces on top of a failing structure.
Why does my leveler crack right over the plywood seams?
This is the most common “advanced” failure I see. You pour your floor, it looks like a mirror, and three weeks later, a hairline fracture appears perfectly tracing the edge of a plywood sheet. This happens because the leveler is bonded so well to the wood that it tries to move with it. Wood expands and contracts; the cement-based leveler does not. Without using a reinforcing lath or an uncoupling membrane, you are essentially inviting why your porcelain tile is cracking over plywood seams. It’s a classic case of the plywood mistake that causes grout cracks in troy bathroom remodels—failing to account for the natural movement of the substrate. 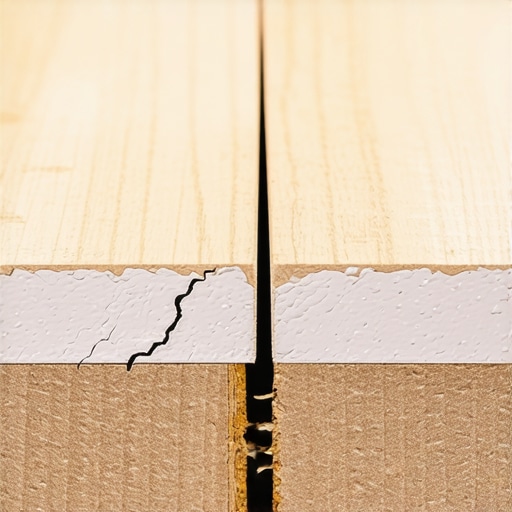
The perimeter gap is not optional
Here is the biggest “oops” factor: the expansion gap. People pour leveler right up against the drywall or the bottom plate of the wall. When the temperature or humidity shifts, your entire floor “sandwich” expands. If it has nowhere to go, it will “tent” or buckle. Always use foam expansion strips around the perimeter. This is one of those flooring installation mistakes to avoid for lasting results. Understanding why your floor to wall gap is the most important part of lvp applies just as much to your leveling layer as it does to your finished planks.
Master the art of the wet edge
Finally, let’s talk about the “pour transition.” If you are working alone, you are at a massive disadvantage. You need to maintain a “wet edge”—where the new bucket meets the previous one. If the first bucket starts to skin over before the second one arrives, you’ll get a visible ridge. This is where mastering floor leveling pro secrets for perfect installations becomes about logistics, not just mixing. Have you ever fallen into this trap where your “flat” floor ended up with a speed bump between buckets? Let me know in the comments.
Stop Guessing and Start Measuring with Pro-Grade Gear
If there is one thing that separates a weekend warrior from a professional, it is the refusal to ‘eyeball’ the substrate. I spent years thinking I could feel the moisture in a board just by touching it. I was wrong every single time. Now, I never start a pour without my Wagner Orion moisture meter. You need to know if your wood is at equilibrium with the room’s environment. If the wood is too wet, it will eventually shrink and pull away from the leveler; if it is too dry, it will suck the life out of your compound. Learning how to use a moisture meter before you lay wood floors is the single most effective way to guarantee your bond lasts twenty years instead of twenty months.
How do I keep my leveled floor from cracking years later?
The secret to longevity isn’t in the cement; it’s in the air. The National Tile Contractors Association (NTCA) emphasizes that maintaining a stable indoor climate is non-negotiable for floor systems. If you let your home’s relative humidity swing from 20% in the winter to 70% in the summer, your subfloor will move so much that no amount of primer can save it. This is especially true if you are trying to how to achieve flawless floor leveling before tile laying. I always tell my clients to keep their HVAC systems running and invest in a humidifier. Beyond humidity, you need to be careful with how you clean. Please, stop using vinegar on your hardwood floors immediately as the acidity can eventually seep through micro-cracks and degrade the edges of your underlayment over time. Proper hardwood floor care secrets to longevity and shine involve using pH-neutral cleaners that don’t introduce excessive moisture to the subfloor level.
#IMAGE_PLACE_HOLDER_D#
Why the Spiky Roller is Non-Negotiable
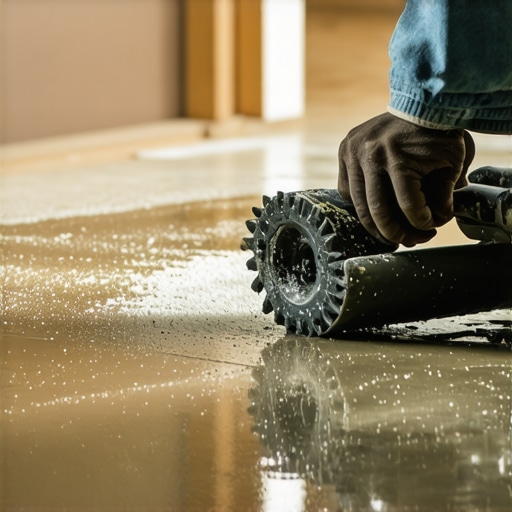
If you want that glass-like finish that you see in professional reveal videos, you need to stop relying on just a rake. I used to think the material would just ‘level itself.’ It doesn’t. You need to assist the surface tension. Using the spiky-roller secret for a mirror-smooth pour allows you to pop the tiny bubbles caused by the mixing process. Without it, you end up with pinholes that can weaken the structure of the pour. Choosing the roller selection that prevents air bubbles in leveler ensures that the density of the compound is consistent from the plywood all the way to the surface. It also helps bridge those transitions between different buckets, ensuring you don’t get a ‘cold joint’ where the first pour meets the second. Sometimes, people complain that the reason your new floor feels cold even with the heat on is due to the density of the leveler, but that density is exactly what provides the thermal mass needed if you ever decide to install radiant heating.
The Future of Leveling involves 3D Scanning
We are moving toward a world where ‘high spots’ are detected by lasers, not long levels. I’ve recently started playing with LiDAR apps on my phone to map out floor topography before I even buy my first bag of leveler. In the next few years, I predict we will see self-leveling compounds that are even more flexible, using advanced polymers to mimic the elasticity of wood more closely. For now, my best advice is to stop rushing the prep. Buy a dedicated mixing station—something like a Hippo mixer—to ensure every bag is identical. Consistency is the only way to avoid why your self-leveling pour looks like a topographical map. Go out and buy a high-quality moisture meter today; it’s the best $100 you’ll ever spend on your home’s future.
The Costly Missteps That Taught Me More Than Any Manual
Looking back at my early projects, I realized that my biggest failures happened because I treated the subfloor like a static piece of stone rather than a living material. If I could go back, I’d tell myself that cleaning isn’t just about sweeping; it’s about vacuuming until you’d feel comfortable eating off the plywood. Any dust left behind is essentially a bond breaker. I also learned that floor leveling challenges are usually won or lost in the first twenty minutes of prep. Here are my biggest takeaways from the trenches:
- The Primer Tacky Test: Never pour until the primer is sticky to the touch but doesn’t transfer to your glove. If it is dry to the bone, you have waited too long; if it is wet, the leveler will mix with it and fail.
- Half-Bags are a Trap: It is nearly impossible to get the water-to-powder ratio perfect when you aren’t using the full bag. Commit to the full pour or do not pour at all.
- Humidity is Your Boss: If you do not control the air, the wood will control your floor.
The Gear I Actually Keep in My Truck
I don’t get paid to promote these, but I won’t step onto a job site without them because they eliminate the guesswork. First, a high-quality Wagner moisture meter is non-negotiable. Knowing how to use a moisture meter before you lay wood floors is what separates a professional from a hobbyist. Second, I always carry a Hippo mixer. Hand-mixing in five-gallon buckets is fine for a closet, but for a kitchen, you need the volume and consistency. Finally, never underestimate the power of the spiky-roller secret for a mirror-smooth pour. It is the difference between a floor that looks okay and a floor that looks like a sheet of ice. These tools ensure you avoid the most common flooring installation mistakes to avoid for lasting results.
Stop Worrying and Start Prepping
It is easy to get paralysis by analysis when you are staring at a big bag of expensive compound and a wonky subfloor. But remember, every expert started with a floor that made them nervous. By taking the time to quench the wood’s thirst and stiffen the joists, you are already ahead of the curve. Mastering flooring installation is a journey of patience, not speed. If you follow a step-by-step guide to flooring installation and leveling success, you will find that the perfect floor isn’t a myth—it is just the result of good prep. Have you ever struggled with a leveler that dried way faster than you expected? Let me know in the comments below!