
I was carrying a heavy tray of appetizers across the living room last Christmas when it happened. Right in the dead center of the room, my foot sank. It wasn’t a cliff-fall, but a distinct, sickening ‘give’ that made the laminate click and groan. My heart sank faster than my heel. I had spent days installing that floor, yet there I was, walking on what felt like a localized trampoline. If you have ever felt that weird hollow dip under your socks, you know exactly the frustration I’m talking about. It feels like the floor is failing you. But here is the good news: you probably don’t need to rip the whole thing up. Today, I am going to show you how to stabilize that annoying soft spot and reclaim your solid footing. It’s a fix born from my own trial and error—mostly error, if I’m being honest—that will save your weekend and your sanity.
Your Floor Should Not Feel Like a Bounce House
We often ignore these little dips, hoping they’ll just ‘settle.’ I made that exact mistake early on, thinking the planks would eventually find their home. They didn’t. In fact, why floating floors sound hollow when you walk on them usually comes down to one thing: a low spot in the subfloor that was ignored during the rush of installation. According to the North American Laminate Flooring Association (NALFA), subfloors must be flat within 3/16 of an inch over a 10-foot radius. Anything more, and you’re basically asking the tongue-and-groove joints to do a job they weren’t designed for. When those joints flex too much, they eventually snap. I learned this the hard way by ignoring a dip near a doorway, only to have the plank crack six months later. To avoid this, you need to identify the depth of the void. Have you ever felt like your floor was more of a suggestion than a solid surface? Drop a comment and tell me where your ‘trampoline zone’ is.
Is This Repair Actually Worth the Effort?
You might be worried that ‘fixing’ a soft spot means a massive construction project involving heavy machinery and dust. I get it; I used to think the same thing. The fear is that we will make it worse or end up with a mismatched patch. However, using the chalk dust secret for finding low spots in subfloors allows you to pinpoint the exact area of the void without guessing. By understanding flooring installation mistakes to avoid for lasting results, we can use a targeted injection method or a partial plank replacement that keeps the rest of your floor intact. We aren’t just putting a band-aid on it; we are rebuilding the support system underneath those planks so they can finally do their job properly. [image_placeholder_1]
Pinpoint the Dip with Scientific Precision
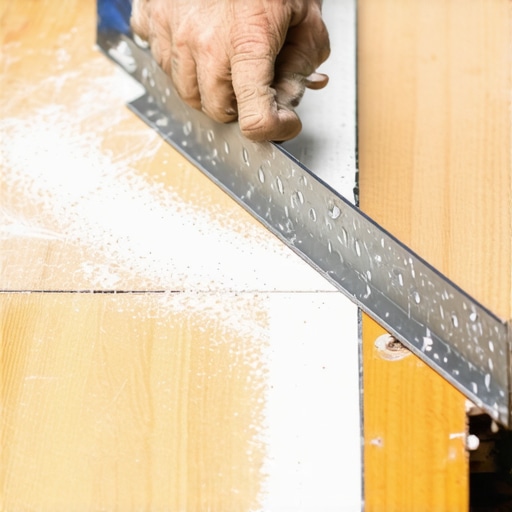
Think of your subfloor as the foundation of a house; if the foundation has a hole, the walls eventually lean. To stop the bounce, you first need to map the ‘valley’ under your floorboards. I once tried to eyeball a dip in my kitchen, poured leveler, and realized I missed the mark by three inches because the shadows lied to me. Don’t do that. Instead, use the chalk dust secret for finding low spots in subfloors. You slide a six-foot level across the area and puff tailor’s chalk underneath. Wherever the dust collects is your target zone. It’s like a topographic map of your failure, but it’s the only way to be sure you aren’t just guessing.
The Drill and Fill Shortcut
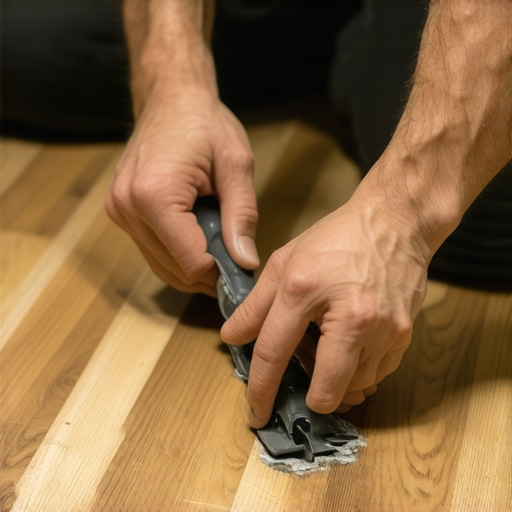
If you have a small, localized hollow spot and the thought of ripping up your flooring makes you want to nap, you can use the injection method. This involves drilling a tiny, 1/8-inch hole in a discrete spot—usually in a grain line or a dark knot in the wood—and injecting a specialized floor-repair adhesive. This resin expands to fill the void, turning that ‘trampoline’ into solid ground. Just be careful; too much pressure can actually lift the planks and create a hump, which is even harder to fix than a dip. I learned this the hard way when I got impatient and turned my hallway into a miniature mountain range. If you’re dealing with larger areas, you’ll need to move toward the ultimate guide to floor leveling for a perfect finish to handle the volume.
Tear It Up for a Level Surface
Sometimes, the ‘squish’ is too big for a needle. In these cases, you have to unzip the floor. Starting from the nearest wall, carefully remove the baseboards and click the planks apart until you reach the problem area. This is where you see the truth: usually a chunk of missing subfloor or a sagging joist. To fix this properly, you must use a self-leveling compound. However, be warned that why your self-leveler is drying faster than you can pour it is often due to a lack of primer or high ambient heat. When I did my first basement, the leveler turned into oatmeal before I could even spread it because the concrete sucked the moisture right out of the mix.
Achieve the Mirror Smooth Finish
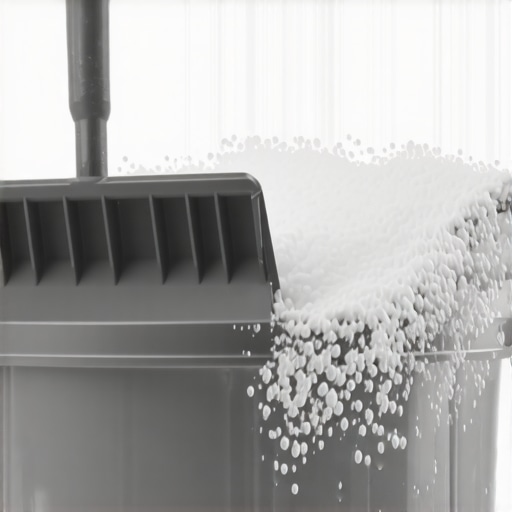
Once your compound is mixed, pour it into the low spot and use a spreader. To ensure you don’t end up with ridges that will telegraph through your planks later, use the spiky roller secret for a mirror smooth pour. This tool breaks surface tension and releases trapped air bubbles that can cause the surface to look like the moon. If you are working over existing materials, remember the leveling secret for installing plank flooring over tiles to ensure the bond stays permanent. A flat subfloor is the only way to prevent your tongue-and-groove joints from snapping under the weight of your morning coffee run. Precision here saves you from a full floor replacement three years down the line.
Leveler Is Not Actually Magic Water
Most DIYers and even some pros fall into the trap of thinking self-leveling compound is a ‘set it and forget it’ solution. The industry secret? It is actually self-smoothing, not self-leveling. If your house has a significant slope, that liquid gold will simply follow the gravity line, leaving you with a floor that is smooth but still slanted. To get it truly flat, you have to ‘gauge’ the pour. I’ve seen countless projects fail because someone assumed the liquid would do all the work. Instead, you need to be active with a gauge rake to ensure the material is distributed evenly across the high and low spots. This is one of the many mastering floor leveling pro secrets for perfect installations that separates a hobbyist from a craftsman. If you don’t manage the flow, you’ll end up with a floor that looks like a frozen pond in a windstorm.
Why Your Drill Speed Might Be Ruining the Mix
Here is an ‘oops’ factor I learned after wasting five bags of expensive compound: speed kills. When you are mixing your leveler, it is tempting to crank the drill to full power to get the job done faster. However, the mixing paddle speed that ruins your leveling compound is anything over 650 RPM. High speeds whip air into the mixture, creating thousands of tiny bubbles. Once you pour, those bubbles rise to the surface and pop, leaving your floor looking like a piece of Swiss cheese. These ‘pinholes’ aren’t just ugly; they weaken the structural integrity of the pour. This is often why self-leveling compounds bubbled over your subfloor, and it’s a nightmare to fix once it’s dry. Have you ever ended up with a ‘lunar surface’ instead of a flat floor? Let me know in the comments if you’ve fallen into the high-speed drill trap.
Does the Existing Surface Need a Mechanical Bond?
Advanced installers know that chemical bonds—like primer—are only half the battle. If you are working over a non-porous surface, you might be wondering if the leveler will actually stick. The National Wood Flooring Association (NWFA) emphasizes that for a successful installation, the substrate must be clean, dry, and structurally sound, but they also highlight the necessity of ‘surface profile.’ This means sometimes you need to physically scuff or etch the floor. This is especially true if you are dealing with old paint or adhesives, as why most floor levelers fail on top of painted concrete usually traces back to the leveler bonding to the paint rather than the slab. If that paint peels, your entire new floor goes with it. To prevent this, the concrete etching step you shouldnt skip before leveling provides the ‘teeth’ the compound needs to bite into the floor. Don’t let a 20-year-old layer of paint be the reason your new hardwood fails. Taking the time to understand these technical requirements is what ensures you aren’t just fixing a dip, but building a floor that will last for decades.
Even with the best technique, you are only as good as the data you have. I never start a pour without my pinless moisture meter. It is the only way to know if your subfloor is actually ready to accept a primer. If the slab is too wet, the leveler will simply delaminate later, and you will find yourself wondering why your lvp floor is showing telegraphing from the subfloor after just one season. I personally use a Wagner Orion series because it does not leave holes in the wood and gives me a deep-depth reading that cheaper models miss. Knowing how to use a moisture meter before you lay wood floors is the difference between a floor that stays flat and one that cups like a Pringle in July. To get the mix right, I always use a dedicated mixing station—essentially a large, clean barrel on wheels. This prevents the common issue of 5 reasons your self-leveler is sticking to the bucket instead-of the floor, which usually involves improper scraping or bad water ratios. 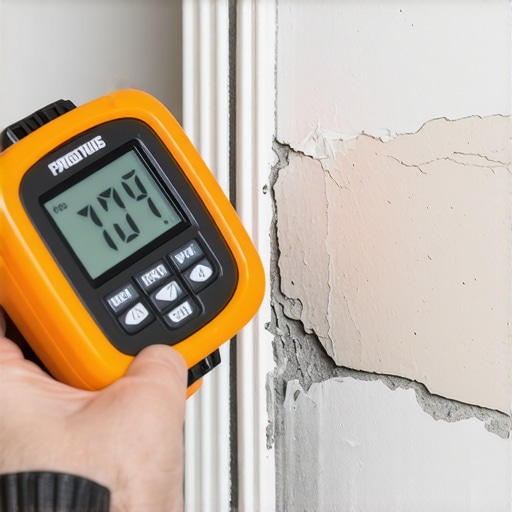
How do I maintain my level floor over the years?
Once that leveler is cured and your finish floor is down, the job shifts from construction to preservation. The most common mistake I see is people treating their new floor like a sidewalk. You must protect the bond you worked so hard to create. This means managing your home humidity like a hawk. The Tile Council of North America (TCNA) Handbook specifically notes that the ‘curing environment’—meaning humidity and temperature—is just as vital as the mix ratio for bond strength. If your home swings from 20% to 80% humidity, that subfloor is going to move, and even the best leveler has its limits. For the top surface, please stop using vinegar on your hardwood floors immediately. The acid eats the finish and eventually reaches the wood, causing it to swell and ruin your perfectly flat plane. Instead, lean into hardwood floor care secrets to longevity and shine to keep the structural integrity intact. I also recommend a high-quality spiked roller to eliminate air pockets during the initial pour; the roller selection that prevents air bubbles in leveler is often the most overlooked part of the toolkit. Looking forward, I predict we will see the rise of more ‘high-flex’ fiber-reinforced compounds that can actually handle the natural bounce of older homes without cracking. We are moving away from rigid, brittle floors toward systems that can ‘breathe’ with the structure using nanotechnology. If you really want to level up your game, go out and buy a 6-foot box level today; do not trust your eyes, trust the bubble. It is the cheapest insurance policy you will ever buy for your home.I was carrying a heavy tray of appetizers across the living room last Christmas when it happened. Right in the dead center of the room, my foot sank. It wasn’t a cliff-fall, but a distinct, sickening ‘give’ that made the laminate click and groan. My heart sank faster than my heel. I had spent days installing that floor, yet there I was, walking on what felt like a localized trampoline. If you have ever felt that weird hollow dip under your socks, you know exactly the frustration I’m talking about. It feels like the floor is failing you. But here is the good news: you probably don’t need to rip the whole thing up. Today, I am going to show you how to stabilize that annoying soft spot and reclaim your solid footing. It’s a fix born from my own trial and error—mostly error, if I’m being honest—that will save your weekend and your sanity.
Your Floor Should Not Feel Like a Bounce House
We often ignore these little dips, hoping they’ll just ‘settle.’ I made that exact mistake early on, thinking the planks would eventually find their home. They didn’t. In fact, why floating floors sound hollow when you walk on them usually comes down to one thing: a low spot in the subfloor that was ignored during the rush of installation. According to the North American Laminate Flooring Association (NALFA), subfloors must be flat within 3/16 of an inch over a 10-foot radius. Anything more, and you’re basically asking the tongue-and-groove joints to do a job they weren’t designed for. When those joints flex too much, they eventually snap. I learned this the hard way by ignoring a dip near a doorway, only to have the plank crack six months later. To avoid this, you need to identify the depth of the void. Have you ever felt like your floor was more of a suggestion than a solid surface? Drop a comment and tell me where your ‘trampoline zone’ is.
Is This Repair Actually Worth the Effort?
You might be worried that ‘fixing’ a soft spot means a massive construction project involving heavy machinery and dust. I get it; I used to think the same thing. The fear is that we will make it worse or end up with a mismatched patch. However, using the chalk dust secret for finding low spots in subfloors allows you to pinpoint the exact area of the void without guessing. By understanding flooring installation mistakes to avoid for lasting results, we can use a targeted injection method or a partial plank replacement that keeps the rest of your floor intact. We aren’t just putting a band-aid on it; we are rebuilding the support system underneath those planks so they can finally do their job properly.
Pinpoint the Dip with Scientific Precision
Think of your subfloor as the foundation of a house; if the foundation has a hole, the walls eventually lean. To stop the bounce, you first need to map the ‘valley’ under your floorboards. I once tried to eyeball a dip in my kitchen, poured leveler, and realized I missed the mark by three inches because the shadows lied to me. Don’t do that. Instead, use the chalk dust secret for finding low spots in subfloors. You slide a six-foot level across the area and puff tailor’s chalk underneath. Wherever the dust collects is your target zone. It’s like a topographic map of your failure, but it’s the only way to be sure you aren’t just guessing.
The Drill and Fill Shortcut
If you have a small, localized hollow spot and the thought of ripping up your flooring makes you want to nap, you can use the injection method. This involves drilling a tiny, 1/8-inch hole in a discrete spot—usually in a grain line or a dark knot in the wood—and injecting a specialized floor-repair adhesive. This resin expands to fill the void, turning that ‘trampoline’ into solid ground. Just be careful; too much pressure can actually lift the planks and create a hump, which is even harder to fix than a dip. I learned this the hard way when I got impatient and turned my hallway into a miniature mountain range. If you’re dealing with larger areas, you’ll need to move toward the ultimate guide to floor leveling for a perfect finish to handle the volume.
Tear It Up for a Level Surface
Sometimes, the ‘squish’ is too big for a needle. In these cases, you have to unzip the floor. Starting from the nearest wall, carefully remove the baseboards and click the planks apart until you reach the problem area. This is where you see the truth: usually a chunk of missing subfloor or a sagging joist. To fix this properly, you must use a self-leveling compound. However, be warned that why your self-leveler is drying faster than you can pour it is often due to a lack of primer or high ambient heat. When I did my first basement, the leveler turned into oatmeal before I could even spread it because the concrete sucked the moisture right out of the mix.
Achieve the Mirror Smooth Finish
Once your compound is mixed, pour it into the low spot and use a spreader. To ensure you don’t end up with ridges that will telegraph through your planks later, use the spiky roller secret for a mirror smooth pour. This tool breaks surface tension and releases trapped air bubbles that can cause the surface to look like the moon. If you are working over existing materials, remember the leveling secret for installing plank flooring over tiles to ensure the bond stays permanent. A flat subfloor is the only way to prevent your tongue-and-groove joints from snapping under the weight of your morning coffee run. Precision here saves you from a full floor replacement three years down the line.
Leveler Is Not Actually Magic Water
Most DIYers and even some pros fall into the trap of thinking self-leveling compound is a ‘set it and forget it’ solution. The industry secret? It is actually self-smoothing, not self-leveling. If your house has a significant slope, that liquid gold will simply follow the gravity line, leaving you with a floor that is smooth but still slanted. To get it truly flat, you have to ‘gauge’ the pour. I’ve seen countless projects fail because someone assumed the liquid would do all the work. Instead, you need to be active with a gauge rake to ensure the material is distributed evenly across the high and low spots. This is one of the many mastering floor leveling pro secrets for perfect installations that separates a hobbyist from a craftsman. If you don’t manage the flow, you’ll end up with a floor that looks like a frozen pond in a windstorm.
Why Your Drill Speed Might Be Ruining the Mix
Here is an ‘oops’ factor I learned after wasting five bags of expensive compound: speed kills. When you are mixing your leveler, it is tempting to crank the drill to full power to get the job done faster. However, the mixing paddle speed that ruins your leveling compound is anything over 650 RPM. High speeds whip air into the mixture, creating thousands of tiny bubbles. Once you pour, those bubbles rise to the surface and pop, leaving your floor looking like a piece of Swiss cheese. These ‘pinholes’ aren’t just ugly; they weaken the structural integrity of the pour. This is often why self-leveling compounds bubbled over your subfloor, and it’s a nightmare to fix once it’s dry. Have you ever ended up with a ‘lunar surface’ instead of a flat floor? Let me know in the comments if you’ve fallen into the high-speed drill trap.
Does the Existing Surface Need a Mechanical Bond?
Advanced installers know that chemical bonds—like primer—are only half the battle. If you are working over a non-porous surface, you might be wondering if the leveler will actually stick. The National Wood Flooring Association (NWFA) emphasizes that for a successful installation, the substrate must be clean, dry, and structurally sound, but they also highlight the necessity of ‘surface profile.’ This means sometimes you need to physically scuff or etch the floor. This is especially true if you are dealing with old paint or adhesives, as why most floor levelers fail on top of painted concrete usually traces back to the leveler bonding to the paint rather than the slab. If that paint peels, your entire new floor goes with it. To prevent this, the concrete etching step you shouldnt skip before leveling provides the ‘teeth’ the compound needs to bite into the floor. Don’t let a 20-year-old layer of paint be the reason your new hardwood fails. Taking the time to understand these technical requirements is what ensures you aren’t just fixing a dip, but building a floor that will last for decades.
Even with the best technique, you are only as good as the data you have. I never start a pour without my pinless moisture meter. It is the only way to know if your subfloor is actually ready to accept a primer. If the slab is too wet, the leveler will simply delaminate later, and you will find yourself wondering why your lvp floor is showing telegraphing from the subfloor after just one season. I personally use a Wagner Orion series because it does not leave holes in the wood and gives me a deep-depth reading that cheaper models miss. Knowing how to use a moisture meter before you lay wood floors is the difference between a floor that stays flat and one that cups like a Pringle in July. To get the mix right, I always use a dedicated mixing station—essentially a large, clean barrel on wheels. This prevents the common issue of 5 reasons your self-leveler is sticking to the bucket instead-of the floor, which usually involves improper scraping or bad water ratios.
How do I maintain my level floor over the years?
Once that leveler is cured and your finish floor is down, the job shifts from construction to preservation. The most common mistake I see is people treating their new floor like a sidewalk. You must protect the bond you worked so hard to create. This means managing your home humidity like a hawk. The Tile Council of North America (TCNA) Handbook specifically notes that the ‘curing environment’—meaning humidity and temperature—is just as vital as the mix ratio for bond strength. If your home swings from 20% to 80% humidity, that subfloor is going to move, and even the best leveler has its limits. For the top surface, please stop using vinegar on your hardwood floors immediately. The acid eats the finish and eventually reaches the wood, causing it to swell and ruin your perfectly flat plane. Instead, lean into hardwood floor care secrets to longevity and shine to keep the structural integrity intact. I also recommend a high-quality spiked roller to eliminate air pockets during the initial pour; the roller selection that prevents air bubbles in leveler is often the most overlooked part of the toolkit. Looking forward, I predict we will see the rise of more ‘high-flex’ fiber-reinforced compounds that can actually handle the natural bounce of older homes without cracking. We are moving away from rigid, brittle floors toward systems that can ‘breathe’ with the structure using nanotechnology. If you really want to level up your game, go out and buy a 6-foot box level today; do not trust your eyes, trust the bubble. It is the cheapest insurance policy you will ever buy for your home.
The Reality Check Most Flooring Manuals Skip
After years of fixing my own mistakes, I’ve realized that a ‘good enough’ subfloor is the most expensive thing you can own. If you see a dip that looks about 1/8 of an inch, don’t assume the underlayment will hide it. It won’t. I also learned that lighting is your best friend; always shine a flashlight across the floor at a low angle to catch shadows that hide during the day. Most importantly, remember that floor leveling challenges common mistakes and how to avoid them usually start with being too impatient to let the primer dry properly.
The Survival Kit for a Perfectly Flat Home
I don’t step onto a job site without three specific things. First is a 6-foot box level because it never lies, unlike a laser that can be knocked out of alignment. Second is a high-quality moisture sensor; how to use a moisture meter before you lay wood floors is a skill that has saved me thousands in potential damage. Finally, I always use the spiky roller secret for a mirror smooth pour to ensure there are no air pockets left to weaken the structure. These aren’t just ‘pro’ tools; they are the difference between a one-weekend fix and a lifetime of solid ground.
[image_placeholder_final]
Stop Walking on Eggshells
You deserve a home that feels solid under your feet, not a series of traps you have to dance around. Taking the time to master precise floor leveling techniques to achieve flawless surfaces is an investment in your home’s future value and your own daily peace of mind. Don’t let the fear of a messy project stop you from having a floor that finally stays quiet. Have you ever felt a sickening ‘give’ in your laminate that made your heart skip a beat? Let me know your floor horror stories in the comments below!