
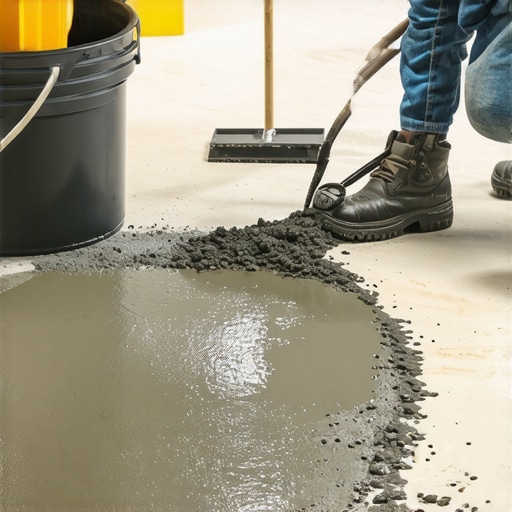
There I was, standing in my basement with a literal ticking time bomb of gray sludge in a bucket. I’d spent all Saturday prepping, thinking I was ready for a “smooth, easy pour.” Within seven minutes, my beautiful liquid floor looked less like a mirror and more like a lumpy oatmeal disaster. I’d panicked, tried to spread the stiffening goo with a trowel, and ended up with a mess I had to grind down the next morning. If you’re reading this while your heart is racing and your compound is thickening, take a breath. We’re going to fix your workflow so you actually have time to breathe between buckets.
Heat and Thirst are Killing Your Open Time
You probably think you’re just moving too slow, but more often than not, the floor itself is sabotaging you. One of the biggest mistakes I made early on was pouring onto a dry, thirsty concrete slab without enough primer. That concrete sucks the moisture right out of your mix like a sponge, causing it to “flash set.” When that happens, your self-leveling pour looks like a topographical map instead of a flat surface. You need precise floor leveling techniques that account for the environment of your room. According to the American Concrete Institute, ambient temperatures above 70°F can drastically reduce the chemical “open time” of cementitious materials, sometimes by as much as 50%. If your room is hot, your leveler is going to act like it’s in a race it intends to win.
Is this DIY project actually worth the stress?
I’ve heard this a thousand times: “Why can’t I just use more water?” Don’t do it. I tried that once in a guest bath, and the result was a soft, chalky floor that crumbled under my boots. You have to respect the chemistry. The goal is to manage the environment and your tools, not change the recipe. Have you ever felt like you were fighting a losing battle against a bucket of mud? It’s a common frustration, but it’s entirely preventable. We need to look at everything from the mixing paddle speed you’re using to how you handle the material once it hits the ground.
Set Yourself Up for a Win with Better Prep
Speed is the byproduct of a good setup, not just moving your arms faster. Before you even crack a bag open, you need to ensure your subfloor is sealed and your tools are within arm’s reach. Using the spiky roller secret can help you move the material quickly without breaking your back or losing those precious seconds of flow. It’s all about creating a “wet edge” and keeping it. Mastering flooring installation fundamentals means knowing that the pour is the shortest part of the job; the real work happens in the two hours before the first bag is mixed. Let’s dig into the specific steps to cool down your slab and prep your mix for a much longer working window.
Seal Your Slab Like Your Project Depends On It
Think of your concrete subfloor as a giant, thirsty sponge. If you pour your expensive leveler directly onto raw concrete, the slab will greedily suck out all the water before the compound has a chance to settle. This is why you see those ugly, dry “islands” in the middle of your floor. I learned this the hard way during a bathroom remodel where I thought one light coat of primer was “good enough.” It wasn’t. The leveler started stiffening the second it touched the floor, and I was left with a gritty mess that wouldn’t budge. To avoid this, you need a generous double-coat of primer. The first coat fills the pores; the second coat creates a tacky bridge. This is one of the most critical mastering floor leveling pro secrets for perfect installations. You want that floor to look shiny and feel sticky, not dull and dry, before the buckets come out.
Slow Down Your Drill to Save Your Surface
We all want to get the job done, but high speed is your enemy when it involves chemistry. If you use a standard high-RPM drill, you’re basically whipping meringue. You’re folding air into the mix, which leads to tiny pinholes later. I once used a high-speed masonry drill because I couldn’t find my low-speed mixer, and the resulting floor looked like a block of Swiss cheese once it dried. Using the correct mixing paddle speed is vital. You want a slow, steady vortex—not a splashy hurricane. If you see foam building up on the surface of the liquid, stop immediately. Those bubbles are air pockets that will eventually rise and pop, leaving you with a surface that requires even more sanding. Managing the air content is a pillar of flooring installation fundamentals that most DIYers skip in their rush to pour.#IMAGE_PLACE_HOLDER_B#
Keep the Edge Moving Before It Sets
The “wet edge” is the most important concept in floor leveling. This is the boundary where your fresh pour meets the previous bucket. If that edge dries for even sixty seconds too long, you’ll get a visible ridge that won’t sand out easily. When I was leveling a large kitchen, I tried to do it solo, thinking I was fast enough. By the time I mixed the third bucket, the first pour had already skinned over. The result was a “topographical map” disaster that cost me two days of grinding. Now, I always have a partner mixing while I’m pouring. You need to keep the material moving constantly to prevent the why self-leveling compounds bubbled over your subfloor issues from ruining your flow. Utilizing the spiky roller secret helps you break the surface tension and merge the two pours into one continuous glass-like sheet. This tool doesn’t just move mud; it releases trapped air and helps the chemistry do its job.
Achieve a Flat Base for Heavy Materials
If you’re planning on laying large tiles later, “close enough” isn’t going to cut it. Large format tiles have zero tolerance for dips. Learning how to achieve flawless floor leveling before tile laying requires a long straightedge to check your work as you go. You aren’t just dumping a bucket; you’re managing a fluid. Use a gauge rake to set the depth, then let the material’s own weight do the leveling. If you fight the material too much with a trowel, you’ll create “birdbaths”—small low spots that will cause your tile to crack or create lippage later. This is particularly important if you are trying to find the ultimate guide to floor leveling for a perfect finish. Trust the product’s flow, but guide it with intent, and never stop moving until the entire room is submerged.
Stop Trusting the Word Self-Leveling on the Bag
The biggest industry lie is the idea that these compounds are “set it and forget it” solutions. In reality, they are self-smoothing, not magically self-leveling. Gravity is a helpful partner, but surface tension and viscosity are your enemies. If you don’t apply precise floor leveling techniques to achieve flawless surfaces, you are simply creating a smoother version of your existing slope. Professionals know that you still have to manually guide the material with a gauge rake or a spreader. I’ve seen homeowners dump five bags into a room and walk away, only to find a perfectly smooth floor that still drops two inches from one corner to the other. You have to actively manage the volume of the pour to truly change the floor’s plane. This is a nuance often missed in the ultimate guide to floor leveling for a perfect finish. Use pins or a laser level to mark your target height, or you’re just guessing in the dark.
The Structural Trap Most DIYers Ignore
Most people think a flat floor is a stable floor, but that is a dangerous assumption. I once leveled a kitchen to a glass-like finish, only to find my porcelain tile is cracking over plywood seams six months later. The culprit? I ignored the subfloor deflection. Adding a heavy layer of cementitious leveler adds significant dead weight to your floor system. According to the Tile Council of North America (TCNA), the maximum allowable deflection for a tile-ready floor is L/360. If your joists are too small or the span is too long, the added weight of the leveler actually increases the bounce. This is one of those flooring installation mistakes to avoid for lasting results. You aren’t just making it flat; you’re making it heavier, and your structure must be able to handle that load without flexing.#IMAGE_PLACE_HOLDER_C#
Can your joists actually support that stone-cold flat floor?
This is the point where the math gets real for an advanced installation. If you are adding an inch of leveler over a 200-square-foot room, you are adding roughly 1,500 to 2,000 pounds of weight. If you don’t reinforce the subfloor from below, you are essentially building a beautiful, rigid surface on a foundation of Jell-O. Before you pour, check the plywood grade you need for a stable tile underlayment and ensure your joist span is within spec. If you have a wobbly base, you might even need the simple shim trick for wobbly baseboards just to hide the gaps created by the floor’s new weight. Remember, even if you are planning on mastering hardwood floor refinishing later, the stability of that base determines if your boards will eventually squeak or gap. Have you ever fallen into this trap of thinking the leveler would solve a structural bounce? Let me know in the comments.Once you have accounted for the structural weight and deflection of your subfloor, the difference between a mediocre result and a showroom-quality finish comes down to the specialized kit in your hands. I spent years trying to ‘make do’ with standard hardware store tools, but the moment I invested in a dedicated gauge rake, my workflow changed forever. A gauge rake allows you to set the exact depth of your pour across the entire room, ensuring you don’t over-pour in one corner and starve another. It is the only way to execute precise floor leveling techniques to achieve flawless surfaces without guessing. Once the material is spread, you must immediately follow up with the spiky roller secret for a mirror-smooth pour. This isn’t just about moving the mix; the spikes break the surface tension and allow the polymer-modified cements to heal together, removing the ‘ghosting’ marks often left by trowels.
Invest in a Gauge Rake if You Value Your Sanity
I personally use a 24-inch gauge rake with adjustable skids. Why? Because it keeps the material at a uniform height while I’m moving at a full sprint. If you’re trying to eyeball a quarter-inch pour over 300 square feet, you’re going to fail. The rake does the thinking for you. If you are preparing the base for timber later, remember that mastering hardwood floor refinishing starts with this very moment. Any dip you leave now will be a squeak you hear for the next twenty years. Don’t forget to keep a high-quality laser level hummed on in the corner to double-check your height pins as you progress. #IMAGE_PLACE_HOLDER_D#
How do I maintain my floor’s mirror finish over time?
Long-term success isn’t just about the pour; it’s about how you treat the surface after it cures. One of the most common calls I get is from homeowners wondering why their beautiful new finish looks dull after six months. The answer is usually in the cleaning bucket. You must stop using vinegar on your hardwood floors immediately. The acid in vinegar slowly eats away at the polyurethane seal, eventually reaching the leveling compound or the wood itself and causing cloudiness. According to the National Wood Flooring Association (NWFA) Technical Publication No. C200, you should only use a pH-neutral cleaner specifically formulated for the finish type. For those who want hardwood floor care secrets to longevity and shine, the ‘dry-mop first’ rule is king. Swabbing a floor with a soaking wet mop is a recipe for flooring installation mistakes to avoid for lasting results, as water can seep into the expansion gaps and cause the leveler to delaminate or the wood to cup.
Where Flooring Tech is Heading in 2026
Looking ahead, the industry is moving toward integrated moisture management. I predict that within the next few years, smart moisture sensors embedded directly into the subfloor will become the standard for high-end residential builds. We are already seeing pros use how to use a moisture meter before you lay wood floors as a non-negotiable step, but real-time data will eventually tell you exactly when your slab is ready for the next layer. For now, your best bet is to grab a professional-grade spiky roller and a gauge rake before your next project. Stop trying to spread leveler with a flat trowel and see how much easier the job becomes when the tools do the heavy lifting.There I was, standing in my basement with a literal ticking time bomb of gray sludge in a bucket. I’d spent all Saturday prepping, thinking I was ready for a “smooth, easy pour.” Within seven minutes, my beautiful liquid floor looked less like a mirror and more like a lumpy oatmeal disaster. I’d panicked, tried to spread the stiffening goo with a trowel, and ended up with a mess I had to grind down the next morning. If you’re reading this while your heart is racing and your compound is thickening, take a breath. We’re going to fix your workflow so you actually have time to breathe between buckets.
Heat and Thirst are Killing Your Open Time
You probably think you’re just moving too slow, but more often than not, the floor itself is sabotaging you. One of the biggest mistakes I made early on was pouring onto a dry, thirsty concrete slab without enough primer. That concrete sucks the moisture right out of your mix like a sponge, causing it to “flash set.” When that happens, your self-leveling pour looks like a topographical map instead of a flat surface. You need precise floor leveling techniques that account for the environment of your room. According to the American Concrete Institute, ambient temperatures above 70°F can drastically reduce the chemical “open time” of cementitious materials, sometimes by as much as 50%. If your room is hot, your leveler is going to act like it’s in a race it intends to win.
Is this DIY project actually worth the stress?
I’ve heard this a thousand times: “Why can’t I just use more water?” Don’t do it. I tried that once in a guest bath, and the result was a soft, chalky floor that crumbled under my boots. You have to respect the chemistry. The goal is to manage the environment and your tools, not change the recipe. Have you ever felt like you were fighting a losing battle against a bucket of mud? It’s a common frustration, but it’s entirely preventable. We need to look at everything from the mixing paddle speed you’re using to how you handle the material once it hits the ground.
Set Yourself Up for a Win with Better Prep
Speed is the byproduct of a good setup, not just moving your arms faster. Before you even crack a bag open, you need to ensure your subfloor is sealed and your tools are within arm’s reach. Using the spiky roller secret can help you move the material quickly without breaking your back or losing those precious seconds of flow. It’s all about creating a “wet edge” and keeping it. Mastering flooring installation fundamentals means knowing that the pour is the shortest part of the job; the real work happens in the two hours before the first bag is mixed. Let’s dig into the specific steps to cool down your slab and prep your mix for a much longer working window.
Seal Your Slab Like Your Project Depends On It
Think of your concrete subfloor as a giant, thirsty sponge. If you pour your expensive leveler directly onto raw concrete, the slab will greedily suck out all the water before the compound has a chance to settle. This is why you see those ugly, dry “islands” in the middle of your floor. I learned this the hard way during a bathroom remodel where I thought one light coat of primer was “good enough.” It wasn’t. The leveler started stiffening the second it touched the floor, and I was left with a gritty mess that wouldn’t budge. To avoid this, you need a generous double-coat of primer. The first coat fills the pores; the second coat creates a tacky bridge. This is one of the most critical mastering floor leveling pro secrets for perfect installations. You want that floor to look shiny and feel sticky, not dull and dry, before the buckets come out.
Slow Down Your Drill to Save Your Surface
We all want to get the job done, but high speed is your enemy when it involves chemistry. If you use a standard high-RPM drill, you’re basically whipping meringue. You’re folding air into the mix, which leads to tiny pinholes later. I once used a high-speed masonry drill because I couldn’t find my low-speed mixer, and the resulting floor looked like a block of Swiss cheese once it dried. Using the correct mixing paddle speed is vital. You want a slow, steady vortex—not a splashy hurricane. If you see foam building up on the surface of the liquid, stop immediately. Those bubbles are air pockets that will eventually rise and pop, leaving you with a surface that requires even more sanding. Managing the air content is a pillar of flooring installation fundamentals that most DIYers skip in their rush to pour.#IMAGE_PLACE_HOLDER_B#
Keep the Edge Moving Before It Sets
The “wet edge” is the most important concept in floor leveling. This is the boundary where your fresh pour meets the previous bucket. If that edge dries for even sixty seconds too long, you’ll get a visible ridge that won’t sand out easily. When I was leveling a large kitchen, I tried to do it solo, thinking I was fast enough. By the time I mixed the third bucket, the first pour had already skinned over. The result was a “topographical map” disaster that cost me two days of grinding. Now, I always have a partner mixing while I’m pouring. You need to keep the material moving constantly to prevent the why self-leveling compounds bubbled over your subfloor issues from ruining your flow. Utilizing the spiky roller secret helps you break the surface tension and merge the two pours into one continuous glass-like sheet. This tool doesn’t just move mud; it releases trapped air and helps the chemistry do its job.
Achieve a Flat Base for Heavy Materials
If you’re planning on laying large tiles later, “close enough” isn’t going to cut it. Large format tiles have zero tolerance for dips. Learning how to achieve flawless floor leveling before tile laying requires a long straightedge to check your work as you go. You aren’t just dumping a bucket; you’re managing a fluid. Use a gauge rake to set the depth, then let the material’s own weight do the leveling. If you fight the material too much with a trowel, you’ll create “birdbaths”—small low spots that will cause your tile to crack or create lippage later. This is particularly important if you are trying to find the ultimate guide to floor leveling for a perfect finish. Trust the product’s flow, but guide it with intent, and never stop moving until the entire room is submerged.
Stop Trusting the Word Self-Leveling on the Bag
The biggest industry lie is the idea that these compounds are “set it and forget it” solutions. In reality, they are self-smoothing, not magically self-leveling. Gravity is a helpful partner, but surface tension and viscosity are your enemies. If you don’t apply precise floor leveling techniques to achieve flawless surfaces, you are simply creating a smoother version of your existing slope. Professionals know that you still have to manually guide the material with a gauge rake or a spreader. I’ve seen homeowners dump five bags into a room and walk away, only to find a perfectly smooth floor that still drops two inches from one corner to the other. You have to actively manage the volume of the pour to truly change the floor’s plane. This is a nuance often missed in the ultimate guide to floor leveling for a perfect finish. Use pins or a laser level to mark your target height, or you’re just guessing in the dark.
The Structural Trap Most DIYers Ignore
Most people think a flat floor is a stable floor, but that is a dangerous assumption. I once leveled a kitchen to a glass-like finish, only to find my porcelain tile is cracking over plywood seams six months later. The culprit? I ignored the subfloor deflection. Adding a heavy layer of cementitious leveler adds significant dead weight to your floor system. According to the Tile Council of North America (TCNA), the maximum allowable deflection for a tile-ready floor is L/360. If your joists are too small or the span is too long, the added weight of the leveler actually increases the bounce. This is one of those flooring installation mistakes to avoid for lasting results. You aren’t just making it flat; you’re making it heavier, and your structure must be able to handle that load without flexing.#IMAGE_PLACE_HOLDER_C#
Can your joists actually support that stone-cold flat floor?
This is the point where the math gets real for an advanced installation. If you are adding an inch of leveler over a 200-square-foot room, you are adding roughly 1,500 to 2,000 pounds of weight. If you don’t reinforce the subfloor from below, you are essentially building a beautiful, rigid surface on a foundation of Jell-O. Before you pour, check the plywood grade you need for a stable tile underlayment and ensure your joist span is within spec. If you have a wobbly base, you might even need the simple shim trick for wobbly baseboards just to hide the gaps created by the floor’s new weight. Remember, even if you are planning on mastering hardwood floor refinishing later, the stability of that base determines if your boards will eventually squeak or gap. Have you ever fallen into this trap of thinking the leveler would solve a structural bounce? Let me know in the comments.Once you have accounted for the structural weight and deflection of your subfloor, the difference between a mediocre result and a showroom-quality finish comes down to the specialized kit in your hands. I spent years trying to ‘make do’ with standard hardware store tools, but the moment I invested in a dedicated gauge rake, my workflow changed forever. A gauge rake allows you to set the exact depth of your pour across the entire room, ensuring you don’t over-pour in one corner and starve another. It is the only way to execute precise floor leveling techniques to achieve flawless surfaces without guessing. Once the material is spread, you must immediately follow up with the spiky roller secret for a mirror-smooth pour. This isn’t just about moving the mix; the spikes break the surface tension and allow the polymer-modified cements to heal together, removing the ‘ghosting’ marks often left by trowels.
Invest in a Gauge Rake if You Value Your Sanity
I personally use a 24-inch gauge rake with adjustable skids. Why? Because it keeps the material at a uniform height while I’m moving at a full sprint. If you’re trying to eyeball a quarter-inch pour over 300 square feet, you’re going to fail. The rake does the thinking for you. If you are preparing the base for timber later, remember that mastering hardwood floor refinishing starts with this very moment. Any dip you leave now will be a squeak you hear for the next twenty years. Don’t forget to keep a high-quality laser level hummed on in the corner to double-check your height pins as you progress. #IMAGE_PLACE_HOLDER_D#
How do I maintain my floor’s mirror finish over time?
Long-term success isn’t just about the pour; it’s about how you treat the surface after it cures. One of the most common calls I get is from homeowners wondering why their beautiful new finish looks dull after six months. The answer is usually in the cleaning bucket. You must stop using vinegar on your hardwood floors immediately. The acid in vinegar slowly eats away at the polyurethane seal, eventually reaching the leveling compound or the wood itself and causing cloudiness. According to the National Wood Flooring Association (NWFA) Technical Publication No. C200, you should only use a pH-neutral cleaner specifically formulated for the finish type. For those who want hardwood floor care secrets to longevity and shine, the ‘dry-mop first’ rule is king. Swabbing a floor with a soaking wet mop is a recipe for flooring installation mistakes to avoid for lasting results, as water can seep into the expansion gaps and cause the leveler to delaminate or the wood to cup.
Where Flooring Tech is Heading in 2026
Looking ahead, the industry is moving toward integrated moisture management. I predict that within the next few years, smart moisture sensors embedded directly into the subfloor will become the standard for high-end residential builds. We are already seeing pros use how to use a moisture meter before you lay wood floors as a non-negotiable step, but real-time data will eventually tell you exactly when your slab is ready for the next layer. For now, your best bet is to grab a professional-grade spiky roller and a gauge rake before your next project. Stop trying to spread leveler with a flat trowel and see how much easier the job becomes when the tools do the heavy lifting.
The Hard Lessons That Saved My Subfloors
Looking back at my first few attempts, the biggest lightbulb moment wasn’t about the product itself, but about the environmental prep. I realized that a floor leveling challenges common mistakes and how to avoid them strategy often begins with a humidifier or a heater. If the room is too dry, the water evaporates too fast; if it’s too cold, the chemicals won’t react. I also learned the chalk dust secret for finding low spots in subfloors—it’s a low-tech way to ensure your leveler is actually filling the valleys and not just piling up on the peaks. Lastly, always keep an extra bag of mix on hand; running out when you have six square feet left is a mistake you only make once.
The Gear That Separates Pros From Frustrated DIYers
If you want to achieve step by step guide to flooring installation and leveling success, your toolbox needs to be specialized. I personally swear by a heavy-duty, low-RPM mixing drill; using a standard cordless drill is the fastest way to burn out a motor and end up with lumpy compound. You also need to know the secret to getting a flat floor for large format tiles, which involves using a gauge rake to set the height and spiked shoes to walk through the wet zone without leaving footprints. These aren’t just gadgets—they are the only way to manage the open time before the material locks into place.
Stop Fearing the Pour and Start Your Transformation
A perfectly flat floor is the unsung hero of any home renovation. Whether you are laying down luxury vinyl or prepping for mastering hardwood floor refinishing, the quality of your finished project depends entirely on what’s underneath. It can be intimidating to dump buckets of liquid cement into a room, but with the right prep and a steady hand, you can create a surface that looks like it was done by a high-end contractor. Take your time, trust your tools, and get that subfloor right the first time. What’s the biggest leveling disaster you’ve ever had to fix on a project? Let me know in the comments below!