
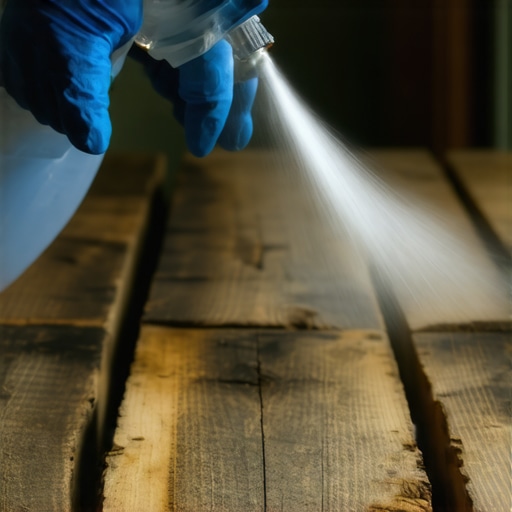
I stood in the middle of my first fixer-upper living room, the subfloor finally ripped up, and I took a deep breath. Big mistake. Even with the old, crusty carpet long gone, the stench of thirty years of neglected feline accidents hit me like a physical wall. It wasn’t just on the surface; it had soaked deep into the very skeleton of the house—the floor joists. I remember thinking, ‘Did I just buy a lemon?’ I had spent weeks mastering floor leveling pro secrets to get the perfect base, only to realize I was about to build a beautiful room on top of a literal stink-bomb. I tried to ignore it, but the smell was stubborn. Most people think they can just mop the wood and move on, but I learned the hard way that wood is like a sponge for ammonia. Today, I am going to show you how to neutralize that rot so you can lay down your new flooring with total confidence.
That One Smell Your New Flooring Won’t Hide
If you think a fresh layer of plywood or some fancy underlayment will trap that ammonia scent forever, let me stop you right there. I tried that once. In my early days, I figured a little bit of spray and a new floor would do the trick. Six months later, on a humid Tuesday, the smell came back with a vengeance. It is a common flooring installation mistake that costs homeowners thousands in do-overs. Urine is tricky because it is not just a liquid; it is composed of uric acid crystals. These crystals are insoluble and stick to wood fibers like superglue. According to the technical experts at the IICRC, ordinary household cleaners simply cannot break down these alkaline salts; you need a specific enzymatic reaction or a specialized permanent seal to win this war. Without it, the moisture in the air will eventually reactivate those salts, bringing the ghost of pets past back into your nostrils.
Can You Actually Get Rid of Decades-Old Pet Odors?
Yes, you absolutely can, but you have to stop thinking like a cleaner and start thinking like a chemist. The biggest fear I hear from folks is that they will have to replace the actual structural beams. That is a nightmare scenario for your budget and your sanity. While you have the floor open, you might as well learn how to fix a squeak in a second-story subfloor since the wood is already exposed. But before you grab the hammer, we need to talk about total neutralization. The reality is that pet urine changes the pH of the wood and can even lead to structural degradation over decades. If you just slap any old paint over it, the bond will fail. Have you ever walked into a room that smelled fine in the winter but like a kennel in the summer? That is exactly what we are going to prevent today. Have you ever felt like a smell was literally haunting your renovation? Tell me I am not the only one who has considered walking away from a project over a cat’s bad habits.
Kill the Bacteria Before You Seal the Wood
Before you even think about opening a can of primer, you have to get the wood surgically clean. I learned this the hard way during a renovation in a small bungalow where I thought a quick sweep was enough. I laid down a beautiful floor, but within weeks, the heat from the vents reactivated the ammonia trapped in the dust. You need to use a shop vac with a HEPA filter to pull every microscopic particle out of the wood grain. If your subfloor is wood, this is also the perfect time to perform the hammer test for finding loose subfloor nails. By hitting the boards and listening for that hollow thud, you can secure the structure before the treatment begins. If you are working on a slab, you must follow the best way to prep a dusty concrete floor for adhesive to ensure your odor-neutralizer actually penetrates the pores of the concrete instead of just sitting on top of a layer of silt.
The Science of Why Enzymatic Cleaners Are Not Optional
Standard cleaners are like perfume on a pig; they just mask the problem. To truly remove the scent, you need an enzymatic cleaner that ‘eats’ the uric acid crystals. I remember saturation-soaking a corner of a master bedroom that had been a designated ‘pet zone’ for years. I didn’t just spray it; I poured the cleaner until the wood was damp and covered it with plastic wrap to keep it from evaporating too fast. This allows the enzymes to follow the same path the urine took deep into the fibers. This level of prep is a critical part of a step-by-step guide to flooring installation and leveling success because any moisture left behind—even from cleaning—can warp your boards later.
The Shellac Shield Strategy
Once the wood is dry and the enzymes have done their work, you need a physical barrier. This is where most DIYers fail by using standard latex primer. Latex is breathable, meaning it allows gas molecules (and smells) to pass through. You need a shellac-based primer. It smells like a chemistry lab for an hour, but it creates an absolute seal that nothing can penetrate. I once skipped this on a flip and had to rip up three hundred square feet of laminate because the ‘ghost smell’ returned in the humidity. Avoiding these flooring installation mistakes is the difference between a home that feels new and one that feels like a disguised kennel.
Prepping for the Final Surface
After the sealer is cured, your subfloor might have some minor imperfections or ‘flashing’ from the heavy primer. Do not ignore this. If you are planning on tile, you need to know the secret to getting a flat floor for large format tiles to ensure the surface is ready for the next phase. Even for hardwood, a smooth, odor-free base is the foundation of the entire project. When I finally finished that first stinky living room, the relief of walking into a room that smelled like absolutely nothing was better than the look of the new floors themselves. Taking the time to use precise floor leveling techniques to achieve flawless surfaces after your odor treatment ensures that your home is both healthy and structurally sound for decades.Most DIYers—and even some ‘pros’—treat self-leveling compound like a magic eraser that hides every sin of the subfloor. I’m here to tell you that’s a dangerous myth. If you pour a high-quality compound over a subfloor that hasn’t been properly prepared, you aren’t fixing the problem; you’re just burying it under a layer of brittle concrete that will eventually crack. For instance, why your self-leveling pour looks like a topographical map usually comes down to one thing: surface tension and improper priming. People think they can skip the specialized primer, but the subfloor will suck the moisture out of the leveler so fast it won’t have time to actually, well, level. This lack of adhesion is why most floor levelers fail on top of painted concrete or old residues.
Don’t Let Self-Leveler Become Your Next Costly Mistake
Another common belief is that a floating floor is the perfect solution for an uneven subfloor because it ‘floats’ over the imperfections. In reality, that lack of contact creates air pockets, which is why floating floors sound hollow when you walk on them. Over time, that vertical movement will fatigue the locking mechanisms, leading to gapping or total floor failure. The ‘Oops’ factor I see most often involves the prep tools themselves. Everyone wants to save a buck, so they use a standard paint mixer on a high-speed drill. Big mistake. The mixing paddle speed that ruins your leveling compound is anything over 650 RPM. High speeds whip air into the mixture, creating tiny pinholes that look like a lunar landscape once it dries. To get that professional finish, you need to use the spiky roller secret for a mirror smooth pour to release those bubbles before the compound sets.
Does Your Subfloor’s Moisture Content Actually Matter for Tile?
The short answer is: more than you think. According to the Tile Council of North America (TCNA), moisture vapor emission rates (MVER) are the silent killers of high-end installations. If you’re working on a slab, you need to use the painters plastic trick for testing concrete moisture before you even consider an adhesive. Even if the surface feels bone-dry, hydrostatic pressure can push moisture up through the pores of the concrete, delaminating your expensive hardwood or causing your tile grout to turn into a chalky mess. This is often why your basement floor needs a moisture barrier even if it feels dry to the touch. When you’re dealing with advanced setups, like heated floors, the stakes are even higher. You have to know how to choose a floor leveler that wont crack over radiant heat because the thermal expansion will snap a standard rigid pour in days. Have you ever fallen into this trap where you thought the leveler would fix everything only to find a bigger mess? Let me know in the comments. We can troubleshoot your specific subfloor headaches together.Now that the subfloor is stable and odor-free, we need to talk about the physical tools that make the difference between a floor that looks ‘DIY’ and one that looks like a professional gallery. I personally never walk onto a job site without my Lignomat moisture meter. It sounds like overkill, but if you do not know the exact moisture content of your planks versus your subfloor, you are playing Russian roulette with expansion gaps. The National Wood Flooring Association (NWFA) explicitly states in their Technical Manual that for a successful installation, the moisture content of the wood and the subfloor should be within 2-4% of each other. I have seen $10,000 installs ruined because someone didn’t wait three days for proper acclimation. This is a level of precision you simply cannot eyeball.
How do I keep these floors looking new for a decade?
The biggest mistake I see homeowners make after a successful install is using the wrong chemicals. I have had clients call me crying because their hardwood floor turned cloudy after cleaning. They thought they were being thorough, but they were actually stripping the finish with acidic solutions. You need to stop using vinegar on your hardwood floors immediately. It eats through the protective polyurethane layer over time. Instead, focus on hardwood floor care secrets to longevity and shine, which usually involves a pH-neutral cleaner and a microfiber mop that is barely damp. If you are dealing with tile, the maintenance starts the second you finish grouting. Knowing the exact moment you should pull your tile spacers for the cleanest lines prevents those tiny grout chips that eventually trap dirt and ruin the aesthetic.
The Three Tools I Refuse to Start a Job Without
Beyond the moisture meter, I swear by a high-torque, low-RPM mixer for levelers and a vacuum-attached orbital sander for any refinishing work. If you are tackling a renovation yourself, mastering hardwood floor refinishing expert tips for 2025 requires gear that manages dust before it enters your HVAC system. Looking forward, I predict we will see more ‘smart’ subfloors with embedded moisture sensors that alert your phone before a slow leak turns into a massive warp. It sounds like sci-fi, but several manufacturers are already testing these in high-end commercial builds. I challenge you to go out and buy a basic pinless moisture meter before your next project; it is the single best $50 investment you can make to guarantee your subfloor is actually ready.
The Hardest Lesson I Learned About Managing Flooring Disasters
Looking back at that first ‘stink-bomb’ house, I realized that flooring is 90% preparation and 10% presentation. One of my biggest lightbulb moments was discovering that if you can still smell the subfloor, the job isn’t done—no matter how expensive your hardwood is. I also learned that why most floor levelers fail on top of painted concrete usually comes down to ego; don’t assume your floor is clean enough without a deep etch or a specialized primer. Another hard truth is that flooring installation mistakes are almost always invisible until the first major change in humidity hits, which is why chemical neutralization is your best friend. Finally, I’ve realized that the ‘cheap’ fix of just covering up a smell always ends up being the most expensive choice in the long run. #IMAGE_PLACE_HOLDER_E#
My Essential Toolkit for Professional-Grade Results
If you want to move from ‘weekend warrior’ to professional results, these are the three things I never leave behind. First, the TCNA Handbook is my go-to for technical specs; it’s the only way to ensure you aren’t guessing on mortar choice or deflection limits. Second, a high-quality pinless moisture meter is non-negotiable for anyone mastering hardwood floor refinishing expert tips for 2025. Finally, I swear by shellac-based primers for their molecular sealing properties. They are the only way to stop ammonia gas in its tracks and ensure your subfloor stays as fresh as the day it was framed.
The Future of Your Living Space Begins Beneath Your Feet
Taking these extra steps might add two days to your project, but it adds twenty years to the life of your home. You’ve worked hard to choose the perfect materials, so give them the foundation they deserve. A successful flooring installation is more than just a renovation; it’s a restoration of your home’s comfort and value. Don’t be afraid to take it slow and get the chemistry right before you lay that first plank. Have you ever discovered a hidden ‘surprise’ under your old carpet that made you want to call it quits? Let me know in the comments below.