
I remember the smell. It wasn’t quite rot, but it was close. A damp, heavy scent that clung to the bottom of my socks every time I walked into the basement. I had spent three weeks laying down a gorgeous grey oak vinyl plank. It was ‘100% waterproof,’ the box said. I took that as a challenge. I skipped the moisture barrier because, hey, the concrete felt dry to the touch. Big mistake. Huge. Three months later, I was pulling up $2,000 worth of flooring to scrub mold off the slab. That visceral realization—that ‘dry’ concrete is a lie—changed how I approach every single basement project. Today, I’m going to save you from that same back-breaking labor by explaining why that thin layer of plastic is the most important part of your renovation.
The Invisible Threat Lurking Beneath Your Concrete Slab
Most homeowners think that if they don’t see standing water, they don’t have a moisture problem. But concrete is essentially a hard, grey sponge. It breathes. Even if your home hasn’t seen a drop of floodwater since the day it was built, ground moisture is constantly migrating upward in the form of vapor. When you slap a non-porous vinyl floor on top without protection, you’re basically creating a greenhouse for bacteria. This is exactly why your basement floor needs a moisture barrier even if it feels dry. I learned the hard way that ‘waterproof’ vinyl only protects the top of the floor from spilled coffee; it does absolutely nothing to stop the vapor pressure from below that causes adhesive failure. If you want to avoid flooring installation mistakes to avoid for lasting results, you have to treat the subfloor with the respect it deserves.
Does a thin piece of plastic really make a difference?
I get the skepticism. You’re standing there looking at a solid concrete floor and wondering why a $30 roll of polyethylene is necessary. You might even think your high-end underlayment has you covered. But here is the reality: moisture vapor can exert enough pressure to actually lift planks and create those annoying ‘clicking’ sounds or, worse, buckling. In fact, research from the Concrete Foundations Association highlights that concrete never truly stops ‘curing’ or releasing moisture, making an impermeable barrier a non-negotiable step for any below-grade installation. When I first started out, I made the classic tent-peaking mistake because I thought the ‘attached underlayment’ on my vinyl was a substitute for a true vapor barrier. It wasn’t. Have you ever felt that weird hollow bounce or noticed a musty scent in your finished basement? If so, you might already be dealing with the consequences of a skipped barrier. It is a frustrating, expensive lesson to learn. Before we get into the nitty-gritty of the installation, let’s look at why your specific slab might be more of a ‘sponge’ than you realize. It’s not just about the rain; it’s about the chemistry of the house itself.
The 24-Hour Test That Saves Your Sanity
Before you even think about unrolling a moisture barrier, you need to know exactly how much vapor your slab is exhaling. I used to rely on the ‘visual check,’ which is about as effective as checking the weather by looking at a photo from last year. Now, I never start a project without learning how to use a moisture meter to prevent floor failure. If you don’t have a meter, the old-school plastic sheet test works wonders: tape a 2-foot square of clear plastic to the slab, seal the edges tight, and wait 24 hours. If there is condensation under the plastic or the concrete is darker when you peel it up, you have an active vapor issue. This is the ‘smoke alarm’ for your subfloor; ignoring it is the fastest way to ensure your new planks end up in a dumpster within two years.
Level the Playing Field Before the Plastic Goes Down
One of the biggest flooring installation mistakes to avoid for lasting results is laying a barrier over a jagged, uneven slab. Think of the moisture barrier like a dress shirt; if the body underneath is lumpy, the shirt will never look right. High spots will puncture the plastic, and low spots will create air pockets where mold loves to throw a party. I remember a job where I thought I could save time by skipping the floor leveler. Three days later, I was staring at a floor that looked like a mountain range. It was a disaster. I had to learn the hard way why you must prime concrete before every leveling job to get the compound to actually stick. If you skip the primer, your leveler will bubble and crack, leaving you with a surface that sounds like you’re walking on potato chips. 
The 6-Mil Polyethylene Rule
When it comes to the barrier itself, don’t overcomplicate it. For most basement LVP installs, a 6-mil polyethylene film is the industry gold standard. It’s thick enough to resist tearing during installation but flexible enough to hug the contours of your (now level) subfloor. The key is the overlap. I always overlap my seams by at least 6 to 8 inches and seal them with a high-quality moisture-resistant tape. If you just butt the edges together, you’re basically leaving a highway open for vapor to bypass the plastic. Failing to secure these seams is a primary reason why your lvp floor is clicking when you walk on it; the vapor causes the planks to move and rub against each other, creating that irritating sound every time you grab a snack from the fridge.
Why the Perimeter Gap is Your Secret Weapon
The biggest mistake I see DIYers make is cutting the plastic flush with the floor. You want that moisture barrier to run about two inches up the drywall. It looks ugly during the middle of the job, sure, but it creates a ‘bathtub’ effect that keeps moisture from sneaking around the edges and rotting out your baseboards or bottom plates. You’ll cover this excess with your trim later, so don’t be shy. This ties directly into why your floor to wall gap is the most important part of lvp. Your floor needs room to breathe and move, and the moisture barrier needs to be part of that expansion strategy. Without that upward wrap, you’re only doing 90% of the job, and in the world of basement renovations, 90% is often a failing grade.
Let’s dig deeper into what happens when the plastic is down but the subfloor still isn’t right. Everyone tells you that self-leveling compound is a magic liquid that solves all your subfloor woes, but in my experience, that name is a total misnomer. It doesn’t just ‘level’ itself; it needs guidance. If you just dump the bucket and walk away, you’re going to end up with a topographical nightmare. The ‘Oops’ factor here is usually the mixing process. If you go too fast with a high-RPM drill, you’re whipping air into the mix like a meringue. Those tiny bubbles will rise to the surface, pop, and leave you with ‘pinholes’ or craters that compromise the bond. This is exactly why self-leveling compounds bubbled over your subfloor. Professionals know that the mixing paddle speed that ruins your leveling compound is the difference between a glass-like finish and a weekend spent grinding concrete. You need a slow, deliberate mix to maintain the structural integrity of the pour.
How much subfloor flex is too much for large tiles?
Once you move past the basics, you realize that flatness isn’t just about the eye test; it’s about physics and structural tolerances. According to the Tile Council of North America (TCNA), large-format tiles—anything with one side longer than 15 inches—require a substrate flatness of 1/8 inch in 10 feet. If you ignore this, you’re heading straight for lippage, where the edge of one tile sits higher than its neighbor. This isn’t just a trip hazard; it’s a structural failure waiting to happen. If you’re working over a wood subfloor, you might find why your porcelain tile is cracking over plywood seams is due to deflection, or ‘bounce,’ that no amount of leveler can fix without proper joist bracing. 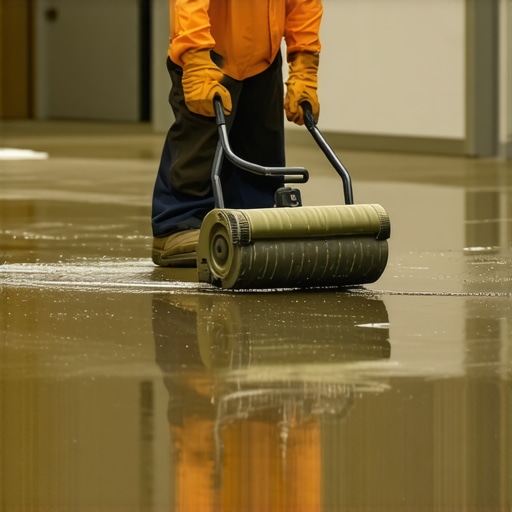 To get that professional look, I always recommend the spiky roller secret for a mirror-smooth pour. It breaks the surface tension and releases those trapped air bubbles I mentioned earlier, ensuring you don’t have to deal with how to prevent ghosting marks on your self-leveling finish once the floor dries. Mastering these floor leveling challenges is what separates a DIY ‘good enough’ job from a floor that lasts thirty years. Have you ever fallen into this trap? Let me know in the comments.
Once the dust settles and your slab is finally level, the temptation to rush the finish is overwhelming. But if you want a floor that doesn’t groan every time you walk on it, you need to invest in precision. I don’t go anywhere without my 360-degree green beam laser. Red lasers are fine for closets, but the green beam is visible even in a sun-drenched room, and it is the only way to execute the laser level move for perfectly straight hallways. This tool isn’t just about straight lines; it is about verifying that your self-leveling pour actually did its job. I’ve seen guys rely on a 4-foot bubble level and end up with a floor that feels like a skate park. Don’t be that guy. If you are serious about mastering floor leveling pro secrets for perfect installations, you need to verify your work with a high-accuracy moisture meter. According to the National Wood Flooring Association (NWFA) technical guidelines, wood subfloors should not exceed a 12% moisture content, and the difference between the subfloor and the flooring should be no more than 4%. If you ignore those numbers, you’re just gambling with your bank account.
How do I maintain my subfloor and finish for the long haul?
Maintenance starts the second the last plank clicks into place. Most people think ‘waterproof’ means ‘indestructible,’ but that mindset is how you ruin a $5,000 investment. For starters, stop using vinegar on your hardwood floors immediately. The acid eats through the protective finish, leaving the wood vulnerable to the very moisture you worked so hard to block from below. The same goes for LVP; why you should never use a steam mop on luxury vinyl is a lesson in heat-induced delamination. The steam can actually force moisture into the seams, bypassing your barrier and causing the edges to curl. To keep things pristine, stick to PH-neutral cleaners and a microfiber mop. This is the core of hardwood floor care secrets to longevity and shine. 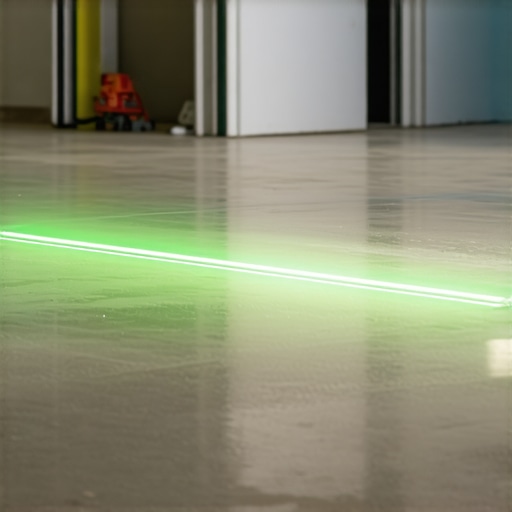
Looking ahead, I see the industry moving toward ‘smart’ subfloor systems—integrated sensors that can actually alert your phone if a leak occurs under your kitchen cabinets or if the humidity in your slab spikes. Until that becomes affordable for the average DIYer, we have to rely on good old-fashioned prep and the right gear. If you’re about to start your layout, I want you to try one specific advanced move: use the chalk dust secret for finding low spots in subfloors. It is a low-tech, high-reward method that shows you exactly where your leveler might have slumped before you commit to the adhesive or the underlayment. It takes ten minutes and can save you twenty years of headache.
Hard-Won Truths from My Most Expensive Flooring Disasters
After years of fixing ‘finished’ basements that felt more like swamps, I’ve realized that the small details carry the most weight. First, never underestimate the power of high-quality tape. I’ve seen moisture barriers fail simply because someone used standard masking tape that lost its stick after a week of humidity. Always use a high-tack, moisture-resistant tape to seal those seams. If you ignore the bond, the vapor finds a way through.
Another big one: don’t trust the marketing on the box. Just because a product says it’s ‘all-in-one’ doesn’t mean it replaces a dedicated 6-mil poly layer in a basement environment. If you’re already hearing weird noises from your finished floor, you might need to know how to fix a hollow sound under your luxury vinyl before it becomes a structural nightmare. Also, remember that acclimation is the quiet hero of any project. Skipping those 48 hours of waiting while your planks sit in the basement is how you end up with buckling later.
Tools That Actually Earn Their Spot in My Van
I don’t believe in buying every gadget at the hardware store, but these are non-negotiable for a professional result. A 360-degree green beam laser is essential for mapping out your high and low spots across a large room. It is the only way to truly visualize your progress. I also swear by a professional-grade moisture meter; it’s the only way to truly verify if your slab is ready for a step-by-step guide to flooring installation and leveling success. For minor subfloor corrections, I always keep a bag of feather-finish patch nearby to smooth out transitions without a full pour. Lastly, the TCNA Handbook is my go-to resource whenever I’m unsure about the technical specs for a specific tile type.
Stop Planning and Start Pouring
It is easy to get paralyzed by the ‘what ifs’ of a renovation, especially when you are dealing with moisture and concrete. But if you follow the prep steps—leveling the floor, testing for moisture, and laying down that barrier—you are already ahead of 90% of the DIY crowd. Taking the time to learn how to achieve flawless floor leveling before tile laying or vinyl installation is what transforms a basement from a cold storage area into a true living space. You’ve got the knowledge, now it’s time to get your hands dirty and build something that lasts. Every great floor starts with the stuff you can’t see, so don’t rush the foundation.
Have you ever encountered a moisture problem that caught you completely off guard? Let me know in the comments below!