
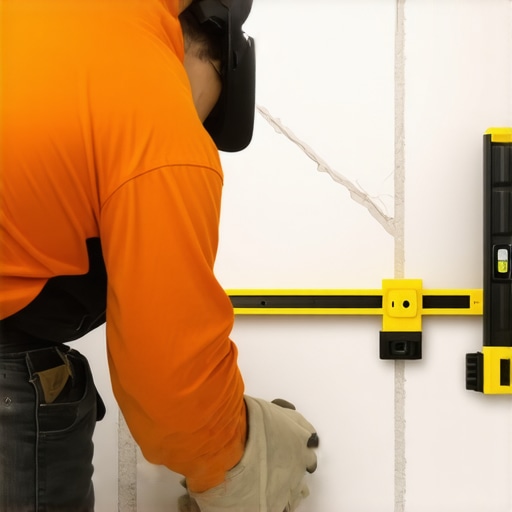
I still remember the first time I tackled 12×24 porcelain planks in my own entryway. I had my spacers, a shiny new trowel, and a lot of confidence. But by the time I finished the third row, I realized something was horribly wrong. I slid a level across the surface and it rattled like a spray paint can. Every single tile had a slight “lip” that caught the light—and my feet. I’d fallen victim to the dreaded lippage. If you’ve ever felt that sharp, annoying edge under your heel, you know exactly what I’m talking about. It ruins the look of a high-end renovation and makes cleaning a nightmare. Today, I am going to show you how to avoid my early failures and get a floor so smooth you could slide a credit card across it without a click.
[image placeholder]
Why Your Subfloor is Secretly Sabotaging the Job
The truth is, those gorgeous oversized tiles are incredibly unforgiving. Unlike the 4×4 squares of the past, large format tiles can’t hide a subfloor that’s even slightly out of whack. I learned the hard way that you can’t just “back-butter” your way out of a dip in the concrete. Before you even open a box of tile, you have to learn how to achieve flawless floor leveling before tile laying. If the base isn’t flat—not just level, but flat—you’re doomed before you start. My biggest mistake early on was thinking I could compensate for a wavy floor by just using more thinset. Big mistake. That leads directly to the trowel size error that leads to hollow-sounding tiles and uneven drying, which actually pulls the tiles down at different rates, creating even more lippage.
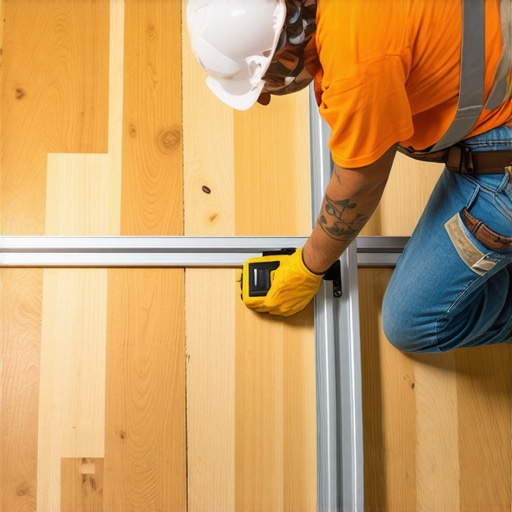
According to the Tile Council of North America (TCNA), the allowable lippage for large format tile is often less than 1/32 of an inch—about the thickness of a credit card. To hit that mark, you need a strategy. You need to be installing tiles like a pro by using a mechanical leveling system. These aren’t just spacers; they are clips that lock the tiles into the same plane while the mortar sets. When I started using them, it was like someone turned the lights on. Suddenly, those ridges disappeared. I also started using the spiky roller secret for a mirror smooth pour when prepping my subfloor with self-leveler, which eliminated the bubbles and high spots that used to haunt my projects.
Is all this extra prep work actually worth the effort?
I get it. You want to see the “pretty” part of the job. You want to see the tile down. But ask yourself: would you rather spend an extra afternoon prepping the floor now, or spend the next ten years tripping over a crooked tile every time you go to the kitchen for a midnight snack? Once that thinset is dry, there’s no “fixing” it without a sledgehammer. Have you ever finished a project only to realize the floor felt like a washboard? Let me know—I’ve been there, and I promise there’s a better way to handle these massive planks.
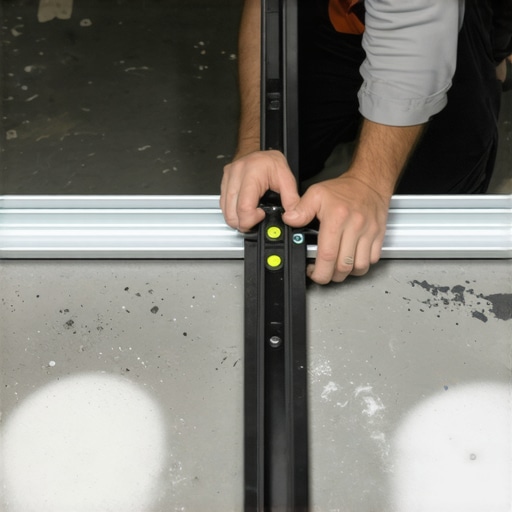
Think of your subfloor as the foundation of a skyscraper. If the foundation is tilted by even a fraction of a degree, the penthouse will be feet off-center. With large-format tile, that ’tilt’ manifests as sharp edges that catch your toes. To stop this, you need to treat your prep work like a forensic investigation. I start by dragging a 6-foot straight edge across the room. If I can see light under the level, I know I have a problem area. A trick I picked up years ago is the chalk dust secret for finding low-spots in subfloors. By lightly dusting the floor and running the level over it, the dust stays in the ‘valleys,’ giving you a perfect map of where you need to add material.
Fix the Waves Before You Lay the Tile
Once you’ve identified the dips, you might be tempted to just pour the leveler and walk away. Don’t. If you are working on an old slab, you need to handle the concrete etching step you shouldn’t skip before leveling. Without it, the new compound won’t bond, and you’ll end up with a hollow-sounding floor that eventually cracks. I remember a kitchen job in 2018 where I skipped the primer because I was in a rush. Two days later, the leveler literally peeled up like a giant scab. It was a nightmare. Now, I advocate that you prime concrete before every leveling job to ensure a chemical bond that lasts forever.
Find the Dips with the Chalk Dust Trick
When you find a low spot, circle it with a permanent marker and note the depth. This helps you calculate exactly how much product you need. Many DIYers face floor leveling challenges because they guestimate the volume, run out halfway through the pour, and end up with a ‘cold joint’ that creates a new ridge. Plan for 10% more material than you think you need.
Stop Your Self-Leveler From Turning Into a Topographical Map
The term ‘self-leveling’ is a bit of a lie; it needs help to get perfectly flat. If you mix it too fast, you’ll introduce air bubbles that leave tiny craters in your finish. I’ve found that the mixing paddle speed that ruins your leveling compound is usually anything on the ‘high’ setting of a standard drill. Keep it low and slow. After the pour, use precise floor leveling techniques to achieve flawless surfaces like using a gauge rake to move the material and a spiky roller to release the air. If you don’t, you’ll see why your self-leveling pour looks like a topographical map instead of a mirror.
Watch Your Mixing Paddle Speed
Mixing is the most critical sixty seconds of the job. Use a bucket with exact quart markings. Too much water and the leveler loses its strength; too little and it won’t flow. I once saw a guy try to mix three bags at once in a trash can using a garden hoe. The result was a lumpy mess that set up before he could even spread it. Stick to one bag at a time and use a dedicated mixing station. When you finally get that pour right, you’re setting yourself up for success, avoiding the trowel size error that leads to hollow-sounding tiles later in the process.
Everyone tells you that if the floor is level, the job is half done. I used to believe that too, until I saw a perfectly flat floor start spider-webbing with grout cracks just six months after the install. Here’s the contrarian truth: flatness is secondary to stiffness. If your subfloor has too much ‘deflection’—the industry term for bounce—all the leveler in the world won’t save your tile. In fact, adding heavy self-leveling compound to a weak subfloor can actually make the problem worse by adding dead weight it wasn’t designed to carry. You need to be mastering floor leveling pro secrets for perfect installations by looking beneath the surface first.
Flatness is a Lie Without Rigidity
I’ve seen DIYers spend hundreds on premium leveling compound only to pour it over a subfloor that moves when you walk on it. If you can feel a vibration in your coffee cup when someone walks across the room, your floor is too ‘wet’ for tile. This is exactly why porcelain tiles crack more often than ceramic on wood structures; the porcelain is so dense and rigid that it cannot move with the house, whereas the subfloor is flexible. Before you pour a drop of leveler, perform the hammer test for finding loose floor joists to ensure everything is mechanically sound.
Does your subfloor meet the L/360 deflection standard?
This is the question that separates the pros from the amateurs. According to the Tile Council of North America (TCNA) Handbook, the standard for ceramic and porcelain tile is a deflection limit of L/360, which means the floor shouldn’t bend more than the length of the span divided by 360. For natural stone, it’s even stricter at L/720. If your joists are spaced too far apart or are undersized, you must learn how to fix a bouncy floor with a few well-placed screws or even sistering the joists before you worry about how level the surface is. Have you ever fallen into this trap of leveling a floor that was still too bouncy? Let me know in the comments.
The Heavy Weight Trap
Another nuance most people miss is the ‘Oops’ factor of weight limits. Self-leveling underlayment (SLU) is heavy—roughly 12 pounds per square foot at an inch thick. If you have an old house with 2×8 joists, you could be adding a massive amount of ‘dead load’ that the structure wasn’t built for. Instead of just pouring more material, sometimes the better move is learning how to level a plywood subfloor without adding weight through strategic shimming. This prevents the subfloor from sagging further under the weight of the new floor, which would ironically create new low spots and lippage issues over time. Proper flooring installation fundamentals require a holistic view of the room’s engineering, not just a quick pour of compound.
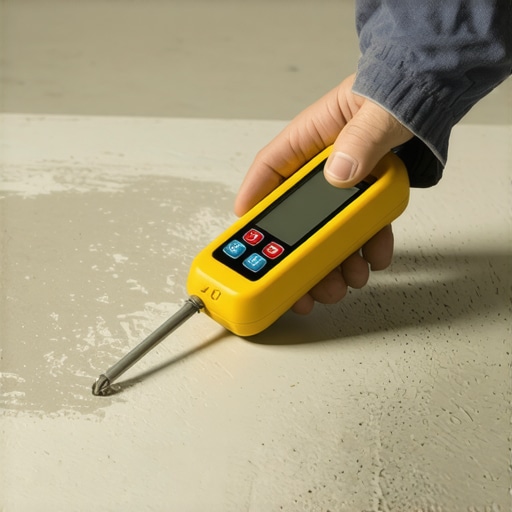
Once you’ve tackled the rigidity and the prep work, the success of your installation hinges on the tools you keep in your kit. I used to think I could ‘feel’ if a floor was ready, but after a disastrous laminate job in a humid basement, I learned that my gut is no match for data. Now, I never mix a single bag of compound without first knowing exactly how to use a moisture meter to prevent floor failure. According to the National Wood Flooring Association (NWFA) technical guidelines, failing to match the moisture content of your subfloor to your flooring material is the number one cause of post-install cupping and gapping. I personally use a pinless meter like the Wagner Orion because it doesn’t leave holes in the substrate, giving me a non-destructive look at what’s happening beneath the surface.
Why I Never Start a Job Without a Moisture Meter
Concrete is particularly deceptive; it can look bone-dry on top while holding a reservoir of moisture at the bottom of the slab. If you trap that water under a leveling compound or a new floor, it’s going to find a way out, usually by blowing your leveler right off the floor. This is one of those flooring installation mistakes to avoid for lasting results. I recommend checking the moisture levels at least three times: before you prep, after you level, and right before you lay the final planks. It might seem like overkill, but compared to the cost of ripping out a failed floor, it’s the cheapest insurance policy you can buy.
Ditch the Chalk and Grab a 360-Degree Laser
If you’re still snapping chalk lines and hoping for the best in long hallways, you’re working too hard. I’ve transitioned entirely to using a green-beam 360-degree laser level. It’s a game-changer for the laser level move for perfectly straight hallways. Instead of squinting at a spirit level, I set the laser in the center of the room and use a target card to check the height of the floor every few feet. It creates a literal ‘plane’ of light that shows you exactly where the dips are. In the near future, I expect to see Augmented Reality (AR) headsets becoming standard for DIYers, projecting a digital grid over the floor that turns red at the high spots and blue at the low spots—making the ‘topographical map’ errors a thing of the past.
How do I keep my leveled floor looking perfect for decades?
The work doesn’t stop once the last tile is grouted. Maintenance is the ‘secret sauce’ of longevity. For those of you who chose wood, you need to be mastering hardwood floor refinishing expert tips for 2025 to keep the surface sealed and protected from environmental changes. I also tell my clients that hardwood floor care secrets to longevity and shine aren’t found in a bottle of grocery-store wax; they’re found in humidity control. Keep your home between 30% and 50% humidity, and that perfectly level floor you worked so hard on will stay flat and silent for a lifetime. My best advice? Buy a moisture meter today and test three different spots in your house tonight. You might be surprised at what the subfloor is trying to tell you.
The Hard Lessons I Learned While Chasing a Flat Subfloor
One of the biggest shifts in my career occurred when I stopped viewing subfloor prep as a chore and started seeing it as the most critical phase of flooring installation. I used to think I could compensate for a bad floor with more thinset, but that only creates a hollow, brittle mess. Now, I focus intensely on mechanical bonding. If you do not etch or prime that concrete properly, your leveler is essentially a floating sheet of glass waiting to crack under the first heavy footstep. Another lightbulb moment was realizing that ‘level’ and ‘flat’ are two different worlds. A floor can be slightly slanted but perfectly flat, and tile will lay beautifully on it—but a perfectly level floor with even minor dips will ruin your finish with lippage.
Never rush the drying process. I have seen homeowners lay hardwood floors over ‘dry-looking’ leveler only to have the boards cup a month later because the core of the compound was still holding moisture. Always trust your data over your eyes. If you follow the ultimate guide to floor leveling for a perfect finish, you will realize that the prep work should take about 70% of your total project time. The actual laying of the floor is just the victory lap. Achieving step-by-step flooring installation success requires respecting the chemistry of your materials as much as the aesthetics of the tile.
The Non-Negotiable Tools for My Job Site
If you are serious about a professional-grade result, there are three things you simply cannot skip. First, a high-quality pinless moisture meter is your best friend; it is the only way to avoid the heartbreak of post-install movement. Second, a 360-degree laser level makes checking for flatness effortless compared to dragging a heavy spirit level around a large room. Lastly, I always suggest keeping the TCNA Handbook or similar industry standards handy to verify structural requirements like deflection limits for specific stone types. I also highly recommend reviewing expert flooring installation tips to see how modern pros handle complex transitions between rooms without using clunky transition strips.
Start Building Your Perfect Floor Today
Taking on a massive floor project can be intimidating, but there is nothing quite like the feeling of walking across a surface that you know is structurally sound and visually flawless. Whether you are installing tiles like a pro or narrowing down your options by choosing the right hardwood floors for your home, the effort you invest in the foundation today will pay dividends for decades. Don’t be afraid to take it slow—perfection is always a result of patience and precise prep work. Have you ever discovered a hidden ‘valley’ in your subfloor right as you were about to start laying your first row of tile? Let me know your stories in the comments below!