
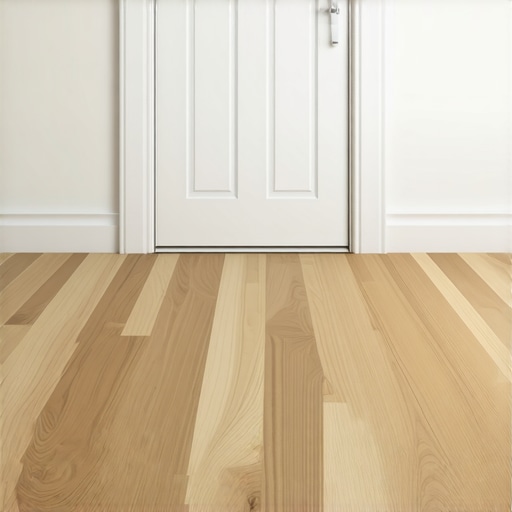
I’ll never forget the first time I invited my father-in-law over to see my ‐high-end‐ kitchen remodel. I had spent weeks picking out what I thought was the perfect Luxury Vinyl Plank. It had a beautiful grain, a nice matte finish, and a price point that made me feel like the king of the clearance aisle. But the moment he stepped on it, a loud clack-clack sound echoed through the room. He didn’t say anything, but the look on his face told me everything: it sounded like hollow plastic. I had made the classic mistake of thinking the floor would hide the imperfections of the world underneath it. It didn’t. In fact, it highlighted them. The glare of the morning sun through the sliding doors revealed every hump, every dip, and every repetitive pattern in the planks. It was a visceral lesson in why ‐cheap‐ is often a matter of technique rather than just the price tag. Today, I want to save you from that same sinking feeling. We are going to dive into exactly why some LVP jobs look like a million bucks while others look like a temporary fix in a budget rental unit, and I promise you, it is mostly about the stuff you cannot see.
Your Subfloor is Telling Secrets About Your Budget
When I first started DIY-ing my own homes, I used to think that a ‐level‐ subfloor was just a suggestion from people with too much time on their hands. I was dead wrong. If your subfloor has even a slight dip or a sudden rise, that thin LVP is going to bridge it or flex over it, creating that annoying hollow echo every time you walk across the room. It is the fastest way to make a guest realize you went for the budget option. High-end hardwood feels solid because it is thick and often physically bonded to the structure, but LVP relies entirely on the smoothness of the surface beneath it. This is why I always tell my neighbors that getting the subfloor perfectly flat is ninety percent of the battle. I once skipped the patching compound on a small hallway, and for three years, I had to listen to a tiny pop every time I went to get a glass of water at night. According to the National Wood Flooring Association, the primary cause of floor failure and aesthetic dissatisfaction is almost always the substrate preparation, not the material itself. If you want to elevate the look, you have to treat the prep work like you are installing a thousand-dollar marble floor.
Is that budget-friendly vinyl actually worth the effort?
I get asked this all the time by people who are staring at a stack of boxes and wondering if they should just return them and buy the real deal. The truth is, even a mid-range plank can look spectacular if you avoid the dead giveaways of a rushed job. The ‐luxury‐ in LVP comes from the illusion, and illusions require attention to detail. For instance, the Resilient Floor Covering Institute (RFCI) notes that proper installation environment—specifically moisture control and acclimation—is the leading factor in long-term product stability. If your planks start shrinking or ‐tenting‐ because they weren’t acclimated to your home’s humidity, the price you paid won’t matter; they will look terrible. Have you ever finished a project only to realize the final look was missing that professional polish? Let me know in the comments if you have ever fought with a ‐bouncy‐ floor. We are moving on to the specific installation traps next, starting with why tightening up those perimeter gaps and using the right trim is your secret weapon for a professional finish.
Find the Low Spots Before They Find You
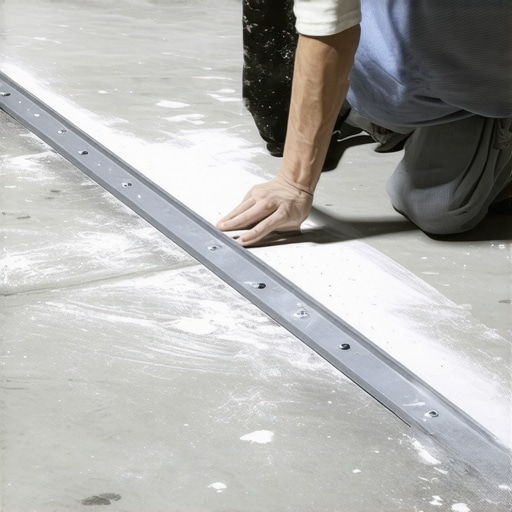
I remember spending a whole afternoon with a six-foot level in my master bedroom, feeling like a detective hunting for a culprit. I had tried using a fancy laser level, but honestly, in a bright room, it was hard to see. I went back to a method my old contractor friend taught me: the chalk dust trick. It is a simple, visceral way to see reality. You drag a long metal straight edge across the floor, and wherever the chalk doesn’t touch, you have found a dip. This chalk dust secret for finding low spots saved me from a ‘bridge’ effect that would have eventually caused the floor to bounce and crack. Once you find those hollows, you must fill them with a high-quality patch. If you skip this, your floor will feel like a trampoline in spots, which is the ultimate giveaway of a rushed DIY job.
Stop Hammering the Life Out of Your Joints
When you are halfway through a room and your knees are screaming, it is tempting to reach for the heaviest mallet you own to force a stubborn plank into place. I once shattered the delicate locking mechanism on an entire row of expensive planks because I was frustrated and swinging too hard. You have to treat the tongue and groove like a delicate handshake, not a boxing match. Making the common rubber mallet mistake can cause the edges to chip or, even worse, create micro-gaps that trap moisture and dirt later. Instead, use a tapping block and light, repetitive pulses. Think of it as coaxing the planks into a perfect marriage rather than forcing them into submission.
The Gap That Actually Keeps Things Together
It feels counterintuitive to leave a deliberate hole at the edge of your beautiful new room. You want the floor to look tight against the wall, right? But vinyl expands and contracts with the temperature like a living thing. In a living room I renovated last summer, the homeowner insisted I skip the expansion gap because they hated the look of baseboard shoe molding. Two months later, the floor looked like a miniature mountain range. This is exactly why vinyl floors tent-peak—they simply have nowhere to go when the sun hits them. You need that 1/4 inch gap at the perimeter; it is the ‘lung’ of the floor that allows it to breathe. Trust me, you can hide it with trim, but you can’t hide a buckled floor.
Choose Underlayment That Does Not Sound Like Plastic
If you want that solid ‘thud’ of a high-end hardwood floor, you cannot buy the bargain-bin underlayment. Using cheap underlayment makes the floor sound hollow and brittle. I once tried to save fifty bucks on a guest room by using a thin foam roll that looked like it belonged in a shipping box. Every time my dog walked into that room, it sounded like he was walking on a bag of potato chips. To get a professional result, switch to a high-density rubber or felt underlayment. This provides just enough ‘give’ to prevent the clicking noise and creates a thermal barrier that makes the floor feel warmer underfoot. Following a step-by-step flooring installation guide is about more than just clicking planks; it is about choosing the layers that provide long-term comfort.
Managing the Transition Without the Trip Hazard
One of the hardest parts of any layout is where the vinyl meets another surface, like tile in a bathroom. I used to hate standard transition strips because they always looked like an afterthought. However, you can hide a bad subfloor transition by ensuring both surfaces are perfectly leveled before the final planks go down. I once spent three hours meticulously shimming a subfloor just so the vinyl would sit flush with the tile. The result was a seamless, professional walk-through that felt like it was designed by an architect rather than a weekend warrior.
People always talk about getting a floor flat, but in my years on the job, I have learned that flatness is a vanity metric if you are ignoring deflection. You can pour the most expensive self-leveler on the market, but if your joists are spaced too far apart or your plywood is too thin, that beautiful stone tile is going to crack the first time a heavy refrigerator rolls over it. It is a common myth that a bag of leveler adds structural integrity; it actually does the opposite by adding dead weight to a weak system. I have seen homeowners spend thousands on premium materials only to have the grout lines crumble because the subfloor was bouncy. Before you even mix a bag, you need to be mastering floor leveling pro secrets for perfect installations, which starts with checking the L/360 deflection rating of your floor system. If your floor moves more than a fraction of an inch under load, no amount of surface flatness will save your investment.
The trowel teeth mistake that sabotages your bond
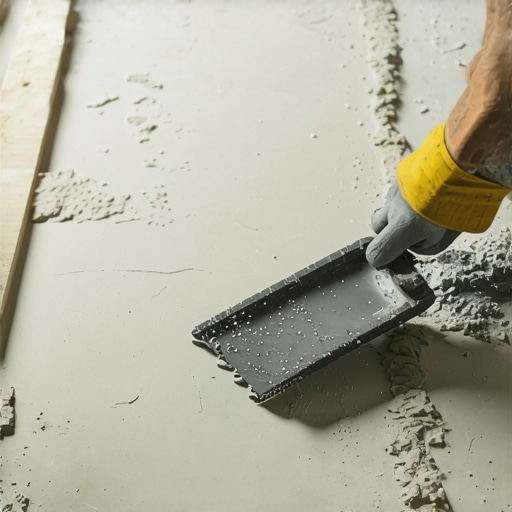
One of the biggest oops factors I see with DIYers is the way they spread mortar. There is a psychological urge to swirl the thinset like you are frosting a cake, but this is a recipe for disaster. When you swirl thinset, you trap air pockets that have nowhere to go once the tile is set. This is the trowel size error that leads to hollow sounding tiles and eventually causes them to pop loose. You should always comb your mortar in straight, parallel lines. This allows the air to escape when you press and shift the tile, ensuring the ridges collapse into a solid, void-free bed of support. The Tile Council of North America (TCNA) Handbook specifies that you need at least 80% mortar contact in dry areas and a whopping 95% in wet areas like bathrooms. If you are not back-buttering your large-format tiles to reach those numbers, you are essentially building a floor on a foundation of air.
Why does my tile crack even after I used a leveler?
The hard truth is that self-leveling compounds are often misused as a fix-all for bad carpentry. If you have a dip in your floor caused by a sagging joist, and you just fill it with compound without addressing the support, you have just created a heavy wedge that puts even more stress on the structure. This often leads to the compound itself cracking or delaminating from the substrate. You must prioritize flooring installation fundamentals leveling for a seamless look by ensuring the bond is permanent. Often, this means you must achieve flawless floor leveling before tile laying by using a high-solids primer. Skipping the primer is the fastest way to watch your leveler peel up like a giant scab because the dry subfloor sucks the moisture out of the mix too quickly. Have you ever fallen into this trap? Let me know in the comments.
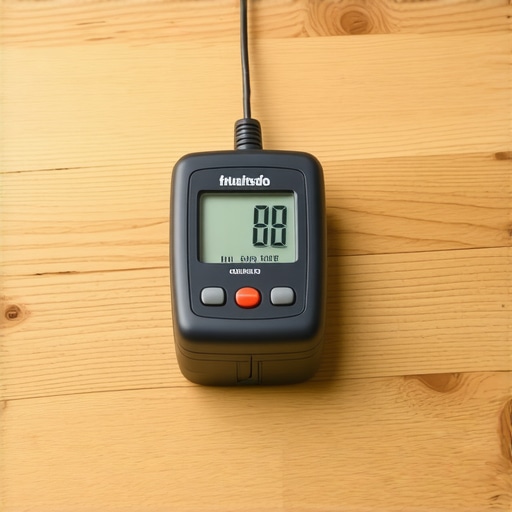
I used to think my hands were sensitive enough to feel if a concrete slab was dry, but physics does not care about my intuition. One tool I now refuse to start any job without is a pinless moisture meter. I learned this the hard way after a glue-down hardwood job in a basement started cupping like a row of potato chips just three months after I finished. You absolutely must learn how to use a moisture meter to prevent floor failure because if that substrate is still off-gassing moisture, your adhesive or your LVP locking tabs will eventually fail. It is the difference between a floor that lasts twenty years and one that needs a complete tear-out in twenty months. Professional installers do not guess; they measure.
Stop treating your floors like they are indestructible
Once the floor is down and the baseboards are nailed in, the real work of preservation begins. I have seen beautiful, expensive white oak ruined in a single season because the homeowner thought ‘cleaning’ meant soaking the floor with a wet mop. If you want hardwood floor care secrets to longevity and shine, you have to embrace the dry-mop lifestyle. According to the Bona Professional Maintenance Guidelines, using a pH-neutral cleaner is non-negotiable for preserving the integrity of the polyurethane or oil finish. Most people reach for the pantry, but you must stop using vinegar on your hardwood floors immediately. The acid in vinegar slowly eats away at the protective finish, leaving your wood vulnerable to every spill and scratch. It is a slow-motion disaster that most people do not notice until the wood looks dull and gray.
Your furniture is the silent enemy of your finish
We spent all that time making the subfloor flat, but then we drag a three-hundred-pound dresser across the room and wonder why there is a permanent white gouge in the vinyl. I always keep a stash of felt pads in my truck, but for the big moves, I swear by the scrap carpet trick for heavy furniture moves. It sounds low-tech, but it creates a friction-free barrier that protects the wear layer better than any commercial slider I have bought. If you are dealing with a refrigerator or a heavy range on LVP, use the cardboard trick for moving heavy appliances on vinyl to prevent those nasty indentation marks that occur when the wheels lock up. I predict that in the next few years, we will start seeing ‘smart floors’ with embedded sensors in the underlayment that alert your smartphone if moisture levels spike behind a dishwasher—but until then, we have to rely on good old-fashioned preventative care.
How do I keep my high-end floors looking brand new for a decade?
The secret is not a magic chemical; it is consistency and the right equipment. Invest in a high-quality vacuum with a dedicated ‘hard floor’ setting that turns off the beater bar—those spinning bristles are designed for carpet and can micro-scratch a matte LVP finish over time. If you eventually notice the luster fading on real wood, do not panic. You can look into mastering hardwood floor refinishing expert tips for 2025 to learn how a simple screen-and-recoat can save you from a full sand-down. My challenge for you this week: go into your cleaning closet, read the labels on your floor cleaners, and toss anything that contains wax, ammonia, or vinegar. Your future self—and your floor—will thank you.
What My First Flooring Failure Actually Taught Me
Looking back at that loud, clicking floor in my first home, I realize that flooring isn’t a race; it’s a conversation with the house. I learned that if you try to outsmart the subfloor, the house will always win. A few lightbulb moments for me: First, always assume the subfloor is worse than it looks before you start. Second, the solid feel of a high-end room comes from the 1% of the work involving the right underlayment, not just the brand of the planks. Lastly, I realized that fixing a bouncy floor early with a few structural screws is much cheaper than tearing it out three years later. Patience is your most valuable tool.
My Non-Negotiable Toolkit for Flooring Success
If you are heading to the hardware store, don’t just look at the aesthetic samples. To revamp your home with expert flooring installation tips, you need the invisible essentials that the pros use. I trust a pinless moisture meter more than my own intuition; it’s the only way to be sure about your slab’s readiness. I also swear by a long, 6-foot aluminum straight edge because a standard bubble level is simply too short to catch the long, slow dips that cause LVP to click. For the final touches, keep a stash of pH-neutral cleaner on hand to ensure your finish doesn’t cloud over from harsh chemicals. Following precise floor leveling techniques to achieve flawless surfaces is the real secret behind every ‘lucky’ DIYer you see on social media.
Build a Foundation You Can Be Proud Of
There is a unique kind of satisfaction in walking across a room and hearing nothing but silence. No creaks, no hollow pops, just the solid feel of a job well done. Don’t be intimidated by the technical specs of thinset or the chemistry of self-leveling compounds. Take it slow, treat the substrate like it’s the most important part of the house, and use these tile installation pointers that save time and money to keep your project on track. Your flooring installation is more than just a surface; it’s the stage where your family’s life happens. Have you ever discovered a ‘secret’ subfloor issue after you already started laying your first row? Let me know in the comments below!