
I still remember the afternoon I watched my “waterproof” laminate floors literally gasp for air. My sunroom, the sunniest spot in the house, had turned into a slow-motion disaster zone because I thought I could cheat the system. I’d spent a weekend on a flooring installation project that I was proud of, only to watch the boards peak and buckle under the brutal July sun. It was a heart-wrenching lesson in why sunrooms aren’t just “another room”—they are high-stakes environments that demand specific materials. If you’re tired of floors that fade, warp, or crack under pressure, I’m here to tell you why porcelain is the only way to go. We are going to dive into why this material survives where others fail, and I’ll share how I finally got it right after a very expensive failure.
Your Sunroom Is a Pressure Cooker for Most Flooring
Sunrooms are unique because they face a double-whammy of environmental stress: extreme UV exposure and wild temperature swings. Most people think “it’s indoors, it’ll be fine,” but that’s the exact flooring installation mistake I made years ago. I ignored how much heat those glass walls trap. When you add kids, heavy furniture, and muddy paws into the mix, you need something that won’t flinch. Porcelain tile is dense, nearly impervious to moisture, and, most importantly, it doesn’t expand and contract like wood or vinyl. While luxury vinyl is great elsewhere, you might find why your vinyl plank floor is bubbling near large windows if you try it in a sun-drenched space. The physics of heat expansion is just too much for plastic-based cores to handle. According to the Tile Council of North America (TCNA), porcelain must meet a water absorption rate of 0.5% or less, which is a fancy way of saying it is incredibly stable even when the humidity spikes.
Is Porcelain Actually Worth the Heavier Price Tag?
I get the skepticism. Porcelain is more expensive upfront and definitely a bit more of a workout to install than a click-lock floor. But let me ask you this: have you ever had to move all your sunroom furniture back out to replace a floor that’s only three years old? I have, and it’s a nightmare. Early in my DIY journey, I skipped the floor leveling step because I was in a rush to enjoy the summer, which led to a series of cracked tiles six months later. It was a rookie move that I still kick myself for. If you do it right the first time—meaning you choose a material that can handle the sun—you won’t be tearing it out later. Have you ever noticed your furniture leaving permanent dents in your current sunroom floor, or maybe the color fading where the rug used to be? That’s the sun winning. Let me know in the comments if you’ve dealt with those annoying floor bubbles before!
Porcelain Laughs at UV Rays and Heavy Traffic
One thing I love about porcelain is that the color is “baked in” at nearly 2,000 degrees. Unlike hardwood, which can bleach out and look tired, or vinyl that might peel, porcelain stays vibrant. This is why why slip resistance ratings matter so much too; sunrooms often connect to the backyard, and porcelain can handle the wet feet from the pool or the snowy boots from the deck without staining or slipping. I once tried to use a standard ceramic tile, but it just didn’t have the density needed for the heavy traffic my family puts it through. Learning how to cut thick porcelain tiles was a learning curve, sure, but the result is a floor that looks exactly the same today as it did when I grouted it. If you’ve been hesitant because you’re worried about the cold, remember that porcelain is a thermal mass—it holds the heat from the sun and stays cozy underfoot long after the sun goes down.
Start with a Subfloor That Doesn’t Fight Back
Before you even open a box of tile, you have to verify that your subfloor is rock solid. In my early days, I treated a concrete slab like a finished surface, but I quickly learned that even the smallest dip is a tile-cracker in waiting. You need to strip away any old adhesive or paint because porcelain won’t bond to a messy surface. Think of it like trying to tape a package with dusty scotch tape; it just won’t stick. I once spent three days scrubbing old mastic off a sunroom floor, and while it was back-breaking work, learning how to remove old mastic without damaging the slab was what saved that project from immediate failure. If you are working over wood, you must ensure the joists can handle the weight of porcelain. I always use a moisture meter now because trapped humidity is the silent killer of sunroom floors. If you skip this, you might find yourself needing to know how to use a moisture meter to prevent floor failure before the first winter ends.
Stop Chasing Low Spots with Extra Thinset
A common rookie mistake is trying to “level” the floor using the tile adhesive itself. I tried that once in a small corner of my sunroom, and by the time I reached the middle of the room, my tiles were stepping up like a staircase. It’s called lippage, and it’s a trip hazard that looks terrible. Instead, you need to use a self-leveling compound. This stuff has the consistency of pancake batter and naturally flows into the low spots to create a glass-smooth surface. Before you pour, remember that why you must prime concrete before every leveler job is a non-negotiable rule. Without primer, the concrete sucks the moisture out of the leveler too fast, causing it to crack. If you’re dealing with a particularly wonky floor, check out mastering floor leveling pro secrets for perfect installations to avoid the dreaded ‘island’ effect where the middle is higher than the edges.
The Layout Strategy That Saves Your Sanity
Nothing ruins the look of a sunroom faster than a tiny, two-inch sliver of tile at the most visible wall. I learned this the hard way when I started from one corner and worked my way across, only to find I had to cut awkward, L-shaped pieces around the door frame. Now, I always find the center of the room and snap chalk lines. Using the pencil mark secret for perfectly centered tile layouts ensures that your cuts are even on all sides, making the room feel balanced and professional. I recommend a dry fit—lay out a few rows without glue just to see how the pattern lands. It’s like a dress rehearsal for your floor; you want to see the mistakes before they are permanent.
Don’t Skimp on Thinset Coverage
When it’s time to actually set the tile, your trowel is your best friend or your worst enemy. For large-format porcelain, you need a notched trowel that’s big enough to provide at least 95% coverage. I remember hearing a hollow ‘click’ every time I walked over a specific tile in my first sunroom. That sound is the ghost of a bad installation haunting you. I’d used a trowel that was too small, leaving air pockets underneath. This is exactly the trowel size error that leads to hollow sounding tiles that you want to avoid. Always back-butter the tiles—apply a thin layer of mortar to the back of the tile like you’re spreading butter on toast—before dropping it into the ridges on the floor. This double-down method ensures the porcelain and the subfloor become one single, unbreakable unit. If you’re nervous about the physical act of laying the tile, installing tiles like a pro step-by-step strategies for 2025 provides a great breakdown of the rhythm you need to find.Everyone tells you that your floor must be level. In my years of fixing failed sunrooms, I’ve realized that’s a half-truth that leads to massive over-spending on self-leveler. If your whole house leans two degrees to the left, your floor can lean too—it just needs to be flat. A flat floor has no humps or dips, whereas a level floor is perfectly parallel to the horizon. If you try to make a floor perfectly level in an old house, you’ll end up with a six-inch step-up at the doorway. I’ve seen homeowners struggle with why your subfloor patching compound is cracking under pressure because they piled it on too thick trying to fight gravity instead of just smoothing the plane. Have you ever fallen into this trap? Let me know in the comments.
Flat and Level Are Not Twin Sisters
The nuance that most pros won’t tell you is that ‘flatness’ is about the substrate’s relationship to the tile, not the earth’s core. When I was starting out, I wasted hundreds of dollars trying to make a sunroom slab perfectly level, only to realize the drainage was actually designed to slope away from the house. By leveling it, I invited water to pool against the foundation. Instead, focus on how to level a plywood subfloor without adding weight or bulk. Use a 10-foot straight edge; if you see a gap larger than 1/8th of an inch, that’s your enemy, not the bubble in your spirit level.
Why Does Porcelain Need a Stiffer Subfloor Than Ceramic?
This is the advanced question that separates the DIYers from the master installers. You might assume that because porcelain is tougher, it can handle more movement. It’s actually the opposite. Porcelain is more brittle because it is so dense. According to the Tile Council of North America (TCNA) Handbook, the maximum allowable deflection for a floor under a concentrated load of 300 lbs should not exceed L/360. This is the hidden reason why porcelain tiles crack more often than ceramic on wood substrates. If your joists have even a tiny bit of ‘bounce,’ the porcelain won’t flex—it will snap. I once ignored a slight squeak near a sunroom door, and three months later, the grout was pulverized into sand.
The Hidden Danger of the Rigid Subfloor Trap
The biggest mistake I see is ‘over-stiffening’ a floor without accounting for thermal expansion. In a sunroom, the temperature can swing 40 degrees in a single afternoon. If you glue your tiles down to a rigid substrate without an isolation membrane, you are creating a ticking time bomb. I’ve seen the plywood mistake that causes grout cracks happen over and over when people use the wrong grade of exterior plywood or fail to leave gaps between the sheets. You must use the expansion joint secret for large tiled living areas to give that porcelain room to breathe. Without these joints, the floor has nowhere to go but up, resulting in ‘tenting’ that can actually shatter the tiles under tension. Don’t let your hard work be undone by physics—prepare the surface for movement, and your sunroom will remain a sanctuary for decades.
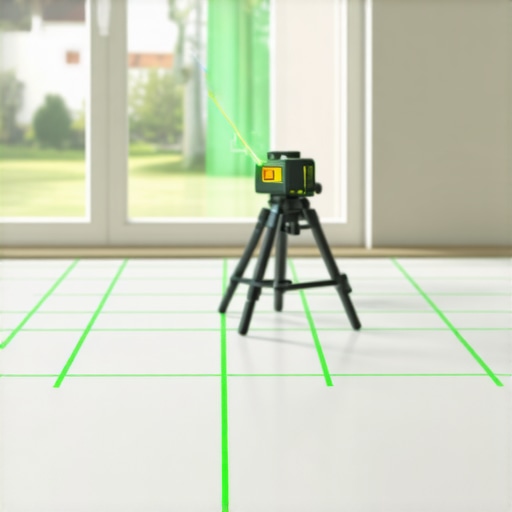
If you want your sunroom floor to survive more than a couple of seasons, you have to stop thinking like a weekend warrior and start thinking like a structural engineer. After my first disastrous attempt, I realized that my tool kit was part of the problem. I wasn’t just missing the right materials; I was missing the ‘truth-tellers’ that catch mistakes before they are buried under ten pounds of mortar. I now refuse to start any installation without a 360-degree green beam laser level. Unlike the old red lasers that vanish in a sunroom’s glare, a green beam cuts through the light, allowing you to execute the laser level move for perfectly straight hallways or open-concept sunrooms with surgical precision.
The Pro Equipment That Actually Makes a Difference
I’m often asked if you really need the fancy gear. My answer? Only if you want it to be flat. For large porcelain slabs, I’ve started using heavy-duty vacuum suction cups. These aren’t just for lifting; they allow you to place a tile perfectly vertically, which is the only way to ensure you don’t displace the thinset and end up with the trowel size error that leads to hollow sounding tiles. While we are talking about essential gear, if you’re also managing wood transitions nearby, make sure you have the 7 tools you actually need for a professional DIY hardwood install in your arsenal. Having a dedicated moisture meter is at the top of that list because, in a sunroom, moisture is a moving target.
Why Your Cleaning Routine Is Secretly Ruining Your Grout
Once the floor is down, the battle shifts to chemistry. I used to be a ‘bucket of hot water and a dash of vinegar’ person until I realized I was literally eating away at my grout’s structural integrity. You have to stop using vinegar on your hardwood floors immediately, and the same rule applies to your tile grout. Acidic cleaners weaken the bond and strip away the sealer, which is why your grout starts to look like a dirty sponge after just six months. I now only use pH-neutral cleaners specifically designed for stone and tile. It might seem like a small detail, but when you have 400 square feet of sun-baked porcelain, the wrong chemical can cause the sealer to haze or yellow.
How do I maintain my sunroom flooring over time?
Maintenance in a sunroom is 90% about UV and moisture management. First, you need to reseal your grout every year—no exceptions. The intense heat in these rooms can cause even ‘permanent’ sealers to break down faster than they would in a bathroom. This is critical if you want to know how to stop grout from changing color in the sun. Secondly, keep an eye on your expansion joints. According to the ANSI A108.02 standard, movement joints are mandatory for large tiled areas, especially those exposed to direct sunlight. If you notice the silicone in the corners starting to peel or crack, it means your floor is moving—replace that caulk immediately to maintain the buffer zone. For those with adjacent wood surfaces, following hardwood floor care secrets to longevity and shine will ensure the two rooms age at the same rate.
Where Sunroom Flooring Is Heading in 2025
I predict we are moving toward ‘smart flooring’ systems where decoupling membranes will include integrated carbon fiber heating elements and thermal sensors that can communicate with your HVAC. We already see this with advanced underlayments, but the future is about floors that actively fight thermal expansion by regulating their own temperature. For now, the most advanced thing you can do is focus on a perfect substrate. If you’re ready to take the leap, I challenge you to try the dry-fit method on your next project; lay out the entire room without glue first. It’s the single best way to catch layout traps before they become permanent. If you’re still feeling unsure, go back and check out tile installation pointers that save time and money to sharpen your fundamentals before you mix that first bag of mortar.
Hard Lessons from My Sunroom Flooring Disasters
After years of trial and error, I’ve realized that the sunroom is the ultimate testing ground for any DIYer. One of the biggest shifts in my mindset was accepting that physics always wins; if you don’t use the expansion joint secret for large tiled living areas, the heat will eventually force those tiles to pop or tent. I also learned that color consistency isn’t just about the tile itself, but about how you maintain it. If you want to know how to stop grout from changing color in the sun, you have to ditch the harsh acidic chemicals and stick to pH-neutral cleaners that won’t degrade the seal. Finally, never underestimate the power of a dry-fit; it’s the only way to catch layout errors before they become permanent, expensive regrets under a layer of mortar.
The Gear I Actually Use for a Flat Finish
You don’t need a warehouse full of tools, but a few specific items are non-negotiable for a professional result in a high-stakes environment like a sunroom. First, a high-quality green beam laser is your best friend for visibility in bright spaces, helping you master the laser level move for perfectly straight hallways or large open sunroom spans. I also keep the 7 tools you actually need for a professional DIY hardwood install nearby even when tiling, because a good moisture meter and a dead-blow hammer are universal essentials for any flooring project. For the porcelain itself, heavy-duty suction cups make placement much easier, preventing you from disturbing the mortar bed and creating those dreaded hollow spots. Following flooring installation fundamentals leveling for a seamless look is much easier when you have the right mechanical advantages on your side.
Time to Build Your Dream Sunroom
Transforming your sunroom into a durable, beautiful oasis is entirely within your reach if you respect the prep work and choose the right materials for the environment. Porcelain offers a resilience that other floors simply can’t match in high-UV, high-temperature settings. By slowing down and applying these tile installation pointers that save time and money, you are building a floor that will look incredible for decades. Don’t be intimidated by the technical specs—just take it one tile at a time and focus on the flatness of your substrate. Have you ever dealt with tiles popping up or grout cracking in your sunroom? Let me know your biggest flooring headache in the comments below!