
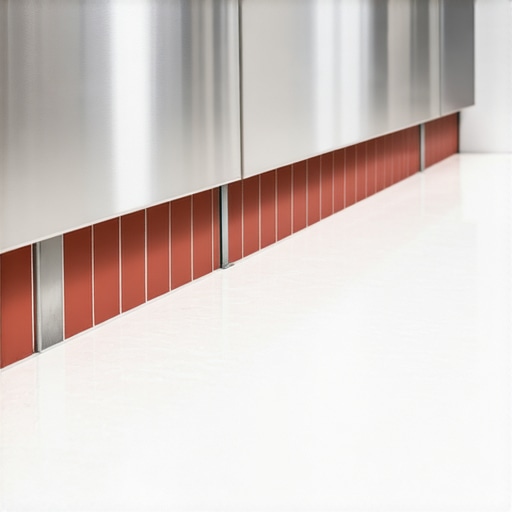
I’ll never forget the day I had to explain to a restaurant owner why his brand-new kitchen smelled like old dishwater and damp socks just three months after opening. I was the guy who installed it, and I’d made the rookie mistake of thinking a standard flat baseboard would be “good enough.” It wasn’t. Watching him try to scrub out a black, slimy build-up from a sharp 90-degree corner with a toothbrush was the moment I realized that in a commercial setting, those corners are where hygiene goes to die. Today, I want to save you from that same cringe-worthy experience and show you how to do it right from the start.
Keep Gunk Out of Your Kitchen Transitions
In a high-octane commercial kitchen, liquids aren’t just a possibility; they are a guarantee. When you have staff hosing down floors or spilling five-gallon vats of soup, that water needs somewhere to go, and it shouldn’t be into your walls. This is exactly why your commercial kitchen floor needs a coved base. A coved base creates a smooth, radiused transition that eliminates the sharp corner where dirt loves to hide. Without it, you are basically inviting bacteria to set up a permanent home. I’ve seen far too many flooring installation mistakes where people try to save twenty minutes of labor only to end up with a failing inspection. In fact, the FDA Food Code specifically mandates that floor and wall junctures in food prep areas must be coved and closed to ensure they are easily cleanable.
Is cove base really worth the extra labor?
You might be looking at the extra cost and the extra cuts and thinking it’s just a way for tile shops to upsell you. I get it. I used to be a skeptic too. But after seeing how tile grout is cracking at the room corners in kitchens that skip this step, I’m a total convert. It isn’t just about passing an inspection; it’s about the longevity of your investment. If you treat your commercial space like a standard residential DIY job, you’ll end up seeing the same mistakes that ruin luxury vinyl plank or high-end tile installations—namely, moisture intrusion and base rot. Have you ever had to deal with a “funky” smell in a kitchen that no amount of mopping could fix? I’d love to hear about your cleaning nightmares while we get ready to walk through the proper installation steps.
Start with a Subfloor That Wont Fail You
Getting that perfect curve starts long before you mix a bag of thinset. I remember a job at a local bistro where I thought I could skip the primer on an old concrete slab. By day four, the self-leveler was crunching underfoot like potato chips because the dry concrete had sucked the moisture right out of the mix. That is why you must prime concrete before every leveling job; it acts as the essential bridge between the old floor and your new prep work. Once the primer is tacky, you need to map out your low spots. I always recommend using the laser level move to ensure the entire perimeter is at a consistent height. In a commercial kitchen, even a quarter-inch dip means a puddle of stagnant water, which effectively turns your floor into a petri dish for bacteria.
Prime and level for a seamless transition
A coved base is only as effective as the floor it sits on. If your floor has a wave to it, your cove tiles will look like a jagged mountain range. This is where following the ultimate guide to floor leveling for a perfect finish becomes non-negotiable. You want to pour your leveler and use a spiked roller to release any trapped air. Think of it like smoothing out frosting on a cake—any bump you leave now will be a nightmare when you are trying to set that radiused tile later. I have seen installers try to build up the thinset under the cove base to compensate for a bad floor, but the trowel size error that leads to hollow sounding tiles will eventually cause the base to crack under the pressure of heavy kitchen equipment.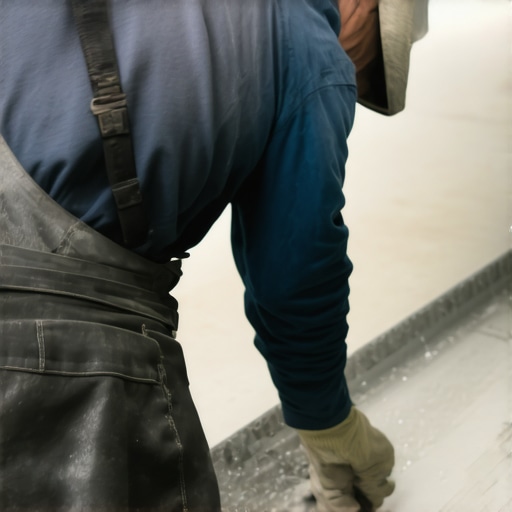
Executing the Perfect Cove Base Install
Secure the base with mechanical precision
When you finally start setting those coved pieces, do not just shove them into the mud and hope for the best. You need 100% coverage behind that curve. I personally back-butter each piece of cove tile with a small notched trowel to ensure there are no air pockets. If you leave a void behind that radius, a heavy utility cart or a stray kick from a chef’s boot will shatter the tile instantly. This is why you should use a dead blow hammer to gently seat the tiles. The hammer provides the necessary force to collapse the mortar ridges without the sharp shock that cracks the ceramic body. It is a small tool change that makes a massive difference in the durability of the installation.
Handle the corners without the headache
The real test of skill occurs where the coved base meets the door frames. I used to struggle with these complex cuts until I mastered the right way to undercut baseboards and door casings. By sliding the tile under the frame rather than trying to scribe a complex shape around it, you achieve a clean, professional seal. For the grout, avoid standard residential products. High-alkaline cleaners used in kitchens will eat through cheap grout in months. If you choose the wrong product, you will eventually find yourself wondering why dark grey grout always looks splotchy and faded after the first deep clean. Stick to epoxy or high-performance grouts that are specifically rated for commercial food environments to ensure your hard work actually lasts.Let’s dig deeper into what happens when the honeymoon phase of a new floor ends. Most people think that once the tiles are down and the grout is dry, the job is done forever. But there is a massive misconception in our industry right now: the idea that “waterproof” flooring solves every moisture problem. I’ve seen homeowners spend thousands on high-end planks, thinking they’ve bought an invincible shield, only to find the subfloor rotting underneath a year later. The “waterproof” label only means the product itself won’t swell; it doesn’t mean the water won’t get trapped between the plank and the slab, creating a breeding ground for mold. This is exactly why your basement floor needs a moisture barrier even if it feels dry to the touch. Concrete is a sponge, and without a barrier, that vapor drive will eventually win.
Why does your ‘waterproof’ floor smell like a swamp?
The smell usually comes from what you can’t see. Advanced installers know that relying on the manufacturer’s marketing is a recipe for disaster. According to the National Wood Flooring Association (NWFA), moisture testing is a mandatory step that cannot be skipped, regardless of the “waterproof” claims on the box. I always tell my clients that knowing how to use a moisture meter to prevent floor failure is the difference between a lifetime warranty and a pile of garbage. If you don’t check the Relative Humidity (RH) of your slab, you are essentially gambling with your budget. #IMAGE_PLACE_HOLDER_C#
Expansion joints are not optional for big rooms
One of the most common “oops” factors I see involves the expansion gap. People often think that tile is static, but everything moves. In large open-concept homes, skipping the expansion joint secret for large tiled living areas is the fastest way to get tented tiles or massive grout cracks. I’ve walked into beautiful homes where the tile was literally “popping” off the floor because the installer didn’t leave room for the house to breathe. If you see an installer running tile wall-to-wall without a single break in a 40-foot run, those are signs your tile contractor is cutting corners on prep work. Another nuance involves the self-leveling process. Most people pour it and walk away. But if you have radiant heat, you need to be twice as careful. I’ve seen countless DIYers wonder why your floor leveler is cracking over radiant heat pipes, and it usually comes down to the thermal expansion of the pipes and the lack of a proper primer or fiber-reinforced mix. When you are mastering floor leveling pro secrets for perfect installations, you learn that every substrate requires a different chemical approach. Have you ever fallen into this trap? Let me know in the comments.When I first started, I thought a basic hardware store rental sander would give me a magazine-quality finish. I was wrong. It is not just about the machine; it is about the dust containment. I learned the hard way that if you do not know how to sand a hardwood floor without creating a massive dust cloud, you will be cleaning sawdust out of your kitchen cabinets for years. That is why I finally invested in a professional HEPA-filtered vacuum system. It is one of the 7 tools you actually need for a professional diy hardwood install if you want to keep your sanity and your health. For the tile work, I swear by a high-end wet saw with a sliding tray. People ask me why I don’t just use a score-and-snap, but when you are working with expensive materials, the wet saw water trick for cleaner porcelain cuts is what prevents those jagged, unprofessional edges that scream ‘amateur.’ 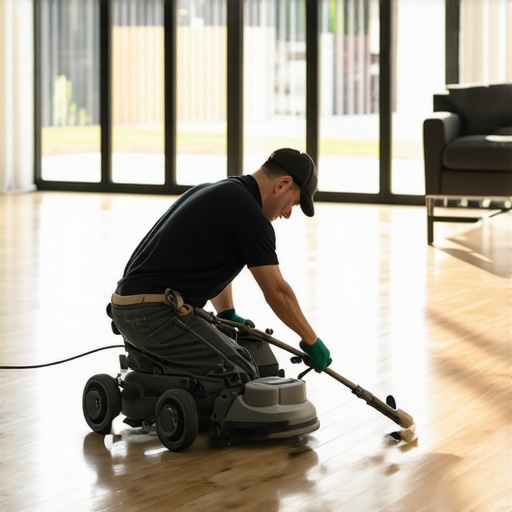
Tools that separate the pros from the hacks
One tool that changed my life was the digital moisture meter. I used to guess when a slab was dry, but now I know for a fact. Before any plank hits the ground, I am checking the substrate. This is vital because why you should not rely on waterproof labels for laminate is a lesson you do not want to learn after the floor starts cupping. I also recommend a laser level for every single room. Using the laser level move ensures that your transitions are flush and your lines are true, even if the walls are crooked.
How can I keep these floors looking brand new for years?
Maintenance is where most homeowners fail. They spend thousands on an install and then use a bucket of hot water and harsh dish soap. Stop! This is exactly why you should never mop your floors with dish soap—the residue builds up over time and turns into a sticky magnet for dirt, eventually dulling the finish. Instead, lean into hardwood floor care secrets to longevity and shine, like using a microfiber mop and a dedicated pH-neutral wood cleaner. According to the Bona Professional series technical documentation, using a pH-neutral cleaner is the only way to avoid chemically degrading the polyurethane coat prematurely. If you have tile, don’t forget the sealer. I always use the spray bottle hack for testing floor sealer coverage. If the water doesn’t bead up within a few seconds, your grout is vulnerable to staining and needs another coat. Looking ahead, I suspect we are going to see a massive shift toward ‘smart’ underlayments that can detect subfloor moisture levels and alert your phone before a pipe leak ruins the entire room. For now, just make sure you are mastering hardwood floor refinishing expert tips for 2025 to stay ahead of the curve. Take my advice: Go grab a high-quality pH-neutral cleaner this weekend and ditch the grocery store ‘all-purpose’ spray. Your finish will thank you.
Hard Truths I Learned the Expensive Way
After two decades of knee pads and wet saws, I’ve realized that even the most expensive hardwood or the glossiest tile cannot hide a lazy foundation. I spent my early years chasing speed, but real quality comes from the things you can’t see once the furniture is moved back in. Here is what I know now: prep work isn’t just the ‘pre-game’—it is the entire game. If you rush the subfloor, the finish will fail, and it will happen sooner than you think. Secondly, a moisture meter is not an optional accessory for a pro; it is your insurance policy. Most flooring installation mistakes happen simply because an installer treated the manufacturer’s technical data like a set of suggestions rather than a law. Finally, always remember that gravity and water are undefeated; if you don’t give them a path or a barrier, they will find one through your subfloor.
Gear and Guides I Use Every Single Week
I don’t just wing it anymore, and neither should you. I keep a copy of the National Wood Flooring Association (NWFA) technical manuals in my truck for any wood-related questions, and I rely on the TCNA Handbook for tile layouts to ensure every bond is permanent. For hardware, I never step onto a job site without my Bosch GLM laser—it is essential for mastering floor leveling pro secrets for perfect installations. I also swear by the Wagner Meters smart sensors for checking slab humidity. I even keep a few bottles of professional-grade, pH-neutral cleaners to hand out to my clients because I want their floors to look as good in five years as they do the day I leave.
Build a Floor That Actually Lasts Decades
You now have the knowledge to avoid the black gunk in the corners and the ‘swamp smell’ that plagues poorly installed waterproof planks. Successful flooring installation is ultimately about the patience to do the boring stuff—the priming, the leveling, and the measuring—with the same intensity as the final row of planks. Whether you are following a step-by-step guide to flooring installation and leveling success or you are diving into mastering hardwood floor refinishing expert tips for 2025, just remember that your floor is the foundation of your home’s comfort. Take your time, use the right tools, and don’t be afraid to redo a section if it doesn’t feel right. Have you ever discovered a hidden moisture problem or a ‘mystery smell’ after you already started laying your new floor? Let me know in the comments below!