
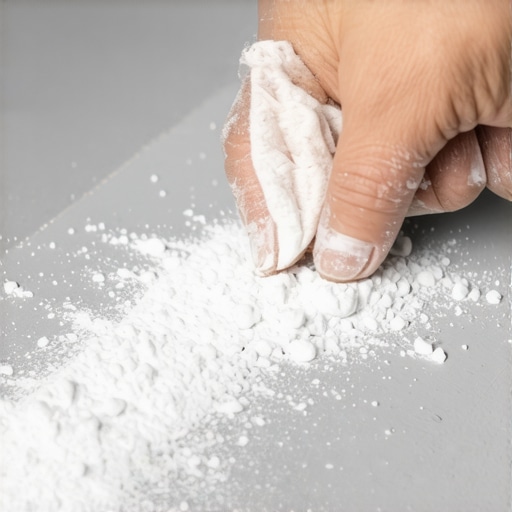
I remember the absolute pride I felt walking across my freshly poured garage floor for the first time. It looked like a slate-grey lake of industrial perfection. But two weeks later, the honeymoon ended abruptly when I realized my black work boots were turning a ghostly white every time I stepped inside. I wasn’t just dealing with a little dirt; the floor was literally disintegrating into a fine, chalky powder that tracked into the house and coated every tool I owned. It felt like I was living inside a flour mill. I’d spent a fortune on the pour, yet I could scratch the surface with my fingernail. Today, we are going to dive into why your concrete is ‘dusting’ and how you can stop that relentless grey cloud from ruining your home for good.
That Annoying Grey Cloud Isn’t Just New House Dust
Concrete dusting, or laitance, isn’t just a cosmetic nuisance; it is a sign that the very top layer of your slab didn’t harden correctly. Often, this happens because someone—and in my early days, that someone was me—added too much water to the mix to make it easier to spread. When that excess water bleeds to the top, it brings fine particles with it, creating a weak, brittle crust. According to the American Concrete Institute, improper curing can lead to a surface that is significantly weaker than the core of the slab, sometimes by as much as 50%. This creates a massive headache if you ever plan on a step-by-step guide to flooring installation and leveling success later on, because nothing will stick to a dusty surface. I once tried to prep a floor for tile and found that my best tool for scraping glue off a concrete slab was actually gouging the soft concrete instead of just cleaning it.
Is My Entire Slab Actually Failing?
It’s the fear that keeps every homeowner awake at night after a big renovation: did I just waste thousands of dollars on a structural disaster? The good news is that dusting is usually a surface-level issue, though it feels catastrophic. However, you can’t ignore it. If you try to ignore the powder and just pour a finish over it, you’ll likely find that your self-leveler starts pulling away from the concrete because the dust acts like a layer of ball bearings, preventing a proper bond. Have you ever swept your floor five times in a row and still felt grit under your shoes five minutes later? Tell me about your struggle in the comments below, because I’ve been there, and I know exactly how frustrating it is to feel like you’re losing a fight against a pile of rocks.The first thing you have to realize is that a broom is often your worst enemy when dealing with a chalky slab. Every time you sweep, you are actually ‘sanding’ the floor with its own debris, creating even more fine particles that settle into every corner of your home. To truly clear the slate, you need a high-quality HEPA vacuum. I’ve found that using the vacuum attachment that actually picks up fine sawdust works surprisingly well on concrete dust because it seals against the floor rather than just pushing the clouds around. If you don’t get every microscopic grain off the surface, any sealer you apply will just sit on top of the dust like chocolate syrup on powdered sugar—it will never actually touch the ‘cake’ of the concrete. This thorough cleaning is the foundation of precise floor leveling techniques to achieve flawless surfaces.
Stop the Bleeding with a Deep Mechanical Clean
Once the visible dust is gone, you need to check the structural integrity of that top layer. Take a flathead screwdriver and drag it across the surface with moderate pressure. If it leaves a deep white gouge, you aren’t ready for a finish yet. You may need to use a floor maintainer with a stiff brush to mechanically remove the ‘laitance’ or the weakest layer of the concrete. I remember a job where I skipped this step, thinking the vacuum was enough. Three weeks later, the epoxy I applied started to bubble because the concrete underneath it was literally turning back into sand. Using tile installation pointers that save time and money usually involves doing the ‘boring’ prep work right the first time so you don’t have to tear it out later.
Turn Your Floor into Granite with a Chemical Densifier
When the floor is surgically clean and the loose debris is gone, you need to chemically change the surface. This is where silicate-based densifiers come in. Think of your concrete like a dry sponge; the densifier is a liquid that soaks in and reacts with the free lime to create a hard, crystalline structure. I remember the first time I used a lithium-based densifier on a particularly chalky basement. It looked like a milky, puddle-filled mess for about thirty minutes, and I was convinced I had just turned my floor into a skating rink of slime. But as it dried, the ‘chalk’ disappeared entirely. The result was a surface so hard I couldn’t even mark it with a screwdriver. This is one of those mastering floor leveler pro secrets for perfect installations: you cannot level a floor that is falling apart at the seams. 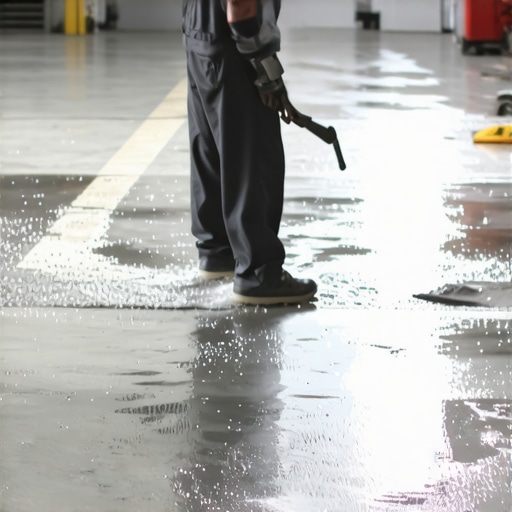
Prepare for the Next Layer Without the Drama
If your goal is to eventually lay down the right hardwood floors for your home or a beautiful new tile, stopping the dust is only half the battle. You have to ensure the surface is actually flat. I’ve seen homeowners skip the densifier and go straight to leveler, only to see the whole thing lift up in sheets. This is exactly why your floor primer is peeling off like a sunburn; the primer bonded to the dust, not the slab. Before you even think about how to achieve flawless floor leveling before tile laying, you must perform a splash test. Drop some water on the treated concrete. If it beads up, you’ve sealed it too well for a leveler to bond; if it disappears instantly, the slab is still too porous. Finding that middle ground is one of the most critical flooring installation fundamentals leveling for a seamless look.Most people assume that once the dusting stops, the hard part is over. In reality, you are just entering the most dangerous phase of the project: the ‘bond trap.’ Most contractors will tell you to just splash some primer on and start pouring, but I’ve learned the hard way that more primer isn’t always better. If you over-apply primer on a slab you’ve just densified, it can’t soak in. It just sits on the surface, creating a film that is essentially a giant sticker waiting to peel. This is exactly why your floor primer is peeling off like a sunburn when you try to walk on it the next day.
Stop Believing That Leveler Is a Magic Eraser
There is a common myth that self-leveling underlayment can bridge any gap or hide any structural sin. I used to believe this until I saw a $5,000 floor lift up like a stale potato chip. The truth is, leveler is a finishing tool, not a structural stabilizer. If your concrete is still ‘breathing’ or off-gassing moisture, no amount of chemical hardener will save you from failure. According to the National Wood Flooring Association (NWFA), substrate moisture is the primary cause of over 75% of flooring failures. If you skip learning how to use a moisture meter before installing wood floors, you are essentially gambling with your renovation budget. Have you ever fallen into this trap of thinking a thick pour would solve a thin-set problem? Let me know in the comments because I want to hear your horror stories.
Why Does My Leveler Look Like Swiss Cheese?
Even if you have fixed the dusting and the moisture, you might encounter the ‘pinhole’ phenomenon. This happens when the concrete is so porous that air is trapped inside the slab. As you pour your leveler, that air wants to escape, bubbling through the wet mix and leaving behind tiny craters. This isn’t just a cosmetic issue; those pits are weak points where your tile or hardwood won’t bond. To avoid this, you need the secret to mixing the perfect bucket of self-leveler every time, which includes a slow-speed mix to avoid whipping air into the product. 
The Moisture Trap No One Talks About
One nuance that even ‘pro’ installers often miss is the difference between a dry floor and a floor that isn’t currently wet. You can have a slab that looks perfectly grey and solid, but the moment you cover it with an impermeable finish, it starts to trap vapor. This is why your concrete floor is sweating under the rugs even months after you thought it was cured. Before moving to the final stage, always perform a plastic sheet test. Tape a 2-foot square of clear plastic to the floor for 24 hours. If there is condensation under that plastic, your ‘fixed’ floor is about to become a moldy mess. Understanding these flooring installation fundamentals leveling for a seamless look is what separates a DIY disaster from a gallery-quality finish.I have spent years fighting with standard hand trowels, trying to get a floor flat enough to pass a professional inspection, and I finally realized I was bringing a knife to a gunfight. If you want a result that doesn’t just look okay but actually meets industrial standards, you need to stop treating leveling like a hobby and start using the specialized kit that saves my back and your subfloor. The single most important tool in my trailer is the gauge rake. Unlike a flat trowel, a gauge rake has adjustable depth pins that allow you to set the exact height of your pour. This is how you achieve [precise floor leveling techniques to achieve flawless surfaces](https://tiletrendshop.com/precise-floor-leveling-techniques-to-achieve-flawless-surfaces) without the guesswork of ‘eyeballing’ the low spots. I pair this with a spiked roller, which isn’t just for show—it actually breaks the surface tension of the wet leveler and pops those tiny air bubbles I mentioned earlier. If you skip the spiked roller, you are practically inviting those pinholes to ruin your finish.
The Specialized Kit That Saves My Back and Your Subfloor
To truly understand why this precision matters, we have to look at the professional requirements. According to the Tile Council of North America (TCNA) Handbook, specifically section ANSI A108.02, any substrate intended for large-format tiles (any side longer than 15 inches) must be flat within 1/8 inch over a 10-foot span. Achieving that by hand is nearly impossible without [the secret to mixing the perfect bucket of self-leveler every time](https://tiletrendshop.com/the-secret-to-mixing-the-perfect-bucket-of-self-leveler-every-time). When I started using a dedicated mixing station instead of a handheld drill, my consistency skyrocketed. The station keeps the RPMs steady, ensuring that the polymer chains in the mix fully hydrate without whipping in excess air. This is the level of detail required for [mastering floor leveling pro secrets for perfect installations](https://tiletrendshop.com/mastering-floor-leveling-pro-secrets-for-perfect-installations). 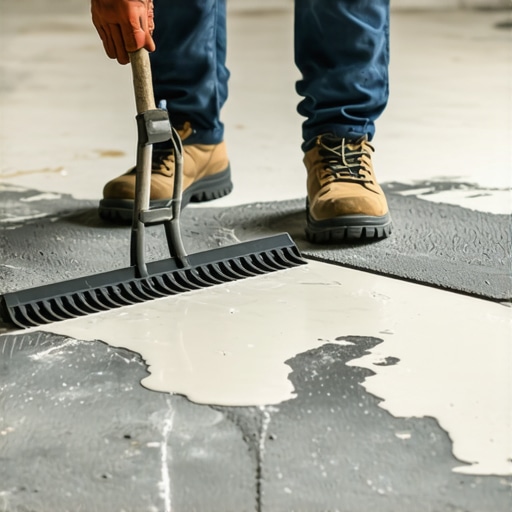
Prepare for the Era of Super-Sized Tile Panels
Looking toward the future, I see the flooring industry moving toward Gauged Porcelain Tile Panels (GPTP)—we are talking about sheets of porcelain that are 5 feet by 10 feet but only 6mm thick. These panels are incredibly beautiful but have zero tolerance for an uneven subfloor. If there is even a 2mm dip, that massive panel will crack the first time someone walks on it in high heels. This is why [how to achieve flawless floor leveling before tile laying](https://tiletrendshop.com/how-to-achieve-flawless-floor-leveling-before-tile-laying) is becoming a mandatory skill rather than a ‘nice-to-have’ for DIYers. If you can’t get your floor mirror-flat today, you won’t be able to install the trends of tomorrow.
How do I make this ‘forever floor’ actually last a lifetime?
Once the floor is down, the game changes from installation to preservation. I have seen $10,000 floors ruined in six months because someone used the wrong mop. For those of you who opted for wood after your leveling project, you need to dive into [hardwood floor care secrets to longevity and shine](https://tiletrendshop.com/hardwood-floor-care-secrets-to-longevity-and-shine) to avoid the dreaded ‘cloudy’ finish. The biggest culprit is moisture. I cannot stress this enough: [why you should never use a steam mop on click-lock floors](https://tiletrendshop.com/why-you-should-never-use-a-steam-mop-on-click-lock-floors) is a lesson usually learned through expensive warping and swelling. Steam forces water into the seams of your perfectly leveled floor, bypassing the protective wear layer and attacking the core. Instead, stick to pH-neutral cleaners and a barely damp microfiber pad. To really take your craft to the next level, I challenge you to go out and buy a 10-foot straightedge today. Don’t rely on your eyes; lay that bar across your floor and see the truth. Identifying those gaps now is the first step toward [step-by-step guide to flooring installation and leveling success](https://tiletrendshop.com/step-by-step-guide-to-flooring-installation-and-leveling-success).
Lessons Bought with Sweat and Wasted Concrete
Over the years, I’ve realized that a dusting floor is really just a cry for help from your slab. Here are the lightbulb moments that saved my career:
- The Penny Rule: If you can scratch the surface with the edge of a penny and see a deep white line, your surface tension is too low for any finish.
- Air Temperature vs. Slab Temperature: Your thermostat might say 70 degrees, but a cold concrete slab can be 15 degrees cooler, which is often the hidden reason your leveler is setting up too fast or failing to bond properly.
- Cleanliness is a Chemical Requirement: Any residue left behind acts as a bond-breaker. This is why I always check the surface twice before starting any flooring installation fundamentals leveling for a seamless look.
Tools That Make the Difference Between Success and Stress
I don’t go to any job site without these four essentials. First, a professional-grade 10-foot straightedge; it is the only way to know how to level a floor that has a 2-inch drop across the room with any accuracy. Second, a high-quality lithium-based densifier that penetrates deeper than old-school sodium formulas. Third, a gauge rake to set your depth, and finally, a deep understanding of the trowel notch secret for getting full thinset coverage for when the tile actually starts going down.
Building a Legacy Under Your Feet
Fixing a chalky, dusty slab is the ultimate test of a homeowner’s patience, but once you conquer it, you have a foundation that can support anything. Whether you are aiming for sleek tile or elegant hardwood floors, the grit you show during the prep phase defines the long-term quality of your home. You’ve done the research and you’ve got the right tools—it’s time to turn that dusty garage or basement into a space you’re truly proud of. Your next flooring installation is the one where you finally get the professional results you deserve. Have you ever struggled with a floor that just wouldn’t stop tracking dust into the house? Let me know your experience in the comments below!