

I still remember the smug satisfaction I felt when I wheeled three pallets of carbonized bamboo flooring into my living room. I was convinced I was saving the planet. I’d read the marketing brochures that praised bamboo as a miracle grass that regenerates in five years, and I proudly envisioned my home as an eco-friendly sanctuary. But my pride took a hit just a year later. One morning, I noticed a strange warping near my hallway transition. Within months, my beautiful green flooring looked like a miniature roller coaster. It turns out I had fallen victim to why bamboo flooring shrinks more than you expect, and that was just the tip of the iceberg.
The Beautiful Lie of the Miracle Grass
We want to make the right choices for our homes and our planet. Because of this, the flooring industry has spent years polishing the image of bamboo as the ultimate sustainable option. But when you pull back the glossy finish, the environmental reality is incredibly complex. The truth is that turning raw, fibrous grass stalks into rock-hard flooring planks requires an immense amount of synthetic resins, chemical treatments, and fossil-fuel energy. In my early DIY days, I made the mistake of assuming natural origin equaled a natural finished product. It was a costly lesson in greenwashing. Today, we are going to dismantle the marketing myths and look at what really goes into your bamboo floor so you can make an honest, informed choice for your next home project.
Is Bamboo Actually Worth the Eco-Hype?
If you are looking at that sleek, modern sample in the showroom, you might wonder if the green credentials are too good to be true. The short answer is yes, they often are. While harvesting bamboo doesn’t kill the plant’s root system, the processing stage changes things dramatically. To bind the grass fibers together, manufacturers use heavy doses of urea-formaldehyde glues, which can off-gas toxins into your home. Furthermore, almost all commercial bamboo is grown in monoculture plantations in Asia. This practice leads to deforestation and biodiversity loss, as natural forests are cleared to make room for cash-crop bamboo. According to a life-cycle assessment published by the Journal of Industrial Ecology, the carbon footprint of shipping heavy bamboo products across the globe can actually make its total environmental impact higher than locally sourced wood.
I realized too late that I could have opted for local alternatives, or even chosen a completely different path like learning how to choose the right hardwood floors for your home. If you want a floor that stands the test of time, you have to look at the entire lifecycle, not just the raw material. Have you ever bought a home product because it was labeled eco-friendly, only to discover later that its carbon footprint was actually massive? Tell me about your experience in the comments below.
Prepping Your Base to Survive Bamboo Movement
If you still want to install bamboo, or if you have decided to transition to more stable options, you must treat your subfloor like the foundation of a house. Bamboo is incredibly temperamental. It acts like a giant sponge, expanding and contracting with every change in seasonal humidity. If your subfloor is uneven, that movement will quickly destroy your locking joints. I learned this the hard way during a humid July weekend when my master bedroom floor began to creak like an old wooden ship. The culprits were tiny subfloor dips I had ignored during installation.
Measure for Flatness Before You Touch a Plank
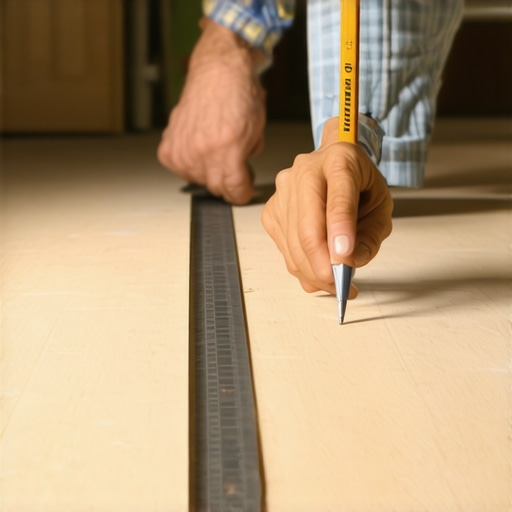
Never rely on your eyes to judge a subfloor. You need objective measurements. To avoid squeaks, bouncing, and premature wear, you must learn how to measure subfloor flatness before you start installing. Grab a ten-foot straightedge or run a tight mason line across the room. Any dip or peak greater than 3/16 of an inch over a ten-foot span must be corrected. If you skip this, your floating planks will flex every time you walk on them, eventually snapping the tongues right out of the grooves.
Prime Your Plywood to Keep Self-Leveler from Failing
When you find those unavoidable dips in a plywood subfloor, your instinct will be to pour self-leveling compound directly onto the wood. Don’t do it. Plywood is incredibly thirsty; it will instantly suck the water out of your wet leveler, causing the mix to cure too quickly, crack, and fail to bond. To prevent this, you must apply the best primer for installing leveler over plywood. This specialized acrylic primer seals the wood pores, ensuring your leveler flows smoothly and cures to a rock-hard, glassy finish.
Contain the Liquid Gold with Doorway Dams
Self-leveler behaves exactly like water; it will find every tiny crack, heating vent, and doorway to escape. During my second flooring project, I poured five gallons of leveler only to watch it disappear down an open threshold and coat my basement ceiling joists. Now, I always take the time to learn how to dam a doorway before pouring self-leveler. Use scrap wood wrapped in packing tape or heavy-duty foam weatherstripping secured with silicone caulk to build a temporary wall at every exit point before you mix your first bag.
When it comes to prepping your home for new surfaces, there is a dangerous misconception whispered in DIY forums: that self-leveling compound behaves like magic water, leveling itself perfectly with zero effort. The industry loves to sell this illusion of easy, foolproof application. However, the reality is that leveling compounds are highly sensitive, chemically engineered materials. If you do not understand how they interact with your subfloor, you are setting yourself up for an expensive disaster. Let’s dig deeper into the actual mechanics of a perfect pour.
Why Does Your Self-Leveler Keep Bubbling?
The most common complaint from homeowners tackling their first leveling project is the sudden appearance of tiny craters and pinholes across the dried surface. Most people assume they simply mixed the compound too aggressively. In reality, the culprit is almost always outgassing. Plywood and concrete are incredibly porous. When you pour wet leveler over an unprimed or poorly primed surface, the air trapped inside the subfloor is forced upward by the heavier liquid. As those air bubbles escape through the curing compound, they leave permanent craters. According to technical bulletins from the Tile Council of North America (TCNA), failing to properly seal a porous substrate before a pour reduces the bond strength by up to fifty percent. To prevent this cosmetic and structural nightmare, you must understand why your self-leveler is bubbling over plywood and take the necessary priming steps first.
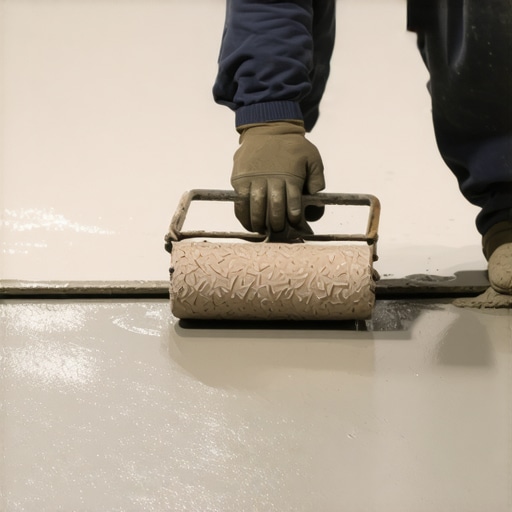
Another major trap is relying on the compound to do all the moving on its own. It is called self-leveling, but in truth, it is merely self-smoothing. If you do not actively guide the liquid into your lowest spots, it will pool unevenly or cure too quickly. To get that glassy, flat surface required for large-format tiles or premium hardwood, you need to master how to use a spiked roller for the perfect leveling pour. The spiked roller breaks the surface tension of the wet mix and releases any remaining trapped air, ensuring a truly flat, continuous substrate.
Ignoring these details will eventually lead to structural movement under your finished floor, causing tiles to crack or luxury vinyl joints to snap. Have you ever fallen into this trap or noticed mysterious bubbles in your leveler? Let me know in the comments below.
How Do I Maintain Flooring and Subfloor Stability Over Time?
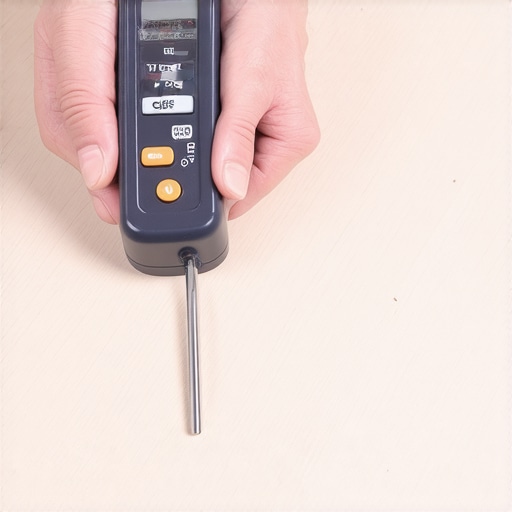
Once you have gone through the grueling work of fixing dips and pouring self-leveling compound, your job is not finished. Real craftsmen know that a floor is a living, moving system. Maintaining that investment is all about environmental control and using highly specialized tools. For years, I relied on simple store-bought hygrometers, but after seeing my own installations suffer from winter gaps, I learned my lesson. Today, I never start a wood project without a pinless moisture meter in my back pocket. I highly recommend investing in professional-grade tools like the Wagner Meters Orion series because it reads moisture deep in the wood without leaving unsightly holes. To protect your hard work from shifting, you must know how to use a moisture meter before installing wood floors and keep checking those levels as the seasons change.
My favorite maintenance ritual is keeping an eye on the expansion gap. When wood or composite planks swell in humid conditions, they need room to breathe. If your gap is too tight, your floor will buckle. I keep a few simple plastic shims around to verify the gap during seasonal shifts. In the winter, the reverse happens as cold air dries out your home. If you want to prevent unsightly splits from opening up in your living room, you need to understand how to keep your hardwood floors from gapping in the winter by maintaining a consistent relative indoor humidity of 35% to 55% using a whole-house humidifier.
Where is Modern Floor Preparation Heading?
The flooring industry is changing rapidly, especially when it comes to material science. In my view, the future belongs to highly modified, fiber-reinforced leveling compounds and dust-free prep technologies. Manufacturers are starting to formulate self-levelers that dry faster and tolerate higher moisture levels without pulling away from the concrete. According to technical guides from the National Wood Flooring Association (NWFA), using the correct primer-to-leveler combination is the single most critical factor in preventing future delamination. If you want your installation to survive decades of foot traffic, you must execute a flawless prep phase by adopting step-by-step guide to flooring installation and leveling success. My challenge to you on your next project is to stop guessing: grab a straightedge, check your flatness to the millimeter, and prime your wood surfaces like a true professional.
When you step back and look at a beautifully finished room, it is easy to forget that the real magic is entirely hidden from view. A spectacular top surface is only as good as the preparation beneath it. Through years of trial, error, and messy cleanup sessions, I have discovered that mastering floor prep is what separates a frustrating weekend headache from a lifetime of structural stability.
Crucial Lessons from My Worst Flooring Disasters
Before you mix your next bag of leveler or lay down a single plank, let me share a few hard-won truths that will save your budget and your sanity:
- Never trust your eyes on flatness: A floor can look perfectly straight under normal lighting, but once those planks go down, every minor dip turns into a squeak. Always use physical testing tools like the string line method for checking floor flatness over 20 feet to find hidden humps.
- Chemical compatibility is non-negotiable: Pouring compounds onto bare, dusty wood or old adhesive residue is a recipe for failure. If you skip proper priming, you run a massive risk of watching why your self-leveler is pulling away from the concrete or plywood substrate.
- Moisture is a silent assassin: Whether you are dealing with solid oak, engineered planks, or composite materials, check your subfloor moisture levels. Skipping this check is the primary reason behind why your bamboo flooring is cupping despite low humidity issues later on.
The Subfloor Kit I Never Leave Behind
You do not need an entire warehouse of tools, but you absolutely need the right gear to ensure your installation stands the test of time. Here is the exact toolkit I rely on for every single job:
- A Heavy-Duty Spiked Roller: This is my absolute secret weapon. It does more than just push liquid around; it actively releases surface tension so you do not have to wonder why your self-leveler didn’t flow into the low spots.
- Premium Pinless Moisture Meter: I use this tool to scan both the subfloor and the new planks before they are joined. It helps ensure that your wood is perfectly acclimated and prevents your hardwood floors from gapping in the winter.
- High-Quality Acrylic Primers: Never cheap out on the bond coat. A professional-grade primer acts as a protective barrier, preventing the subfloor from drinking the water out of your leveling mix.
Your Blueprint for a Lifetime of Perfect Floors
Great floors do not happen by accident. They are the result of patience, careful measurement, and a willingness to do the unglamorous work before the first decorative plank is even unboxed. By taking control of your subfloor environment, sealing your porous substrates, and respecting the natural expansion and contraction of your materials, you can create a gorgeous, squeak-free surface that lasts for decades. Your home deserves a foundation that is as strong and reliable as the roof overhead. Now that you know how the pros handle subfloor prep, you are fully equipped to take on your next project with absolute confidence.
Have you ever run into unexpected shifting or annoying squeaks after finishing a DIY flooring project? Let me know about your experiences and questions in the comments below!