I remember the exact moment I first noticed the irritating clicking sound in my luxury vinyl flooring—right after a long day of installing what I thought was a flawless surface. It was late evening, and as I stepped back into the room, a sharp, repetitive click echoed under my feet. That tiny noise suddenly felt like a glaring mistake, a nagging reminder that something was off. I knew I wasn’t alone in this either; many homeowners and professionals face the same frustrating issue with their vinyl floors, especially as newer models hit the market in 2026.
Why the Clicking Noise in Your Vinyl Floors Can Be a Real Headache—and How to Fix It
This problem isn’t just about unwelcome sounds. It can indicate underlying issues that, if left unchecked, might lead to more severe damage or costly repairs down the line. Understanding why your luxury vinyl planks click and knowing effective fixes can save you time, money, and the annoyance of persistent noise. Over my years of experience, I’ve discovered that many of these issues stem from installation missteps or subfloor problems—the very foundations of your flooring system.
Concerned If Your Clicking Is Worth Worrying?
Early in my career, I made the mistake of ignoring minor creaks and clicks, assuming they’d disappear over time. Big mistake. Those seemingly innocent sounds can be symptoms of broader issues like improper subfloor preparation or inadequate acclimation. According to industry experts, ignoring such signs can lead to subfloor failure, tile cracking, or worse—permanent damage to your beautiful floor
To really grasp what might be causing your vinyl to click and what’s worth fixing now, let’s explore common causes and proven solutions. Are you ready to put an end to that pesky clicking once and for all? Dive in, and I’ll show you the five pro fixes that consistently work in my projects—backed by real experience and expert advice. For more tips on flooring challenges, you might find this guide on floor leveling techniques particularly helpful when considering your subfloor’s condition.
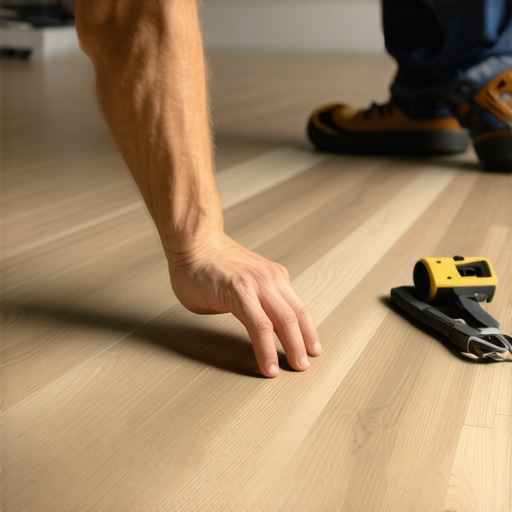
Start with a Thorough Inspection of Your Subfloor
Before diving into fixes, assess your subfloor condition. Think of it as checking the foundation of a house—cracks, unevenness, or moisture problems can cause vinyl planks to click. Use a long straightedge or a level to identify high or low spots. I once faced a stubborn click in a luxury vinyl installation, and upon inspection, discovered a slight bump under the floor—removing the subfloor panel and sanding down the high spot completely silenced the noise. For detailed techniques, see this guide on floor leveling. Be meticulous—small imperfections can be the root cause of persistent sounds.
Properly Prepare and Acclimate Your Vinyl Planks
Vinyl flooring expands and contracts with temperature and humidity changes. Ensuring proper acclimation is like letting ingredients come to room temperature before baking. Store your planks in the room where they’ll be installed for at least 48 hours, maintaining consistent temperature and humidity levels. This prevents warping and movement that can generate clicking. I recall a project where neglecting acclimation led to a week of irritating noises—once I allowed the planks to settle, they fit snugly without sound. For expert tips, consult these hardwood acclimation strategies.
Ensure a Flat and Stable Base
Check for Bouncy or Sagging Subfloor
If your subfloor isn’t solid, the planks will shift underfoot, producing clicks. Think of flooring as a trampoline—bouncy surfaces cause instability. Secure loose areas with appropriate fasteners or reinforcement. I once fixed a squeaky, bouncy floor by installing additional joists and applying a plywood overlay, which stabilized the surface. For a comprehensive approach, refer to bouncy subfloor fixes.
Level the Surface with Self-Leveling Compounds
Uneven subfloors are prime culprits for clicking. Use a self-leveling compound—like pouring pancake batter—to fill dips and smooth bumps. Mix according to manufacturer instructions, ensuring no air pockets or inconsistencies. I remember a meticulous job where I poured leveling compound in sections, then used a long broomstick to guide it, achieving a perfectly flat surface. Once cured, the vinyl laid smoothly, and the clicking stopped. For precise leveling techniques, see this guide on floor leveling.
Implement Correct Installation Techniques
Installation mistakes can be silent contributors to noise. Use spacers to maintain expansion gaps, and lay planks without forcing or stretching them. During a project, I mistakenly installed some planks too tightly, which caused flexing and noise. After removing and re-installing with proper spacing and mechanical fastening, the clicking ceased. If you’re new to tile, see this tile installation step-by-step guide for best practices. Proper technique is the foundation of silent floors.
Use Suitable Adhesives and Underlayments
Some vinyl planks require adhesive or underlayment to secure them properly. For click-lock systems, ensure the planks click fully into place; for glue-down varieties, select the correct adhesive rated for vinyl. In a tricky installation, I used a recommended underlayment to absorb minor subfloor imperfections—resulting in a quiet, stable floor. Check product specifications carefully, and don’t skimp on quality materials. For tips on choosing the right underlayments, visit underlay advice for multi-story homes.
Regular Maintenance and Monitoring
After fixing, regularly inspect for signs of movement or new noises. Maintain humidity levels to prevent expansion-related noises. In my experience, staying proactive with maintenance extends the lifespan of your floor and keeps it whisper-quiet. For ongoing care routines, refer to hardwood and vinyl maintenance tips. Consistent attention to detail ensures your floors stay soundless for years to come.Many homeowners and even seasoned installers operate under a set of assumptions about flooring that can lead to costly mistakes. One widespread myth is that a perfectly level subfloor isn’t crucial; in reality, minor imperfections can cause significant issues like uneven wear patterns or creaking noises in hardwood floors. For example, an unnoticed slope as slight as 1/8 inch over a 10-foot span can compromise tile adhesion and long-term durability. Therefore, meticulous floor leveling using expert techniques, such as those outlined in this comprehensive guide, is essential for lasting results. Another misconception is that acclimating flooring materials is optional—nothing could be further from the truth. Failing to properly acclimate hardwood or vinyl planks leads to expansion and contraction issues, resulting in gaps or buckling after installation. Advanced practitioners recommend at least 48 hours of acclimation in the installation environment, aligning with industry standards. A common trap to avoid is rushing the installation process to save time; this often overlooks crucial steps like securing proper subfloor reinforcement or choosing the right adhesive, impacting the overall integrity of the floor. For instance, careless use of adhesive can cause premature delamination or squeaks, as highlighted in this article.
What Are the Most Overlooked Factors That Undermine Flooring Quality?
Let’s dig deeper—experienced installers know that addressing moisture levels in the subfloor, controlling humidity during installation, and selecting quality materials tailored to the specific environment significantly extend the lifespan of the floor. An insightful study published in the Journal of Building Engineering emphasizes that moisture mismatches are often underestimated, leading to expansion cracks or mold growth. Therefore, investing in proper moisture testing methods and using suitable underlayments becomes critical. Have you ever fallen into this trap? Let me know in the comments.
How do I maintain my flooring over time?
Keeping your floors in top shape requires the right tools and consistent upkeep. I personally swear by a high-quality moisture meter like the Tramex CME4, which allows me to accurately assess subfloor moisture content before doing any repairs or installations. Using a digital caliper ensures precise measurements when leveling uneven surfaces—small differences can make a big impact on long-term durability. Additionally, a good floor roller helps seat adhesive properly, preventing future gaps and noise. For a detailed approach, check out this expert guide on floor leveling techniques.
In terms of ongoing maintenance, investing in a dedicated vacuum with a soft brush attachment minimizes debris buildup that can cause scratches or wear. Regularly inspecting for loose tiles or creaky spots allows you to catch issues early before they escalate. As flooring materials evolve, so do the tools—trend forecasts suggest that smart sensors integrated into subfloor panels might soon provide real-time feedback on moisture and stress levels, enabling preemptive repairs and scaling. It’s essential to stay ahead of such innovations to optimize repair longevity and installation efficiency.
Premium equipment I recommend for flooring projects
I rely on a cordless oscillating multi-tool for scraping off old adhesive or removing damaged sections without damaging surrounding surfaces. Its versatility saves time and reduces the need for multiple specialized tools. For leveling compounds, I prefer the rapid-setting variants that cure within 4-6 hours, allowing me to finish projects faster. When it comes to measuring floor flatness, laser levels like the Bosch GLL3-330CG provide exceptional accuracy and align with industry best practices, helping me achieve truly flat surfaces essential for hardwood or tile installation. These tools form the backbone of my toolkit and have proved invaluable over countless projects.
The future of flooring maintenance and scaling
Technological integration, particularly IoT-enabled sensors, promises to revolutionize how we monitor and maintain floors in the coming years. Predictive analytics derived from sensor data will alert homeowners and professionals about potential issues before symptoms manifest—saving money and extending floor life. Scaling operations will also benefit from modular leveling systems that adapt dynamically to subfloor imperfections, making large-scale projects more efficient and less prone to errors. Staying updated with these innovations will be crucial for any professional aiming to keep pace in this evolving industry.
Ready to step up your flooring game?
Apply one of these advanced tips today—try out a laser level like the Bosch GLL3-330CG to ensure perfect flatness for your next hardwood or tile project. Precise leveling is the foundation of flawless flooring and long-lasting results. For more insights or to discuss specific challenges, don’t hesitate to reach out.
What the Quietest Floors Have Taught Me About Precision
One of the most unexpected lessons I learned was that meticulous subfloor inspection can prevent a lifetime of squeaks and clicks. Early in my career, I underestimated the importance of minor imperfections—thinking they were negligible. Now, I know that tiny bumps or dips can lead to persistent noise issues, and taking the time to address them pays dividends in long-term satisfaction. This insight has transformed my approach, ensuring every project starts with a flawless foundation.
My Go-To Tools for Flawless Flooring Outcomes
Over the years, I’ve curated a toolkit that saves me countless hours and guarantees quality results. A laser level like the Bosch GLL3-330CG helps me achieve perfect flatness, minimizing the risk of clicking or buckling. A high-quality moisture meter ensures that moisture levels are properly controlled before installation, preventing future expansion or contraction issues. And a sturdy floor roller is essential for secure adhesive application and eliminating trapped air. These tools, combined with a commitment to best practices, consistently elevate my flooring projects beyond expectations.
Taking Action for Peaceful, Durable Floors
The journey to quieter, longer-lasting floors begins with embracing thorough preparation and continuous learning. Investing in proper acclimation, precise leveling, and quality materials will set your project up for success. Remember, every squeak avoided and click silenced adds value and comfort to your home. So, why not start implementing these proven techniques today? Your future self—and your neighbors—will thank you.
What steps have you taken to ensure your flooring remains silent and durable? Share your experiences below—I’d love to hear what has worked for you!
**