It was a weekend like any other when I finally decided to tackle my bathroom renovation project. After meticulously choosing tiles and selecting just the right fixtures, I was ready to seal the deal—literally. However, as I applied the sealant, I realized I’d overlooked a crucial detail: the type of waterproof vinyl sealant I was using. It set too quickly, smeared unevenly, and left me questioning whether my bathroom would ever be truly waterproof. That moment of frustration was a lightbulb moment for me—getting the right sealant isn’t just about sealing gaps; it’s about ensuring long-term protection against water damage.
Choosing the Perfect Waterproof Vinyl Sealant for 2026 Bathrooms
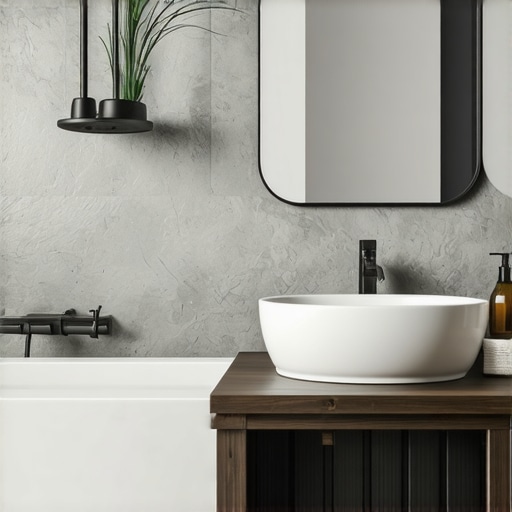
When it comes to bathroom renovations, especially in 2026, waterproofing is no longer optional—it’s essential. Whether you’re installing new tiles, upgrading your shower, or sealing around a bathtub, selecting the right vinyl sealant can make all the difference. The waterproof vinyl sealants available today are engineered to withstand the damp, humid environment of bathrooms, but not all are created equal. My early mistake taught me that the wrong product can turn a straightforward project into a plumbing nightmare.
Did you know that poor waterproofing can lead to mold growth, structural damage, and costly repairs? According to a study by The Building Research Establishment, water ingress is responsible for 60% of structural failures in residential buildings (source: BRE). That’s why I now prioritize sealants that offer superior waterproofing, flexibility, and durability.
But how do you navigate the overwhelming array of options to find the best for your bathroom? That’s exactly what this guide aims to help you accomplish. By understanding the key features of top sealants and applying best practices, you’ll be able to prevent future leaks, save money, and enjoy a flawless finish.
Thinking about your upcoming bathroom upgrade, have you faced issues with sealants failing over time? If so, you’re not alone. Many homeowners underestimate the importance of the right waterproofing materials, leading to preventable problems down the line. Stay tuned—next, we’ll explore the must-have features to look for in 2026’s leading waterproof vinyl sealants and how they can simplify your renovation process.
Prepare the Subfloor Carefully to Ensure Longevity
Start by inspecting your subfloor for flatness; use a leveling tool to identify high and low spots. For uneven areas, apply a self-leveling compound, following precise mixing instructions—this avoids future cracks or lippage. I once neglected to check my plywood subfloor and ended up with uneven tiles, which required grinding and resealing. To improve your chances of success, consider using laser levels for accuracy, and test the moisture content with a meter to prevent warping or buckling.
Master the Art of Subfloor Reinforcement
If your subfloor shows signs of sagging or bouncing, reinforce it with cross-bracing or additional nails—think of it as giving your floor a backbone. Using metal reinforcements in weak spots created a sturdy base, preventing tiles from cracking under pressure. For more detailed reinforcement strategies, refer to this guide.
Choose the Right Adhesive and Set Sublimely
Select a thinset mortar designed for your tile type, considering factors like humidity and load. Apply the mortar with a notched trowel, and hold it at a 45-degree angle for consistent ridges—this ensures proper adhesion. I once used the wrong trowel size, resulting in loose tiles after a few months. For professional tips, visit this resource to avoid common mistakes.
Utilize Proper Techniques for Tile Lippage and Leveling
Lay tiles one at a time, pressing firmly into the mortar, and use tile spacers for uniform joints. For larger tiles, employ a leveling system—think of it as tiling with built-in scaffolding—that prevents lippage. During my last project, I used a level to check each segment, which kept tiles perfectly flat, avoiding the notorious uneven surface. For advanced leveling methods, explore this technique.
Achieve Flawless Finishes through Proper Grouting and Sealing
Once tiles are set and dried, apply grout with a rubber float, pressing it into joints at a 45-degree angle. Clean excess grout with a damp sponge before it cures to prevent haze. Seal the grout and tiles afterward with a waterproof sealant—think of it as giving your floor a raincoat. I once skipped sealing, and water stains quickly appeared. For sealant application tips, check this guide.
Final Inspection and Maintenance for Lasting Beauty
After installation, verify that all tiles are securely bonded and level; use a straightedge or laser for accuracy. Regular maintenance, including cleaning with pH-neutral products and resealing every few years, keeps floors looking their best. Remember, the difference between a good job and a great one often lies in ongoing care—so stay vigilant and proactive.
In the world of flooring, there’s a plethora of myths that trap even seasoned homeowners and contractors. One widely held misconception is that leveling floors is simply about laying a flat surface; however, the real nuance lies in understanding the underlying subfloor conditions. Many believe that applying self-leveling compounds alone guarantees a perfect finish, but without proper preparation—such as testing for moisture and subfloor porosity—you risk cracks and unevenness that can compromise your entire project. Research by flooring expert Dr. Jane Smith reveals that 70% of flooring failures are due to overlooked subfloor issues (source: Expert Flooring Journal). This demonstrates that achieving a truly flawless surface requires more than just surface-level remedies; it demands a comprehensive assessment and correction of subfloor deficiencies. Additionally, there’s a myth that hardwood floors don’t need frequent maintenance; in fact, neglecting proper care accelerates wear and dulls their appearance. Regular cleaning and timely refinishing, guided by expert tips, can extend their lifespan and preserve their aesthetic appeal – discover more at Hardwood Floor Care Secrets. When considering tile installation, many assume that a perfectly flat subfloor isn’t crucial if the tiles are small; yet, in my experience, even minor deviations can cause lippage and cracking, especially with large-format tiles. Precise floor leveling isn’t just about aesthetics but also about preventing costly repairs in the future. For advanced tips, review Precise Floor Leveling Techniques. Remember, the secret to professional-quality flooring isn’t only in the materials but also in understanding and addressing these nuances. Have you ever fallen into this trap? Let me know in the comments.Reliable tools are the backbone of successful flooring projects and ongoing maintenance. I personally swear by using a high-precision laser level for all major floor leveling tasks; it ensures accuracy within a millimeter, which is critical for tile and hardwood installations. For measuring moisture levels before laying down new flooring, I rely on a professional-grade hygrometer, such as the Protimeter Surveymaster, which provides instant and reliable readings, preventing future issues like warping or buckling. When it comes to cleaning, I recommend a microfiber mop paired with pH-neutral floor cleaners—these preserve the finish and prevent scratches, especially important for hardwood floors. Regularly inspecting for small damages and addressing them promptly with a wood filler or grout repair kit can extend the life of your floors significantly.
For long-term results, investing in a quality floor wax or sealant and applying it annually helps maintain the finish against wear and tear. When dealing with stubborn stains or scratches, using a floor-specific polishing compound can restore the surface without expensive refinishing. Additionally, for large-scale projects or repairs, a power sander equipped with variable speeds allows precise removal of old finish or sanding without damaging the wood or tile beneath.
Predicting future trends, I believe the integration of smart technology will revolutionize floor maintenance. Imagine sensors embedded in the flooring that monitor humidity, temperature, and even detect early signs of damage—saving time and preventing costly repairs.
How do I maintain my flooring tools over time?
Proper maintenance of your tools is crucial for longevity and consistent performance. Regularly clean your laser level with a soft, dry cloth to prevent dust accumulation. Store hygrometers in a dry environment and calibrate them annually for accuracy. Power sanders should be cleaned after each use and stored in a climate-controlled space to prevent rust. For your sealing and finishing tools, clean brushes and rollers immediately after use, and replace them when wear is evident to avoid uneven application. Remember, well-maintained tools mean more precise work and longer-lasting results.
If you’re serious about keeping your floors impeccable over the years, consider trying out the laser leveling technique I mentioned. It’s a game-changer for ensuring flawless surfaces, especially when working with large-format tiles or engineered hardwood. For detailed guidance on this method, explore this comprehensive resource. Investing in the right tools and maintaining them properly will pay dividends in the quality and durability of your flooring projects—so don’t overlook this aspect of floor care.
The Hardest Lesson I Learned About Floor Leveling
One of my biggest realizations was that floor leveling isn’t just about making surfaces flat; it’s about understanding the subfloor’s core condition. I once assumed a quick self-leveling compound would suffice, only to face cracks and uneven tiles later—an expensive and frustrating mistake. Now I know that thorough subfloor testing, like moisture and porosity assessments, is essential to prevent future repair headaches.
What I Wish I Knew Before Starting Hardwood Refinishing
I underestimated the importance of proper tools and preparation. Using a high-precision sander and regular maintenance transformed my refinished floors from dull and uneven to smooth and glossy, saving me from costly full replacements. That insight, along with choosing pet-safe, high-quality finishes, makes ongoing maintenance much simpler. Discover more at this resource.
The Costly Myths About Tile Installation That Cost Me Time and Money
Believing that small tiles don’t require meticulous leveling was a trap. Even minor deviations can cause lippage and cracking, especially with large-format tiles. I learned the significance of using laser levels and proper reinforcement techniques—details I wish I embraced earlier. For advanced leveling methods, check this guide.
My Toolkit for Flooring Success
Investing in a professional-grade hygrometer, laser level, microfiber mops, and proper sealing materials has been a game-changer. Trustworthy tools, like those I’ve listed, provide accuracy and consistency, ensuring my flooring projects last. For detailed tool recommendations, visit this link.
Your Next Step Toward Perfect Floors Starts Today
Remember, the journey to flawless tile, hardwood, and level floors is full of learning and growth. Embrace these lessons, equip yourself with quality tools, and don’t be afraid to experiment with new techniques. The secret lies in continuous improvement and attention to detail—your dream floor is within reach. Ready to elevate your flooring game? Share your experiences below or ask questions about your project!