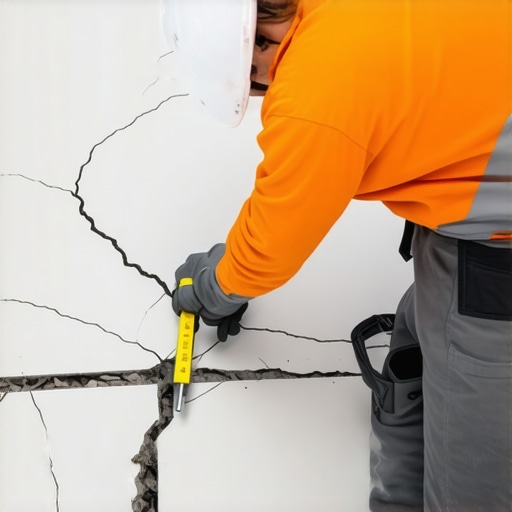
I remember the moment vividly. I was in the middle of a bathroom renovation, tile perfectly laid—until I noticed a tiny crack snaking across the surface. Suddenly, my heart sank. That crack wasn’t just a flaw; it was a sign of a deeper problem—unstable subfloor and uneven leveling that I overlooked. It was a lightbulb moment for me, realizing that the secret to durable, crack-free tiles lies in understanding a simple, yet often ignored, rule: the 3-foot leveling guideline.
Why Proper Floor Leveling Can Make or Break Your Tiling Project
Every seasoned installer knows that a level surface isn’t just about aesthetics; it’s about preventing future issues like cracks, lippage, and dislodging tiles. Without a solid foundation, even the most carefully laid tiles can develop issues over time, leading to costly repairs and frustration. In fact, a study by the Ceramic Tile Education Foundation highlights that improper subfloor preparation is one of the leading causes of tile failure within the first few years of installation. This makes understanding and applying the correct leveling techniques essential for any successful flooring project. Learn more about achieving perfect floor leveling.
Have You Faced This Issue Before?
If you’ve ever installed tiles only to find them cracking or feeling uneven, then this article is for you. I’ll share insights from my own beginner mistakes and how mastering the 3-foot rule revolutionized my approach. Trust me, once you grasp this concept, you’ll set your project up for lasting success. Ready to dive into the practical steps? Let’s explore how to make sure your floors are truly level and prepared for tile, hardwood, or any other flooring you choose.
Start with Accurate Subfloor Testing
Before laying any flooring, you must assess the subfloor’s flatness. Use a long, straight edge—a 6-foot level works well—and place it across different areas of the surface. Look for gaps or rocking that indicate unevenness. I once neglected this step and started tiling over a wavy surface; the tiles cracked despite my best efforts. Testing early reveals high spots and dips, guiding you where to focus your leveling efforts. For precise results, consider laser level tools that can detect subtle irregularities, especially in larger areas. To ensure thoroughness, run multiple tests in different directions, as subfloors might be uneven in one axis but stable in another. This step sets the foundation for everything that follows. For detailed methods, see our guide on subfloor flatness tests.
Prepare a Stable & Even Base
Clean the Surface Deeply
Remove all debris, dust, and residues that can interfere with leveling compounds or adhesives. A thorough cleaning with a vacuum and damp mop ensures a clean slate. During my project, I used a shop vacuum to clean crevices and then wiped the surface with a damp cloth, which significantly improved bond strength and minimized future problems. Skipping this step can lead to voids in the leveling compound, causing uneven settling and tile lippage.
Patch imperfections with Repair Mortar
Fill low spots or cracks with a high-quality patching compound, following manufacturer instructions. This improves surface uniformity, preventing future cracking or shifting. I once tried to skip patching a large dip—resulting in a lopsided tile installation that I had to redo. Allow patches to cure fully before proceeding, typically 24 hours, to ensure stability.
Apply Followed by Leveling for a Perfect Finish
Mix a self-leveling compound according to product instructions. When pouring, start from the highest point and let gravity do the work—spread the mixture gently with a gauge rake if needed. During one of my early attempts, I poured too quickly and it pooled unevenly, causing additional smoothing work. To prevent this, work in manageable sections and use a gauge rake to distribute the compound evenly. After pouring, guide it with a screed or straightedge to level the surface. Use a long straightedge—like a 4-foot wooden board—that spans the area to catch high spots and fill dips. If you encounter stubborn low spots, apply more leveling compound in layers, allowing each to cure before proceeding.
During my last project, I worked systematically—testing, patching, and pouring in stages—which resulted in a flawlessly level surface. For intricate areas or large surfaces, consider a laser-guided leveling system to save time and ensure accuracy. Once the surface is smooth and level, you can proceed with tile or hardwood installation. For expert tips on finishing the top layer, consult our article on precise leveling techniques.
While many believe that a quick pour of self-leveling compound guarantees a flawlessly flat floor, the reality is more nuanced. The secret to successful flooring—be it tile, hardwood, or vinyl—lies in understanding the complexities of substrate preparation and layer interactions. Rushing through surface prep or neglecting specific subfloor conditions can lead to issues like lippage, cracking, or even long-term instability. For instance, improperly assessed moisture levels can cause adhesives to fail or wood to warp over time, a mistake often overlooked by DIYers eager to move forward. Advanced experts recommend performing comprehensive moisture and porosity tests (learn more about testing) before application—many installers skip this critical step, assuming standard procedures suffice. The myth that all subfloors are compatible with any flooring type can trap homeowners into costly repairs; each surface demands tailored solutions and specific products. Moreover, novice installers often underestimate the importance of integrating proper expansion joints, especially with large-format tiles or wide plank hardwoods, which can expand and contract significantly. The details in the layering and joint placement prevent issues like buckling or cracking under temperature fluctuations. As noted by flooring experts, “Ignoring subtle substrate variations or the need for reinforcement can undermine even the best adhesives and finishes” (see common mistakes). Recognizing these nuances and avoiding the typical traps transforms your project from a gamble into a durable, professional-quality installation. Remember, effective floor leveling isn’t just about pouring leveling compounds; it’s about understanding the underlying science and adapting your approach accordingly. Have you ever fallen into this trap? Let me know in the comments and share your experiences or questions about advanced floor prep techniques.
How do I keep my floors in top shape over time?
Maintaining one’s flooring, especially after a professional installation or a thorough DIY project, is crucial for ensuring long-term durability and aesthetic appeal. I’ve found that investing in the right tools and adopting a routine maintenance plan makes all the difference. First, a high-quality vibration mop or microfiber dust mop is indispensable for daily cleaning. Unlike traditional brooms, these tools trap fine dust and debris without scratching delicate surfaces such as hardwood or tile. Personally, I prefer the microfiber mop because it minimizes dust dispersal and provides a gentle, thorough clean, reducing wear over the years.
For more deep cleaning, a steam cleaner designed for floors can be effective for certain types like tile and sealed hardwood. It sanitizes without harsh chemicals, which is especially beneficial for households with pets or children. However, always check the manufacturer’s guidance to avoid moisture issues, as excessive water can damage unsealed wood or porous substrates. Additionally, applying a suitable protective finish or wax periodically preserves the surface and enhances shine. For hardwood, I recommend periodic refinishing using a product like professional-grade hardwood refinishing kits, which can be used to freshen up the floor without a full sanding process.
Underlying all these routines is the importance of monitoring moisture levels in your subfloor and environment. Moisture can cause wood to warp or tiles to loosen over time. Using a moisture meter or hygrometer periodically helps catch issues before they escalate. For example, in high-humidity areas, I recommend installing a dehumidifier or upgrading to moisture-resistant flooring options, as discussed in our guide on hardwood floor care; this proactive approach pays dividends in longevity.
Tools I Recommend for Effective Maintenance
Investing in the right equipment is essential: a laser level, for precise calibration of surface flatness, is invaluable for detecting subtle dips that might trap dirt or cause uneven wear. I personally use a professional-grade laser level that projects a bright, continuous line over large surfaces, making it easier to identify problem spots early. Additionally, a handheld vacuum designed for hardwood and tile prevents scratches and ensures debris removal without damaging surfaces. Don’t underestimate the importance of quality buffers and polishers; they help restore shine after cleaning and can be used to maintain the finish—crucial for high-traffic areas.
To keep your floors looking pristine longer, consider implementing a regular inspection schedule. Check for signs of wear, scratches, or moisture intrusion every few months. Catching issues early can save you significant repair costs down the line. For detailed techniques, review our article on long-term flooring upkeep. As technology advances, I predict smarter moisture sensors and automated cleaning devices will become more commonplace, making maintenance more effortless and effective for homeowners.
Future Trends in Floor Maintenance
Looking ahead, the integration of IoT (Internet of Things) devices into flooring maintenance is an exciting development. These sensors can continuously monitor environmental conditions, alerting homeowners to potential issues like rising moisture levels or temperature fluctuations that could jeopardize your investment. Think of it as having a proactive health monitor for your floors. By leveraging such innovations, you can significantly extend the lifespan of your flooring and retain its beauty for generations to come. Don’t hesitate to try incorporating a moisture sensor into your maintenance routine—it’s an advanced step that pays off over time.
Lessons No One Tells You About the 3-Foot Rule
One of the biggest revelations in my flooring journey was understanding how crucial the 3-foot leveling guideline truly is. Early on, I assumed that a quick pour of leveling compound would suffice, but I learned that meticulous testing and patience are key to avoiding cracks and lippage. The lightbulb moment was realizing that the smallest dips, invisible to the naked eye, can cause long-term problems if overlooked.
Why Skipping the Prep Stage Can Cost You Big
I’ve learned that rushing into tile or hardwood installation without thorough subfloor testing and preparation often leads to costly mistakes. Proper cleaning, patching imperfections, and ensuring moisture levels are within limits are steps I now never skip. These details—though seemingly minor—build the foundation for a long-lasting, crack-free surface.
Embrace Advanced Tools and Techniques
Using laser levels and moisture meters transformed my approach. These tools provided precise data, guiding my decisions and saving time. Trusting technology not only boosts confidence but also elevates the quality of the final result. Incorporating these tools into your project can make the difference between a good job and a professional finish.
The Role of Continuous Learning and Adaptation
Throughout my projects, I discovered that each flooring challenge taught me something new. Staying updated with industry advancements and being willing to adjust techniques is essential. Remember, what worked yesterday might not be enough tomorrow—embrace innovation and keep refining your craft.
Resources That Amp Up Your Flooring Skills
Over the years, I’ve relied on trusted resources like comprehensive guides on floor leveling and expert tips for hardwood refinishing to deepen my knowledge. Investing in quality tools, tutorials, and industry updates has been invaluable. These resources empower you to tackle challenges confidently and ensure your flooring stands the test of time.
Don’t Wait—Your Perfect Floor Is Within Reach
Embrace the learning curve and take proactive steps toward mastering floor leveling. Each project is an opportunity to improve, and with a detail-oriented mindset, you can achieve stunning, durable results. Your floors will thank you, and you’ll enjoy the satisfaction of a professional-grade finish that lasts for years.
What was the most surprising lesson you learned about floor leveling or installation? Share your insights below—I’d love to hear your stories and tips!