
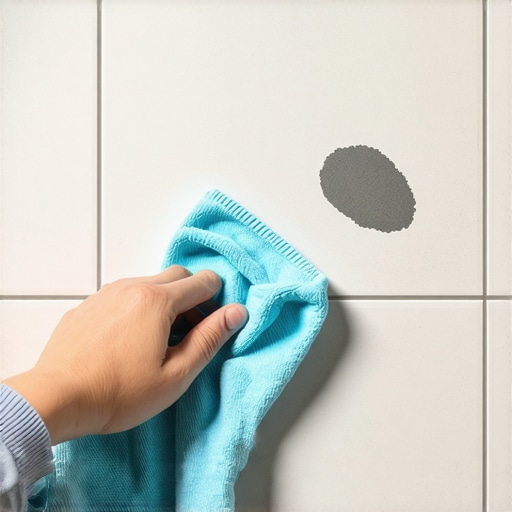
I remember the exact moment I realized my “low-maintenance” matte porcelain floors were actually going to be my biggest headache. It was 6:00 PM on a Tuesday, and the setting sun was hitting the floor at just the right angle to reveal a series of ugly, dark streaks near the entryway. I had spent a fortune choosing the perfect tile, thinking that matte finish hides scratches better than high-gloss, but nobody warned me about the rubber scuff marks. I felt defeated. My pristine kitchen looked like a middle school gymnasium after a basketball tournament. I grabbed a sponge and some dish soap, thinking it would be a five-minute fix, but I only made it worse. Stop using dish soap on your floors immediately; it creates a sticky residue that actually traps more grime and makes the scuffs look like they are under a layer of plastic. Today, I am going to share the exact method I used to restore my floors without ruining the finish or spending hours on my hands and knees.
Why Your Matte Floor Feels Like a Magnet for Rubber
Matte porcelain is a bit of a contradiction. It is incredibly durable and slip-resistant, which is why it is often the first choice when people are choosing the best tile for an upgrade. However, that same slip-resistant texture is what causes the trouble. Unlike high-gloss tiles, matte porcelain has a microscopic texture—a series of tiny peaks and valleys. When a shoe sole or a furniture leg drags across it, the tile acts like a very fine piece of sandpaper, shaving off a tiny amount of the rubber or plastic and trapping it in those microscopic valleys. According to the Tile Council of North America, porcelain tiles are fired at higher temperatures than ceramic, making them denser, but the surface finish determines how easily it releases foreign materials. This density is great for longevity, but it means you cannot just “buff” a scuff out like you would with hardwood floor care routines. You have to chemically or mechanically lift the rubber out of those tiny crevices.
Is a specialized cleaner actually necessary?
You might be skeptical—I certainly was. I thought the “experts” were just trying to sell me expensive bottles of pH-neutral chemicals. I spent a week trying vinegar (which is too acidic) and baking soda (which can be too abrasive if you aren’t careful). The truth is, while you don’t always need a branded bottle, you do need to understand the chemistry of what you are putting on your floor. If you use the wrong product, you risk stripping the factory sealer or creating a permanent haze that no amount of scrubbing will fix. Have you ever tried a ‘miracle’ cleaning hack only to find it left a giant dull spot on your tile? I want to hear about it in the comments below because, trust me, I’ve likely made that same mistake too. We are in this together, and the goal is to get your home back to looking like the showroom it was meant to be.
Start with the Tennis Ball Trick
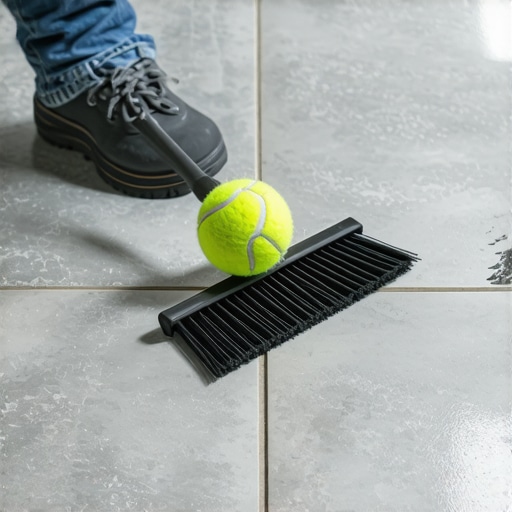
Before you reach for heavy chemicals, go to your garage and find a clean tennis ball. It sounds like a joke, but it is the most effective way to handle top-level scuffs without damaging the tile. Think of the rubber scuff mark like a pencil drawing on a textured wall; the tennis ball acts as a giant eraser. The fuzzy texture of the ball reaches into those microscopic valleys of the matte finish and grabs the rubber particles. I usually cut a small ‘X’ in the ball and pop it onto the end of a broom handle so I do not have to bend over. Use firm, circular pressure directly on the mark. Unlike hardwood floor care secrets to longevity and shine, where you have to worry about scratching a delicate finish, matte porcelain can handle this physical friction quite well.
If the tennis ball does not do the trick, you are likely dealing with a scuff that has been ‘heat-set’ into the tile. This happens when the friction of the shoe was so intense it partially melted the rubber into the surface. In these cases, you need to break the bond. I found out the hard way that aggressive scrubbing with a green abrasive pad is a recipe for disaster. Last year, I tried to scrub a stubborn mark near my mudroom and ended up creating a ‘halo’—a permanent change in the tile’s sheen that is visible every time the light hits it. Instead, use a 70% isopropyl alcohol solution. Dampen a microfiber cloth and let it sit on the scuff for 60 seconds to soften the rubber before gently wiping. This is a much safer alternative than the the mineral spirits trick for removing dried grout haze, which can be too aggressive for daily maintenance.
Break Down the Rubber Bonds with Targeted Solvents
If alcohol fails, you might be tempted to go back to the kitchen sink. Please, stop using dish soap on your floors. The surfactants in dish soap are designed to cling to grease, and on a matte floor, they just create a sticky film that makes future scuffs even harder to remove. Instead, look for a pH-neutral intensive cleaner designed for porcelain. The goal is to ‘lift’ rather than ‘dissolve’. You want a product that gets under the rubber. When I was dealing with a particularly nasty set of black marks from some new work boots, I used a specialized alkaline cleaner diluted at a 1:10 ratio. I applied it with a soft-bristled brush, worked it into the texture, and then—this is the vital part—rinsed it with distilled water. If you leave the cleaner to dry, you are just trading a scuff for a chemical smudge.
Stop the Scuffs Before They Happen
Often, the reason a floor catches every single shoe mark is that the tiles are not perfectly level. If one tile edge sits slightly higher than the neighbor, it acts as a ‘blade’ that shaves rubber off every shoe that passes over it. If you are in the middle of a renovation, understanding flooring installation fundamentals leveling for a seamless look is the best preventative medicine. For those already living with the floor, check for ‘lippage’. If you find a high edge, you may need to look into the secret to installing large format tile without lippage for your next project. For your current floor, placing a high-quality walk-off mat at every entrance is non-negotiable. It catches the grit and softens the impact of shoe soles before they even reach your porcelain, saving you hours of scrubbing later.
I see it every single weekend in the DIY forums: homeowners wondering why self-leveling compounds bubbled over your subfloor after they spent hundreds on premium product. The biggest myth in the flooring industry is the name itself. ‘Self-leveling’ implies you can just pour the liquid and walk away while gravity does the work. In my experience, that is exactly how you end up with a topographical map of ridges and craters instead of a glassy surface. The truth is that leveler is lazy. It wants to stay exactly where you pour it unless you mechanically coerce it into the corners. If you aren’t mastering floor leveling pro secrets like using a gauge rake to set the depth, you are essentially just guessing with a very expensive puddle.
Why is your subfloor still failing even after a pour?
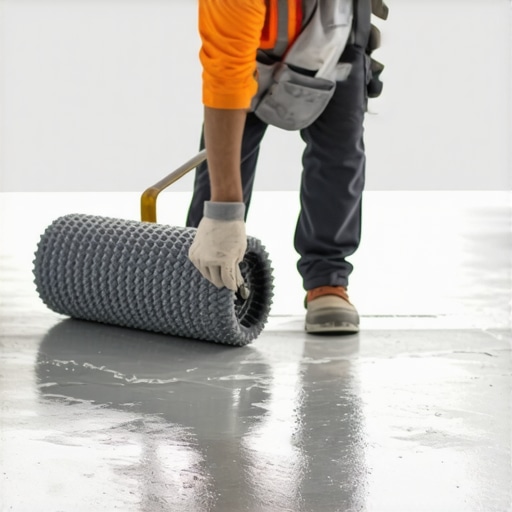
It often comes down to the invisible enemy: surface tension and air. According to the National Wood Flooring Association (NWFA), a subfloor must be flat within 1/8 inch over a 10-foot span for most modern installs. Most people fail this because they treat the leveler like pancake batter. If you don’t use the spiky roller secret for a mirror smooth pour, the air trapped in the mixture will stay there, creating tiny volcanoes that pop and leave pinholes. These pinholes aren’t just ugly; they are structural weak points. When you eventually lay your tile, the thinset won’t bond correctly to those aerated spots, leading to the dreaded ‘hollow’ sound when you walk across the room.
The ‘Oops’ factor usually starts at the drill. Most people grab the same paddle they use for drywall mud and crank it to full speed. This is a massive mistake. Using the wrong mixing paddle speed that ruins your leveling compound introduces millions of microscopic bubbles into the slurry. I once watched a friend mix three bags at high speed, only to have the entire floor look like a piece of Swiss cheese by morning. You need a high-torque, low-RPM mix. It takes longer, but it ensures the chemical polymers stay intact. Also, never skip the primer. Without it, the dry subfloor will suck the moisture out of the leveler so fast that it won’t have time to flow, leaving you with ‘cold joints’ where two different pours meet but don’t fuse. Have you ever fallen into this trap and ended up with a floor that looked worse after you ‘leveled’ it? Let me know in the comments because I have spent many nights grinding down those mistakes.
Stop Guessing and Start Measuring for a Decade-Proof Floor
If I could go back and give my younger self one piece of advice, it wouldn’t be about the tile color or the grout shade—it would be about the equipment I ignored. I used to think a moisture meter was a luxury for high-end contractors, but after seeing a friend’s luxury vinyl click-lock fail because of a damp slab, I realized how to use a moisture meter to prevent floor failure is the single most important skill you can learn. Even if your concrete feels dry to the touch, it can still be ‘sweating’ underneath your beautiful new floor. The NWFA (National Wood Flooring Association) technical guidelines explicitly state that wood flooring should only be installed when the subfloor moisture is within 2-4% of the flooring’s moisture content—skipping this check is essentially gambling with your bank account.
How do I maintain my floor’s integrity year after year?
Maintenance isn’t just about cleaning; it’s about respect for the material. For those of you with wood, please stop using vinegar on your hardwood floors immediately. The acid eventually eats through the polyurethane, leaving the wood vulnerable to spills. Instead, focus on the hardwood floor care secrets to longevity and shine that rely on pH-neutral cleaners and micro-fiber dusters. If you are dealing with radiant heat, you must strictly follow the expansion gap rule for radiant heated wood floors. I’ve seen beautiful installs buckle in February because the homeowner didn’t leave enough room for the wood to move when the heat kicked on. 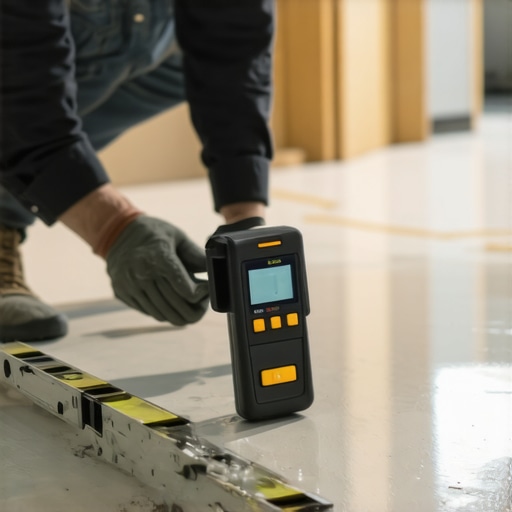
Where We Are Going With Smart Leveling Technology
Looking ahead, I predict we are going to see a massive shift toward ‘smart’ leveling compounds. We are already seeing polymers that change color when they reach the perfect curing point, and I expect AI-integrated laser systems to become affordable for the average DIYer within the next few years. These systems will map your subfloor in 3D and tell you exactly where your low spots are, eliminating the need for the chalk dust secret for finding low spots in subfloors. Until then, we rely on the fundamentals. My biggest pro tip for scaling your skills is to stop treating every room as a separate project. Start looking at the transition points. If you can learn how to get a seamless look with different flooring types, you increase the value of your home exponentially. I want you to go grab a simple 4-foot level today and walk your kitchen. Find the highest point. Once you know where the problem is, you’re halfway to fixing it. Drop a photo of your most challenging subfloor in the community tab—I’d love to help you troubleshoot the next step!
What Five Years of Scrubbing Taught Me About Matte Tile
Reflecting on my journey from frustrated homeowner to flooring enthusiast, I’ve realized that matte porcelain is often misunderstood. Here are the three truths I wish someone had told me before I laid my first tile: First, texture is a trade-off. While it provides incredible slip resistance, it also requires you to understand the chemistry of cleaning. Second, light is your best inspector. Always check your work with a grazing light source to spot scuffs or lippage before they become permanent fixtures. Third, the quality of your subfloor determines the life of your finish. I’ve seen many flooring installation mistakes to avoid for lasting results, and most of them start with rushing the prep work. If you don’t respect the leveling process, your beautiful tiles will suffer from uneven wear and stubborn scuffs.
The Precision Toolkit for Your Next Big Project
You don’t need a warehouse full of equipment, but you do need these three essentials to get professional results. I personally never start a project without a reliable moisture meter; learning how to use a moisture meter to prevent floor failure has saved me thousands in potential repairs. Next, if you are tackling a pour, use a specialized roller. The spiky roller secret for a mirror smooth pour is the only way to ensure your leveler doesn’t look like a moonscape. Finally, invest in a concentrated pH-neutral cleaner. It preserves the integrity of your finish far better than any kitchen soap ever could, keeping your hardwood floor care secrets to longevity and shine applicable across different surfaces in your home.
Take the First Step Toward Your Dream Home
Flooring projects can feel overwhelming, but remember that every master installer started with a single, slightly crooked tile. Whether you are battling rubber scuffs on matte porcelain or preparing for a full renovation using installing tiles like a pro step-by-step strategies for 2025, the key is patience and the right information. You now have the techniques to lift the toughest marks and the knowledge to level a subfloor like a veteran. Don’t be afraid to make mistakes—that’s just part of the craft. Your home is a canvas, and with these skills, you are well on your way to creating a masterpiece that lasts for decades. Have you ever encountered a scuff mark or a floor hump that seemed impossible to fix? Let me know in the comments below!