
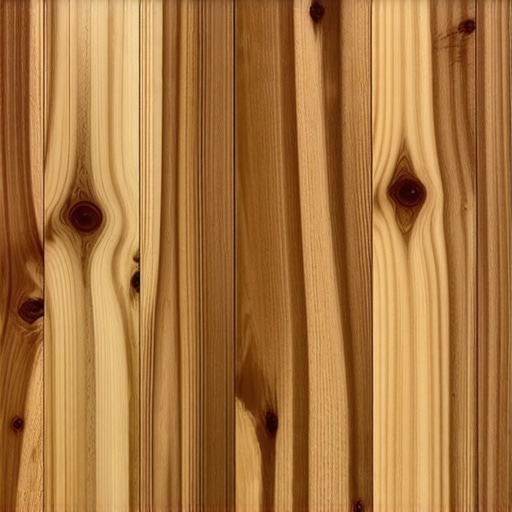
I stood over those fresh pine planks with a brush in one hand and a can of ‘Early American’ in one hand, feeling like a master craftsman about to reveal a masterpiece. Ten minutes later, I wanted to cry. My floor didn’t look like the luxury hardwood I envisioned; it looked like a Dalmatian dog had been through a mud puddle. Some spots were dark as midnight, while others were practically bare, creating a chaotic mess that no amount of wiping could fix. It was a classic case of blotchiness, and if you are staring at your own floor right now wondering what went wrong, I have been exactly where you are. Today, we are going to stop the panic and talk about why this happens and, more importantly, how you can actually get that smooth, professional finish you were promised.
The Day I Turned My Living Room Into a Giant Dalmatian
I made the classic rookie mistake that haunts many DIYers: I assumed wood was like a sponge that absorbs everything equally. Pine is a different beast altogether. Because it is a softwood with varying densities in the grain, it drinks up stain at completely different rates. When I first started, I ignored the flooring installation mistakes to avoid for lasting results and skipped the most crucial prep steps because I was in a hurry to see the color. I ended up with a floor that looked more like a topographical map than a living room surface. I even tried to ‘fix’ it by adding more stain to the light areas, which—spoiler alert—only makes the dark areas darker and the blotchiness more pronounced. According to the Wood Database, pine’s erratic cell structure and high resin content are the primary reasons it rejects uniform staining. To get it right, you have to treat the wood before the pigment even touches the surface, much like how you would handle the secret to getting a perfect finish on reclaimed pine. Have you ever had a project look worse after the stain went on than it did before? I’d love to hear your ‘oh no’ moments in the comments.
Does Pine Always Have to Look This Messy?
Many people think that pine is just a ‘cheap’ wood that can’t look high-end, but that is simply not true. The skepticism usually comes from one bad experience where the stain went on splotchy and stayed that way. The truth is that pine is incredibly rewarding if you respect its porous nature. You aren’t just applying color; you are managing absorption. By following proper hardwood floor care secrets to longevity and shine, you can ensure that your pine floors look sophisticated and even. We are going to dive into the exact sanding grits and conditioners that act as the ‘gatekeepers’ for your stain, ensuring every inch of your floor takes the color exactly the same way.
Get the Sanding Right to Avoid Grain Pop
The foundation of a non-blotchy floor isn’t actually the stain; it’s the sandpaper. Think of your wood surface like a series of microscopic tubes. If you sand too aggressively, you tear those tubes open wide, and they will swallow the stain like a thirsty traveler in the desert. I once tried to save time in a narrow hallway by skipping from 60-grit straight to 120-grit. I thought it looked smooth to the naked eye, but the moment the stain hit, those deep 60-grit scratches lit up like neon signs. To avoid this, you need a progressive sequence—start with 80, move to 100, and finish at 120. If you go much higher than 150 on pine, you run the risk of ‘burnishing’ or sealing the wood with friction, which prevents the stain from sinking in at all. Before you even touch the sander, however, make sure your surface is ready by learning how to measure subfloor flatness before you start installing. If the subfloor is wavy, your sander will hit the high spots harder, creating uneven density before you even open a can of color.
The Secret is the Pre-Stain Gatekeeper
If you take away one thing from this guide, let it be this: never stain pine without a pre-stain conditioner. It acts like a ‘hall monitor’ for the wood’s pores. Without it, the softer ‘early wood’ absorbs 90% of the pigment while the harder ‘late wood’ rejects it. The conditioner partially fills those thirsty pores so that when the stain arrives, it sits more evenly across the surface. When I was working on a project last summer, I applied the conditioner and let it sit for exactly 15 minutes before wiping the excess. If you wait too long, it dries hard and blocks the stain; if you don’t wait long enough, it’s still too wet and dilutes your color. This delicate balance is part of mastering hardwood floor refinishing expert tips for 2025.
Wipe Away Your Splotchy Floor Worries
When it is finally time to apply the pigment, stop thinking like a painter and start thinking like a polisher. You aren’t ‘painting’ the floor; you are massaging the color into the wood and then taking away whatever the wood doesn’t want. Use a high-quality natural bristle brush or a lint-free rag to apply the stain in the direction of the grain. Work in small, manageable 3-foot sections. On that ‘Dalmatian’ floor I mentioned earlier, my mistake was trying to do the whole room at once. By the time I got back to the first corner to wipe the excess, the stain had already ‘tacked up,’ leaving permanent dark streaks. Now, I apply, wait three minutes, and wipe clean. This controlled approach is a staple in any step-by-step guide to flooring installation and leveling success. Also, keep in mind that moisture content matters; if the wood is too damp, the conditioner won’t penetrate. Use a tool to check, specifically following how to use a moisture meter before installing wood floors to ensure the pine is ready to accept the finish. Finally, remember that you will need to protect that hard work later, and part of that process is knowing why you must sand between polyurethane coats to get that glass-smooth final feel.While many DIY guides suggest that pine’s only hurdle is its thirst for stain, the real experts know that the surface prep is only half the battle. Everyone tells you to just pour some self-leveling compound and call it a day if the floor is wavy, but in my experience, that is exactly how you end up with a cracked, expensive mess. The industry calls it ‘self-leveling,’ but a more honest term would be ‘self-smoothing.’ If you don’t manage the substrate first, that liquid magic will simply follow the laws of gravity and pool in places you never intended, leaving you with new high spots and a very light wallet. Have you ever poured leveler only to watch it disappear into a gap you didn’t see? I once watched three bags of high-flow leveler vanish into a hole the size of a nickel, and let me tell you, explaining that to a homeowner is not a fun afternoon. Have you ever fallen into this trap? Let me know in the comments.
The Myth of the Magic Self-Leveler
Many people assume that once you mix the bag and dump it, the hard work is over. This is a dangerous trap. According to the Tile Council of North America (TCNA) Handbook, the most common reason for bond failure isn’t the product itself, but the failure to properly prime the substrate. If you are working over plywood, that wood will suck the moisture out of the leveler so fast it won’t have time to flow. You end up with ‘islands’ of hardened cement that look like a lunar landscape. This is where the best primer for installing leveler over plywood becomes your best friend. Without it, you are effectively setting yourself up for a hollow-sounding floor that will eventually crunch under your feet. Before you pour, you also need to understand how to stop your floor leveler from leaking through the subfloor. Use a high-quality silicone caulk or spray foam to dam up every single crack, or you’ll be cleaning gray soup off your basement furnace.
Why is Your Leveler Setting Up Before You Finish?
This is the advanced reader’s nightmare: the product begins to ‘skin over’ while you are still spreading it. This happens because of improper water ratios or high ambient temperatures, leading to the reason your leveler is setting up too fast. To combat this, pros use a specific tool that most beginners skip. 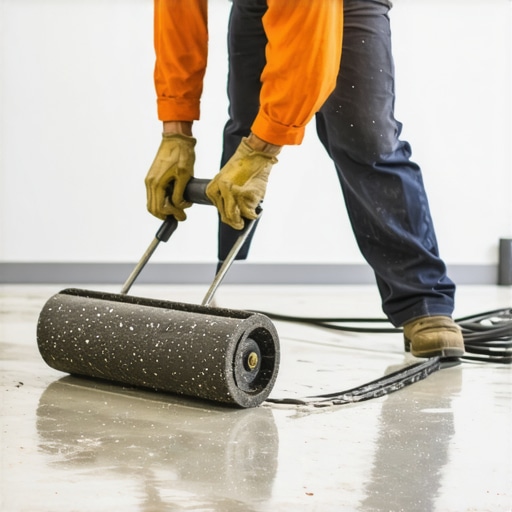 A spiked roller is essential; it breaks the surface tension and releases trapped air bubbles that would otherwise leave tiny craters in your finished floor. If you skip this, you’re not mastering floor leveler pro secrets for perfect installations, you’re just making a bigger mess to sand later. Also, keep an eye out for why your self-leveler is bubbling over plywood, which is usually a sign that air is escaping from the wood fibers and getting trapped in the mix.
The Critical Link Between Subfloors and Finish
It might seem like staining pine and pouring cement leveler are worlds apart, but they both rely on one thing: moisture control. If your subfloor is damp, your self-leveler will peel, and your stain will refuse to dry. This is why precise floor leveling techniques to achieve flawless surfaces always start with a moisture test. If you are moving toward a final look, you have to be meticulous about the transition points. Don’t forget that the one step people skip during waterproof flooring installation is often the most vital—ensuring the perimeter expansion gap is maintained even after the leveling is complete. By following a step-by-step guide to flooring installation and leveling success, you ensure that the effort you put into the beautiful stain on top isn’t ruined by a failure in the foundation below. It’s about building a system, not just applying a coat of paint.Once the leveling compound has cured and that ‘Early American’ stain is finally looking uniform, you might feel like the battle is won. But as someone who has seen a perfect finish ruined by a single humid summer, I can tell you that the real work transitions from labor to management. To keep that floor from shifting or the finish from failing, you need the right kit in your garage. I personally swear by a pinless moisture meter, specifically something like the Wagner Orion series. I use it because it lets me scan the entire floor without leaving tiny pinholes in my fresh pine planks, and it helps me track how the wood reacts to the seasons. This is one of the hardwood floor care secrets to longevity and shine that pros use but rarely talk about. If you are serious about mastering hardwood floor refinishing expert tips for 2025, stop guessing and start measuring. According to the National Wood Flooring Association (NWFA) Technical Manual, maintaining a consistent interior environment between 60 to 80 degrees Fahrenheit and 30% to 50% humidity is the only way to prevent structural failure in softwoods like pine.
Invest in Tools That Save Your Back and Your Finish
I used to think a standard bucket and a stick were enough for mixing leveler, but after a few batches of ‘lumpy’ cement, I switched to a high-torque, variable-speed mixer. You need that slow, consistent churn to avoid whipping air into the mix, which leads to those annoying bubbles I mentioned earlier. If you are tackling a large area, using how to use a spiked roller for the perfect leveling pour is non-negotiable for a glass-like surface. Looking ahead, I predict we are going to see a massive shift toward UV-cured site finishes. This technology, currently used in high-end commercial spaces, allows you to ‘cure’ your floor finish instantly with a specialized light, meaning you can move furniture back in five minutes rather than five days. It’s the future of DIY efficiency.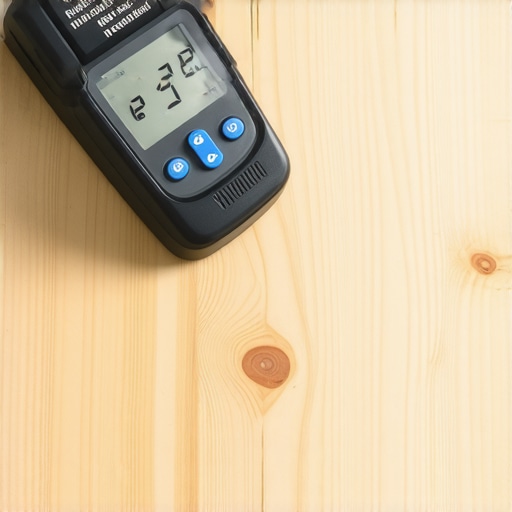
How do I maintain my floor finish over time?
Maintenance isn’t about scrubbing harder; it’s about cleaning smarter. The biggest mistake I see—and I’ve been guilty of it—is using a steam mop. You should learn why you should never use a steam mop on click-lock floors or solid wood; that pressurized moisture will force its way into the grain of your pine and cause it to swell and delaminate the finish. Instead, use a microfiber mop slightly dampened with a pH-neutral cleaner. For those who went the extra mile with the leveling, remember that your tile or wood is only as good as the bond. If you notice a ‘hollow’ sound later on, you might be dealing with why your self-leveler is pulling away from the concrete. Stay proactive by checking your transition strips and expansion gaps every spring. I want you to go grab a moisture meter today; it is the single most important investment you can make to protect the thousands of dollars you just put into your subfloor and finish.
What My Splotchy Living Room Taught Me About Persistence
Refinishing wood isn’t just about the physical labor; it’s about the mental game of staying patient when things look messy. One of the biggest ‘lightbulb moments’ for me was realizing that pine isn’t an enemy to be conquered, but a partner to be understood. If the wood is fighting the stain, it’s usually because I missed a prep step. I’ve learned that a side-lamp—a simple light placed low to the floor—will reveal sanding swirls that you’d never see otherwise. Catching those before you open the stain is the difference between a professional job and a DIY disaster. Also, remember that humidity is the invisible hand that can ruin your day; if it’s raining outside, maybe wait 24 hours before you apply that final coat of poly. It’s these small shifts in mindset that truly lead to mastering hardwood floor refinishing expert tips for 2025.
The Gear That Actually Earns Its Spot in My Garage
I don’t believe in buying every gadget on the shelf, but there are four things I will never start a flooring project without. First, a pinless moisture meter is non-negotiable for tracking the health of your pine without leaving marks. Second, if you’re pouring leveler, a high-torque mixer ensures you don’t end up with ‘cement clumps’ that ruin your flat surface. For the actual leveling process, flooring installation fundamentals leveling for a seamless look requires a spiked roller to keep those bubbles away. Finally, invest in a high-quality natural bristle brush. Those cheap foam brushes fall apart and leave black specks in your stain, which is a nightmare to pick out. I trust these tools because they have personally saved me from having to sand a whole room back down to the bare wood.
Your Weekend Masterpiece Awaits
There is a specific kind of pride that comes from walking across a floor you leveled and finished yourself. It transforms a house into a home when you know every grain and every smooth transition was crafted by your own hands. Don’t let the fear of a few splotches keep you from starting. By following a step-by-step guide to flooring installation and leveling success, you have all the technical knowledge you need to avoid the ‘Dalmatian’ disaster I once faced. Your journey into flooring installation starts with that first piece of 80-grit sandpaper. Go make something beautiful. Have you ever tried to stain a softwood and ended up with unexpected dark spots? Let me know about your project in the comments below!