
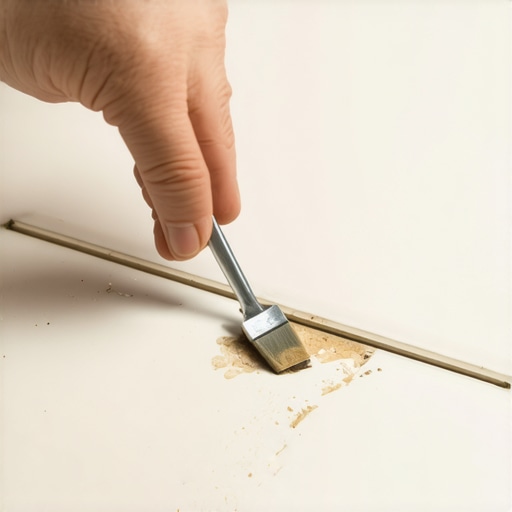
I remember exactly where I was: standing in the kitchen, clutching a cast-iron skillet that felt ten pounds heavier than usual. It slipped. That sickening crack wasn’t the skillet breaking; it was the pristine, charcoal-grey porcelain floor I’d finished installing just months prior. I stared at that bright white crater for three days before I dared to touch it. It felt like the entire room was ruined because of one tiny, jagged hole. If you have ever felt that pit in your stomach after dropping a hammer or a heavy mug, I am here to tell you that the tile isn’t dead. You do not need to tear it out and start over.
Stop Stressing About the Crater in Your Kitchen
Most people think porcelain is indestructible. While it is incredibly dense, its hardness actually makes it more prone to chipping under high-impact force compared to softer materials. I’ve spent years mastering tile installation pointers that save time and money, and one thing I’ve learned is that a repair is almost always better than a replacement if you have the right materials. Epoxy is the secret weapon here. It’s not just a glue; it’s a structural filler that, when tinted correctly, makes that unsightly white spot vanish into the background. I once made the mistake of trying to use a standard hardware store wood putty on a floor chip early in my career. It stayed for exactly two days before the moisture from a mop turned it into a gummy mess that pulled right out. Don’t do that. You need something that bonds to the ceramic structure itself. According to the Tile Council of North America (TCNA), porcelain has a water absorption rate of less than 0.5 percent, which means your repair material has to be incredibly tenacious to actually stick.
Is a DIY epoxy fix actually going to last?
It’s a fair question. You’re walking on this floor, mopping it, and maybe even sliding chairs across it. The skepticism is real. But if you mix your resin and hardener with precision, the bond is often stronger than the surrounding tile. This isn’t a temporary band-aid; it is a permanent restoration. Before you even think about the epoxy, though, make sure your floor isn’t suffering from other issues like a lippage problem in your new tile layout, which can make chips more likely because edges are exposed. Have you ever tried to hide a floor chip with a permanent marker or nail polish, only to have it look even worse? Tell me your most creative (or failed) floor repair stories in the comments below! We are going to walk through the exact steps to get this right the first time.
Scrub the crater until it shines
You cannot skip the prep work. If there is a single microscopic bead of grease or a speck of household dust inside that chip, the epoxy will eventually peel off like a bad sunburn. Grab a soft-bristled toothbrush and some denatured alcohol. Scrub the jagged edges of the hole until the white porcelain body looks bright and sterile. Avoid using soapy water or typical floor cleaners; soap leaves a thin film that acts like a lubricant for the epoxy, preventing a true mechanical bond. It is a similar logic to how to patch a hole in a polished concrete floor—the cleaner the substrate, the tighter the grip. Ensure the area is bone-dry before proceeding, as moisture is the ultimate enemy of a resin-based repair.
Tweak your tones for a stealthy repair
This is the part that scares most people, but it is actually the most rewarding phase of the process. You are not just looking for a generic grey or beige; you are looking for the subtle blue or brown undertones that make your specific tile unique. I once worked on a job where I rushed the color match on a beautiful Carrara-style porcelain, thinking a standard off-white would blend in. I ended up with a yellowish blob that looked like a drop of mustard on a tuxedo. I had to scrape the whole thing out with a dental pick. Now, I always mix my pigment into the resin first—before adding the hardener—so I have an infinite amount of time to get the shade perfect. Use a toothpick to dab a tiny bit of the colored resin onto the tile next to the chip to check the match against the factory finish.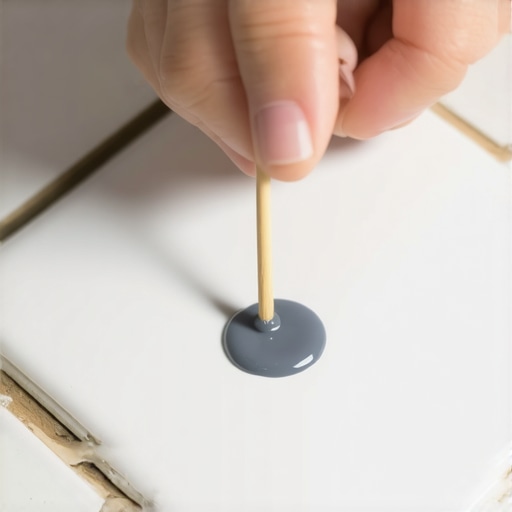
Drop the resin with surgical precision
Once the color is dead-on, mix in your hardener thoroughly. Remember, just like the correct way to mix grout so it does not change color, you need to be precise with your ratios. Over-fill the chip slightly. You want a small dome of epoxy sitting just above the surface of the tile. This accounts for the slight shrinkage that happens as the chemical reaction takes place and the resin cures. If you are working on a floor where you have previously seen flooring installation mistakes to avoid for lasting results, you know that shortcuts during the chemical mixing stage lead to a soft, gummy finish that attracts dirt forever. Use a steady hand and build the material up in thin layers if the hole is deeper than an eighth of an inch.
Shave the excess for a flush finish
Wait until the epoxy reaches a state called leather hard. It should feel firm to the touch but still have a tiny bit of give if you press a fingernail into it—this usually happens about 30 to 60 minutes after mixing, depending on the room temperature. Take a fresh, sharp razor blade and hold it at a 45-degree angle. Gently shave away the top of that epoxy dome until it is perfectly flush with the surrounding tile. If you wait 24 hours until it is fully cured, the material will be as hard as rock, and you will be forced to sand it, which risks scratching the polished glaze of your porcelain. Shaving it while it is semi-soft is the secret to a repair that you cannot even feel with your eyes closed. When you move the blade, use one smooth, continuous stroke rather than a sawing motion to keep the surface as flat as possible.But even the most perfect chip repair can’t hide the structural flaws underneath. A lot of people believe that once the tile is down, the subfloor doesn’t matter anymore. That is a dangerous mistake. In my experience, most floor failures—cracks, chips, and ‘hollow’ sounds—start months before the tile is even buttered.
Stop treating self-leveler like a magic wand
You’ll often hear that self-leveling underlayment (SLU) is ‘liquid gold’ that finds its own level like water in a pond. I’m here to tell you that’s a myth. SLU is actually self-smoothing, not self-leveling. If you don’t help it move, it will sit in a hump right where you poured it. I’ve seen countless DIY projects fail because they didn’t realize the secret to mixing leveler for a glass smooth finish involves more than just a bucket and a whisk. If you don’t use a spiked roller to release surface tension, you’ll end up with ‘islands’ that are higher than the rest of the floor.
Why does a flat floor still lead to tile failure?
You might have a subfloor that looks flat to the eye, but for modern large-format tiles, ‘looks flat’ is a recipe for disaster. The American National Standards Institute (ANSI) specifies in standard A108.02 that for tiles with any side longer than 15 inches, the subfloor flatness cannot vary more than 1/8 inch over 10 feet. If you skip how to measure subfloor flatness before you start installing, your tiles will eventually ‘bridge’ a low spot, creating a hollow void. One heavy footfall later, and you have a fresh crack right through your beautiful porcelain. 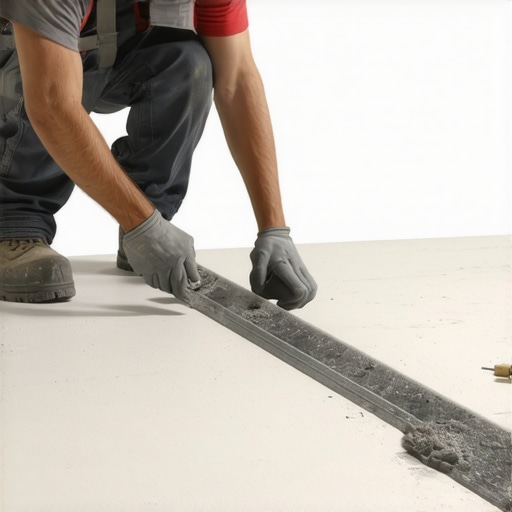
The chemistry trap that kills your bond
Here is the ‘oops’ factor that haunts professionals: the thirst of the subfloor. If you are working over plywood, that wood is a sponge. If you don’t use the correct primer, the plywood will suck the moisture out of your leveler or thinset before it can chemically cure. This is exactly why your self-leveler is bubbling over plywood. Those bubbles aren’t just ugly; they are air pockets where there is no bond. Before you pour a single drop, you must learn how to stop your floor leveler from leaking through the subfloor by sealing every single gap. I once watched a 50-pound bag of expensive leveler disappear through a hole the size of a nickel, raining down onto the homeowner’s furnace in the basement. It was an expensive, messy lesson in preparation. Hardwood floors aren’t immune either; a non-level subfloor causes planks to flex and joints to snap over time. Mastering flooring installation mistakes to avoid for lasting results means looking at the floor as a system, not just a surface. Have you ever fallen into this trap? Let me know in the comments below, and let’s make sure your next install is rock solid.Once you’ve conquered the subfloor and set the tile or laid the planks, the real battle shifts to time. I’ve seen beautiful installs age ten years in just six months because the homeowner treated their floor like a sidewalk. If you want your investment to stay quiet and gap-free, you need to own a moisture meter. I’m serious. I never step onto a job site without my Wagner or Delmhorst pinless meter. It is the only way to know if your wood is actually acclimated or if your subfloor is still hiding moisture from that leveler pour. According to the National Wood Flooring Association (NWFA), wood is a hygroscopic material, meaning it constantly exchanges moisture with the air. If your home’s relative humidity isn’t kept within a specific range, your floor will move, no matter how good your adhesive was. Learning how to use a moisture meter before installing wood floors is the difference between a lifetime warranty and a buckling nightmare.
Trust your tools more than your eyes
I once trusted a ‘dry-to-the-touch’ plywood subfloor in a basement. Two weeks later, the hardwood had cupped so badly it looked like a washboard. Now, I use the moisture meter to verify every square foot. It is also vital to remember that why you should never mop new hardwood for at least two weeks isn’t just a suggestion—it’s a chemical necessity. The finish needs time to fully cross-link and harden. If you introduce water too early, you risk clouding the finish forever. 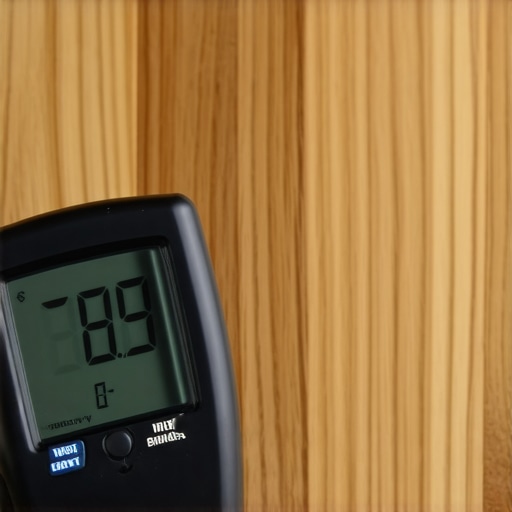
How can you protect your floor’s finish from the daily grind?
Maintenance isn’t just about cleaning; it’s about prevention. I always tell my clients that the most dangerous tool in their house is a steam mop. People love them because they feel ‘sanitary,’ but they are absolute floor killers. I’ve written extensively about why you should never use a steam mop on click-lock floors; that pressurized steam forces moisture into the core of the plank, causing it to swell and delaminate at the seams. Instead, stick to a pH-neutral cleaner and a microfiber pad. For the wood lovers, following hardwood floor care secrets to longevity and shine involves using felt pads on every single piece of furniture—yes, even the small stuff.
Smart sensors are the next big thing
Looking ahead, I predict that ‘analog’ floors are on their way out. Within the next decade, high-end installations will likely feature embedded moisture and temperature sensors within the underlayment that sync to your smart home system. Imagine your floor sending an alert to your phone because a pipe leaked under the cabinets before you even see a puddle. Until then, we rely on manual precision. If you are dealing with an older home, you might need to use the shim trick for fixing a bouncy plywood subfloor to stop those annoying squeaks before they start. My challenge for you this week: go buy a $30 hygrometer for your living room. Monitor your humidity for seven days. If it’s swinging wildly, your floors are suffering in silence, and it’s time to look into a whole-home humidifier before you start mastering hardwood floor refinishing expert tips for 2025.
The 48-Hour Rule for Avoiding Flooring Disaster
The most painful lesson I ever learned about flooring installation didn’t involve a hammer; it involved a clock. Early in my career, I was so eager to see the finished product that I would walk on a self-leveler pour the second the surface felt dry to the touch. But moisture is a sneaky adversary. I once rushed a project only to find that the trapped humidity eventually caused the adhesive to emulsify, turning a beautiful hardwood layout into a buckling mess. Now, I always add a ‘buffer day’ to my schedule. If the bag says wait 12 hours, I give it 24. If it says 24, I give it 48. This patience is what separates a DIY job from a professional restoration. Another lightbulb moment was realizing that subfloor prep isn’t a chore—it’s the most artistic part of the process. If your base isn’t perfect, your finish never will be, no matter how expensive the tile.
The Essential Gear for a Flawless Foundation
If you are serious about your home’s longevity, stop buying the cheapest version of every tool. I swear by my Wagner Moisture Meter; it is the only way to truly know if you are ready to install without the heartbreak of future gapping. For those diving into the ultimate guide to floor leveling for a perfect finish, a high-quality spiked roller and a pin-leveler rake are non-negotiable for removing air bubbles. I also highly recommend keeping a current TCNA Handbook on your shelf; it is the industry bible that explains the ‘why’ behind every thinset and grout ratio. Finally, invest in professional-grade kneepads. Your future self will thank you for not grinding your joints into the concrete today while you are avoiding flooring installation mistakes that others make in a rush.
Turn Your Flooring Fears into a Masterpiece
I know it feels daunting to look at a deep chip in your porcelain or a sloping subfloor and think you can’t handle it. But remember, every expert started with a dropped skillet and a pit in their stomach. By following these steps—from surgical epoxy repairs to precise moisture monitoring—you are doing more than just fixing a floor; you are mastering the craft of flooring installation. Take it one bag of leveler and one toothpick-dab of resin at a time. If you run into a unique situation that feels over your head, you can always reach out through our contact page for expert advice. You have the tools, the knowledge, and the strategy to make that floor look better than the day it was first laid. Keep your humidity stable, follow hardwood floor care secrets to longevity and shine, and your investment will last for decades.
Have you ever tried to match the color of a tile chip and ended up with a shade that stood out even more? Let me know your biggest repair wins and fails in the comments below!