
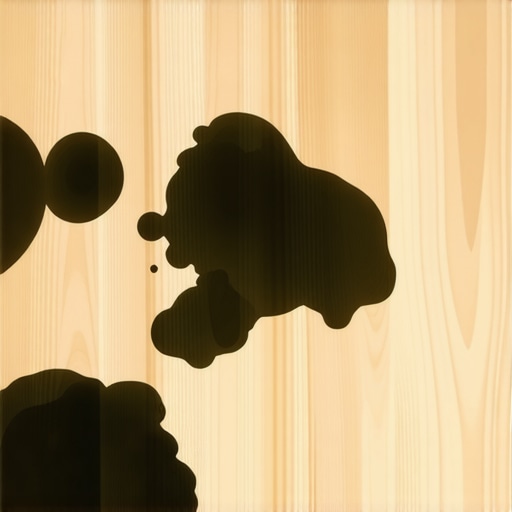
I’ll never forget the sinking feeling in my chest when I moved the rug in my hallway and saw them—ugly, jet-black splotches staring back at me from my beautiful white oak. I’d spent months picking the perfect grade, obsessing over the finish, and finally felt like my home looked like a magazine. Then, seemingly out of nowhere, these inky stains appeared near the kitchen entrance. My first instinct? I grabbed a bucket of soapy water and a scrub brush. That was my first big mistake. If you’ve ever looked at a "water stain" that looks more like a Sharpie leak than a dried puddle, you know exactly the frustration I’m talking about. We aren’t just dealing with a dirty floor here; we are dealing with a chemical reaction that is literally changing the DNA of your wood.
It Is Not Dirt and It Is Probably Not Mold Either
Most people assume that black spots are mold, but with white oak, it’s usually something far more scientific—and honestly, a bit more annoying. White oak is packed with naturally occurring tannins. When water sits on the surface and seeps into the wood, it reacts with trace amounts of iron, which can come from your tap water or even tiny particles of steel wool left behind during the installation process. This reaction creates iron tannate, a permanent dye that is that deep black color you’re seeing. I learned this the hard way after trying to sand out a pet stain in a solid oak floor and realizing that sanding alone doesn’t always stop the chemistry from happening. According to the National Wood Flooring Association, white oak is particularly susceptible to this because of its incredibly high tannic acid content compared to red oak or maple. If you don’t neutralize the reaction, you’re just thinning your wood for no reason.
Is my expensive floor permanently ruined?
That’s the fear, right? That you’ll have to rip up the whole thing or live with a floor that looks like it’s been through a war zone. I’ve been there. I actually once tried to cover a spot with a heavy rug, which only trapped more moisture and made the problem worse. The truth is, you can fix this, but you need to understand the hardwood floor care secrets to longevity and shine before you start pouring random cleaners on your boards. We’re going to talk about using oxalic acid—a wood bleacher—and how to properly seal your wood so this never happens again. It’s about working smarter, not harder, to save your investment.
Stop the Damage Before You Pick Up the Sandpaper
Before you even think about mastering hardwood floor refinishing, you have to address the moisture source. Have you noticed these spots near your exterior doors or maybe around the base of your potted plants? It’s amazing how a tiny, invisible leak can ruin a finish. I didn’t realize my subfloor had high moisture levels until it was too late, which is why I always tell my neighbors to use a moisture meter before installing wood floors to rule out rising damp from the concrete. Today, I’m going to show you how to neutralize those black spots and restore that clean, airy look you fell in love with. Have you ever tried to scrub a spot only to watch it get darker? I’d love to hear your horror stories—I promise you’re not alone in this flooring nightmare.
Oxalic Acid is the Scientific Eraser You Need
Speaking of horror stories, my biggest one involved a gallon of standard household bleach that did absolutely nothing but ruin the finish on the adjacent boards. Standard bleach is designed to kill organic matter like mold, but it doesn’t touch the iron-tannin bond that creates those deep black streaks. For that, you need a specific wood bleach called oxalic acid. I think of it as a chemical magnet that selectively targets the iron particles and pulls them out of the wood’s cellular structure. It’s a process used frequently in mastering hardwood floor refinishing, and it is the only way to restore the wood without aggressive, deep sanding that removes years of your floor’s life.
Clear the Way by Sanding to Bare Wood
You cannot simply pour a treatment over your floor and hope for the best. The first real step is removing whatever is blocking the wood’s pores. If there is still a layer of polyurethane or wax on those black spots, the acid will just sit on top and accomplish nothing. I’ve found that using a hand-sanding block with 80-grit paper is the best way to open the grain without creating a massive dip in the floor. Be careful not to create the sanding mistake that leaves swirl marks on your wood, as these will become glaringly obvious once you apply a new coat of finish. You just want to reach the raw, thirsty wood fibers. Once the wood is exposed, vacuum up every speck of dust—I mean every single one. If you leave sawdust behind, it will turn into a gritty paste the moment you add the liquid treatment.
Apply the Treatment and Watch the Black Vanish
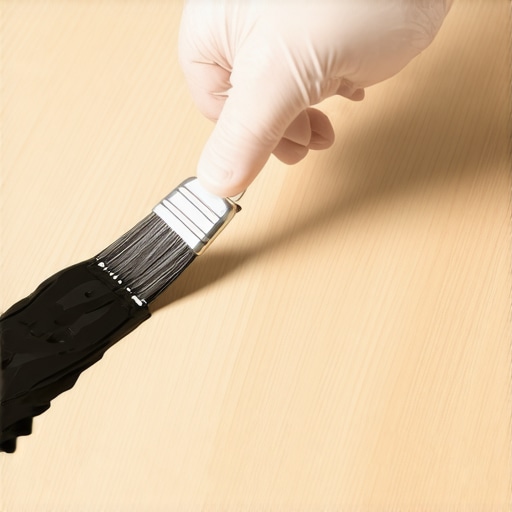
Mixing the oxalic acid is where the magic happens. I usually dissolve the crystals in hot water until the solution is saturated—meaning no more crystals will dissolve. Using a small nylon brush, I paint the solution onto the black spots. The first time I did this, I was so nervous I’d ruin the floor that I barely used any. Don’t be like me. You need the wood to be damp but not soaked. Within minutes, you’ll see the black begin to fade into a light gray, and then back to the natural golden hue of the oak. Sometimes it takes two or three applications. I remember one particularly stubborn spot near a radiator that took four rounds of acid before the wood finally gave up its ghostly black hue. It’s like watching a magic trick in slow motion.
Neutralize the Acid or Risk Your New Finish
This is the step most DIYers skip, and it’s the reason why your hardwood polyurethane is peeling in sheets a month later. Acid left in the wood fibers will prevent your topcoat from bonding. You have to neutralize the pH of the wood using a mixture of two tablespoons of baking soda to a gallon of water. I learned this the hard way after a repair job in my own living room turned into a gummy, white mess that never dried. After the wood looks clear, wipe it down with the baking soda solution, then follow up with a final wipe of clean, distilled water. Let it dry for at least 24 hours. If you rush this, you might find why your hardwood finish feels rough after drying because the moisture caused the grain to raise too aggressively.
Final Checks Before You Seal
Before you even think about putting a drop of sealer on that spot, verify that the moisture problem is gone. I always use a moisture meter before installing wood floors or refinishing a repaired section because if the subfloor is still damp, that black stain will be back before the week is out. Once the wood is dry and the color is uniform, you can lightly hand-sand with 120-grit to smooth out the raised grain and proceed with your finish. Following these hardwood floor care secrets to longevity and shine ensures that your repair isn’t just a temporary fix, but a permanent restoration of your home’s most beautiful asset.
Now that the wood is clear, I want to address the biggest myth in flooring: the idea that more sanding equals a better repair. In my experience, the opposite is usually true. When people see those black spots, their first instinct is to fire up a heavy-duty sander and keep going until the color looks right. This is a massive mistake. If you sand too deep in one concentrated area, you create a structural ‘valley’ that will catch the light and look like a dent once the glossy finish is applied. Instead of chasing the stain with grit, you should be chasing it with chemistry. If the oxalic acid hasn’t lifted the color after three rounds, you likely have a deeper moisture issue or a ‘blind’ nail head from the installation that is continuously oxidizing.
Why aggressive sanding is actually your worst enemy
Everyone tells you to just sand it out, but I’ve seen homeowners go through three layers of veneer on engineered wood or take a full eighth of an inch off solid oak trying to find ‘clean’ wood. The nuance here is that iron-tannate stains are often microscopic and travel deep into the grain. If you don’t neutralize the chemistry, you’ll just be mastering hardwood floor refinishing techniques only to realize you’ve compromised the tongue-and-groove joint of the boards. I always suggest a light touch with 80-grit just to open the surface, then let the chemicals do the heavy lifting. Have you ever fallen into the trap of sanding a spot until it was physically lower than the rest of the floor? Let me know in the comments; it’s a mistake even the pros make when they’re in a rush.
How do you know if the subfloor is the real culprit?
This is where the real expertise comes in. According to the National Wood Flooring Association (NWFA) technical manuals, a common ‘trap’ is assuming the moisture is coming from above. In reality, capillary action can pull moisture from a damp crawlspace or a concrete slab right up through the floorboards. If you fix the surface but don’t how to measure subfloor flatness before you start installing or checking for vapor barriers, that black spot will return like a ghost. I’ve found that using a pin-type moisture meter is the only way to be sure. Most people don’t realize that a meter calibrated for Red Oak will give a false reading on White Oak because of the higher density and different electrical resistance. If you’re seeing a reading above 12% in your ‘dry’ wood, stop what you’re doing—you have a leak, not just a spill.
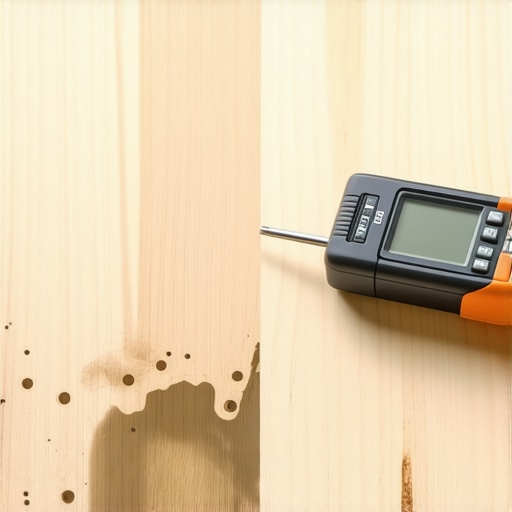
Before you commit to the final seal, you need to check for the ‘invisible’ debris. Even if the wood looks clean, tiny metal shards from a previous sanding belt or even a dropped staple can restart the blackening process the moment you apply a water-based finish. I use a high-powered magnet over the area to pull out any microscopic iron filings before I even think about the topcoat. This extra five minutes of effort is the difference between a repair that lasts a decade and one that fails in a month. This is also the perfect time to ensure you aren’t making the sanding mistake that leaves swirl marks on your wood, as the acid treatment can sometimes make those scratches more apparent.
Don’t let your finish bubble up after all that work
The final ‘oops’ factor involves the compatibility of your chemicals. If you don’t thoroughly rinse that baking soda neutralizer, the residual salts will cause ‘poly-beading,’ where your finish refuses to lay flat and creates tiny craters. It’s why you must why you must sand between polyurethane coats even on a small patch. If the surface feels even slightly gritty or ‘fuzzy,’ you’ve got raised grain. A quick pass with 220-grit paper will knock those fibers down and ensure you don’t end up wondering why your hardwood finish feels rough after drying. Taking these extra steps might feel tedious, but they are exactly what separates a DIY ‘patch’ from a professional restoration.
Once you’ve successfully neutralized those chemical stains, the challenge shifts from rescue to preservation. I used to think a good repair was the end of the journey, but it’s actually the starting line for a much longer race. To keep those boards pristine, I’ve stopped relying on the generic ‘wood cleaners’ found at the grocery store. Most of them contain waxes or oils that build up over time, creating a sticky residue that actually traps dirt. Instead, I stick to a pH-neutral cleaner specifically formulated for polyurethane. I also made a significant investment in my toolkit: a high-end HEPA vacuum with a dedicated soft-brush floor head. Using the vacuum attachment that actually picks up fine sawdust and grit is the single best way to prevent the micro-scratches that eventually lead to finish failure.
The Gear That Saves My Back and My Boards
If you’re planning to scale up your home projects from a single patch to a full room, don’t skimp on your leveling equipment. I’ve found that even the most beautiful hardwood installation will fail if the subfloor is wavy. I personally use a 10-foot magnesium straightedge to find dips before the first plank goes down. If I find a low spot, I don’t just ‘pad it’ with extra underlayment. I use precise floor leveling techniques to achieve flawless surfaces, ensuring the wood has a solid, flat foundation that won’t flex or squeak. This attention to detail is why my floors don’t just look good in photos—they feel solid underfoot. It is also the reason I’ve avoided flooring installation mistakes to avoid for lasting results that often plague DIY projects.
How do I keep my white oak looking fresh for a decade?
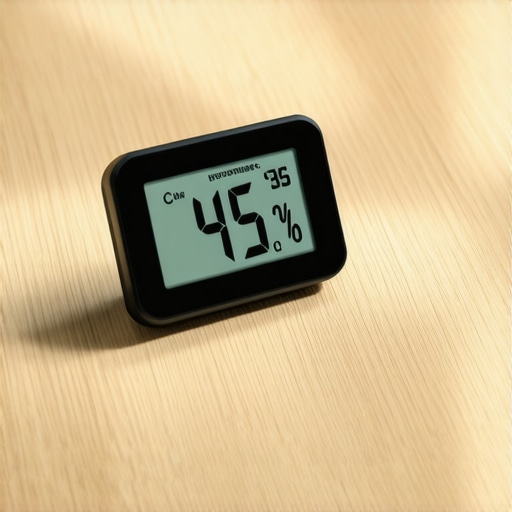
The secret isn’t in a bottle; it’s in your thermostat and humidity control. White oak is a living material that reacts to the air around it. According to the NWFA Technical Publication A100, maintaining a consistent indoor relative humidity between 30% and 50% is non-negotiable for wood health. I learned this the hard way when a dry winter caused my hallway to look like a series of trenches. Now, I keep a hygrometer in the main living area and adjust my humidifier accordingly. This is the only way to how to keep your hardwood floors from gapping in the winter. Furthermore, why you should never use a steam mop on click-lock floors or even solid oak cannot be overstated—the heat and moisture forced into the grain will destroy your hard work in weeks.
Digital Precision is the Future of Flooring
I’m seeing a massive shift in how we approach installations. We are moving away from ‘eyeballing it’ toward digital moisture mapping and laser-leveled subfloors. In the next few years, I predict we will see smart-sensors embedded under the finish that alert homeowners to leaks before a black spot even has a chance to form. For now, we have to be our own sensors. Whether you are mastering hardwood floor refinishing or just trying to save one board, the goal is always longevity. I want you to take one specific step today: go buy a reliable pin-less moisture meter. It’s the ultimate diagnostic tool that tells you exactly what’s happening beneath the surface, saving you from the heartbreak of a recurring stain. If you can master the moisture, you can master the floor.
White Oak Chemistry Myths That Almost Cost Me My Subfloor
After years of fighting these tannin reactions, I’ve realized that the wood isn’t trying to ruin your day—it’s just being its chemical self. The biggest lightbulb moment for me was realizing that tap water can be the enemy; the minerals in it often react faster with oak than distilled water ever would. I also learned that patience is literally a virtue when it comes to drying times. If you don’t wait for that moisture to fully escape, you’re just trapping a future problem under a fresh coat of poly. It’s the same level of care required when mastering hardwood floor refinishing at a professional level.
My Go-To Toolkit for Flawless Wood Restoration
To get these results, I never leave home without a few specific items. First, a high-quality moisture meter is non-negotiable for how to use a moisture meter before installing wood floors or repairing them after a leak. Second, I swear by using distilled water for my acid mixes to prevent introducing new minerals that cause staining. Lastly, a dedicated HEPA shop vac with the vacuum attachment that actually picks up fine sawdust is the only way to keep the grain clean enough for a lasting bond. These tools are the foundation of hardwood floor care secrets to longevity and shine that keep your investment safe.
#IMAGE_PLACEHOLDER_E#
The Finish Line Is Closer Than You Think
Don’t let a few black spots make you fall out of love with your home. These floors are a legacy, and with a bit of patience and the right chemical approach, you can restore them to their former glory. You now have the knowledge to fix the damage and prevent it from returning. Have you ever encountered a mystery stain that refused to budge even after sanding? Let me know in the comments below!