
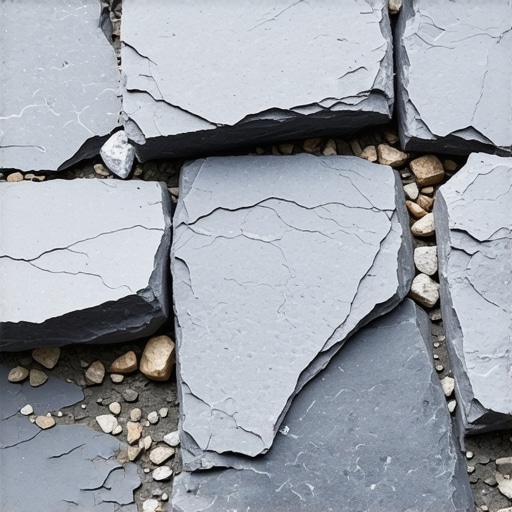
I remember the exact moment I realized my beautiful, rustic slate floor was essentially acting like a giant, gray onion. I was walking barefoot to the kitchen for my 6 AM coffee when a sharp, razor-thin sliver of stone pierced my heel. It wasn’t a crumb or a pebble; it was a piece of the floor itself. If you are currently finding those annoying little piles of stone dust in your corners or seeing thin wafers of rock lifting off your entryway, you are dealing with what we call shaling or spalling. It’s incredibly frustrating, especially when you’ve invested time into learning tile installation pointers that save time and money, only to have the material itself seem to fail. Today, I’m going to break down why this happens and show you how to stabilize your floor so you can finally stop living with a broom in your hand.
The Real Reason Your Floor is Shedding Layers
When I first started working with natural stone, I made a classic rookie mistake: I assumed all stone was equally indestructible. I actually tried to ‘clean’ a flaking area with a stiff wire brush and a harsh acidic cleaner, thinking I could just scrub the problem away. I quickly learned why you should never use acid-based cleaners on natural stone the hard way—it actually dissolved the mineral bonds and made the flaking ten times worse. Slate is a metamorphic rock formed in distinct layers, and sometimes those layers just don’t want to stay together. This is often caused by ‘clefting,’ where the natural planes of the stone separate due to internal pressure, moisture, or even just poor-quality stone selection. According to the Natural Stone Institute, the durability of slate is heavily tied to its absorption rate; stone with higher water absorption is far more prone to this type of layering failure, especially in humid environments. If your stone was poorly quenched or is being hit with the wrong chemicals, those layers will pop up like a deck of cards. Have you noticed the flaking getting worse after you mop or during a specific season?
Is This Just a Sign of Cheap Stone
One of the biggest fears I hear from neighbors is that they got ripped off. While it’s true that some ‘soft’ slates are more prone to shaling than others, even high-end slate can experience a bit of ‘settling’ in the first year. However, if your floor is years old and still shedding, the culprit is usually improper maintenance or a lack of sealing. I’ve seen people ruin perfectly good slate by using the wrong tools, which is why I always warn why you should never use standard mops on natural stone floors. Those heavy, soaking-wet cotton mops can drive moisture into the layers, freezing and expanding or just weakening the bonds until the top layer gives way. We are going to look at how to identify if your stone is just ‘finding its level’ or if you need to take drastic action to save the installation.
Stop the Dust at the Source
To fix a shaling floor, you have to be part detective and part surgeon. First, you need to find every piece of stone that is already planning its escape. I use a plastic putty knife—never metal, as it can gouge the softer layers—to gently ‘rake’ the surface of the affected tiles. If a piece clicks, moves, or feels like a loose fingernail, it has to go. I once ignored a small, clicking edge in my laundry room, thinking the sealer would just glue it down. Within two weeks, that ‘small edge’ snagged a wool sock and ripped a crater into the stone the size of a silver dollar. You have to be ruthless here; if it is loose, remove it now or it will become a sharp hazard later. Once you have cleared the immediate debris, you need to address the underlying stability. Often, slate fails because the subfloor wasn’t flat, causing the stone to flex and the layers to shear under weight. While this isn’t exactly the same as following the ultimate guide to floor leveling for a perfect finish, the principle is identical: a stable base prevents surface failure. If you hear a hollow thud when you tap the stone, you aren’t just dealing with shaling; you have a bond failure. You can learn how to detect a hollow tile before the grout starts cracking by using the ‘coin tap’ method to see if the whole slab needs to be replaced rather than just patched.
Clear Out the Loose Flakes Without Damaging the Rest
Cleaning the slate after you have finished scraping is a critical step that most people rush through. You cannot seal a dusty floor, or you will simply be ‘laminating’ the dirt onto the stone. Use a vacuum with a soft brush attachment—the kind of the vacuum attachment that actually picks up fine sawdust works wonders here—to pull every microscopic grain out of the newly exposed crevices. After vacuuming, use a damp, but never soaking, microfiber cloth to wipe the area. Remember, trapped moisture is a primary cause of slate layers popping, much like how the damp mop mistake that swells your laminate seams can ruin a wood-look floor. Let the stone air dry for at least 24 hours before moving to the next phase.
Seal the Stone From the Inside Out
The actual stabilization happens with a high-quality, penetrating impregnating sealer. Avoid those cheap ‘high-gloss’ topical coats that sit on top like a layer of plastic wrap; they are brittle and will peel off the moment the stone underneath expands. You want a sealer that sinks into the pores and binds those metamorphic layers from the inside out. Apply the sealer in thin, even coats using a lint-free applicator. I’ve found that hardwood floor care secrets to longevity and shine often emphasize the importance of thin, controlled applications, and the same applies to natural stone. Thick puddles of sealer will not soak in; they will just become a sticky, cloudy mess that attracts hair and dirt. For deeply shaled areas, you might need two or three applications to fully ‘quench’ the stone’s thirst.The biggest myth I see in the flooring world is the ‘more is better’ approach to sealing. Most homeowners assume that a thick, glossy topical sealer acts like a protective shell. In reality, for natural slate, this is a recipe for disaster. Unlike ceramic, slate is a porous, living material that needs to ‘breathe.’ When you apply a non-breathable coating, you create what pros call a moisture sandwich, trapping vapor underneath the surface. This vapor pressure eventually forces the microscopic layers of the stone apart, leading to even more dramatic shaling than you started with. It is a similar phenomenon to why your hardwood polyurethane is peeling in sheets; the bond fails from the bottom up because moisture has nowhere to go. If you see white, cloudy spots under your sealer, that is trapped moisture telling you the stone is suffocating.
Why Your ‘Indestructible’ Stone is Losing the War
Another ‘Oops’ factor that even experienced DIYers rarely talk about is subfloor deflection. If you have followed expert flooring installation tips but your stone is still cracking or flaking near the grout lines, your subfloor might be the culprit. Natural stone requires a much stiffer base than ceramic or porcelain. While ceramic can often handle a deflection of L/360, the Tile Council of North America (TCNA) recommends a much stricter L/720 standard for natural stone—meaning your floor needs to be twice as rigid. If your joists are slightly bouncy, the real reason your floor joists are making your tile crack isn’t the stone’s quality, it is the simple physics of structural movement shearing those delicate metamorphic layers.
Is Your Subfloor Stiff Enough for the Weight of Real Stone?
To test this properly, you cannot just jump on the floor and hope for the best. You need to how to measure subfloor flatness before you start installing and calculate the specific span and spacing of your joists. I have seen beautiful, expensive installations ruined because the installer skipped the extra layer of underlayment or forgot to use the shim trick for fixing a bouncy plywood subfloor. When the floor flexes, the slate, which has zero elasticity, simply gives up and sheds a layer to relieve the stress.
Stop Eyeballing Your Leveler Mix
Finally, if you are leveling the area to prevent future issues, do not get lazy with the mix ratio. A common trap is adding just a bit more water to make the leveler flow faster into the low spots. This is a critical mistake. Over-watering dilutes the polymers and leads to a chalky, weak surface that will eventually pull away from the slab. Mastering the secret to mixing the perfect bucket of self leveler every time is about following the manufacturer’s weight-based measurements exactly. Precision is what separates a floor that lasts decades from one that turns into dust within a year. Have you ever fallen into this trap of trying to ‘eyeball’ your materials to save a few minutes? Let me know in the comments.Once the dust settles and the leveler is cured, the real work of living with your floor begins. I’ve found that most people spend weeks obsessing over the install but only minutes thinking about the next ten years. If you want to avoid a repeat of the shaling slate disaster or see your hardwood start to buckle, you need a specialized toolkit. Personally, I never step onto a job site without my digital moisture meter. It’s not just for the initial install; I use it every change of season to see how my subfloor is reacting to the humidity. According to the National Wood Flooring Association (NWFA), maintaining a consistent environment—typically between 60 and 80 degrees Fahrenheit and 30% to 50% humidity—is the single most important factor in floor longevity.
How do I maintain my floor’s finish over the next decade?
The answer isn’t in a bottle of ‘miracle’ polish you buy at a big-box store. In fact, those often contain waxes that build up and make mastering hardwood floor refinishing expert tips for 2025 much harder because the new finish won’t bond to the old wax. Instead, focus on mechanical protection. I’ve transitioned all my heavy furniture to heavy-duty felt pads, and I check them every six months for embedded grit. For my tile areas, I’ve abandoned the old-school scrubbing brush for a high-quality steam cleaner—but only on tiles where I’ve verified the grout is intact. If you have any doubts, use how to detect a hollow tile before the grout starts cracking to ensure you aren’t forcing steam into a cavity. I genuinely believe the next big shift in our industry is the ‘Smart Floor.’ We are already seeing the emergence of embedded Bluetooth moisture sensors that sit beneath your underlayment and alert your phone if a pipe starts leaking or if your crawlspace humidity spikes. It takes the guesswork out of hardwood floor care secrets to longevity and shine because you’re treating the cause, not just the symptom. These sensors will eventually be standard in every high-end install, allowing you to catch a subfloor failure before it ever reaches the surface. If you’re serious about your home’s foundation, stop relying on your eyes alone. Go out and buy a pinless moisture meter this week. It’s the one tool that will tell you exactly when your subfloor is ready for precise floor leveling techniques to achieve flawless surfaces or if you need to wait another week for things to dry out. Don’t gamble with your investment; measure it.
Stone Restoration Lessons That Changed My Career
One of the most important things I ever realized is that a stone floor is more like a living organism than a static piece of plastic. If you have been stressed about every tiny flake, remember that ‘quarry dust’ and initial settlement can last for months. However, the one test that never fails me is the plastic wrap trick. Tape a small square of clear plastic over a suspicious area for a full day; if beads of water appear, your stone is ‘exhaling’ moisture that will blow your sealer right off the surface. Also, learn to trust your ears more than your eyes. A hollow thud is the sound of a failing bond, while a crisp click usually means the stone is just shedding a surface layer. Stop fighting the natural texture and start working with it.
#IMAGE_PLACEHOLDER_E#
The Three Tools That Save My Reputation Every Week
I do not go to any restoration job without my digital moisture meter. I initially picked this habit up when researching how to use a moisture meter before installing wood floors, and it is just as vital for slate. If the stone is holding more than 4% moisture, walk away and let it dry. Secondly, I always keep a high-quality repair compound for those deep ‘craters’ left by large flakes; applying precise floor leveling techniques to achieve flawless surfaces ensures those patches do not just pop back out next year. Finally, I always have a supply of solvent-based penetrating sealers. Water-based ones are easier to clean up, but they often do not dive deep enough into the clefts of the slate to truly stabilize the layers like a solvent can. If you are looking ahead to future maintenance, remember that mastering hardwood floor refinishing expert tips for 2025 often mirrors the same level of care needed for natural materials.
Take Pride in Your Unique Natural Installation
Slate floors are challenging, but they offer a character that porcelain simply cannot replicate. Do not let a few flakes discourage you from enjoying the warmth and organic feel of natural stone. By using these tile installation pointers that save time and money, you can transform a high-maintenance headache into a lifetime asset. If you ever feel stuck or see issues that seem beyond a simple fix, do not hesitate to contact us for advice on your specific project. The beauty of natural stone is worth the extra care. Have you ever had a piece of your floor ‘shed’ unexpectedly, or did you catch it before it became a sharp hazard? Let me know in the comments below!