

I stood in my kitchen, coffee in hand, when I heard that dreaded ‘pop.’ It was a sound that made my stomach drop because I knew exactly what it was—a hairline crack snaking across my expensive new porcelain. I had done everything ‘by the book.’ I bought the fancy spacers, I spent hours getting a straight line for my first row, and I even used a premium mortar. But I ignored the bounce. I ignored the slight vibration every time the dog ran through the room. I made the classic mistake of thinking the surface was the problem when the real issue was the skeleton of the house itself. Today, I’ll show you why your joists are the real culprits and how to stop the movement that’s ruining your floors.
Stop Blaming Your Grout for Structural Failure
Most DIYers think a crack is a sign of bad luck or poor mixing. In reality, why your porcelain tile is cracking in a straight line usually boils down to ‘deflection.’ That’s just a fancy contractor word for floor joists that bend like a diving board. Tile is rigid; wood is flexible. When those two fight, the tile always loses. I once tried to fix a bouncy floor by just slathering on more thinset, thinking the extra ‘meat’ would stop the movement. I was dead wrong. All I did was waste money on expensive materials that eventually crumbled because the joists were still dancing underneath. According to the Tile Council of North America (TCNA), a floor must meet the ‘L/360’ standard for ceramic tile, meaning it shouldn’t deflect more than the length of the span divided by 360 under a specific load. If you are dealing with heavy natural stone, that requirement doubles to L/720. If your joists are too small or spaced too far apart, your floor is basically a trampoline.
Does my subfloor really need all this extra work?
It’s tempting to think that a layer of 1/2-inch plywood is enough to ‘stiffen things up.’ I used to think the same until I saw my first project fail. You have to look at the joist span—the distance between supports. If those joists are over-spanned, the subfloor will dip every time you walk across it. Before you even think about starting your floor leveling, you need to address the bounce. Have you ever felt your floor vibrate when someone walks past you? If so, you’re looking at a ticking time bomb for your tile. One of the most effective ways I’ve found to fix this without rebuilding the entire house is the plywood sandwich trick for fixing bouncy floor joists. It adds massive rigidity without the cost of sistering every single beam. Have you noticed a specific crack appearing in the same spot, no matter how many times you’ve tried to patch the grout? Tell me about it—I’ve likely been there too. Now, let’s look at how to measure that deflection before you lay a single square of tile.Before you even think about how to check for high spots with a 10-foot-straightedge, you need to know if your floor is going to sink the moment a heavy refrigerator is rolled onto it. I once spent a weekend leveling a kitchen floor in a 1920s bungalow. I used three bags of self-leveler, and it looked like a sheet of glass. But the first time I walked across it, I heard a sickening crunch. The weight of the leveler itself was enough to make the undersized joists sag. It was a brutal lesson in why structural rigidity matters more than aesthetics.
Measure your floor deflection the low-tech way
You don’t need an engineering degree to find a problem area. Grab a long piece of string and tape it tightly across the room, about an inch above the floor. Measure the gap carefully. Now, have a friend stand in the middle of the room or walk heavily near the center of the span. If that gap changes by more than an eighth of an inch, your joists are crying for help. This movement is the primary reason why your grout is falling out of the joints in the hallway. Tile is a stone product; it cannot bend. If the wood move beneath it, the bond breaks, and your expensive project begins to fail. 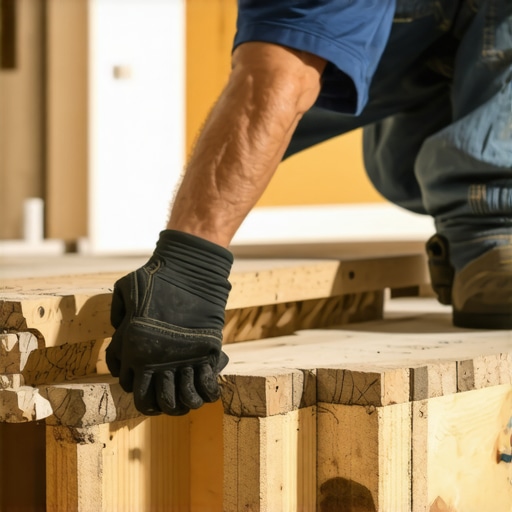
Install solid blocking to kill the vibration
The quickest way to stiffen a floor without tearing the house apart is to install solid blocking between the joists. I’m talking about 2×10 or 2×8 chunks of wood wedged and nailed between the existing beams. It forces the joists to act as one single unit rather than individual springs. I remember a project where the floor felt like a trampoline every time the dryer went on. After adding three rows of staggered solid blocking, the vibration vanished completely. This is often more effective and significantly cheaper than the hidden cost of using cheap thinset on large format tiles in a vain attempt to glue the problem away.
Why the plywood sandwich is your best friend
If blocking isn’t enough, you need to add mass. The plywood sandwich trick for fixing bouncy floor joists involves screwing and gluing a layer of 3/4-inch plywood directly to the side of the joist. It is a specialized version of sistering that adds immense strength. Unlike full sistering, where you must go wall-to-wall, this method allows you to target the center of the span where deflection is highest. By laminating the joist, you are effectively turning a flexible beam into a rigid pillar, which drastically reduces that L/360 deflection to something closer to a concrete slab.
Clean your subfloor before you level
Once the joists are stiff, you can move on to surface prep, but do not just pour your compound. I have seen countless homeowners wonder why your floor primer is peeling off like a sunburn only to realize they didn’t sweep. Use the vacuum attachment that actually picks up fine sawdust to get every speck of grit off that plywood. Only then can you follow precise floor leveling techniques to achieve flawless surfaces. If you skip the cleaning, your expensive leveler will just float on top like a pancake on a dusty griddle, eventually leading to those hairline cracks we are working so hard to avoid.Let’s dig deeper into the most pervasive myth in the industry: the idea that ‘self-leveling’ compound actually levels itself. In my experience, homeowners treat this stuff like they’re pouring a bowl of cereal, expecting gravity to do 100% of the work. It’s a lie. Self-leveler is more like thick syrup; it has surface tension that prevents it from becoming truly flat on its own. If you don’t help it along, you’ll end up with ‘islands’ and ‘valleys’ that make how to achieve flawless floor leveling before tile laying a nightmare. You have to use a gauge rake to set the depth and a spiked roller to break that tension. If you don’t, you’re just creating a new set of hills for your tile to sit on. 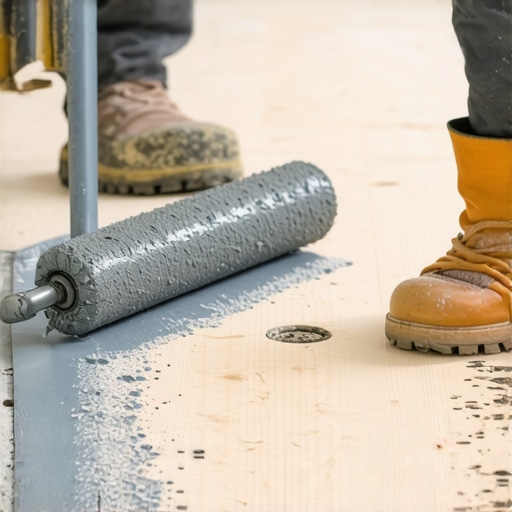
The primer trap that most pros won’t admit to
A huge mistake I see is people thinking the primer is just ‘extra insurance.’ It’s actually the most critical chemical bond in the entire system. I’ve seen cases where the leveler looks perfect, but because the installer skipped the second coat of primer on a porous subfloor, the wood sucked the moisture out of the leveler too fast. This causes the compound to shrink and curl at the edges, eventually snapping the bond with the wood. This is exactly why your self-leveler didn’t bond to the wood subfloor. According to the ASTM F2873 standard, proper subfloor preparation and priming are mandatory to ensure the flow and healing properties of the underlayment. If you see bubbles or ‘pinholes’ appearing as you pour, your subfloor is literally exhaling air into your expensive mix because the wood wasn’t sealed properly.
Why does my leveler look like it has tiny craters?
If you’ve ever noticed those small, volcano-like holes after the floor dries, you’re seeing the effects of outgassing. This is why your floor leveler pitted during the drying process. It happens when the subfloor isn’t sealed correctly, and air is trapped in the wood fibers. Beyond the surface prep, many DIYers miss the nuance of ‘back-buttering.’ You might think a 1/2-inch notch trowel provides enough coverage for big planks, but why your large format tiles need back buttering every time comes down to mechanical adhesion. Without that thin skim coat of mortar on the back of the tile, you’re essentially trying to stick a giant suction cup to a dry surface. It might hold for a month, but the first time the house settles or a heavy appliance moves, that tile is popping loose. Have you ever spent a fortune on materials only to have them fail because of a ‘hidden’ step like this? Let me know in the comments—I want to hear your horror stories so we can keep others from repeating them.
Don’t let the clock win the race
Another nuance that separates the pros from the weekend warriors is temperature control. Most people don’t realize that why your self-leveler is drying faster than you can pour it is often because the water was too warm or the room was too drafty. If you don’t use ice-cold water, the chemical reaction happens at light speed, leaving you with a lumpy mess that you can’t even trowel flat. It’s these tiny, advanced details that determine if you’re doing a flooring installation that lasts twenty years or one that starts cracking before the paint is dry. Mastering the secret to mixing the perfect bucket of self-leveler every time is about speed, temperature, and precision—never just ‘eyeballing’ the water ratio.I’ve spent years thinking my eyes were good enough to judge a subfloor, but the truth is, your eyes lie to you. If you want to move from being a hobbyist to a pro, you need to stop guessing. The single most important tool in my kit isn’t a fancy saw or a laser level—it’s a high-quality moisture meter. I personally use a pin-less electromagnetic sensor model because it doesn’t leave holes in the finish, but for subfloors, a pin-style meter is king. You have to know how to use a moisture meter before you lay wood floors or tile because moisture is the silent killer of adhesives. If your plywood has soaked up humidity from a damp crawlspace, that self-leveler you just poured won’t just fail; it will delaminate in giant, heartbreaking sheets.
Tools that turn a struggle into a success
Beyond the meter, precision cleaning is your best friend. I can’t stress enough how many failures I’ve seen because of a thin film of drywall dust. Using the vacuum attachment that actually picks up fine sawdust is the difference between a bond that lasts a lifetime and a floor that clicks every time you step on it. When you are mastering flooring installation fundamentals leveling for a seamless look, you’ll find that a specialized gauge rake is worth every penny. It allows you to set the exact depth of your pour so you aren’t fighting the material as it starts to set. 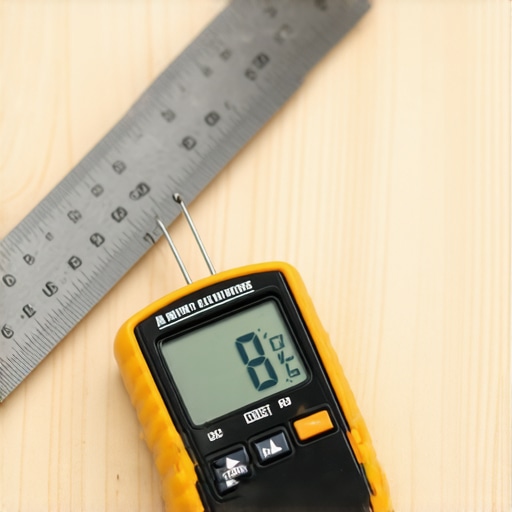
How do I maintain my floor for the long haul?
Once the installation is finished, the real work of preservation begins. The biggest threat to your new floor isn’t heavy furniture; it’s the way you clean it. I always warn my clients about the damp mop mistake that swells your laminate seams. Water is the enemy of any wood-based product. For those who went the natural route, following hardwood floor care secrets to longevity and shine involves using pH-neutral cleaners and avoiding the steam mops you see on late-night infomercials. According to the National Wood Flooring Association (NWFA) Technical Publication No. A100, maintaining a consistent indoor climate—specifically between 30% and 50% humidity—is the only way to prevent seasonal gapping. Even if you are mastering hardwood floor refinishing expert tips for 2025, you can’t outrun a bad environment.
Next-gen materials are changing the game
Looking ahead, the industry is moving toward smart underlayments and fiber-reinforced self-levelers that have higher flexural strength than anything we used ten years ago. I predict we will see more carbon-fiber infused mortars that allow for even larger tile formats with zero risk of cracking. The trend is moving away from rigid, brittle systems toward materials that can handle the natural settling of a modern home. My advice? Grab your moisture meter today and check three different spots on your subfloor before you start. It is the single best way to ensure your hard work doesn’t go to waste.
Why Precision Always Beats Speed in Subfloor Prep
Moving fast is the enemy of a flat floor. My biggest takeaway after years in the trades is that the ‘skeleton’ of the room—the joists and subfloor—is 90% of the battle. If you get that right, the tile practically lays itself. One myth I had to unlearn was that thick mortar fixes everything; in reality, it just adds weight and creates more points of failure. I now live by the rule that if the floor moves even a hair, the project isn’t ready for thinset. Another ‘lightbulb’ moment was realizing that common flooring installation mistakes to avoid for lasting results start with impatience. If you don’t wait for your primer to dry or your moisture levels to stabilize, you’re just gambling with your budget. #IMAGE_PLACEHOLDER_E#
The Gear That Saved My Back and My Grout Lines
To do this right, you need a few non-negotiables in your bucket. First, a pin-style moisture meter is your best defense against delamination. Second, a heavy-duty gauge rake takes the guesswork out of your self-leveler depth, ensuring you don’t end up with those dreaded ‘valleys.’ I also highly recommend checking out this guide on mastering floor leveling pro secrets for perfect installations to see how the right spiked roller can eliminate pinholes. Finally, don’t skimp on a high-quality straightedge; it’s the only way to hold your work accountable before the mortar sets. These aren’t just gadgets; they are the barrier between a pro finish and a DIY disaster.
Build a Floor That Lasts Decades
You have the knowledge now to look past the surface and fix the structural issues that ruin most homes. Don’t be afraid to pull back a subfloor or sister a joist if it means your tile won’t crack in two years. With these proven tile installation pointers that save time and money, you can transform a bouncy, uneven room into a rock-solid foundation for your family. Taking that extra day to prep might feel tedious, but the peace of mind when you walk across a silent, rigid floor is worth every second. Your home deserves a foundation that is as beautiful as the finish you put on top. Have you ever discovered a hidden structural issue after you already started laying your tile? Let me know in the comments below!