
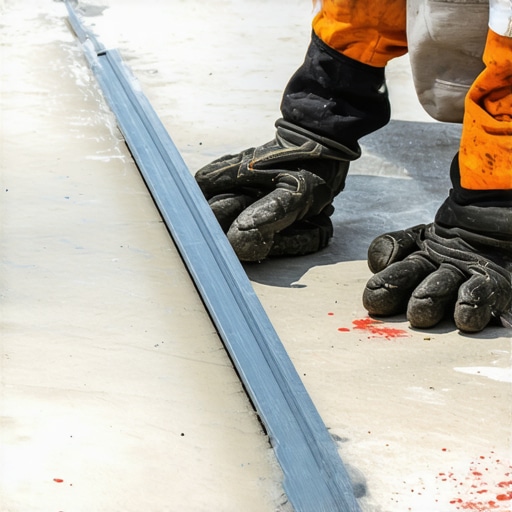
I’ll never forget the sinking feeling in my gut when I slid my first chair across the brand-new laminate I’d spent three days installing. Thump-click. That sound is the heartbeat of a failing floor. I had eyeball-checked the subfloor, convinced it was “good enough,” only to realize too late that a three-sixteenths-of-an-inch hump can turn a beautiful room into a noisy, bouncing mess. It was a rookie move, and it cost me hours of tear-out work. If I’d just owned a simple 10-foot straightedge back then, I could have saved my back and my wallet.
Stop Guessing and Start Measuring for a Flawless Finish
When you’re staring down a wide expanse of plywood or concrete, your eyes lie to you. They really do. You think it’s flat because it looks flat from five feet up. But once you start mastering floor leveling, you realize that precision is the only thing standing between a professional-grade job and a DIY disaster. Using a 10-foot straightedge isn’t about being picky; it’s about insurance. Whether you are dealing with flooring installation mistakes to avoid or prepping for expensive hardwoods, this tool is the ultimate truth-teller. Today, I’m going to show you exactly how to hunt down those elusive high spots. We are going to turn that subfloor into a surface so smooth you could play billiards on it. Most people think they can skip this step if they are using thick underlayment, but according to the National Wood Flooring Association, subfloors must be flat to within 3/16″ in a 10-foot radius for most installations to meet warranty standards. That’s a tight margin of error.
Is a 10-foot tool really necessary for my small room?
I get it. Dragging a ten-foot piece of aluminum or a perfectly straight 2×4 around a bedroom feels like overkill. You might be tempted to just use a four-foot level. Don’t do it. A shorter tool will “bridge” smaller dips but completely miss the long-tapered humps that cause floating floors to click when you walk. I made the mistake of trusting a short level early in my career, and the result was a floor that felt like a trampoline in the corners. Learning how to achieve flawless floor leveling before tile laying starts with the right scale of measurement. Have you ever finished a flooring project only to find a ghost hump that you swear wasn’t there when you started?
The Secret to Finding Hills in Your Subfloor
The process is actually quite meditative once you get into the rhythm. You aren’t just looking for gaps; you are looking for the pivot point. When you lay that straightedge down and it teeter-totters, you’ve found your enemy. This is especially critical if you are aiming for the secret to getting a flat floor for large format tiles, where even a tiny high spot will cause lippage that you’ll trip over every single day.
Map the Floor Before You Mix the Mud
Think of your subfloor as a topography map where every hump is a mountain that needs to be ground down and every dip is a valley waiting for filler. Before you even think about cracking open a bag of compound, you have to identify the terrain with military precision. I once spent an entire Saturday afternoon chasing my tail in a kitchen because I skipped a deep clean. A single stray drywall screw had rolled under my straightedge, lifting it just enough to make a perfectly flat section look like a massive crater. I poured three extra bags of leveler before I realized the ‘crater’ was a lie created by that one tiny piece of metal. Now, I sweep and vacuum twice because precise floor leveling techniques to achieve flawless surfaces start with a floor you could literally eat off of.
Clear the Debris to Avoid False Readings
Even a grain of sand can throw off a ten-foot straightedge by a fraction of an inch, a discrepancy that multiplies over the length of the tool. Use a shop vac to pull dust out of the corners and any old adhesive ridges. If you find staples or nails from old carpet, pull them now. This prevents those annoying ‘ghost humps’ that appear only when you’re trying to calculate your material needs. Following a step-by-step guide to flooring installation and leveling success means respecting the prep work as much as the pour. A clean floor ensures that your straightedge sits flush, giving you the truth about your subfloor’s health rather than a distorted version of it.
#IMAGE_PLACE_HOLDER_B#
Pivot the Tool Like a Compass
Once the floor is surgical-grade clean, lay your straightedge down in the center of the room. Don’t just drag it across the surface; pivot it. Imagine the tool is the hand of a clock and rotate it in a 360-degree arc using one end as the axis. If the tool starts to ‘teeter-totter’ like a playground see-saw, you’ve landed on a high spot. If you can see light under the middle, you’re over a dip. I like to keep a handful of different colored lumber crayons nearby. Red is for ‘grind’ (high spots) and blue is for ‘fill’ (valleys). This visual map is crucial because understanding why your self-leveler is drying faster than you can pour it often comes down to not knowing exactly where the material needs to go before the clock starts ticking. When I worked on a 1920s bungalow with sagging joists, this mapping process saved me from pouring five gallons of expensive leveler into an area that was actually high, not low.
Trace the Perimeter of Your Problem Areas
When you find a dip, don’t just mark a single spot. Slide the straightedge back and forth to find the exact point where the floor finally meets the metal again. Draw a circle around the entire ‘valley.’ This gives you a clear target for your pour. If you are dealing with a hump, mark the ‘peak’ where the tool pivots. This is especially vital when learning flooring installation fundamentals-leveling for a seamless look because it tells you exactly where you need to break out the sander or the floor grinder. By the time you’re done, your subfloor should look like a crime scene of circles and crosses, each one a roadmap to a perfectly flat finish that will support your new floors for decades.
We need to talk about the ‘self-leveling’ myth because it is one of the most dangerous misconceptions in the flooring world. Most people assume that once you pour a bucket of compound, gravity does the rest. In reality, self-leveler is actually ‘self-smoothing.’ If you don’t help it along with a gauge rake or a spike roller, you will end up with a series of connected puddles rather than a monolithic plane. This is one of the most common floor leveling challenges that I see even seasoned renovators overlook. You have to actively manage the material to ensure it reaches the edges and maintains a consistent depth.
Why does my leveler look like the surface of the moon?
If you have ever seen tiny craters or bubbles in your dried compound, you have encountered the ‘pinhole’ effect. This happens because most people treat primer as an optional step. It isn’t. Raw concrete is incredibly porous; it acts like a sponge, sucking the moisture out of your leveler and pushing air up through the mixture. This leads to why your floor leveler pitted during the drying process. According to the Tile Council of North America (TCNA) Handbook, substrate preparation—including the use of specific primers to seal pores—is the single most critical factor in a successful bond. Without that primer, you aren’t just risking aesthetic pits; you are risking delamination where the leveler eventually peels off in sheets.
#IMAGE_PLACE_HOLDER_C#
Another nuance that separates the pros from the amateurs is the distinction between ‘level’ and ‘flat.’ I have seen homeowners spend thousands of dollars trying to make a 1940s subfloor perfectly level with the horizon. Unless you are installing a billiard table, you probably don’t need ‘level.’ You need ‘flat.’ A floor can be pitched at a slight angle and still look incredible as long as there are no dips or humps. If you chase ‘level’ in an old house, you will often create massive height discrepancies at doorways that require awkward transitions. Focusing on precise floor leveling techniques to achieve flawless surfaces means prioritizing a flat plane for your tile selection tips for elegant hardwood floors over a perfectly horizontal one.
The biggest trap to avoid is the ‘over-watering’ mistake. It is tempting to add an extra quart of water to the bucket to make the leveler flow better, but this destroys the chemistry of the product. Excess water causes the sand to sink to the bottom and the polymers to float to the top, resulting in a chalky, weak surface that will crumble under the weight of your furniture. If you’ve ever wondered why your self-leveler didn’t bond to the wood subfloor, check your water ratios first. Have you ever fallen into the trap of thinking ‘self-leveling’ meant the product would do all the hard work for you? Let me know in the comments below.
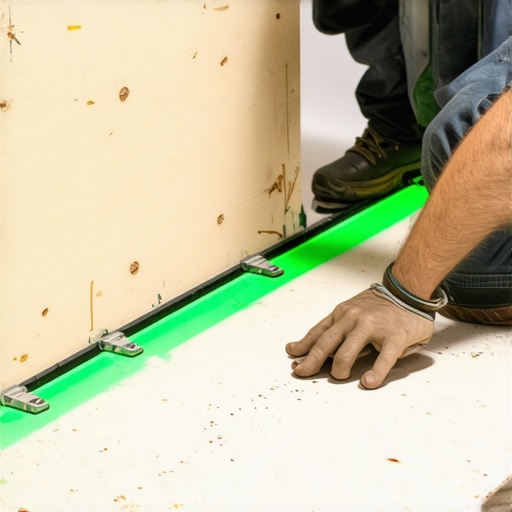
I’ve reached a point in my career where I no longer trust my eyes. If you want to move from ‘weekend warrior’ to ‘expert installer,’ you need to invest in tools that don’t lie to you. For me, that meant moving beyond a basic bubble level and picking up a high-precision laser. I personally swear by the Bosch GLL3-330CG because the green beam is visible even in bright sunlight, and it allows me to establish a benchmark height across an entire 1,000-square-foot room in seconds. When you are mastering floor leveling, having a 360-degree reference point is the only way to ensure your kitchen island is perfectly flush with your hallway transition. It’s about taking the guesswork out of the equation so you can focus on the craftsmanship.
Invest in Tools That Dont Lie to You
Beyond the laser, my most utilized piece of equipment is a high-end pin-less moisture meter. I use the Delmhorst PX-20 because it’s non-destructive, meaning I can check the health of a subfloor without poking holes in it. If you’ve ever wondered how to use a moisture meter before you lay wood floors, you know that a reading above 12% on plywood is a flashing red light for disaster. Moisture is the silent killer of even the most perfectly leveled floor, causing hardwoods to crown and LVP to separate. Following step-by-step guide to flooring installation and leveling success means verifying the environment before the first plank is even unboxed. If the substrate is wet, your leveling compound won’t just struggle to bond—it might eventually pulverize from the inside out.
Ditch the Guesswork for Digital Precision
Looking ahead, the industry is moving toward digital mapping. I’m already seeing pros use LiDAR-based apps on their tablets to create heat maps of subfloors. This isn’t just sci-fi fluff; it allows you to calculate exactly how many bags of compound you need to buy down to the tenth of a gallon. This level of precise floor leveling techniques to achieve flawless surfaces reduces waste and saves you from those mid-project runs to the hardware store. According to the Laticrete Technical Data Sheet 152, substrate deflection must be limited to L/360 for ceramic tile and L/720 for natural stone. If your subfloor has too much ‘bounce,’ no amount of leveler will save your grout lines from cracking. This is why I always check the joist spacing and subfloor thickness against those engineering specs before I commit to a layout.
How can I ensure my subfloor stays stable forever?
The secret to long-term results isn’t what you do on installation day; it’s how you control the climate afterward. I tell all my clients that they need to maintain a consistent relative humidity between 30% and 50%. Sudden swings in moisture will cause the subfloor to expand and contract, which can stress the bond of your self-leveler. For hardwood owners, following hardwood floor care secrets to longevity and shine includes keeping an eye on your HVAC settings. If you’re dealing with floor leveling challenges in a basement, consider a high-quality dehumidifier to keep the ‘stack effect’ from pulling ground moisture up through your slab. A stable environment is the only way to protect the ‘perfectly flat’ work you just completed.
Before you start your next pour, I want you to try this: use a green laser to find the highest point in your room, mark it with a screw set to the exact height of your intended finish, and use that as your ‘North Star.’ It’s a simple trick that ensures you never over-pour. If you have questions about which primer to use for a specific substrate, reach out via our contact us page.
Everything I Learned the Hard Way About Subfloors
Over the years, I’ve realized that the most expensive mistakes are the ones you can’t see until the project is finished. One of the biggest lightbulb moments for me was understanding that why your self-leveler developed spiderweb cracks overnight often has nothing to do with the product and everything to do with a thirsty, unprimed substrate. I’ve also found that the 5 reasons your self-leveler is sticking to the bucket usually trace back to improper mixing speeds or using water that is too warm, which jumpstarts the chemical reaction. My hardest lesson? Never trust a floor just because it was recently poured by a previous contractor; always run your own straightedge. Finally, remember that temperature matters; a room that is too hot will flash-dry your compound before it can even settle into the dips you marked.
The Tools I Bet My Reputation On
I don’t step onto a job site without a specific kit that I’ve curated through trial and error. The Bosch GLL3-330CG is my primary reference because its green laser line stays sharp even in brightly lit rooms, making it easier to see the ultimate guide to floor leveling for a perfect finish in real-time. For moisture verification, I trust the Delmhorst PX-20 because it’s accurate enough to prevent the nightmare of a buckling floor. If you are serious about installing tiles like a pro, I highly recommend keeping a copy of the TCNA Handbook in your truck; it’s the industry bible for a reason. These tools aren’t just gadgets; they are the difference between a floor that lasts five years and one that lasts fifty.
#IMAGE_PLACEHOLDER_FINAL#
Take the First Step Toward a Flawless Surface
You now have the framework to transform a wavy, problematic subfloor into a perfect plane. By identifying high spots and valleys before the first drop of leveler hits the ground, you are already ahead of 90% of DIYers. Don’t let the fear of a complex prep job lead you into making common flooring installation mistakes to avoid. Precision in floor leveling isn’t about perfection for perfection’s sake—it’s about protecting your investment and ensuring your home feels solid underfoot. It’s time to stop guessing and start pouring. Have you ever discovered a massive dip in your subfloor after you already bought your flooring material? Let me know in the comments below.