
I’ll never forget that first crisp December morning when I heard a sound like a dry twig snapping under my feet in the living room. I had spent weeks picking out what I thought was the perfect flooring, but there I was, staring at a visible gap where a seamless joint used to be just weeks earlier. My heart sank. I thought I’d been scammed or that my subfloor was failing. It turns out, I was just witnessing the laws of physics playing out on my floorboards. If you are seeing those same unsightly spaces between your planks right now, don’t panic—you aren’t alone, and your floor isn’t necessarily ruined.
The Winter Gap That Drives Homeowners Crazy
The real culprit behind your shrinking floor isn’t a manufacturing defect; it’s the relative humidity in your home. Bamboo is a grass, but it behaves a lot like wood, meaning it is hygroscopic. It breathes. When the heater kicks on and the air gets bone-dry, your floors literally exhale their moisture and physically get smaller. I made the classic rookie mistake of skipping the prep work early in my career. I didn’t use a moisture meter to check the environment before the boards went down, and I paid for it with a winter full of drafts coming through the floorboards. Today, I want to show you exactly how to manage this seasonal shift and why hardwood floor care secrets aren’t just for oak and maple.
Does Bamboo Really Live Up to the Hype?
I get this question all the time from neighbors who see their floorboards pulling apart. You might be wondering if you made a mistake choosing this material over traditional wood or tile. While I used to think bamboo was the ultimate eco-friendly choice without any downsides, the reality is that its dense structure makes it particularly reactive to moisture swings. According to the National Wood Flooring Association, bamboo can expand and contract significantly more than certain engineered products if the indoor climate isn’t strictly controlled between 35% and 55% humidity. If your environment falls outside that range, you might even notice that your bamboo floor is making a loud cracking sound as it struggles to adjust. Have you noticed these annoying gaps appearing between your planks or heard strange pops during the night? Let me know in the comments, because catching it early is the only way to prevent permanent damage. We are going to dive into the practical ways to stabilize your home’s air so your floor stays put all year long.
The transition from a drafty, gapping floor to a solid, silent surface starts with acknowledging that your floor is a living, breathing entity. To stop the movement, you have to control the atmosphere it lives in. Think of your bamboo planks like a sponge; when the air is dry, they shrink. To fix this, you don’t reach for the wood filler first—you reach for the humidifier.
Stop the Shrinkage with Controlled Humidity
Your first line of defense is a high-quality hygrometer. You can’t fix what you can’t measure. I once worked on a renovation in a high-desert climate where the homeowner was convinced the installer had used sub-par material. When I pulled out my sensors, the indoor humidity was sitting at a bone-dry 12%. No floor stands a chance at that level. By installing a whole-house humidifier, we brought the levels back to a steady 45%, and within three weeks, most of the gaps had vanished on their own as the bamboo re-hydrated. This is a core part of hardwood floor care secrets to longevity and shine—maintaining that atmospheric sweet spot.
How to Close Gaps Without Tearing Up the Room
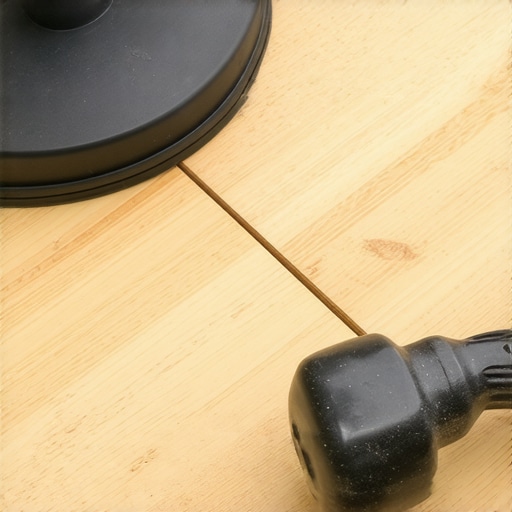
If your humidity is stable but the gaps remain, you need to physically encourage the planks back together. I remember a particularly stubborn hallway in a lake house where the gaps were large enough to see the subfloor. Instead of ripping it out, I used a flooring gap fixer tool—essentially a high-grip suction cup block that you stick to the board and tap with a rubber mallet. This allows you to slide the boards back into their original positions without damaging the finish. Once the boards are tight, you can secure the last row or use a tiny bit of wood-safe adhesive in the tongue-and-groove joint of the offending boards to keep them from migrating again. Knowing how to stop hardwood floors from gapping in the hallway often comes down to this physical manipulation rather than chemical fillers, which usually just crack and fall out when the seasons change again.
The Right Way to Prep for a Stable Foundation
Oftentimes, bamboo movement is exacerbated by what lies beneath. If your subfloor isn’t perfectly flat, the planks will flex and shift every time you walk on them, eventually pulling the joints apart. Before any installation, you must consult the ultimate guide to floor leveling for a perfect finish. A level surface ensures the locking mechanisms of your bamboo aren’t under constant vertical stress. I’ve seen countless flooring installation mistakes to avoid for lasting results, but skipping the self-leveler or failing to use the plywood grade you need for a stable tile underlayment or wood base is the most common. Additionally, if you are installing over a slab, never ignore the moisture barrier rule for basement vinyl floors which applies just as strictly to bamboo to prevent the planks from absorbing ground moisture and cupping later on.
Secure Your Planks for the Long Haul
For wider bamboo planks, sometimes a simple click-lock isn’t enough to fight the forces of nature. In my experience, why wide plank flooring needs both glue and nails becomes very apparent when you see a five-inch wide bamboo board start to bow. Using a high-quality flooring adhesive in conjunction with cleats provides a double-layered defense against seasonal movement. This hybrid approach keeps the floor rigid during the dry months and prevents the boards from “walking” away from each other toward the walls. It might take a bit more time during the initial install, but it saves you from the 2:00 AM cracking sounds that keep homeowners awake during the first frost of the year.
While many homeowners focus solely on the moisture content of the planks, I’ve found that the real failures usually start long before the first board is even unboxed. There’s a persistent myth in the DIY community that ‘self-leveling’ compounds are a magic wand you just pour and walk away from. In my years on the job, I’ve seen more failed installs because people assumed gravity would do the work for them. If you don’t actively manage the surface tension of the pour, you’ll end up with high spots that cause your bamboo to ‘bridge’ and eventually crack under the weight of furniture.
Level Your Subfloor Like a Scientist Not a Handyman
The most common trap I see is skipping the primer or, even worse, using the wrong one for the substrate. I once consulted on a project where the entire floor was ‘hollow.’ The installer had poured a high-end leveler over old, sealed concrete without a grit-based primer. Within months, the whole surface debonded. This is exactly why most floor levelers fail on top of painted concrete. You need to create a mechanical bond, not just a chemical one. If you see your prep work starting to flake, you’re likely witnessing why your floor primer is peeling off like a sunburn, and laying bamboo over that is a recipe for a structural nightmare.
#IMAGE_PLACE_HOLDER_C#
Why does your self-leveler develop spiderweb cracks overnight?
This is the question that haunts advanced installers. You followed the mixing ratios, yet you wake up to a map of tiny fractures. This usually happens because of ‘flash drying’—where the subfloor sucks the moisture out of the leveler too quickly. To prevent this, professional precise floor leveling techniques to achieve flawless surfaces involve multiple coats of primer to seal the substrate’s porosity. According to the Tile Council of North America (TCNA), proper substrate preparation is responsible for over 90% of flooring longevity. If you ignore the absorption rate of your plywood or concrete, you are setting yourself up for failure. You must master the roller selection that prevents air bubbles in leveler to ensure the structural integrity remains intact during the cure.
The Thinset Myth That Destroys High-End Finishes
Everyone wants to save a few bucks, but using a standard unmodified thinset for modern, dense materials is a massive mistake. Whether you are transitioning to tile or securing bamboo headers, you need a high-polymer-modified mortar. I’ve seen the hidden cost of using cheap thinset on large format tiles firsthand; the bond simply isn’t strong enough to resist the lateral shear forces as your house settles. This is especially true if you are trying to find the secret to getting a flat floor for large format tiles near your bamboo transitions. A premium mortar offers the flexibility needed to handle the slight shifts in your home’s foundation without snapping the grout lines or popping the planks.
Getting the foundation right isn’t just about looks—it’s about the physics of how your home breathes. If you don’t use mastering floor leveling pro secrets for perfect installations, you’ll be chasing ‘clicks’ and ‘pops’ for the next decade. Have you ever fallen into the trap of thinking a subfloor was ‘good enough’ only to have it fail six months later? Let me know in the comments, and let’s figure out how to stop the cycle of flooring frustration.
Once the dust settles and the leveler is cured, the real work of homeownership begins—keeping that surface pristine. I’ve seen beautiful installs turn into disasters in less than a year because someone used a steam mop or the wrong chemical cleaner. If you want to avoid a situation where your hardwood floor turned cloudy after cleaning, you need a strategy. My personal go-to is a dedicated microfiber spray mop with a pH-neutral cleaner. I never, ever use the ‘natural’ concoctions found on DIY blogs; in fact, the vinegar mistake that eats through your natural stone tiles is just as destructive for bamboo finishes, stripping the protective resins over time.
The Maintenance Kit I Actually Use Every Week
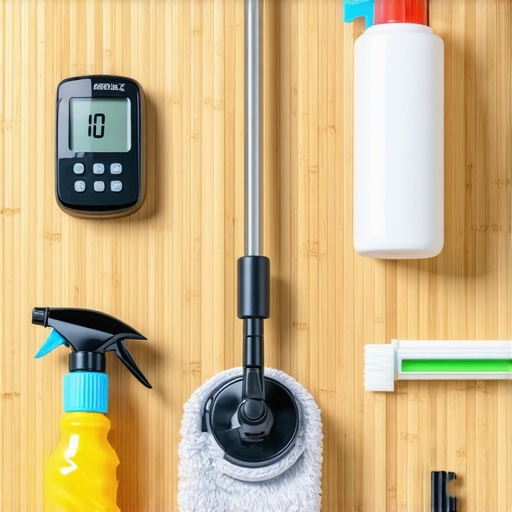
People always ask me what’s in my personal tool bag. It’s not just hammers and nails. I rely heavily on a digital moisture meter to keep tabs on the house as the seasons change. If I see the percentage dipping below 6% in the wood, I know it is time to turn up the humidifier before those gaps reappear. For daily upkeep, I recommend a vacuum with a soft brush attachment—never a beater bar, which can leave microscopic scratches that dull the finish. These small habits are the real hardwood floor care secrets to longevity and shine. If you do encounter a disaster, like a deep scratch from moving furniture, don’t panic. You can look into mastering hardwood floor refinishing expert tips for 2025 to learn how to spot-repair without sanding the whole room.
How do I maintain my bamboo floor’s shine for years?
The secret isn’t more wax; it is less friction. Dirt and grit act like sandpaper under your feet. I tell all my clients to place high-quality walk-off mats at every entrance. But maintenance also means checking the ‘infrastructure.’ Every six months, I walk the floor listening for the ‘hollow’ sounds we discussed earlier. According to the National Wood Flooring Association (NWFA) Technical Publication No. C200, the moisture content of wood is a direct function of the relative humidity and temperature of the surrounding air. By staying ahead of these shifts with revamp your home with expert flooring installation tips regarding environmental control, you extend the life of the finish by a decade. I’m also a huge fan of felt pads on furniture legs—not the cheap adhesive ones that fall off, but the heavy-duty screw-in versions that stay put permanently.
The Future of Smart Flooring is Closer Than You Think
Looking ahead, I predict we will see ‘smart’ subfloors becoming the industry standard. We are already seeing prototypes of underlayments with embedded sensors that alert your smartphone if moisture levels from the slab exceed safe thresholds. Imagine getting a push notification that your floor is thirsty before the first crack even forms. Until then, you have to be the sensor. I challenge you to go out and buy a $15 hygrometer today. It is the single most important tool for any homeowner with bamboo or hardwood. Start tracking your indoor humidity daily for a week; you might be surprised to see how much your HVAC system is actually drying out your investment. If you stay proactive and use mastering floor leveling pro secrets for perfect installations as your foundation, you won’t just be living on your floor—you’ll be preserving a masterpiece.
I’ll never forget that first crisp December morning when I heard a sound like a dry twig snapping under my feet in the living room. I had spent weeks picking out what I thought was the perfect flooring, but there I was, staring at a visible gap where a seamless joint used to be just weeks earlier. My heart sank. I thought I’d been scammed or that my subfloor was failing. It turns out, I was just witnessing the laws of physics playing out on my floorboards. If you are seeing those same unsightly spaces between your planks right now, don’t panic—you aren’t alone, and your floor isn’t necessarily ruined.
The Winter Gap That Drives Homeowners Crazy
The real culprit behind your shrinking floor isn’t a manufacturing defect; it’s the relative humidity in your home. Bamboo is a grass, but it behaves a lot like wood, meaning it is hygroscopic. It breathes. When the heater kicks on and the air gets bone-dry, your floors literally exhale their moisture and physically get smaller. I made the classic rookie mistake of skipping the prep work early in my career. I didn’t use a moisture meter to check the environment before the boards went down, and I paid for it with a winter full of drafts coming through the floorboards. Today, I want to show you exactly how to manage this seasonal shift and why hardwood floor care secrets aren’t just for oak and maple.
Does Bamboo Really Live Up to the Hype?
I get this question all the time from neighbors who see their floorboards pulling apart. You might be wondering if you made a mistake choosing this material over traditional wood or tile. While I used to think bamboo was the ultimate eco-friendly choice without any downsides, the reality is that its dense structure makes it particularly reactive to moisture swings. According to the National Wood Flooring Association, bamboo can expand and contract significantly more than certain engineered products if the indoor climate isn’t strictly controlled between 35% and 55% humidity. If your environment falls outside that range, you might even notice that your bamboo floor is making a loud cracking sound as it struggles to adjust. Have you noticed these annoying gaps appearing between your planks or heard strange pops during the night? Let me know in the comments, because catching it early is the only way to prevent permanent damage. We are going to dive into the practical ways to stabilize your home’s air so your floor stays put all year long.
The transition from a drafty, gapping floor to a solid, silent surface starts with acknowledging that your floor is a living, breathing entity. To stop the movement, you have to control the atmosphere it lives in. Think of your bamboo planks like a sponge; when the air is dry, they shrink. To fix this, you don’t reach for the wood filler first—you reach for the humidifier.
Stop the Shrinkage with Controlled Humidity
Your first line of defense is a high-quality hygrometer. You can’t fix what you can’t measure. I once worked on a renovation in a high-desert climate where the homeowner was convinced the installer had used sub-par material. When I pulled out my sensors, the indoor humidity was sitting at a bone-dry 12%. No floor stands a chance at that level. By installing a whole-house humidifier, we brought the levels back to a steady 45%, and within three weeks, most of the gaps had vanished on their own as the bamboo re-hydrated. This is a core part of hardwood floor care secrets to longevity and shine—maintaining that atmospheric sweet spot.
How to Close Gaps Without Tearing Up the Room
If your humidity is stable but the gaps remain, you need to physically encourage the planks back together. I remember a particularly stubborn hallway in a lake house where the gaps were large enough to see the subfloor. Instead of ripping it out, I used a flooring gap fixer tool—essentially a high-grip suction cup block that you stick to the board and tap with a rubber mallet. This allows you to slide the boards back into their original positions without damaging the finish. Once the boards are tight, you can secure the last row or use a tiny bit of wood-safe adhesive in the tongue-and-groove joint of the offending boards to keep them from migrating again. Knowing how to stop hardwood floors from gapping in the hallway often comes down to this physical manipulation rather than chemical fillers, which usually just crack and fall out when the seasons change again.
The Right Way to Prep for a Stable Foundation
Oftentimes, bamboo movement is exacerbated by what lies beneath. If your subfloor isn’t perfectly flat, the planks will flex and shift every time you walk on them, eventually pulling the joints apart. Before any installation, you must consult the ultimate guide to floor leveling for a perfect finish. A level surface ensures the locking mechanisms of your bamboo aren’t under constant vertical stress. I’ve seen countless flooring installation mistakes to avoid for lasting results, but skipping the self-leveler or failing to use the plywood grade you need for a stable tile underlayment or wood base is the most common. Additionally, if you are installing over a slab, never ignore the moisture barrier rule for basement vinyl floors which applies just as strictly to bamboo to prevent the planks from absorbing ground moisture and cupping later on.
Secure Your Planks for the Long Haul
For wider bamboo planks, sometimes a simple click-lock isn’t enough to fight the forces of nature. In my experience, why wide plank flooring needs both glue and nails becomes very apparent when you see a five-inch wide bamboo board start to bow. Using a high-quality flooring adhesive in conjunction with cleats provides a double-layered defense against seasonal movement. This hybrid approach keeps the floor rigid during the dry months and prevents the boards from “walking” away from each other toward the walls. It might take a bit more time during the initial install, but it saves you from the 2:00 AM cracking sounds that keep homeowners awake during the first frost of the year.
While many homeowners focus solely on the moisture content of the planks, I’ve found that the real failures usually start long before the first board is even unboxed. There’s a persistent myth in the DIY community that ‘self-leveling’ compounds are a magic wand you just pour and walk away from. In my years on the job, I’ve seen more failed installs because people assumed gravity would do the work for them. If you don’t actively manage the surface tension of the pour, you’ll end up with high spots that cause your bamboo to ‘bridge’ and eventually crack under the weight of furniture.
Level Your Subfloor Like a Scientist Not a Handyman
The most common trap I see is skipping the primer or, even worse, using the wrong one for the substrate. I once consulted on a project where the entire floor was ‘hollow.’ The installer had poured a high-end leveler over old, sealed concrete without a grit-based primer. Within months, the whole surface debonded. This is exactly why most floor levelers fail on top of painted concrete. You need to create a mechanical bond, not just a chemical one. If you see your prep work starting to flake, you’re likely witnessing why your floor primer is peeling off like a sunburn, and laying bamboo over that is a recipe for a structural nightmare.
#IMAGE_PLACE_HOLDER_C#
Why does your self-leveler develop spiderweb cracks overnight?
This is the question that haunts advanced installers. You followed the mixing ratios, yet you wake up to a map of tiny fractures. This usually happens because of ‘flash drying’—where the subfloor sucks the moisture out of the leveler too quickly. To prevent this, professional precise floor leveling techniques to achieve flawless surfaces involve multiple coats of primer to seal the substrate’s porosity. According to the Tile Council of North America (TCNA), proper substrate preparation is responsible for over 90% of flooring longevity. If you ignore the absorption rate of your plywood or concrete, you are setting yourself up for failure. You must master the roller selection that prevents air bubbles in leveler to ensure the structural integrity remains intact during the cure.
The Thinset Myth That Destroys High-End Finishes
Everyone wants to save a few bucks, but using a standard unmodified thinset for modern, dense materials is a massive mistake. Whether you are transitioning to tile or securing bamboo headers, you need a high-polymer-modified mortar. I’ve seen the hidden cost of using cheap thinset on large format tiles firsthand; the bond simply isn’t strong enough to resist the lateral shear forces as your house settles. This is especially true if you are trying to find the secret to getting a flat floor for large format tiles near your bamboo transitions. A premium mortar offers the flexibility needed to handle the slight shifts in your home’s foundation without snapping the grout lines or popping the planks.
Getting the foundation right isn’t just about looks—it’s about the physics of how your home breathes. If you don’t use mastering floor leveling pro secrets for perfect installations, you’ll be chasing ‘clicks’ and ‘pops’ for the next decade. Have you ever fallen into the trap of thinking a subfloor was ‘good enough’ only to have it fail six months later? Let me know in the comments, and let’s figure out how to stop the cycle of flooring frustration.
Once the dust settles and the leveler is cured, the real work of homeownership begins—keeping that surface pristine. I’ve seen beautiful installs turn into disasters in less than a year because someone used a steam mop or the wrong chemical cleaner. If you want to avoid a situation where your hardwood floor turned cloudy after cleaning, you need a strategy. My personal go-to is a dedicated microfiber spray mop with a pH-neutral cleaner. I never, ever use the ‘natural’ concoctions found on DIY blogs; in fact, the vinegar mistake that eats through your natural stone tiles is just as destructive for bamboo finishes, stripping the protective resins over time.
The Maintenance Kit I Actually Use Every Week
People always ask me what’s in my personal tool bag. It’s not just hammers and nails. I rely heavily on a digital moisture meter to keep tabs on the house as the seasons change. If I see the percentage dipping below 6% in the wood, I know it is time to turn up the humidifier before those gaps reappear. For daily upkeep, I recommend a vacuum with a soft brush attachment—never a beater bar, which can leave microscopic scratches that dull the finish. These small habits are the real hardwood floor care secrets to longevity and shine. If you do encounter a disaster, like a deep scratch from moving furniture, don’t panic. You can look into mastering hardwood floor refinishing expert tips for 2025 to learn how to spot-repair without sanding the whole room.
How do I maintain my bamboo floor’s shine for years?
The secret isn’t more wax; it is less friction. Dirt and grit act like sandpaper under your feet. I tell all my clients to place high-quality walk-off mats at every entrance. But maintenance also means checking the ‘infrastructure.’ Every six months, I walk the floor listening for the ‘hollow’ sounds we discussed earlier. According to the National Wood Flooring Association (NWFA) Technical Publication No. C200, the moisture content of wood is a direct function of the relative humidity and temperature of the surrounding air. By staying ahead of these shifts with revamp your home with expert flooring installation tips regarding environmental control, you extend the life of the finish by a decade. I’m also a huge fan of felt pads on furniture legs—not the cheap adhesive ones that fall off, but the heavy-duty screw-in versions that stay put permanently.
The Future of Smart Flooring is Closer Than You Think
Looking ahead, I predict we will see ‘smart’ subfloors becoming the industry standard. We are already seeing prototypes of underlayments with embedded sensors that alert your smartphone if moisture levels from the slab exceed safe thresholds. Imagine getting a push notification that your floor is thirsty before the first crack even forms. Until then, you have to be the sensor. I challenge you to go out and buy a $15 hygrometer today. It is the single most important tool for any homeowner with bamboo or hardwood. Start tracking your indoor humidity daily for a week; you might be surprised to see how much your HVAC system is actually drying out your investment. If you stay proactive and use mastering floor leveling pro secrets for perfect installations as your foundation, you won’t just be living on your floor—you’ll be preserving a masterpiece.
Bamboo Realities No One Mentions in the Showroom
After years of tackling seasonal shifts, my biggest lightbulb moment was realizing that bamboo is a performance material that demands a performance environment. One thing the showroom won’t emphasize is that carbonized bamboo is often softer and more reactive than natural strands. I learned the hard way that you cannot force a plank to stay put if the foundation is compromised; referencing a step-by-step guide to flooring installation and leveling success is non-negotiable to prevent those heart-wrenching mid-winter gaps. Lastly, remember your floor moves as a single unit—if one section is pinned by a heavy kitchen island or permanent cabinetry, the rest of the room will inevitably pull away, creating gaps at the weakest joints.
Gear That Saved My Floors and My Sanity
If you are serious about maintaining a gap-free home, skip the expensive polish and buy a high-accuracy digital hygrometer. I personally use Bluetooth-enabled sensors that log data to my phone so I can see patterns when the furnace kicks on. For physical repairs, the orange suction-cup ‘Gap Fixer’ is the only tool that allows you to shift boards without damaging the finish. I also highly recommend studying flooring installation fundamentals leveling for a seamless look to ensure your subfloor isn’t the hidden enemy behind your planks’ movement. These tools, combined with professional-grade felt pads, are the best insurance policy you can buy for your investment.
Building a Floor That Outlasts the Seasons
Caring for bamboo flooring isn’t just about cleaning; it’s about mastering the physics of your home. When you control the humidity and ensure a level foundation, those alarming cracking sounds disappear, replaced by the silence of a well-built home. Even when faced with complex layouts, such as how to fix a transition between tile and uneven concrete, remember that every flooring challenge has a mechanical solution. You now have the knowledge to turn a finicky material into a lifelong feature of your home. Have you ever felt like your floor was actually moving under your feet during a cold snap? Let me know your experience in the comments below!