
I remember the day I decided to renovate my 1920s bungalow and found a floor that looked like a skateboard ramp. I set a simple carpenter’s level on the subfloor and watched in horror as the bubble didn’t just touch the line—it disappeared into the stratosphere. A full two-inch drop from one side of the room to the other. I felt defeated before I even started. If you are staring at a slope that makes your furniture look like it is sliding into a black hole, I have been there. It is intimidating, but it is not the end of the world for your flooring project.
Tackling the Sinking Ship Feeling in Your Subfloor
Let us be honest: a two-inch drop is massive. It is not something you can just hide with a thick rug or extra padding. When I first started out, I made the classic rookie error of thinking I could just eyeball the amount of material needed. I ended up with a wavy mess that looked like a frozen ocean, and that is one of the biggest flooring installation mistakes to avoid. Since then, I have learned that flooring installation fundamentals require a much more methodical approach when the slope is this dramatic. Today, I am going to show you exactly how to bridge that gap so you can finally get to the fun part—choosing the right hardwood floors or tile for your home. We are going to talk about sleepers, shims, and the ultimate guide to floor leveling steps that actually work for deep dips.
Is a two-inch drop actually too far gone for a DIY fix?
I get why you might be skeptical. You might be worried that the sheer weight of all that leveling compound will crack your joists or that it simply will not bond to the existing surface. It is a valid fear. I used to worry that floor levelers would fail if I poured them too thick in one go. But here is the reality: according to the National Wood Flooring Association, while most subfloors should be flat within 3/16 of an inch over a 10-foot span, you can absolutely correct major structural dips if you use the right mechanical support system first. We are not just pouring liquid; we are rebuilding the plane of your room. Before we dive into the grit, have you ever tried to ignore a slope only to have your table legs wobble for a decade? Let me know in the comments because I need to know I am not the only one who lived with a leaning kitchen for years. Let’s get into the precise floor leveling techniques that will save your sanity and your subfloor.
Build a wooden bridge over the dip
When you are facing a two-inch drop, pouring liquid leveler is like trying to fill a swimming pool with a garden hose—it is expensive, heavy, and likely to fail. Instead, you need to think like a bridge builder. We use “sleepers,” which are essentially tapered wooden strips that act as a new set of joists on top of your old ones. This is the core of a step-by-step guide to flooring installation and leveling success for extreme slopes. In my 1920s bungalow, I didn’t just throw plywood down. I spent a Saturday morning with a table saw, ripping 2x4s into long, skinny wedges that started at zero and ended at exactly two inches. It felt like I was building a miniature staircase for the world’s flattest mouse, but once those sleepers were glued and screwed into the existing joists, that terrifying slope was gone.
Rip your sleepers like a professional tailor
To do this correctly, you need to find the high point of the room and mark a level line around the perimeter using a laser level. Measure down from that line to your subfloor every 12 inches. This gives you the exact thickness your sleepers need to be at every point. It is much more effective than guessing. If you are preparing for how to achieve flawless floor leveling before tile laying, these wooden supports provide the rigid base that prevents grout from cracking later. I remember rushing this once and not fastening the sleepers tightly enough; the “click-clack” sound of the wood rubbing against the subfloor haunted me until I ripped the whole thing up and did it again with construction adhesive and heavy-duty floor screws.
#IMAGE_PLACE_HOLDER_B#
Seal the perimeter before the final pour
Once your sleepers are in and you have topped them with a new layer of 3/4-inch plywood, you still have small micro-dips to handle. This is where the liquid magic comes in. But before you mix a single bag, you must seal the edges of your room. Self-leveling compound has the consistency of pancake batter, and it will find every tiny crack to leak through. I have seen leveler disappear into a basement through a gap in the baseboard like a disappearing act. Use spray foam or caulk around the entire perimeter to create a “bathtub” effect. When you are ready, pay attention to the mixing paddle speed that ruins your leveling compound—too fast and you introduce bubbles; too slow and it sets before you can spread it. Use the spiky roller secret for a mirror-smooth pour to knock out any remaining air pockets. This secondary layer fills the grain of the plywood and creates that glass-like surface needed for mastering floor leveling pro secrets for perfect installations.
Why mechanical fasteners beat chemistry every time
For a drop this deep, the bond between the leveler and the wood is your biggest risk. Leveler is heavy, and wood expands and contracts. By using the sleeper method, you are using mechanical fasteners to bridge the gap, rather than relying solely on the adhesive strength of a chemical pour. This prevents the “hollow” sound often associated with thick pours. It also ensures that your hardwood floors have something solid to nail into. If you just poured two inches of leveler, you would have no way to secure your planks without specialized adhesives. This structural approach is how I saved my bungalow and why my kitchen table finally stays where I put it.
Let’s dig deeper into the psychology of why we often fail at these high-stakes repairs. Everyone tells you that self-leveling compound is a magic potion that washes away your subfloor sins. In my experience, relying on liquid alone for a deep two-inch dip is the fastest way to waste five hundred dollars and end up with a brittle, cracked mess. It’s a common myth that “self-leveling” means “zero effort.” If you don’t manually guide that material with a gauge rake, you’ll end up with stagnant humps instead of a true plane. This is where most floor leveling challenges begin—with the false hope that gravity does all the work for you.
How do I stop my leveler from cracking over old wood joists?
The secret isn’t more product; it’s structural reinforcement and chemical compatibility. The National Wood Flooring Association (NWFA) emphasizes that for a stable installation, the deflection—that slight bounce you feel when you walk—must not exceed a specific ratio (L/360). If your joists are sagging, no amount of liquid will fix that underlying movement. This is the “oops” factor I see constantly: homeowners pouring heavy leveler onto a weak subfloor, only to find spiderweb cracks appearing by the next morning. You need to staple down a galvanized diamond mesh or plastic lath to give the leveler some tensile strength. Without it, the wood expands and the leveler snaps. This is a critical step before mastering hardwood floor refinishing on an older home.
#IMAGE_PLACE_HOLDER_C#
Another hidden nuance people miss is the “telegraphing” effect. You might finally get the floor level to the eye, but if you leave tiny ridges from your trowel or bubbles from a poor mix, your new luxury vinyl will show every single imperfection once the light hits it. This is exactly why your LVP floor is showing telegraphing weeks after the job is done. And for the love of your project budget, please use a moisture meter. Leveling compounds are incredibly porous and can trap moisture against your original wood joists, leading to silent rot or causing levelers to fail by losing their bond. Have you ever fallen into the “liquid-fix” trap only to have it crack or hollow out a month later? Let me know in the comments because your mistakes might just save someone else’s floor.
To get that level surface I was obsessed with in my 1920s bungalow, I had to stop relying on a simple four-foot bubble level. When you are dealing with significant slopes, you need a 360-degree green beam laser level. I personally swear by the Bosch GLL3-330CG because red beams tend to disappear in a sunlit kitchen, making it impossible to see your marks across a large span. By setting it up in the center of the room, you create a consistent ‘sea level’ that exposes every dip and hump instantly. This is part of the revamp your home with expert flooring installation tips that saved my project. When you are working with those sleepers we discussed earlier, the laser is your only honest friend. If you are off by even an eighth of an inch at the start, that error compounds dramatically by the time you reach the far wall.
How do I ensure my floor stays level for the long haul?
The secret to longevity isn’t just about how many screws you use; it is about climate control. Wood is a living material that reacts to the air around it. If you do not maintain a consistent humidity level between 30% and 50%, your subfloor will shift, and those beautiful hardwood floors will eventually start to gap or buckle. I keep a digital hygrometer in my hallway now to monitor this daily. Beyond humidity, you need to revisit the hardwood floor care secrets to longevity and shine. This means checking for any signs of moisture migration through the slab or joists. I always recommend following the ASTM F710 technical standard for those prepping concrete—it is the industry gold standard for testing pH and moisture levels before you even think about applying an adhesive. 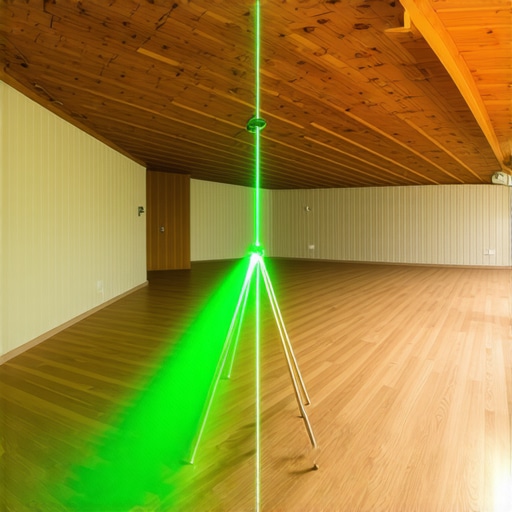 Stop guessing with the painter’s plastic trick. Before I pour a single bag of compound, I tape a 2×2 foot square of clear plastic to the floor. If there is condensation under it 24 hours later, the floor is too wet for installation. It is a brilliant, low-tech version of how to use a moisture meter before you lay wood floors, and it has saved me from thousands of dollars in ruined materials. For the final pour, I also recommend a roller selection that prevents air bubbles in leveler. Using a 20mm spiky roller is the only way to get that ‘glass’ finish without the micro-pitting that can ruin a thin-set bond later. Looking ahead, the next big thing in flooring isn’t a new material—it is LIDAR mapping. We are already seeing apps that use your smartphone’s camera to create a heat map of your floor’s topography. In a few years, we won’t be hand-cutting shims; we will be 3D printing custom subfloor inserts based on a 30-second digital scan. For now, try the plastic square test on your own subfloor tonight to see what is happening underneath. Spend twice as much time on your prep as you do on your finish, and your future self will thank you every time they walk across a perfectly silent, flat room.
The Hard Reality of Trying to Cheat a Deep Slope
If there is one thing that my 1920s bungalow project taught me, it is that you cannot negotiate with physics. When I first encountered that two-inch drop, my instinct was to find the fastest ‘pour-and-forget’ solution, but that path leads straight to cracked tiles and squeaky boards. The biggest lightbulb moment for me was realizing that sleepers aren’t just fillers; they are the new backbone of your room. I used to think a little movement was okay, but I quickly learned how to stop your subfloor from squeaking with one screw by making sure every sleeper was rock-solid. Another lesson? Never underestimate the power of primer. I once skipped it on a porous wood surface and watched in horror as air escaped the wood, creating a moonscape of tiny craters, which is exactly why self-leveling compounds bubbled over your subfloor in the first place.
The Reliable Gear That Actually Delivers a Flat Finish
You don’t need a warehouse full of tools, but you do need the right ones to bridge a massive gap. First, I always keep a high-quality 360-degree laser level in my kit; it is the only way to ensure your sleepers align across the entire room. Second, I cannot recommend the plastic test enough before you pour any compound. It is a simple, no-cost way to check for subsurface dampness using the painters plastic trick for testing concrete moisture. Finally, if you find that your leveling job creates a height difference at the door, you need to know how to fix a transition between tile and uneven concrete to avoid a permanent tripping hazard. These aren’t just ‘pro tips’; they are the safety net for your investment.
Reclaim Your Home from the Slope
Staring at a two-inch drop can feel like you are looking into an abyss, but once you break it down into mechanical support and a clean liquid finish, it becomes just another weekend project. You have the knowledge now to move beyond temporary fixes and actually rebuild a surface that will support your family for decades. Don’t let a sagging joist or an old house slope stop you from installing those dream floors. Proper floor leveling is the silent hero of every beautiful renovation, and you are more than capable of mastering it. Have you ever pulled back an old carpet only to find a subfloor that looked more like a half-pipe? Let me know your biggest ‘oh no’ moments in the comments below!