
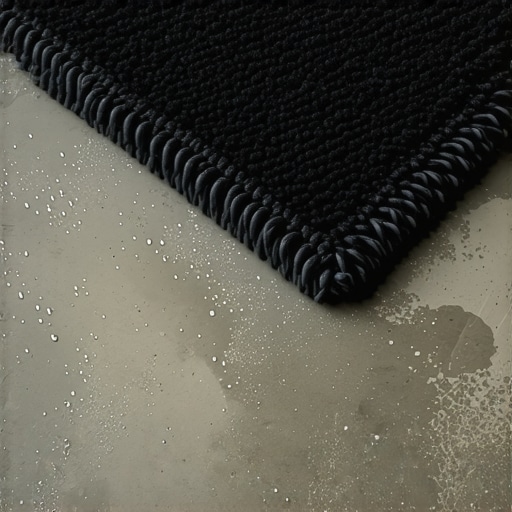
I remember the exact moment I realized my basement office had a secret. I reached down to adjust my favorite vintage wool rug, and instead of the dry, cool touch of concrete, my fingers met a cold, clammy dampness. It was gross. My rug was basically a giant sponge, and the floor underneath looked like it had just finished a marathon. I felt like a failure. I had spent thousands on a remodel, only to have the ground itself turn against me. I thought concrete was a solid, impenetrable fortress. I was wrong. Concrete is actually more like a giant, hard sponge that constantly ‘breathes’ moisture from the earth below.
Your Concrete is Breathing and Your Rug is Suffocating It
The technical term for this soggy mess is ‘sweating slab syndrome,’ but to those of us living through it, it just feels like a damp basement nightmare. This happens because of a process called vapor drive. Moisture from the soil beneath your home travels through the porous concrete. When you throw a rug over that slab, you are effectively putting a plastic bag over a sweaty forehead. The moisture has nowhere to go, so it condenses and settles between the floor and the rug. This is exactly why you need to understand the moisture barrier rule for basement vinyl floors and other coverings before you lay anything down. Early in my DIY journey, I made the mistake of thinking a thicker rug pad would solve the coldness; in reality, it just created a bigger environment for mold to thrive. According to the American Concrete Institute, moisture vapor can migrate through even the densest concrete slabs, often carrying dissolved salts that can damage your flooring over time.
Is this actually a foundation leak or just science?
It is easy to panic and think your pipes are bursting or your foundation is crumbling. Most of the time, it is just a simple matter of dew points and humidity. When warm, moist air hits that cool concrete surface, it liquefies. If you are planning a more permanent fix, you might be looking into the concrete etching step you shouldn’t skip to prepare the surface for a real sealer. We are going to solve this today by identifying if your slab is the problem or if it is the air in the room. Have you ever lifted a rug only to find a dark, damp patch staring back at you? It’s a sinking feeling, but it is totally fixable with the right approach. Before you commit to any new flooring, I highly recommend using the painters plastic trick for testing concrete moisture to see exactly how much water your slab is pushing out. Once we know what we are dealing with, we can talk about the right sealers and barriers to keep your feet dry and your rugs fresh.
Stop Your Concrete from Acting Like a Sponge
To fix a damp slab, you first have to measure what you cannot see. I learned the importance of this the hard way when I tried to patch a small section of oak in my hallway; within a week, the edges were curling like a dried leaf because I ignored the subfloor moisture. To avoid this, you absolutely must learn how to use a moisture meter before you lay wood floors. If you do not have a pro-grade meter, you can still get reliable results with a DIY approach. Use the painters plastic trick for testing concrete moisture by taping a square of clear plastic to the floor for 24 hours. If there is condensation under it or the concrete looks darker, your slab is ‘exhaling’ water. It is like checking for an oil leak by putting cardboard under your car—it is low-tech, but it never lies.
Prep the Surface So Your Sealer Actually Sticks
Once you have confirmed a moisture issue, the preparation phase begins. You cannot simply pour a sealer or leveler over dusty concrete and expect it to work. It is like trying to use duct tape on a sandy beach—it just will not grab. You need a clean, open surface to ensure a proper bond. This is where the concrete etching step you shouldn’t skip before leveling becomes essential. Etching uses a mild acid solution to open up the ‘pores’ of the concrete so the subsequent layers can bite into the material. Without this, your expensive moisture barrier is just sitting on top like a loose sheet of paper, waiting to peel. #IMAGE_PLACE_HOLDER_B#
Beat the Clock When Pouring Leveler
If your slab is uneven, which most basement floors are, you will likely need a self-leveling compound. However, timing is everything. I once had a whole five-gallon bucket of leveler harden into a rock while I was still frantically looking for my trowel. It was a fifty-dollar mistake that taught me why why your self-leveler is drying faster than you can pour it is a common nightmare for DIYers. You have to work fast and ideally have a helper. To get that glass-like finish without any trapped air, I swear by the spiky roller secret for a mirror smooth pour. It is essentially a tool that pops tiny air bubbles as you roll it over the wet compound, preventing your floor from looking like a piece of Swiss cheese once it dries.
Choose a Barrier That Actually Works
Finally, you need to install a physical barrier that acts as a raincoat for your finished flooring. For those dealing with high humidity, knowing how to install luxury vinyl over a concrete slab with high moisture is a game changer. This usually involves a 6-mil poly film that stops vapor drive in its tracks. If you are aiming for a more complex look, you might even consider transform-your-space-with-expert-hardwood-floor-tile-combinations to place moisture-resistant tile in the highest risk areas while keeping your wood floors in the dryer zones. By using precise floor leveling techniques to achieve flawless surfaces and the right barriers, you are not just hiding a problem; you are engineering a permanent solution that keeps your rugs dry and your air clean.
I’ve seen dozens of DIYers spend hours obsessing over a laser-level line, only to have their grout crack or their planks separate six months later because they missed the hidden nuance of structural deflection. Everyone tells you that ‘flat is king,’ but in my experience, rigidity is the real boss of the basement. You can have a floor that is as flat as a frozen lake, but if the subfloor has even a millimeter of ‘bounce’ or deflection, your tile will fail. Most people assume that pouring five bags of compound will fix a shaky floor, but leveler is not a structural repair; it is a cosmetic one. Before you even think about the finish, you need to use the hammer test for finding loose subfloor nails to eliminate any structural movement that a leveler cannot fix. According to the Tile Council of North America (TCNA) Handbook, the maximum allowable deflection for floor joists under a live load should not exceed L/360 for ceramic tile. If you ignore the physics of what is happening under the surface, no amount of expensive sealer will save your installation.
Why does my floor feel bouncy even though it is perfectly level?
The trap most advanced DIYers fall into is assuming that a level subfloor is a stable subfloor. If you are chasing the secret to getting a flat floor for large format tiles, you must first address the joist spacing. Large format tiles are incredibly unforgiving; they essentially act as a giant lever, and any subfloor movement will snap the bond between the tile and the thinset. This is why many floor leveling challenges common mistakes and how to avoid them actually start with the wood underneath the concrete or the plywood. If you are installing hardwood instead of tile, the rules change slightly but remain just as strict. You might have perfectly leveled the floor, but if you forgot the expansion gap rule for radiant heated wood floors, the natural movement of the wood as it breathes will cause the planks to buckle and peak, undoing all your hard work.
The Hidden Trap of Over-Watered Compounds
Another nuance that separates the pros from the amateurs is the ‘thirsty’ subfloor. Most people mix their self-leveling compound by eye, adding a little extra water to make it flow easier. This is a fatal mistake. Adding too much water weakens the polymer bonds, leading to a powdery, brittle finish that will eventually delaminate. This is a primary reason why your self-leveler developed spiderweb cracks overnight. If the mixture is too thin, the solids settle to the bottom and the water rises to the top, leaving you with a surface that looks like a dried-out salt flat rather than a professional subfloor. #IMAGE_PLACE_HOLDER_C#
Furthermore, if you are working on a concrete slab, the concrete itself can suck the moisture out of your leveler before it has a chance to bond. This is why the priming stage—often dismissed as an optional upsell—is the most critical part of the process. Without proper priming, your leveler is just sitting on a bed of dust. Even when you are following the rules for revamp your home with expert flooring installation tips, skipping the bond breaker or the primer is the fastest way to a failed inspection. Have you ever fallen into this trap? Let me know in the comments.
Once the dust settles and you are finally walking on a surface that doesn’t crunch or dip, the real work of preservation begins. I used to think the job ended when the last piece of trim was nailed in, but I was wrong. A floor is a living part of your home. If you want those hardwood floor care secrets to longevity and shine to actually work, you have to treat the environment as part of the installation. I personally keep a digital hygrometer in every room where I have laid wood or large format tile. Why? Because according to the National Wood Flooring Association (NWFA), maintaining a relative humidity between 30% and 50% is the only way to prevent your planks from becoming a gapping mess. If you ignore the air, your floor will eventually ignore its duty to stay flat.
The Gear That Separates Success from Heartbreak
I have a shelf in my garage dedicated to the ‘failures’—tools that promised the world but delivered nothing but frustration. If you are serious about avoiding flooring installation mistakes to avoid for lasting results, you need to invest in a heavy-duty, low-RPM mixing drill. Most people use a standard cordless drill for their leveler, which is a recipe for disaster. You end up with air bubbles that make your floor look like the moon’s surface. I only use a dedicated paddle mixer because the mixing paddle speed that ruins your leveling compound is a very real thing; too fast and you whip air into it, too slow and it clumps. I also never go onto a job site without a 10-foot straightedge. Lasers are great for height, but a physical straightedge tells you the truth about the small dips that a laser might skip over. It is the only way to achieve mastering floor leveling pro secrets for perfect installations without second-guessing yourself every five minutes.
#IMAGE_PLACE_HOLDER_D#
How do I keep these surfaces for a lifetime?
Maintenance isn’t just about a mop; it is about inspection. Every six months, I do a ‘sock slide’ across my floors. If my sock catches on an edge, I know I have a lippage issue or a plank that is starting to peak. For tile, this is the moment to check for any hairline fractures. If you used the secret to installing large format tile without lippage, you should be fine, but houses settle. For wood, I look for the ‘cloudy’ look that happens when people use the wrong cleaners. If your finish is starting to look tired, don’t wait for it to peel. Check out mastering hardwood floor refinishing expert tips for 2025 to learn how to buff and coat before a full sand-down becomes a necessity. Prevention is always cheaper than a total tear-out.
A Look at Where Flooring Technology is Going
I am seeing a massive shift toward ‘smart’ underlayments and high-performance adhesives that handle moisture better than anything we had five years ago. The industry is moving toward installing tiles like a pro step-by-step strategies for 2025 that involve uncoupling membranes as a standard, not an upgrade. These membranes allow the tile and the subfloor to move independently, which is the ultimate insurance policy against cracks. I predict that within the next decade, we will see self-healing grouts and even more advanced vapor-permeable sealers that allow the slab to ‘breathe’ without ruining the adhesive. My advice? Don’t be afraid to try the newer, more expensive polymer-modified compounds. They are far more forgiving than the old-school cement mixes. Take the leap and try a variable-speed mixer on your next small patch; it will change how you view the entire process.
Lessons I Paid for in Sweat and Spare Tile
One of the hardest truths I had to swallow is that a ‘clean’ floor isn’t always a ready floor. If you’ve ever dealt with a renovation, you know that dust is the absolute enemy of adhesion. I’ve learned that using the best way to prep a dusty concrete floor for adhesive is non-negotiable if you want your leveler to stay put. I also learned the hard way that planning for debris is part of the professional mindset; understanding the 10 yard dumpster weight limit secret for heavy tile demo in reeds spring can save you from a massive logistics headache and unexpected fees mid-project. These small details are what separate a stressful weekend from a successful home upgrade.
My Unshakable Kit for a Smooth Pour
When it comes to tools, don’t settle for ‘good enough.’ I found that the roller selection that prevents air bubbles in leveler was the single biggest difference between a floor that looked like a moonscape and one that looked like a sheet of glass. These aren’t just gadgets; they are the insurance policies for your hard work. Beyond the roller, I always keep a dedicated paddle mixer and a high-quality straightedge on hand to verify every inch of my work before the compound sets up. #IMAGE_PLACE_HOLDER_E#
Your Foundation Deserves the Best Possible Start
You’ve got the knowledge now to transition from a damp, uneven mess to a professional-grade masterpiece. Remember that flooring installation fundamentals and leveling for a seamless look are the bedrock of everything else you do in your home. You aren’t just laying a floor; you’re building the stage for your family’s daily life. Don’t rush the prep, trust the physics of the materials, and take that first step with confidence. Have you ever found a surprising moisture issue after pulling up an old floor or rug? Let me know in the comments below!