
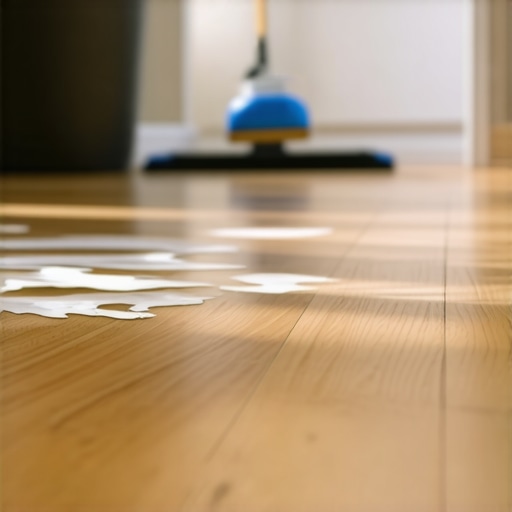
I stood there with my hands on my hips, staring at what used to be a glossy, rich expanse of oak. After three hours of scrubbing, my living room didn’t look clean—it looked like it was covered in a thin, milky fog. I had invited neighbors over for dinner, and instead of showing off my home, I felt like I needed to apologize for the “dust” that wouldn’t wipe away. It’s a frustrating, sinking feeling when your hard work backfires, but that afternoon was my wake-up call. I realized that most of us are taught to clean wood all wrong. Today, we’re going to peel back that hazy layer and get your floors back to their former glory without the need for a full-scale renovation.
The day I almost ruined my finish with “common sense” cleaning
For years, I followed the advice of my grandmother: a little bit of vinegar and hot water solves everything. I thought I was being “natural” and avoiding harsh chemicals. In reality, I was slowly etching the finish and leaving behind a dulling residue that eventually turned into a stubborn, cloudy film. It’s one of those hardwood floor care secrets that many people learn too late. I even went through a phase where I thought mopping with dish soap was a great way to cut through grime. All I did was create a sticky magnet for dirt. According to the National Wood Flooring Association, using the wrong pH-balanced cleaner can cause a chemical reaction that permanently clouds the surface or even causes the finish to peel. This isn’t just about aesthetics; it’s about protecting your home’s value. If you’ve been struggling with this, you might be tempted to jump straight into mastering hardwood floor refinishing, but wait—most of the time, the fix is much simpler and involves stripping away the gunk you’ve accidentally applied. You absolutely must stop using vinegar on your hardwood floors immediately if you want to see that shine again.
Does a cloudy floor mean the wood is permanently damaged?
The biggest fear I had was that I’d have to spend thousands of dollars to sand everything down to the bare grain. It’s a common skepticism: is the wood “dead,” or is it just “dirty”? Most of the time, that cloudiness is just a “wax buildup” or a “surfactant haze” sitting on top of the polyurethane. It’s essentially a layer of dried soap and minerals that’s refracting light instead of letting it pass through. Have you ever looked at your floor from a certain angle and felt like you could literally scrape the fog off with your fingernail? Tell me in the comments if you’ve experienced that “milky” look right after a deep clean! We’re going to walk through the exact steps to diagnose if your problem is surface-level or if it’s deep-seated moisture damage, setting the stage for a floor that actually reflects your hard work.
Identify the source of that milky film before you start scrubbing
Before you dump more chemicals on your floor, you need to know exactly what you are fighting. Think of your floor’s finish like a window; right now, you’ve got a layer of grease and dust stuck to the outside of the glass. If you scrape a small, inconspicuous area with your fingernail and a greyish, waxy substance comes up, you are dealing with surfactant buildup. This usually happens when people think mopping with dish soap is a safe alternative to dedicated cleaners. The soap never actually leaves; it just dries into a microscopic mountain range that traps light. If the cloudiness doesn’t scrape off, it might be moisture trapped under the finish, which is a different beast altogether. For those dealing with deeper issues, mastering hardwood floor refinishing might be the eventual path, but for most of us, we just need to strip the gunk away.
The low-moisture method for stripping wax and soap buildup
The biggest mistake I made during my first attempt was flooding the floor. I thought more liquid meant more cleaning power. I ended up with boards that started to cup because I ignored the hardwood floor care secrets regarding moisture control. To do this right, you need a pH-neutral intensive cleaner or a mixture specifically designed to break down wax. Use a spray bottle rather than a bucket. By misting a three-foot section and letting it sit for exactly sixty seconds, you allow the chemistry to do the heavy lifting. I remember the first time I did this in my hallway; I used a white microfiber pad, and after one pass, the pad was nearly black. It wasn’t dirt from the outdoors; it was years of “cleaner” residue finally coming off. It felt like peeling a sticker off a new phone—satisfying and slightly horrifying.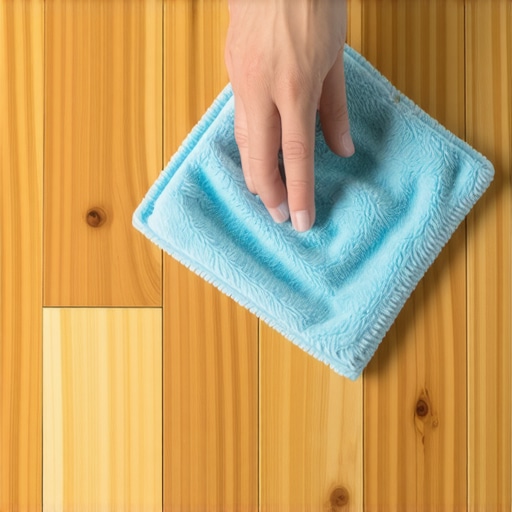
Choose the right tools to avoid scratching the grain
You don’t need a drum sander to fix a hazy floor, but you do need the right mechanical action. Avoid steel wool, which can leave behind tiny shards that rust. Instead, use a non-abrasive scrubbing pad. If you’ve ever used the mineral spirits trick for removing dried grout haze on tile, you know that sometimes a solvent is your best friend. For wood, a bit of odorless mineral spirits on a cloth can dissolve stubborn wax spots without hurting the polyurethane beneath. This is especially helpful if you’ve recently transitioned from a high-gloss to a more modern look, as you’ll find that matte finish hides scratches better than high gloss, but only if the surface is perfectly clean first.
Wipe twice to ensure a streak-free reflection
Once you’ve broken down the haze, the most critical step is the “final buff.” If you leave even a hint of the stripping solution on the floor, it will dry back into a new, thinner haze. I use a two-cloth system: one damp cloth to pick up the dissolved sludge and one bone-dry microfiber to buff the wood immediately after. It’s a bit like step-by-step guide to flooring installation and leveling success where the prep work defines the final look. If you see your reflection clearly without any “halo” around the light fixtures, you’ve won. If the wood still looks thirsty, you might consider a specialized hardwood refresher, but never, ever reach for the vinegar again.
Let’s dig deeper into why simply stripping the surface gunk isn’t always the end of the journey. While most people assume that a high price tag on the material guarantees a flawless finish, the truth is that your floor is only as good as what lies beneath it. In my experience, even the most expensive engineered planks will eventually fail if you ignore the nuances of the substrate. This is where most flooring installation mistakes to avoid for lasting results actually begin—long before the first board is even laid down. I once saw a neighbor spend a fortune on 7-inch wide-plank oak, only to have it start “telegraphing” every single seam and imperfection from the plywood underneath within six months. This happened because the subfloor wasn’t prepped using precise floor leveling techniques to achieve flawless surfaces. People often mistakenly believe that a thick foam underlayment will hide a multitude of sins, but it actually acts like a hinge, causing the joints to flex and eventually snap underfoot.
Stop blaming the wood for your subfloor’s failures
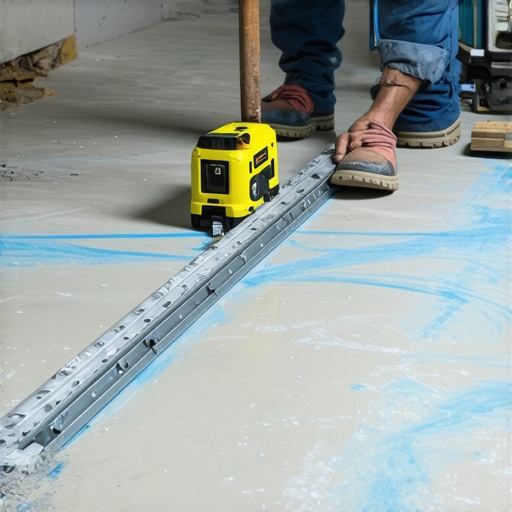
Everyone says the wood is the star of the show, but I’ve learned that the subfloor is the director. You can have the most beautiful finish, but if the foundation is uneven, you’ll end up with why your lvp floor is showing telegraphing from the subfloor. One of the biggest traps to avoid is the “Oops” factor of rushing your prep work. For instance, I’ve seen enthusiasts mix self-leveling compound at 1200 RPMs because they wanted to save time. All that does is whip air into the mixture, resulting in a brittle surface full of pinholes. You end up with a mess because you ignored the mixing paddle speed that ruins your leveling compound. The National Wood Flooring Association (NWFA) provides a clear standard: a subfloor should not deviate more than 3/16 of an inch in a 10-foot radius. Most people just eyeball it and pay the price later. To find those hidden valleys that lead to creaks and cracks, you should use the chalk dust secret for finding low spots in subfloors. Have you ever fallen into this trap? Let me know in the comments!
Why your expensive planks still sound hollow
There is a common skepticism among homeowners that “floating floors” are naturally supposed to sound clicky or hollow. That is a myth. If your floor sounds like a drum when your dog walks across it, it’s not the material’s fault—it’s an air gap. This often traces back to why your self-leveling pour looks like a topographical map. When the leveler isn’t distributed properly, it creates micro-hills. When you place a rigid plank over those hills, it bridges across the low spots, leaving a pocket of air. That air is what creates the “cheap” sound, even if you’re using top-tier materials. If you’ve already installed your floor and hear that annoying noise, you might be dealing with why your lvp floor is clicking when you walk on it. Correcting this after the fact is a nightmare, which is why mastering hardwood floor refinishing should always be paired with a deep dive into subfloor stabilization.
Does a 1/8-inch dip really require self-leveling compound?
This is the question that separates the amateurs from the pros. A 1/8-inch dip might seem negligible, but over a four-foot span, it creates enough of a slope to stress the tongue-and-groove joints of modern flooring. According to a study by the Floor Covering Institute, cumulative stress on these locking mechanisms is the number one cause of floor separation. Instead of just pouring liquid leveler everywhere, which can lead to its own set of problems, sometimes a localized patch is better. However, the trap here is failing to prime the floor first. Without a proper primer, the subfloor will suck the moisture out of your patch or leveler too quickly, leading to shrinkage and cracking. Whether you are prepping for wood or choosing the best tile for your hardwood floor upgrade, the chemistry of the bond is just as important as the levelness of the surface. By focusing on these advanced nuances, you ensure that your restoration isn’t just a temporary fix, but a lifetime upgrade.
The professional gear that separates a weekend project from a lifetime investment
I used to think that a standard 4-foot bubble level was enough. I was wrong. When you are working on a long hallway, even a fraction of a degree off at the start becomes a massive gap by the time you reach the bedroom door. This is why I always use the laser level move for perfectly straight hallways. It’s not about being fancy; it’s about having a reference point that doesn’t sag or shift like a string line. If you are serious about mastering floor leveling pro secrets for perfect installations, a 360-degree green beam laser is your best friend. It highlights those tiny subfloor humps that you’d never see with the naked eye until it’s too late. I personally rely on the Bosch GLL3-330CG because the visibility is unmatched even in bright rooms.
How do I maintain my floors and keep that level surface for the long haul?
The secret isn’t in a bottle of expensive polish; it’s in what you don’t do. For instance, I see so many people buy beautiful LVP and then destroy the adhesive bond or the core by using high-heat cleaning tools. You should never use a steam mop on luxury vinyl. The localized heat can cause the material to expand and contract too rapidly, leading to the dreaded “cupping” or joint failure. Instead, stick to a damp (not dripping) microfiber mop. To ensure your subfloor stays stable, especially over concrete, you have to follow the ASTM F710 standards, which emphasize the importance of moisture testing before you even think about laying a single tile or plank. If the moisture is rising from the slab, your leveler will eventually fail, no matter how good the pour looked on day one.
#IMAGE_PLACE_HOLDER_D#
The spiked roller is the unsung hero of a mirror-smooth finish
If you’ve ever poured a self-leveling compound and ended up with tiny pinholes or “craters,” it’s because of trapped air. I learned the spiked roller secret for a mirror smooth pour the hard way. By running a specialized spiked roller through the wet compound, you break the surface tension and allow those air bubbles to escape. It’s the difference between a floor that looks like a topographical map and one that looks like a sheet of glass. This is one of those tile installation pointers that save time and money because it prevents you from having to grind down high spots later. Looking ahead, I predict we’re going to see a massive shift toward “smart” flooring underlayments that can actually alert your phone if moisture levels under the wood reach a critical point—think of it as a check-engine light for your living room.
Before you start your next project, I want you to try this: go into your workspace and check the humidity levels with a hygrometer. If you aren’t within the 35% to 55% range, wait. Your wood needs to acclimate, or all that leveling work will be for nothing. Grab a high-quality moisture meter today; it’s the one tool that will save you more money than any other gadget in your bag.
The Hardest Lesson I Learned While Chasing a Perfect Finish
Reflecting on years of DIY mishaps, the biggest lightbulb moment wasn’t about the wood itself; it was about my own patience. I used to think I could outsmart the drying times on a leveler or skip the acclimation period for my planks. I learned that floor leveling isn’t just a chore—it’s a science of timing. If you try to rush the process, you’ll inevitably face floor leveling challenges common mistakes and how to avoid them. Another big realization? Expensive wood won’t fix a cheap subfloor. You have to treat the foundation with as much respect as the top layer. I also found that the ultimate guide to floor leveling for a perfect finish isn’t found in a single product, but in the systematic way you prep the surface before the first drop of leveler hits the ground.
#IMAGE_PLACEHOLDER_E#
Gear That Actually Earned a Permanent Spot in My Garage
I’ve wasted plenty of money on gimmicks, but a few tools have become my non-negotiables. First, a high-quality moisture meter is mandatory; it prevents you from installing wood over a damp slab and watching it warp. Second, the spiked roller I mentioned earlier is the only way to get a smooth surface without grinding. If you’re looking for more advanced techniques, I highly recommend checking out mastering floor leveling pro secrets for perfect installations. I also swear by using a dedicated hardwood cleaner that is pH-neutral to maintain those hardwood floor care secrets to longevity and shine. These tools don’t just save time; they protect your investment for decades.
Your Home Deserves a Better Foundation
Don’t let the fear of a milky haze or a creaky board stop you from transforming your space. Every pro was once a beginner staring at a messy subfloor and wondering where to start. By taking the time to address the underlying issues, from moisture barriers to precise leveling, you are ensuring your hardwood floors stay beautiful and structurally sound for the long haul. You have the knowledge and the tools—now it’s just about taking that first step toward a flawless home. Have you ever struggled with a persistent haze that just wouldn’t go away, or a subfloor that seemed impossible to level? Let me know in the comments below!