
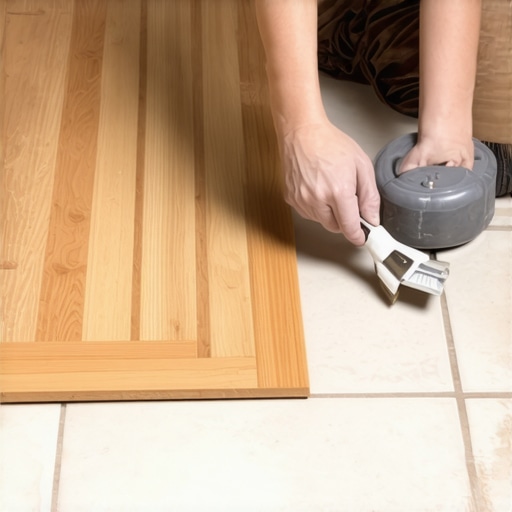
There I was, standing in the doorway of my first big renovation project, listening to the rhythmic thwack-thwack of a loose transition strip every time someone walked past. It felt like a personal insult from the house itself. You spend days revamping your home with expert flooring installation tips, obsessing over every plank alignment and ensuring you are mastering floor leveling for a flat surface, only to have a tiny piece of wood or metal humiliate you. We have all been there—trying to glue and pray while knowing deep down it is not going to hold. Today, I am going to show you exactly how to stop that strip from popping up for good. We are moving beyond the basic squeeze-tube approach and getting into the real mechanics of a permanent bond. Whether you are dealing with choosing the right hardwood floors for your home or finishing a tile project, the transition is where the quality of your work truly shows.
Stop Trip-Hazard Transitions from Ruining Your New Floors
Transition strips are the unsung heroes of a seamless home. They bridge the gap between different materials, but they are also under constant pressure. Every step you take applies lateral force that wants to shear that glue right off. One of the biggest flooring installation mistakes to avoid for lasting results is assuming that standard wood glue is a universal solution. I learned this the hard way when I tried to glue a reducer to a dusty concrete slab without any prep. It held for about twenty minutes before it became a dangerous launching pad for anyone in socks. The secret is not just the adhesive itself, but how you treat the surface beneath it. If you have ever wondered why your glue down vinyl is curling at the edges, it is often the same culprit: a lack of mechanical bond.
Is a simple bead of glue actually enough to hold?
Honestly? Usually not. According to the National Wood Flooring Association (NWFA), adhesive failure is most often caused by improper substrate preparation or using the wrong type of bond for the specific surface. If you are struggling with how to fix a transition between tile and uneven concrete, you need more than just a sticky substance; you need a clean, etched, and perfectly weighted setup. Have you ever had a transition strip fail right in the middle of a high-traffic area? Let me know in the comments if you have a strip that is currently driving you crazy. We are about to dive into why the weight plate trick for bonding stubborn vinyl corners might just be your new best friend for these repairs.
Prep the Floor Like a Pro Surgeon
If you try to glue a transition strip to a dusty subfloor, you are essentially trying to tape a brick to a pile of flour. It will never hold. I remember a kitchen remodel in 2019 where I rushed the prep. I slapped down some construction adhesive over a clean-looking slab and went to lunch. By the time I got back, the strip had arched like a bridge because the dust on the concrete acted as a barrier, preventing the glue from actually touching the floor. Now, I never skip the concrete etching step you should not skip before leveling or installing transitions. You need to open up those pores in the concrete or scuff up your wood subfloor so the adhesive has something to bite into.
Etch and Clean for a Better Grip
Think of your adhesive as a series of tiny anchors. If the surface is smooth or dirty, those anchors cannot hook into anything. For concrete, a quick wipe with a damp cloth is not enough. You need to ensure you are mastering floor leveling techniques by starting with a truly bare surface. Use a wire brush to scrape away old thinset or paint. If you are dealing with a particularly stubborn area, learning how to remove old mastic without damaging the slab is a skill that will save your transition from failing six months down the road. Once it is scraped, vacuum it twice—yes, twice—to ensure no microscopic debris remains.
#IMAGE_PLACE_HOLDER_B#
Adhesives That Actually Hold Under Pressure
Forget the school glue mentality. When you are choosing the right hardwood floors for your home, the transition strips often come with their own metal tracks, but those tracks usually bend or pull out of the wood. I prefer a high-quality polyurethane construction adhesive for a direct bond. It stays slightly flexible, which is vital because floors breathe. If you use an adhesive that dries brittle, the natural expansion and contraction of your wood will eventually snap the bond. This is a common theme in flooring installation mistakes to avoid for lasting results. You need a moving bond that can handle the micro-shifts of your home.
Apply the Weight Plate Trick for a Flawless Bond
This is where most DIY projects fail: the installer walks away too soon. Adhesive needs constant, even pressure to cure correctly against a potentially uneven substrate. I used to stack bags of grout on top of my transitions, but they are lumpy and do not apply even force. Now, I use the weight plate trick for bonding stubborn vinyl corners and apply it to my transition strips. I lay a flat piece of scrap wood over the transition to distribute the weight, then stack 25-pound gym plates on top. It ensures every square inch of the strip is forced into the adhesive. When I did this for a friend struggling with how to fix a transition between tile and uneven concrete, it stayed rock solid even after three years of heavy foot traffic. If you do not have gym weights, a five-gallon bucket of water works in a pinch, provided you have that flat spreader board underneath.
The Self-Leveling Myth That Ruins Subfloors
Most DIYers think self-leveling compound is basically magic water. You pour it, and it finds the low spots, right? Wrong. In reality, it has the viscosity of heavy cream and a very short working time. I have seen countless homeowners watch in horror as their expensive compound sets up in a giant hump because they didn’t move it fast enough. If you have ever wondered why your self-leveling pour looks like a topographical map, it is likely because you treated it like a passive liquid rather than an active material that needs mechanical help. You have to guide it with a gauge rake and then use the spiky roller secret for a mirror-smooth pour. Without that roller, you are trapping thousands of tiny air bubbles that will eventually collapse, leading to a brittle, pitted surface. Have you ever fallen into this trap and ended up with a floor that felt like a moonscape? Let me know in the comments.
Why does my leveler look like a topographical map?
The answer usually lies in the “oops” factor of mixing. Most people grab a standard drill and a paint paddle, then crank it to max speed. This is a massive mistake. High-speed mixing introduces air into the slurry, which is exactly why self-leveling compounds bubbled over your subfloor in the first place. The Tile Council of North America (TCNA) emphasizes that substrate preparation and proper mixing ratios are the two most critical factors in a successful installation. They recommend a low-RPM mix to prevent entraining air. Using the mixing paddle speed that ruins your leveling compound is an easy way to turn a $40 bag of material into a crumbly mess that won’t support choosing the right hardwood floors for your home later on.
#IMAGE_PLACE_HOLDER_C#
The Hidden Trap of Painted Concrete
Here is a contrarian view: just because your concrete is clean doesn’t mean it is ready for a bond. Many people skip the grinding phase because the floor “looks fine,” but if that concrete was ever sealed or painted, your transition strips and levelers are essentially sitting on a layer of plastic. I have found that why most floor levelers fail on top of painted concrete is due to a lack of chemical and mechanical keying. You need to get back to the raw aggregate. If you are mastering floor leveling at an expert level, you know that a “primed” surface is the only surface that counts. Skipping the primer on a porous slab is like trying to glue two sponges together without getting them wet first—the slab will suck the moisture out of your adhesive or leveler so fast that it will crack before it even cures. This is one of the most common flooring installation mistakes to avoid for lasting results that separates the weekend warriors from the true pros.
Don’t Let Your Investment Warp from the Inside Out
Once you have conquered the transition strips and the messy leveling pours, you might think the battle is won. But honestly, the real test of a professional-grade installation is how it looks three years after the last tool leaves the room. I have seen gorgeous wide-plank installs fail because the homeowner didn’t understand the atmospheric pressure the house puts on the wood. This is where hardwood floor care secrets to longevity and shine become more than just advice—they are your survival guide. If you aren’t monitoring the humidity in your home, those tight joints you worked so hard on will eventually gap or, worse, buckle. I personally keep a hygrometer in my tool bag and recommend my clients do the same. It is the cheapest insurance policy you will ever buy for a floor.
How do I maintain my floor’s integrity over time?
Maintenance isn’t just about cleaning; it’s about chemical compatibility. One of the most heartbreaking things I see is a homeowner who just finished revamping their home with expert flooring installation tips only to ruin the finish with the wrong cleaner. You must stop using vinegar on your hardwood floors immediately. The acidity breaks down the polyurethane bond over time, leaving the wood vulnerable to moisture. Instead, use a pH-neutral cleaner specifically designed for your finish type. If you have moved into a home with older surfaces, mastering hardwood floor refinishing becomes essential. It’s better to do a light screen-and-recoat every five years than to wait a decade and have to sand the wood down to nothing. Also, please, why you should never mop your floors with dish soap is a lesson in avoiding sticky residue that attracts dirt like a magnet.
#IMAGE_PLACE_HOLDER_D#
Ditch the Tape Measure and Buy a Laser Instead
If you are still trying to find high spots with a six-foot level and a prayer, you are working harder than you need to. When I’m mastering floor leveling on a large scale, I rely exclusively on a self-leveling rotary laser. It’s the only way to ensure that a kitchen island at one end of the room is truly on the same plane as the pantry forty feet away. Using the laser level move for perfectly straight hallways is a game-changer for layout. It eliminates the cumulative error that happens when you use a physical string line or a standard level. For wood moisture specifically, I follow the technical standards set by Wagner Meters. Their documentation notes that for most North American homes, a target equilibrium moisture content (EMC) of 6% to 9% is critical. If your planks are outside that range when you nail them down, they will move, and no amount of glue will stop them.
What the Future of Floor Leveling Looks Like
We are moving toward a world where ‘eye-balling it’ is a thing of the past. I predict that within the next five years, we will see consumer-grade LIDAR scanners that can map a subfloor and tell you exactly how many bags of compound you need to buy to reach a perfectly flat plane. Until then, the best way to scale your skills is to invest in high-quality mechanical aids. My advice? Grab a pinless moisture meter today and check five different spots on your subfloor before your next project. It’s a 30-second habit that separates the pros from the people who have to call me for repairs six months later. Try that one specific tip—measuring MC before you even open a box of flooring—and you’ll never look back.
Lessons Bought with Sweat and Scrapped Subfloors
After decades of troubleshooting, I have realized that the most expensive tool in your kit is actually your patience. Looking back at my early days, the biggest lightbulb moment was realizing that a floor is only as good as the physics of the bond beneath it. One hard lesson I learned about flooring installation is that close enough always leads to a squeak or a crack later. I once spent three days on a layout only to have the leveler pop because I used a high-speed mixer—a mistake I could have avoided with a step-by-step guide to flooring installation and leveling success. Also, never underestimate the power of acclimation; bringing hardwood into a room and installing it the same day is a recipe for buckling that no adhesive can stop. Finally, remember that your subfloor is a living surface—it moves, breathes, and reacts to your home’s climate.
#IMAGE_PLACE_HOLDER_E#
The Tools That Rescued My Projects from Disaster
If you are serious about achieving a pro-level finish, you need more than just a hammer and a prayer. I personally swear by a self-leveling rotary laser for every layout; it is the only way to ensure precise floor leveling techniques to achieve flawless surfaces across multiple rooms. Another non-negotiable is a pinless moisture meter; if the wood or slab is not dry, the project does not start. For those diving deep into the technical side, the ultimate guide to floor leveling for a perfect finish has saved me more times than I can count. I also recommend keeping a stash of polyurethane construction adhesive—it is the only thing that handles the lateral shear on transition strips without failing over time.
Transforming Your Space One Level Inch at a Time
Installing your own floors is one of the most rewarding home improvements you can undertake. It is more than just a weekend project; it is about creating the foundation for your family’s daily life. Don’t let the fear of a messy pour or a tricky transition stop you. With the right prep and a bit of insider wisdom, you can achieve a result that looks like it cost ten times more than you spent. If you ever hit a wall or need a second set of professional eyes, don’t hesitate to reach out to the pros at our contact page. Your journey toward a perfect flooring installation starts with that very first clean sweep of the subfloor. Go ahead—get started.
Have you ever had a transition strip fail after only a few months, or did you struggle with a leveler that set too fast? Let me know your biggest flooring headache in the comments below!