
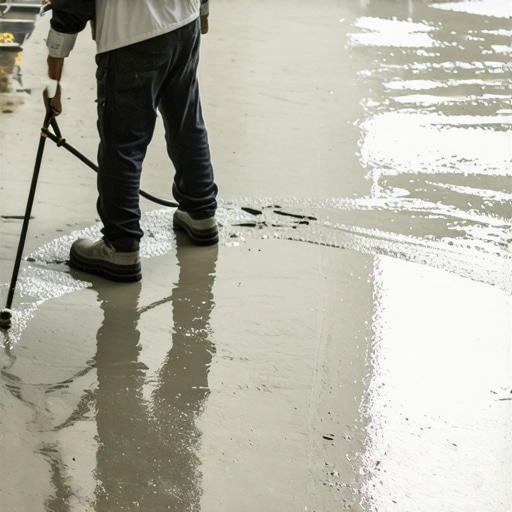
I’ll never forget the first time I tried to level out a subfloor in my 1920s bungalow. I had everything ready: the spiked rollers, the expensive bags of compound, and enough confidence to fill a stadium. I poured the mix, watched it flow like liquid silver, and went to bed thinking I was a genius. But when the morning sun hit that floor? Disaster. I saw every single outline of the plywood seams underneath. It looked like a topographic map of a place I never wanted to visit. Those “ghosting marks” are the bane of every DIYer’s existence, but after a few more failed attempts and a lot of wasted cash, I finally cracked the code on how to stop them. [image_placeholder_1]
Stop the Shadowy Lines from Ruining Your New Floor
Ghosting isn’t just an aesthetic annoyance; it’s a sign that your subfloor is literally “drinking” the moisture out of your leveling compound unevenly. When I first started, I thought I could skip the expensive bottles of liquid primer. Big mistake. I ended up with floor leveling challenges that cost me an extra weekend of sanding and swearing. The truth is, self-leveling underlayment is a chemical miracle, but it’s finicky. If your substrate isn’t sealed tight, the thirsty wood or concrete pulls water away from the mix at the joints, causing the leveler to settle and dry differently in those spots. It creates those faint, frustrating outlines that even the best hardwood floor refinishing won’t always hide.
Is high-end primer actually worth the extra forty bucks?
I get the skepticism. You’ve already spent a few hundred on the bags, and the guy at the big-box store is trying to sell you a gallon of “magic blue juice.” You’re probably wondering if it’s just a upsell. Trust me, learning why you must prime concrete and wood substrates is the single most important lesson I’ve ever learned in flooring. Without a proper barrier, you’re inviting air bubbles and telegraphing every seam through your finish. According to the Tile Council of North America (TCNA), substrate preparation is responsible for over 80% of flooring failures, and ghosting is often the first visible sign that your prep work fell short. Today, I’m going to walk you through the exact steps to ensure your floor leveling finish is as smooth as a frozen pond. Have you ever finished a pour only to see the seams of your plywood haunting you the next day? It’s a gut-punch, isn’t it? If you’re tired of seeing those shadows, we’re going to fix your technique right now.
Kill the Ghosting Before You Open a Single Bag
The secret to a mirror-finish floor isn’t in how you pour, it’s in how you treat the “thirsty” surface beneath. Think of your plywood or concrete subfloor like a dry sponge. If you pour liquid leveler over it, the substrate grabs that water instantly. When that happens over a seam, the leveler loses volume and “sinks” into the gap, creating those lines. You need to turn that sponge into a waterproof shield first.
Lock Down Your Subfloor So It Doesn’t Budge
Movement is the enemy of leveler. I once tried to level a hallway in an old Victorian without checking the joists. Every time the refrigerator kicked on, the floor vibrated, and my fresh pour developed tiny spider-web cracks. Before you even touch a primer bottle, walk the floor. If it squeaks or flexes, you need to learn how to fix a bouncy floor with a few well-placed screws. Drive those fasteners directly into the joists. If you’re worried about the height, focus on how to level a plywood subfloor without adding weight by using targeted patches instead of a whole-room flood.
Seal the Seams Like You’re Building a Boat
The gaps between your plywood sheets are essentially thirsty canyons. If you don’t block them, the leveler will drain right through like water through a sieve. I use a high-quality caulk or specialized seam tape to bridge these gaps. Skipping this step is the most common of the plywood mistake that causes grout cracks later on because the subfloor continues to breathe and move independently of the tile or wood above.
Why Two Coats of Primer Win Every Time
Here is the “pro move” that separates the flat floors from the topographic maps: the double-prime. The first coat of primer seals the pores of the wood or concrete. Let it dry until it’s tacky, then hit it again. This second layer creates a literal plastic-like film that the leveler can’t penetrate. I remember a job in a humid basement where I only did one coat because I was in a rush to get home for a ball game. By the time I came back the next morning, the floor looked like it had measles—thousands of tiny pinholes where air escaped from the concrete. Following a step-by-step guide to flooring installation and leveling success means respecting the dry times. When you learn why you must prime concrete properly, you realize that the primer is actually the most important chemical in the room.
Execute the Pour with a Spiked Roller
Once your primer is translucent and no longer wet to the touch, you’re ready. Mix your bags precisely—not a drop more water than the manufacturer recommends. Using precise floor leveling techniques to achieve flawless surfaces involves using a spiked roller to break the surface tension. This helps those last few air bubbles escape and ensures the mix finds its own level without you having to “chase” it with a trowel. If you see a seam starting to “ghost” while the mix is still wet, it means your primer failed in that spot. Usually, you can save it by gently agitating that area, but the goal is to never see it at all.
More Water Is Actually Your Worst Enemy
The most common mistake I see—and I’ve been guilty of it too—is the belief that adding ‘just a splash’ more water will make the leveler flow into those stubborn corners more easily. It sounds logical, right? Thinner liquid equals a flatter surface. In reality, you are playing a dangerous game with chemistry. Over-watering breaks down the polymer chains that give the compound its strength. Instead of a rock-hard surface, you end up with ‘chalking,’ where the top layer of your floor remains soft and dusty. When you eventually go to glue down your boards, that dust acts like a bond-breaker. I’ve seen entire hardwood floor refinishing projects ruined because the leveler underneath literally turned back to powder. Stick to the manufacturer’s ratio as if your life depends on it.
Stop Whipping Air Into Your Mix
If you’re using a standard high-speed construction drill to mix your bags, you’re basically making a concrete mousse. High RPMs pull air into the bucket, creating thousands of tiny bubbles. Once you pour that mix, those bubbles rise to the surface and pop, leaving behind ‘pinholes.’ These aren’t just ugly; they are weak points in the floor. Professional mastering floor leveling pro secrets always involve a low-speed, high-torque mixer. Think slow and steady. If you see foam on top of your bucket, you’ve already gone too fast. I learned this the hard way on a kitchen remodel where I had to skim-coat the entire floor a second time just to fill the ‘moon craters’ I created with my cordless drill.
Why is your leveler cracking over radiant heat pipes?
This is a question I get from homeowners who do everything ‘by the book’ and still see failure. If you are pouring over hydronic or electric heat, the expansion and contraction of those elements is immense. Most standard levelers are too brittle to handle that movement. You need a fiber-reinforced compound specifically rated for thermal expansion. Furthermore, why your floor leveler is cracking over radiant heat pipes often comes down to the temperature of the substrate during the pour. If the heat is on, the leveler dries too fast from the bottom up, leading to spiderweb fractures. Always ensure the system is off and the floor is at room temperature for at least 24 hours before and after the pour.
The Scientific Reality of Subfloor Moisture
We often focus on the ‘flatness’ of the floor, but we ignore the ‘dryness.’ Even if a concrete slab looks bone-dry, it can be exhaling moisture vapor that will eventually delaminate your leveler or cup your wood. According to the National Wood Flooring Association (NWFA), failure to account for moisture vapor emission is a leading cause of bond failure in self-leveling underlayments. This is why learning how to use a moisture meter to prevent floor failure is a non-negotiable skill. If your slab is ‘hot’ (high moisture), you need a moisture vapor barrier before the leveler, not just after. Skipping this step is one of the biggest flooring installation mistakes to avoid if you want your floor to last more than a single season. Have you ever fallen into this trap or noticed your floor ‘clicking’ months after a pour? Let me know in the comments. We also need to talk about the trowel size error that leads to hollow sounding tiles, because even a level floor won’t save you from a bad thinset spread. If you’re moving on to wood, make sure you know how to prep a concrete slab for glue down hardwood to ensure that expensive white oak stays exactly where you put it.
Once the leveler is dry and your pulse has finally returned to normal, you might think the hard part is over. But honestly? The ‘set it and forget it’ mindset is what leads to those $10,000 phone calls to flooring contractors five years later. If you want a floor that doesn’t groan every time you walk to the kitchen at midnight, you need to transition from ‘builder’ to ‘steward.’
Use a Laser to Stop Guessing
I used to rely on a six-foot bubble level and a prayer. Now, I won’t even start a layout without my cross-line laser. If you’re trying to figure out why your transitions look wonky, the laser level move for perfectly straight hallways is the only way to go. It’s not just about the leveler; it’s about aligning your planks or tiles to the actual geometry of the house. I also swear by the chalk dust secret for finding low spots in subfloors. It’s a low-tech way to double-check that your high-tech leveler actually did its job. If you find a divot that your liquid mix missed, you can hit it with a quick patch before the main flooring goes down.
Treat Your New Finish with Some Respect
You’ve spent days getting the substrate flat, so don’t ruin the finish with ‘old wives’ tales’ cleaning methods. I see so many people spend a fortune on white oak and then mop it with acidic solutions. Please, stop using vinegar on your hardwood floors immediately. It eats away at the polyurethane faster than you can say ‘cloudy finish.’ If you want that glow to last, you have to follow the hardwood floor care secrets to longevity and shine. I’ve seen beautiful installs turned into matte disasters in under a year just because the homeowner thought ‘natural’ meant ‘safe.’
How do I keep my level floors looking new?
The technical reality is that floors are living systems. The National Wood Flooring Association (NWFA) Technical Manual emphasizes that moisture is the primary cause of dimensional change in wood. I recommend getting a dedicated hygrometer for your living room to track your indoor climate. If your humidity spikes in the summer, your perfectly level floor will expand and potentially buckle. In the future, I expect we’ll see ‘smart underlayment’ that pings your phone when the subfloor moisture hits a critical level, but for now, we have to be the sensors. You might also want to look into the best eco-friendly underlayment for quiet apartments if you’re worried about sound dampening as part of your long-term comfort.
Invest in a Proper Maintenance Kit
I always tell my clients that the most expensive tool they’ll ever buy is the one they didn’t use. For me, that’s a high-quality moisture meter. Before you ever lay your finish, verify that your leveler is actually cured all the way through. If you’re moving on to tile, don’t forget the waterproofing move that saves livonia bathroom remodels from tile failure. It’s these small, specialized steps that differentiate a DIY weekend project from a lifetime investment. Ready to take your game to the pro level? Get yourself a self-leveling cross-line laser and map your next room before you buy a single plank. It’ll change how you see your house forever.
The Hard Truths I Learned While Staring at My Own Mistakes
Looking back at those first few ghosted floors, I realized that my biggest mistake wasn’t a lack of effort, it was a lack of respect for the prep work. The chemistry doesn’t lie. If you skip the primer or eyeball the water ratio, the laws of physics will haunt your plywood seams every single time. One lightbulb moment for me was realizing that precise floor leveling techniques to achieve flawless surfaces aren’t just for pros—they are the only way to avoid an expensive tear-out later. I also learned that the ‘waiting game’ is your best friend; rushing to walk on a tacky floor is a recipe for footprints that will plague your tile layout forever. Finally, I stopped trusting my eyes—if you haven’t tried the chalk dust secret for finding low spots in subfloors, you’re missing the easiest way to verify your work before the glue goes down.
Gear That Actually Earns Its Spot in My Truck
If you’re serious about getting this right, stop guessing and start measuring. Here are the three things I never go to a job site without:
- A Reliable Moisture Meter: This is the only way to know if your slab is ready for a pour or if you’re headed for a disaster. Understanding how to use a moisture meter to prevent floor failure is the difference between a floor that lasts and one that peels up in six months.
- A Cross-Line Laser: This tool reveals the lies your subfloor is telling you. Implementing the laser level move for perfectly straight hallways changed my entire layout workflow.
- The Spiked Roller: It’s not a luxury; it’s a necessity to pop air bubbles and help the compound self-heal during the pour.
[image_placeholder_final]
Your New Subfloor Is Just One Weekend Away
Getting a perfectly smooth substrate might feel like magic, but it’s really just a series of disciplined steps. Don’t be intimidated by the ‘ghosts’ of projects past. By sealing your seams, double-priming, and following a step-by-step guide to flooring installation and leveling success, you’re setting yourself up for a finish that even the pickiest inspector would envy. Your future self—the one walking across a silent, perfectly flat floor—will thank you for the extra effort you put into floor leveling today. What’s the biggest hurdle you’re facing with your subfloor right now? Let me know in the comments below!