
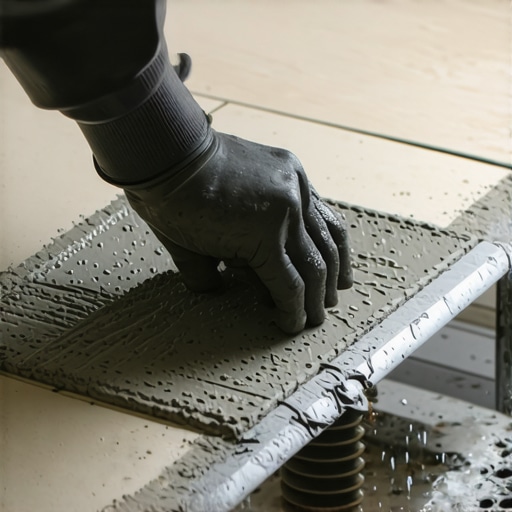
I was staring at a puddle that refused to move. I had just finished my first supposedly professional shower floor, and instead of a sleek, downward glide toward the drain, I had created a series of miniature, jagged plateaus. Every time I stepped in, a sharp tile edge bit into my heel. It was embarrassing, painful, and honestly, a total waste of expensive porcelain. I realized then that standard thinset application just does not cut it when you are dealing with a steep pitch toward a point drain. You cannot just slap tile down and hope for the best; you need to embrace the wet-shimming move to make those transitions invisible.
Stop Fighting the Slope and Start Working With It
The struggle is real when you are trying to marry flat, rigid tiles to a floor that is intentionally broken to slope toward a drain. Most people make the classic tile installation mistakes of trying to use more spacers or beating the tile into submission with a rubber mallet. I have been there. In my early days, I tried to force a 12×24 tile onto a standard center drain—a disaster that ended with massive lippage no amount of grout could hide. What we are solving today is the lippage nightmare. By using thinset not just as an adhesive, but as a structural shim—essentially wet-shimming—you can create a micro-adjustment that allows the tile to transition the slope without those nasty sharp edges. This is especially crucial if you did not quite get your floor leveling perfect before laying tile. According to the Tile Council of North America (TCNA), even a variation as small as 1/32 of an inch in lippage can be enough to cause safety hazards and drainage issues, which is why precision in your mortar bed is everything.
Does This Extra Mortar Actually Hold Up Over Time?
You might be worried that shimming with thinset will lead to hollow spots or cracking down the road. It is a valid fear. If you do it wrong, you are just creating a bridge that will eventually snap. But when done correctly, you are ensuring 100% coverage while compensating for the geometric impossibility of a flat plane on a curve. I used to think I could just eye it, but that is how I ended up with a shower that looked like a topographical map of the Rockies. Have you ever finished a floor only to find the water pooling in the exact opposite direction of the drain? It is a soul-crushing moment, isn’t it? The secret lies in the consistency of your mix and the way you back-butter to build that ramp. We are going to walk through how to build that support so your tiles sit flush, your feet stay safe, and the water goes exactly where it is supposed to go.
Get Your Mortar Consistency Right First
Before you even touch a trowel, you need to rethink your thinset. For a standard flat floor, you want a mix that flows, but when you are wet-shimming a slope, you need “stand-up.” Think of the difference between pancake batter and heavy peanut butter. If your mortar is too loose, the weight of the tile will just squash it down, and you will lose that critical elevation you are trying to build. I learned this the hard way on a tiny powder room project where I tried to save time by using a runny mix; the tiles literally drifted overnight, leaving a jagged edge that looked like a saw blade. You want a mix that holds a ridge without drooping. This is where many DIYers fail because why your trowel teeth are ruining your thinset coverage often comes down to the mortar being too wet to maintain its shape.
Avoid the Slump with Proper Mixing
Add your powder to the water slowly. You are looking for a “peanut butter” stage where the ridges from your trowel do not collapse. If they slump, add a handful more powder. This structural integrity is what allows the mortar to act as a shim, holding the tile at a slight angle to follow the drain’s pitch without sinking into the abyss.
The Art of the Back-Buttered Wedge
This is the “meat” of the move. Instead of just a flat layer of thinset on the back of the tile, you are going to create a directional wedge. I remember a specific 3×3 master shower where the plumber had set the drain slightly off-center and too high. It was a nightmare. I had to use the tile itself to bridge a half-inch height difference over just twelve inches. I started by applying a standard layer of mortar, then added an extra “dollop” to the side of the tile furthest from the drain. By tapering this extra mortar, I created a custom-fit ramp for each piece. This is a critical part of a step-by-step guide to flooring installation and leveling success because it addresses the physical gap that standard methods ignore. 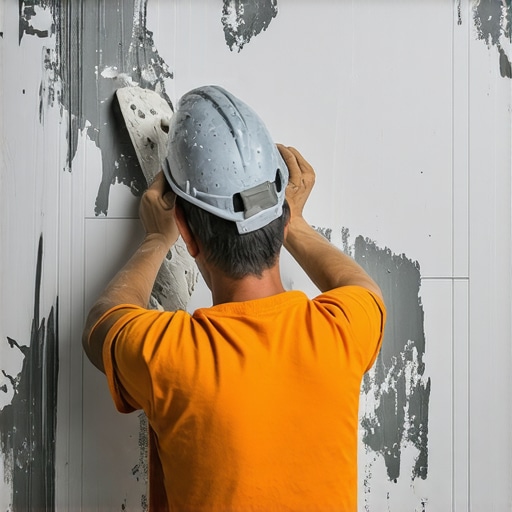
Fill Those Gaps Before They Become Cracks
When you are building up mortar like this, you have to be careful about air pockets. A hollow spot under a shower tile is a ticking time bomb. Use the flat side of your trowel to “burn” the thinset into the back of the tile first, ensuring every square inch is covered. Then, apply your wedge. If you skip this, you will end up with that annoying “thump” sound when you step on it later. Avoiding the trowel size error that leads to hollow-sounding tiles is about more than just the notch; it is about how you pack the mud into the transitions.
Set the Tile with a Bridging Motion
When you lay the tile down, do not just press it flat. You need to “bridge” it across the slope. Use a small scrap of straight lumber or a dedicated level to check the transition between the new tile and the one you just set. If you feel a “lip” with your fingernail, the shim needs more mud or a firmer press. It is a game of millimeters. I once spent an entire afternoon on just four tiles because the slope was so aggressive, but when the water finally hit that floor, it spiraled into the drain like a dream. No puddles, no sharp edges, just a perfectly engineered surface that looks flat but works like a funnel.I’ve heard it a thousand times: “Just use a self-leveling compound and the tile will lay itself.” It’s a seductive lie. In reality, relying too heavily on pourable levelers without understanding the subfloor’s structural limits is a recipe for disaster. I once watched a guy pour forty bags of leveler into a second-story bathroom only to have it crack within a month because he didn’t account for the bounce in the floor joists. This is where floor leveling challenges and common mistakes really start to bite you. You have to understand that leveler is not a structural fix; it’s a surface preparation. If your subfloor is flexing, no amount of liquid gold is going to save your grout lines.
Stop Obsessing Over Manufacturer Thickness Specs
Here is my contrarian take: the “do not exceed 1/4 inch” rule on many thinset bags is often treated like a holy commandment, but for professional wet-shimming, you have to know when to bend the rules. When you are trying to prevent lippage on a large format tile near a drain, you might need a medium-bed mortar that can go up to 3/4 of an inch thick without shrinking. If you stick strictly to the thin-set limit, you’ll end up with flooring installation mistakes that look like a staircase for your toes. The National Tile Contractors Association (NTCA) actually highlights the use of “Large and Heavy Tile” (LHT) mortars specifically for these scenarios. These mortars are engineered to support the weight without “slumping” as they dry. 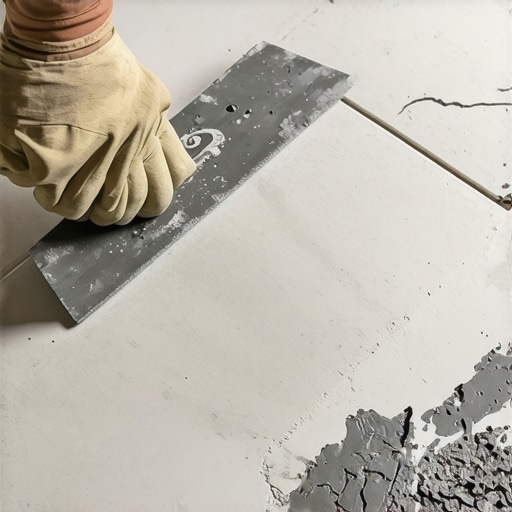
How thick can you actually go before the bond fails?
This is the million-dollar question for anyone staring at a dip in the slab. According to ANSI A108.02 standards, the bond strength of your mortar relies on coverage, not just thickness. However, if you exceed the intended depth of an LHT mortar, you risk “shrinkage cracks” that pull the tile away from the substrate. This is why I always recommend precise floor leveling techniques to minimize the amount of mud you need to “make up” during the set. If you’re consistently shimming more than half an inch, you should have spent more time on the subfloor prep.
The Nightmare of the Plywood Pivot
If you’re working on a wood subfloor, don’t just jump to the mud. I’ve found that how to level a plywood subfloor with shims and plywood scraps is a much more stable way to handle massive dips than trying to build a mountain of thinset. Wood moves, and thick mortar doesn’t like to move with it. If you try to bridge a massive gap with just adhesive, you’ll eventually hear that sickening “crunch” of a hollow tile. It’s the same reason why wide planks need more than just nails to stay flat—tension and moisture are always working against you. Have you ever fallen into this trap of trying to fix a structural dip with just a thicker trowel? Let me know in the comments; I’d love to hear your “war stories” from the field.I have learned that the right tools are not just about making the job easier; they are about removing variables that lead to failure. I used to trust my standard 4-foot bubble level until I realized it was hiding a subtle dip in the center of a wide hallway. Now, I swear by a 6-foot box beam level. It does not flex, it does not lie, and it is the foundation of mastering floor leveling pro secrets for perfect installations. When you are dealing with the micro-adjustments of wet-shimming, that extra length helps you see the bigger picture of the slope. If you are struggling with larger rooms, you should also look into precise floor leveling techniques to achieve flawless surfaces before the first tile even hits the mud. 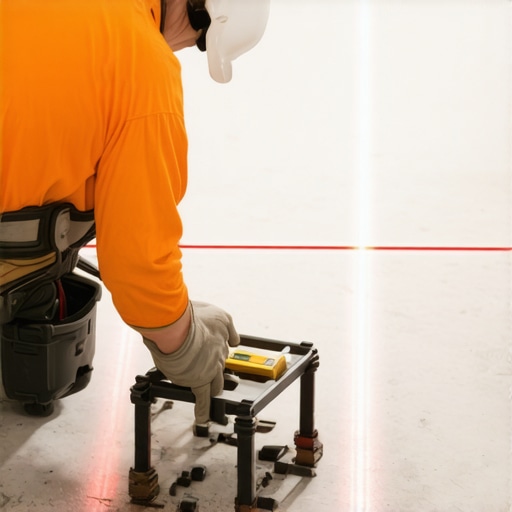
A Moisture Meter is Your Only Real Insurance
One tool I will never enter a job site without is my digital pinless moisture meter. You might think the slab is dry because it looks light gray, but the core could still be holding enough water to blow your bond in six months. I have seen beautiful hardwood installs buckle because the installer did not know how to use a moisture meter to prevent floor failure. It is an easy step that saves thousands in potential repairs. For those moving into hardwood, mastering hardwood floor refinishing expert tips for 2025 starts with ensuring your substrate is actually ready for the finish.
How do I keep these transitions perfect for a decade?
Maintenance is not just about the right mop; it is about accounting for the natural movement of your home. If you have wet-shimmed a large area or used a heavy bed of mortar, you must include movement joints. The expansion joint secret for large tiled living areas is to place them every 20 to 25 feet to prevent the floor from tenting when the seasons change. Also, stop using bleach on your grout before you read this—it is the fastest way to eat away at the polymer additives in your mortar and cause those shims to crumble. To maintain that just-installed look, follow hardwood floor care secrets to longevity and shine, which involves pH-neutral cleaners and felt pads on all furniture legs. According to the MAPEI Technical Bulletin on Substrate Deflection (Standard A108.01), it is not just about the weight of the tile, but how the joists react under that weight, making proper support essential for long-term results.
Lasers and LiDAR are the Future of Flat Floors
Looking ahead, I see a shift toward high-precision digital scanning. We are already seeing apps that use LiDAR on your phone to create heat maps of floor dips. In a few years, we will not be guessing with straight edges; we will be following a digital topographic map projected onto the subfloor. For now, trust your hands and your high-quality levels. Try the burn-in method with your thinset on your next transition; do not just spread it, force it into the substrate with the flat side of the trowel first. You will feel the difference in the bond immediately.
The Hard Lessons That Saved My Knees and My Reputation
After years of fighting with stubborn slopes, I’ve realized that the ‘eye-balling’ method is the fastest way to lose money. One major lightbulb moment for me was realizing that your mortar changes its personality every thirty minutes; what started as perfect ‘peanut butter’ can quickly become too dry to grab the tile, leading to the nightmare of how to fix a hollow-sounding tile without tearing it up later. I also learned to never trust overhead lighting. Always use a raking light—a lamp placed directly on the floor—to cast long shadows over any lippage you might have missed. If you see a shadow, your shim isn’t high enough. Finally, remember that the prep work is where the profit is hidden; avoiding the 7 signs your tile contractor is cutting corners on prep work starts with you being your own harshest critic before the grout goes in.
Gear That Actually Earns Its Spot in My Truck
You don’t need a thousand tools, but you need the right ones for flooring installation. First, ditch the cheap plastic levels and invest in a high-quality box beam level—I trust brands like Stabila because they stay true even after being tossed in a van. Second, always keep a bag of LHT (Large and Heavy Tile) mortar on hand for these wet-shimming jobs; the non-slump characteristics are non-negotiable when you’re building a wedge. Third, for anyone serious about a 2025 renovation, I highly recommend keeping a copy of the ultimate guide to floor leveling for a perfect finish on your phone for quick reference on site. #IMAGE_PLACEHOLDER_E#
Stop Aiming for Perfection and Start Aiming for Performance
It is easy to get paralyzed by the fear of making a mistake, but the reality is that every pro was once staring at a puddle that wouldn’t move. Wet-shimming is a skill that comes with touch and time. As you begin to revamp your home with expert flooring installation tips, focus on the integrity of the bond and the smoothness of the transition. Your future self—and your feet—will thank you when that shower drains perfectly every single morning. Have you ever encountered a floor slope so aggressive that a standard trowel just couldn’t handle it? Let me know your solution in the comments below!