
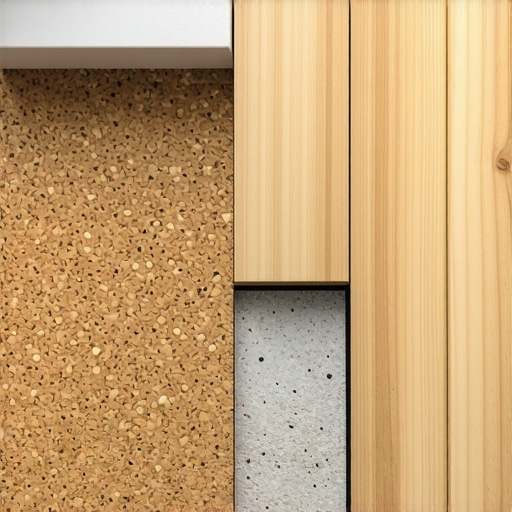
I remember sitting in my third-floor walk-up at 11 PM, frozen in place because I’d just dropped a single AA battery on my new ‘luxury’ floors. In the dead silence of the building, it sounded like a structural steel beam had snapped. I knew, with a sinking feeling in my gut, that the guy living below me—a very nice accountant named Dave—was currently staring at his ceiling and cursing my name. It was my lightbulb moment. I had spent a fortune on the surface boards but absolutely nothing on what sat beneath them. I’d fallen for the trap of thinking the ‘attached foam pad’ on my planks was enough. It wasn’t. Today, I’m going to show you why cork isn’t just an optional upgrade; it is the literal peace treaty between you and the rest of your building. We are going to dive into how this bark-based wonder fixes the dreaded ‘drum effect’ and why your HOA might actually legally require it.
Stop the Drum Effect Before Your Neighbors Stage a Mutiny
If you have ever wondered why floating floors sound hollow when you walk on them, look no further than the air gap. Without a dense material like cork to bridge the space between your subfloor and your finish material, your floor acts like a giant acoustic guitar body. Every footstep is amplified and sent straight down. When I first started DIY-ing, I made the classic rookie error of using the thinnest, cheapest foam I could find. I thought I was being thrifty. In reality, cheap vinyl underlayment makes your floor sound hollow and brittle. Cork, however, is packed with millions of tiny air-filled cells that act as miniature shock absorbers. It doesn’t just muffle sound; it kills it. Have you ever felt that awkward vibration in your feet when someone else walks across the room? That’s what we’re fixing today.
Is Cork Just an Overpriced Marketing Gimmick?
It’s easy to be skeptical when a salesperson tries to up-sell you on a product made of tree bark, but the physics don’t lie. According to the International Building Code (IBC), multi-family dwellings generally require a minimum Impact Insulation Class (IIC) rating of 50 to ensure habitable living conditions. Most bare concrete slabs or thin foam pads struggle to hit that mark. Cork is one of the few natural materials that can significantly boost your IIC rating without adding three inches of height to your floor. I’ve seen too many flooring installation mistakes to avoid for lasting results, but ignoring the decibel transfer is the only one that will get you a formal noise complaint from management. Have you ever had a neighbor knock on your door because of your ‘loud’ walking? It’s an embarrassing conversation I want to help you avoid forever.
Start With a Subfloor So Clean You Could Eat Off It
Before you even touch that roll of cork, you need to treat your subfloor like a surgical site. Any tiny pebble, stray screw, or dried blob of drywall mud will eventually telegraph through the cork and create a pressure point under your new boards. Think of cork like a high-end memory foam mattress; it is incredibly supportive, but if there is a Lego on the bed frame, you’re going to feel it. I once rushed a living room job and left a few grains of sand near the transition; six months later, every time someone walked there, it sounded like crunching glass. You must use precise floor leveling techniques to achieve flawless surfaces before the underlayment goes down. If your slab has a dip deeper than 3/16 of an inch over a 10-foot span, the cork will eventually compress into that void, leaving your floor bouncy and prone to joint failure.
The Moisture Test That Saves Your Investment
Cork is an organic material, which means it’s a living thing’s bark. While it’s naturally resistant to mold, it isn’t a fan of constant dampness rising from a concrete slab. Before laying your cork, you need to perform the painters plastic trick for testing concrete moisture. If you see condensation under that plastic after 24 hours, you need a vapor barrier—usually a 6-mil poly film—underneath your cork. Skipping this is how you end up with that musty ‘old basement’ smell that no amount of candles can mask. 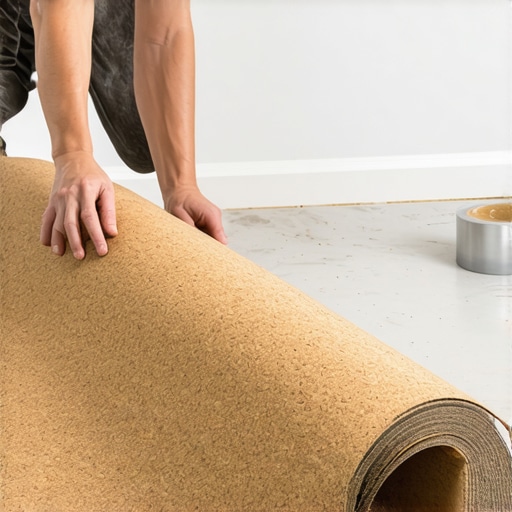
Roll Out the Peace and Quiet Without the Overlap
When you finally start laying the sheets or rolls, the most important rule is no overlapping. If you overlap the edges of cork underlayment, you create a literal mountain range under your flooring that will cause your planks to disconnect. You want the seams to butt up tightly against each other like a puzzle. In my early days, I tried to ‘save time’ by just tossing it down and assuming the weight of the hardwood would flatten it out. It didn’t. I ended up with a literal ridge in the middle of a hallway that looked like a buried cable. Now, I always use flooring installation fundamentals leveling for a seamless look to ensure the transition areas are perfectly flat before the first sheet of cork hits the ground.
Tape Your Seams or Regret It Later
This is the step most DIYers skip because they think the floor’s weight will hold everything in place. It won’t. You need to use a high-quality duct tape or aluminum seam tape to join your cork pieces. If you don’t, the cork can ‘walk’ or shift during the actual floor installation. I remember a master bedroom project where I skipped the tape; halfway through clicking the planks together, the underlayment underneath had slid two inches, leaving a massive gap of bare concrete. That gap is exactly why your LVP floor is clicking when you walk on it months later. The tape isn’t for structural strength; it’s to keep your acoustic barrier unified while you’re manhandling heavy planks on top of it. If you are working over an existing surface, remember the leveling secret for installing plank flooring over tiles to make sure the cork isn’t trying to bridge a grout line valley, which can lead to premature wear.
Why More Cushioning Actually Ruins Your Planks
Most homeowners—and even some general contractors—assume that if a little bit of padding is good, a lot must be better. It is the ‘over-stuffed sofa’ mentality. In my experience, this is the quickest way to snap the delicate locking systems on your expensive boards. While a thick 1/2-inch cork layer sounds like a dream for soundproofing, it creates too much ‘deflection.’ The National Wood Flooring Association (NWFA) warns that excessive vertical movement is the leading cause of joint fatigue. When your floor has too much squish, the tongue and groove are forced to act as a hinge, a job they weren’t designed for. Eventually, those joints will crack, leading to the exact scenario where your LVP floor is clicking when you walk on it. Stick to the manufacturer’s recommended thickness; more cushion isn’t a luxury, it’s a structural liability.
Can You Skip the Leveling Compound if the Floor Looks Flat?
This is the advanced question I get most often from DIYers who have graduated beyond the basics. The short answer is: almost never. Your eyes are terrible at judging 3/16 of an inch over ten feet. I’ve seen pros try to ‘eyeball’ a subfloor only to find out during the final row that they are uphill. You should always use precise floor leveling techniques to achieve flawless surfaces because cork, while resilient, cannot bridge a structural valley. If you ignore those dips, the cork will eventually compress into the void, leaving your floor feeling bouncy and hollow in random spots. Have you ever stepped on a floor and felt it sink just a fraction of an inch? That is a leveling failure hiding under the underlayment. 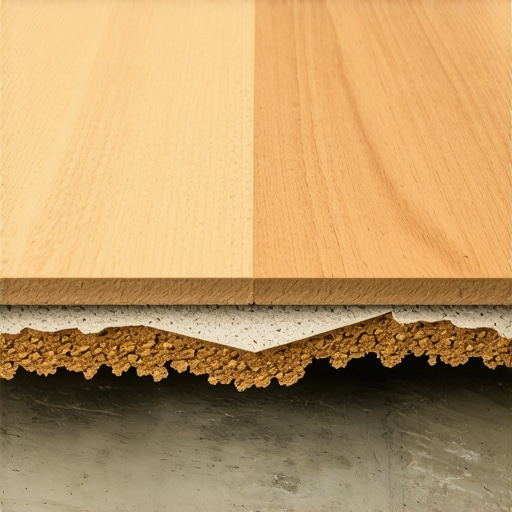
The High-Speed Mixing Disaster You Need to Avoid
If you decide to use a self-leveler before laying your cork, there is a technical ‘oops’ factor that ruins thousands of bags every year: the drill speed. People treat mixing leveler like they are mixing cake batter, but the mixing paddle speed that ruins your leveling compound is anything over 650 RPM. High speeds whip air into the mixture, creating thousands of tiny micro-bubbles. Once you pour it, those bubbles rise to the surface and pop, leaving your subfloor looking like a piece of Swiss cheese. This ‘honeycombing’ makes the surface brittle and weak. Instead, keep the speed low and always use the spiky roller secret for a mirror-smooth pour to release any trapped air. I once saw a beautiful high-end remodel where the leveler started crumbling six months later because the installer used a high-speed drywall mud mixer. It’s an expensive mistake that is entirely avoidable if you just slow down.
Beware the ‘Primer’ Trap on Old Concrete
Another common myth is that you can just pour leveler or lay cork over any old concrete. If that slab was ever painted or sealed, modern leveling compounds won’t bond to it properly. You need to verify the porosity of the slab first. If water beads up on the surface, your leveler will peel off like a sunburn. I always recommend the concrete etching step you shouldn’t skip before leveling to ensure a mechanical bond. Without it, you are essentially building a house on a sheet of ice. Have you ever fallen into this trap where you thought the floor was ready, only to realize the prep work was 90% of the job? Let me know in the comments, I’d love to hear your horror stories or how you fixed a stubborn subfloor.I have seen guys spend three days obsessing over a layout only to have the entire floor buckle three months later because they did not own a fifty-dollar moisture meter. In my early twenties, I thought I could judge the dryness of a slab by touching it with my palm; I was wrong every single time. Now, I never start a job without checking the stats because knowing how to use a moisture meter to prevent floor failure is the difference between a referral and a lawsuit. If you are laying cork over a slab, you need to know exactly what is happening in the concrete pores. I personally use a pinless meter because it allows me to scan large areas of the subfloor without leaving thousands of tiny holes in the wood or the cork.
The One Tool I Never Step on a Jobsite Without
Precision is not just about the boards; it is about the geometry of the room. When I am setting up a long run that carries through a hallway into a kitchen, I skip the old-school chalk line. Chalk is messy, it gets covered by the underlayment, and it is easy to smudge. Instead, I rely on the laser level move for perfectly straight hallways to keep my rows perfectly parallel to the main focal wall. It allows me to see the line even after the cork is down and the first few rows of hardwood are snapped together. If you are still trying to eyeball a thirty-foot run, you are setting yourself up for a wedge-shaped gap at the other end of the house that no baseboard can hide.
How do I maintain my floor’s finish over the next decade?
Maintenance is where most homeowners accidentally destroy their own investment. I have walked into beautiful homes where the owners were literally melting the glue in their floors with steam mops because a commercial told them it was ‘sanitary.’ If you want your floors to last, you have to stop using vinegar on your hardwood floors immediately. The acid in vinegar eats through the polyurethane finish, leaving the wood vulnerable to graying and water damage. Instead, focus on hardwood floor care secrets to longevity and shine, which usually involves nothing more than a pH-neutral cleaner and a barely-damp microfiber mop. 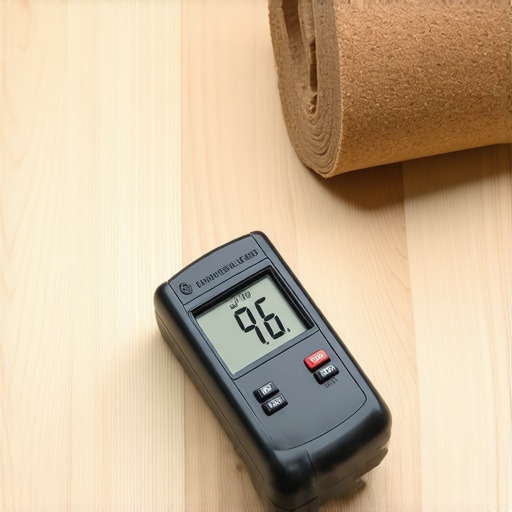
Stop Treating Your Hardwood Like a Science Project
We are entering an era where ‘smart’ flooring is becoming the norm. I am already seeing high-end cork underlayments integrated with sensors that can alert a smartphone if a pipe leaks under the floorboards. This is where the industry is heading: proactive protection rather than reactive repair. Until those sensors are in every home, you are the primary guardian of your floor. The National Wood Flooring Association (NWFA) explicitly states in their Technical Publication No. C200 that the moisture content between your wood and your subfloor must be within a 2-4% margin for wide-plank flooring. If you ignore that technical spec, no amount of glue or nails will save you. If your floor is already showing its age, you might need to look into mastering hardwood floor refinishing expert tips for 2025 to bring back that factory glow. My advanced tip for you today: buy a professional-grade moisture meter before your next project. It is the cheapest insurance policy you will ever buy for your home.
Lessons Bought With Sweat and Noise Complaints
Over the years, I’ve realized that the small technical details differentiate a ‘good enough’ job from a truly professional one. One of the most vital lightbulb moments I had was realizing that if the cork is allowed to touch the perimeter walls, you create a ‘flanking path’ where sound travels through the studs instead of being absorbed. I’ve seen homeowners overlook this, leading to flooring installation mistakes to avoid for lasting results. Another tip: never use old, brittle cork that has been sitting in a humid warehouse; it should be supple and resilient. If you can snap it like a dry cracker with one hand, it’s already failed its mission.
My Field-Tested Toolbox for a Silent Subfloor
I don’t step onto a job site without a few specific items that ensure the floor stays quiet for decades. First, a high-quality pinless moisture meter is non-negotiable. Knowing how to use a moisture meter to prevent floor failure is the only way to be sure your concrete isn’t exhaling dampness into your cork. Second, if you have any dips in the slab, you must be mastering floor leveling pro secrets for perfect installations to ensure the surface is dead-flat. I also swear by aluminum seam tape rather than standard duct tape; it creates a much better vapor seal that won’t degrade over time and prevents the cork from shifting during the flooring installation.
#IMAGE_PLACEHOLDER_E#
Build a Surface Your Neighbors Will Actually Thank You For
At the end of the day, your flooring installation is only as good as the layers you cannot see. Taking the time to properly roll, tape, and level your subfloor isn’t just about technical compliance; it’s about the peace of mind that comes from knowing you won’t hear every footstep or dropped remote. When you follow a step-by-step guide to flooring installation and leveling success, you are building a legacy of quality in your home. Now that your foundation is set, you can focus on hardwood floor care secrets to longevity and shine to keep those surfaces looking brand new for years to come.
Have you ever dealt with a floor that sounded hollow or echoed every time the dog ran across it? Let me know your acoustic horror stories in the comments below!