I remember the exact moment I realized my beautifully installed tile was developing those dreaded large cracks. It was just a few months after completing what I thought was a flawless job—until I noticed uneven edges and hairline fissures spreading across my new floor. Frustration and doubt crept in. I had followed all the typical advice, yet the cracks persisted. That experience was a real lightbulb moment: I had overlooked a critical detail—the uneven subfloor beneath my tiles.
Over the years, I’ve learned that the secret to lasting tile installations isn’t just about choosing the right materials or perfect grout lines. It’s about ensuring the subfloor is perfectly level and stable before laying those tiles down. Great surfaces lead to long-lasting, crack-free floors, and neglecting this step often results in costly repairs and endless frustration. If you’re tackling a big tile project or fixing cracks that keep popping up, understanding the right subfloor leveling tactics is essential.
Why Proper Subfloor Leveling Is Your Best Defense Against Cracks
Cracks in large tiles are often a signal that the subfloor isn’t holding up as it should. When the foundation shifts or sags, the tiles above will reflect that movement, leading to stress fractures. According to industry experts, a well-leveled subfloor can reduce tile cracking by up to 70%. But here’s the kicker: many homeowners or DIYers don’t realize how crucial subfloor prep is—until it’s too late.
Early in my career, I made a common mistake—rushing the leveling process to save time. I skipped some essential steps, assuming that a quick patch would suffice. The result? Cracks started appearing within months. That mistake taught me a hard lesson: thoroughness beats speed every time when it comes to subfloor prep.
Is subfloor leveling really worth the extra effort?
Absolutely. Proper leveling not only prevents cracks but also extends the lifespan of your flooring. Neglecting it can lead to uneven wear, tile tiles popping loose, and even water damage seeping into the subfloor. To see detailed techniques on achieving a flawless surface, check out this expert guide.
With this in mind, let’s dive into the four most effective subfloor leveling tactics that can help you prevent those large tile cracks in 2026 and beyond. Are you ready to give your floor the foundation it deserves?
Start with a thorough inspection
Before you even lift a tile, examine the entire subfloor for high spots, dips, or uneven areas. Use a long straightedge or a laser level to identify discrepancies. I once skipped this step on a bathroom project, assuming I could fix things during installation. The result was a bathroom floor with visible lippage and hairline cracks within six months, a clear sign that unevenness had caused stress. Starting with a detailed assessment ensures you address foundational issues upfront, saving you time and money later.
Clean and prepare the surface meticulously
Clear all debris, dust, and oils from the subfloor. A clean surface allows leveling compounds and adhesives to bond properly. Think of it like prepping a canvas before painting; the cleaner and smoother, the better your final result. I learned this during a DIY backsplash tile project when I overlooked cleaning the concrete slab; the tiles never adhered correctly, and cracks soon appeared. Proper cleaning is non-negotiable for a long-lasting installation.
Choose the right leveling method for your subfloor type
Self-leveling underlayment works wonders
If your subfloor has moderate irregularities, a self-leveling compound is your best friend. Mix it according to the manufacturer’s instructions, pour it onto the surface, and spread with a rake or squeegee. The compound naturally flows into low spots, creating a flat surface. On a recent project, I used a rapid-dry self-leveler on a concrete slab, which allowed me to tile the same day, eliminating delays and ensuring a perfectly flat base.
Shims and mortar beds for stubborn unevenness
For larger dips or high spots, shimming with thin layers of mortar can bring the surface into level. This is akin to layering pancake batter to get the perfect thickness; each shim must be firmly seated and flush with neighboring shims to prevent future movement. I once used epoxy-coated shims under a large-format tile in an open kitchen, which prevented flexing and cracking at the joints.
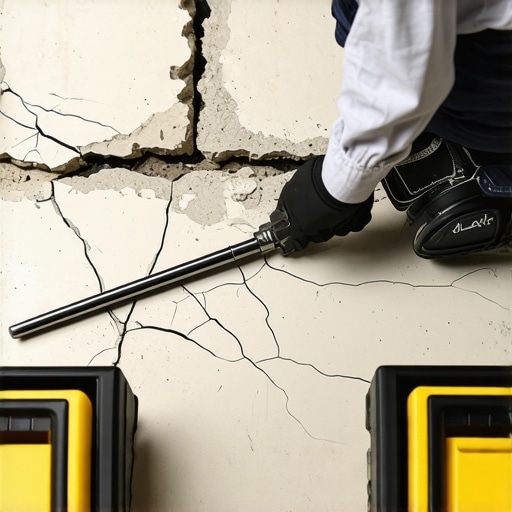
Use a laser level for precision
Invest in a quality laser level to ensure each section of your floor is within a quarter-inch tolerance. Set it up at multiple points across the room and compare readings. This technique allows you to identify subtle variations that manual methods might miss, preventing surprises down the line. During a basement tile project, employing laser-guided leveling allowed me to spot and correct a slight depression that would have caused tile cracking, leading to a flawless finish.
Test and recheck before proceeding
After applying leveling compounds or shimming, re-evaluate the surface. Use a long straightedge or a level to verify flatness. Don’t rush this step. I once installed a large-format tile directly over a freshly leveled surface without rechecking—resulting in noticeable lippage and minor cracks within months. Patience here pays off, giving you a stable base that significantly reduces the risk of future cracks and tile failure.
Remember, a solid foundation is the key to crack-free tiles. Proper inspection, cleaning, precise leveling, and thorough testing form the backbone of a durable installation. For detailed techniques on achieving these results, explore these expert leveling strategies.
Many homeowners and even seasoned DIYers believe that achieving a perfectly leveled floor is simply about slapping on a leveling compound or adjusting a few shims. However, the real nuance lies in understanding the interconnected factors that influence long-term success. One common myth is that as long as the surface looks flat after initial work, the foundation is solid. But according to experts, subtle imperfections can cause significant issues down the line, especially in large-format tiles or hardwood floors. Rushing through the prep phase or skipping detailed inspections often results in preventable cracks or uneven wear. For advanced insights on avoiding these pitfalls, check out our comprehensive guide on common flooring installation mistakes.When it comes to maintaining and scaling your flooring projects, having the right tools can make all the difference. I personally rely on a high-precision laser level, like the Bosch GLL3-330CG, which offers exceptional accuracy within 1/8 inch over 30 feet. Its multi-plane capability allows me to assess flatness across large areas quickly, minimizing guesswork and ensuring my subfloor remains impeccably level. Additionally, a moisture meter such as the Tramex Tramex Concrete Moisture Encounter ensures the substrate is dry enough to prevent future adhesion issues or cracks. Consistent dryness is a trend I see gaining momentum, especially with advances in fast-curing compounds and moisture-sensitive finishes. For long-term results, regularly check the subfloor’s condition with these dependable tools, and incorporate a digital level for spot checking critical areas. In terms of software, I recommend using the LevelTec app, which integrates with laser levels for precise readings and detailed leveling maps, saving hours during large-scale projects. Predictably, as technology evolves, we’re moving toward more integrated, smart tools that communicate with cloud-based project management systems, streamlining workflows and reducing errors.
**How do I maintain my flooring setup over time?** Routine inspections with moisture meters after installation and adjusting leveling tools before applying thinset prevent minor issues from compounding. Remember, investing in quality equipment isn’t just for the initial phase—regular calibration and updates maintain their accuracy. To elevate your skills further, I urge you to try the advanced laser leveling techniques discussed in our [expert guide](https://tiletrendshop.com/precise-floor-leveling-techniques-to-achieve-flawless-surfaces). Mastering these can drastically reduce the need for future repairs and rework, saving money and stress.
A crucial tip I personally swear by: always double-check your subfloor’s flatness with a laser level before committing to tile or hardwood installations. This simple step is a game changer, especially in high-traffic or load-bearing areas. For those ready to take their craftsmanship to the next level, exploring professional-grade tools like the Bosch GLL3-330CG or the LevelTec app is well worth the investment. Ready to give your next project a solid foundation? Visit our [contact page](https://tiletrendshop.com/contact-us) for advice on choosing the right equipment or to get expert support for scaling your flooring endeavors.
Lessons That Didn’t Make the Textbook
- Sometimes, the most overlooked detail—like checking every inch of the subfloor—can save you from future cracks and costly repairs. My biggest mistake was rushing past that initial inspection, and the fallout was a floor covered in hairline fissures. It’s a reminder: never skip the thorough assessment, no matter how tempting to move fast.
- Choosing quick fixes over proper methods might seem efficient, but experience taught me that tools like self-leveling compounds and shims need careful application. I once thought I could patch a wobbling subfloor quickly—and paid the price with uneven tiles and unhappy clients. Patience and precision always win over shortcuts.
- Investing in the right tools—like laser levels and moisture meters—transformed my projects. They’re not just gadgets; they’re game-changers that reveal subtle imperfections before they become big problems. Trust me, a small investment here saves a mountain of headaches later.
- The myth that a surface appearing flat equals a perfect foundation is just that—a myth. Subtle dips hidden from plain sight can cause cracks or uneven wear. Regular rechecks with an accurate laser level are essential for long-term durability. Remember, a floor’s true strength lies beneath the surface.
My Cutting-Edge Toolkit for Floor Success
- **Bosch GLL3-330CG Laser Level**: Its multi-plane accuracy helps me spot and correct tiny imperfections, making tile installation smoother—and more reliable. Reliable leveling ensures longevity.
- **Tramex Moisture Encounter**: Moisture issues are silent enemies that cause future cracks or adhesion failures. Using this meter, I confirm my substrate is moisture-free, saving money and frustration.
- **LevelTec App**: This digital companion integrates with my laser level, providing detailed leveling maps. It’s like having a blueprint for perfect floors, especially on large projects.
- **Quality Thinset and Leveling Compounds**: Not all products are equal. I prefer high-quality, fast-curing options that minimize waiting time and offer consistent results, reducing the risk of cracks.
Step Up Your Floor Game Today
Mastering the art of precise subfloor leveling is more than just a step in installation; it’s an investment in your peace of mind and your home’s longevity. Every crack-free, durable tile floor starts with a thorough assessment and meticulous preparation. Let go of assumptions that a surface is good enough—commit to the process, and your future self will thank you. Dive into our expert guide on flawless floor leveling to elevate your craftsmanship today.
What has been your biggest challenge in ensuring a perfectly leveled floor? Drop your stories and tips in the comments below—I’d love to hear your experiences!