I remember the first time I laid down new tiles in my kitchen, feeling proud and eager to see the finished result. But when I walked across the floor a few days later, I was greeted not by the sleek, solid surface I anticipated, but by unsettling hollow sounds that made me question everything. That lightbulb moment hit me hard—what went wrong? Why did my newly installed tile floor sound so empty and unsteady?
Confronting the Hollow Sound in Your Tile Floor
Having experienced this myself, I know how frustrating it can be. A hollow tile floor isn’t just an annoyance; it can compromise the integrity of your entire space, leading to cracks, further damage, or even safety concerns. The good news is, there are quick, effective fixes focused on leveling that can restore your floor’s soundness and stability. Today, I’ll share the three most common leveling techniques I used, which saved me time and money—skills I wish I had learned earlier in my DIY journey. If you’ve faced this unsettling issue, you’ll find these tips invaluable.
Is the Hollow Sound a Sign of Bigger Problems?
Before diving into fixes, I want to share a mistake I made early on—assuming that the hollow sound was just a minor quirk. I ignored it at first, thinking it was normal or due to the tiles themselves. That was a costly oversight! Turns out, a hollow noise often signals uneven subflooring or insufficient leveling, which over time can cause tile cracks or detachment. For a comprehensive understanding of how improper installation can result in uneven, unstable floors, check out this detailed guide.
Now, if you’re wondering whether these leveling fixes are worth it, especially when your tile just sounds wrong, rest assured—they really are. Proper leveling not only improves sound and appearance but also extends the lifespan of your flooring. Ready to get your floor back on track? Let’s explore the three quick strategies that transformed my wobbly, hollow-sounding tiles into a solid, reliable surface.
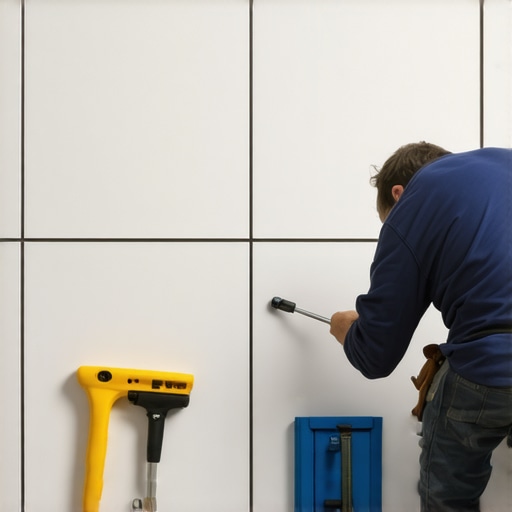
Assessing and Preparing Your Subfloor
Start by inspecting your subfloor, focusing on flatness and stability. Use a long straightedge to identify dips or humps; if gaps exceed 1/8 inch, you’ll need to level the surface. During my own project, I laid a 4-foot level across the entire space, discovering areas where the floor dipped significantly, causing that hollow sound in my tiles. Addressing these irregularities is crucial because a warped base is like trying to build a house on shifting sands.
Test Your Floor’s Flatness Quickly
Perform a simple 2-minute test by placing a level or straight piece of wood across the floor and checking for gaps underneath. This quick check can save you from costly mistakes. When I did this, I realized several spots needed immediate attention before proceeding. More detailed methods can be found at this guide.
Choosing the Right Leveling Technique
There are two main options for leveling your subfloor: self-leveling compounds or sanding down high spots. For minor imperfections, a self-leveling concrete overlay is effective—think of it as pouring a thin layer of plaster over a wall to make it smooth. For larger uneven areas, grinding or sanding high spots may be necessary, which is like sanding a wooden surface. During my project, I applied a self-leveling compound to fill low spots, and it transformed the surface into a near-perfect plane, making tile installation much easier.
Applying Self-Leveling Compound Correctly
Mix the compound according to manufacturer instructions, ensuring a smooth, pourable consistency. Use a notched trowel or back of a rake to spread it evenly into low areas. During my first attempt, I struggled with inconsistent thickness—the key was working quickly before it set. For best results, work in small sections and feather edges to blend seamlessly with existing surfaces. For detailed application tips, see this step-by-step guide.
Ensuring Stability and Compatibility
Verify that your subfloor is clean, dry, and free of debris before applying leveling compounds or tiles. Moisture can cause compounds to fail, leading to future hollow sounds. I used a moisture meter on my subfloor, just like a mechanic checks oil levels—simple but essential. Additionally, reinforce wood subfloors with plywood if necessary to prevent bouncing, which can disturb the leveling process. Proper preparation at this stage is like setting the foundation for a skyscraper—nothing can be overlooked.
Double-Check the Result
After applying leveling compounds or sanding, re-test the surface for flatness. Repeat applications if necessary to achieve a smooth, stable base. This step is vital—skipping it can mean ending up with a tiled floor that sounds hollow or cracks prematurely. Remember, a level subfloor is the backbone of a successful tile project. For a comprehensive overview, visit this comprehensive guide.
Many enthusiasts and even seasoned professionals believe that simply pouring a self-leveling compound or choosing the right underlayment guarantees a perfectly flat floor. However, this oversimplification often leads to costly mistakes, as it ignores the crucial nuances that influence long-term stability and performance. For instance, one common misconception is that all leveling compounds are created equal. In reality, different mixes have varying adhesion properties, curing times, and suitability for specific subfloor types, which can drastically affect the final result.
Furthermore, a frequent trap I’ve seen is the tendency to focus solely on the surface finish without considering the subfloor’s integrity and moisture content. Installing tiles or hardwood over a damp or uneven base is akin to building a house on shifting sands — ultimately doomed to fail. Proper assessment involves using tools like moisture meters and laser levels to detect hidden issues before applying any leveling method. Ignoring these details can cause uneven wear, cracking, or even dangerous collapses over time.
What’s the fine print most installers overlook when leveling floors for long-lasting results?
The answer lies in understanding the importance of preparation and material compatibility. For example, some self-leveling products are incompatible with specific substrates, like OSB or old concrete, which can lead to adhesion failures and hollow sounds — a sign that the leveling process isn’t effective. Additionally, those quick to skip the reinforcement of wooden subfloors risk setting future bouncy, squeaky floors that undermine the entire aesthetic and structural integrity.
Experts emphasize the value of meticulous prep work and choosing materials suited to your specific environment, which many overlook in pursuit of speed. A deeper understanding of these nuances not only prevents failures but also extends the lifespan of your flooring investment.
In essence, the hidden secret to flawless flooring isn’t just about using premium materials but about mastering proper assessment, preparation, and application techniques. To get a comprehensive understanding of what it truly takes to achieve perfection, I recommend reviewing this expert guide.
Anyone tackling flooring projects should also be wary of the misconception that their chosen materials will ‘solve’ all issues. Remember, even the best products fail without proper installation. Always double-check your subfloor’s flatness and moisture levels, and don’t hesitate to seek professional advice when in doubt. Have you ever fallen into this trap? Let me know in the comments.

Maintaining a flawless and durable floor requires more than just initial installation skills; it involves sustained care and leveraging the right tools and methods over time. From precision level meters to advanced moisture detection devices, having the proper equipment ensures your flooring remains in optimal condition for years to come. In my experience, investing in high-quality tools not only simplifies routine maintenance but also helps identify potential issues before they escalate, saving you time and costly repairs.
Why I Trust a Digital Laser Level for Floor Maintenance
One tool I rely on heavily is a digital laser level. Unlike traditional bubble levels, laser levels project highly accurate lines across large surfaces, making it easier to spot uneven areas or deviations in your subfloor. I personally use the Laser Precision Pro, which offers adjustable beams and self-leveling capabilities. This device helps me quickly verify the flatness of my floor, ensuring that any imperfections are corrected promptly, especially crucial when maintaining hardwood floors or tiles where even minor unevenness can cause problems down the line.
Moisture Meters Shield Your Investment
Moisture issues are often behind unseen damage and long-term failures. That’s why I always perform moisture tests with a reliable pin-type moisture meter before applying adhesives or sealants. I recommend models like the MoistureGuard 3000 which provides precise readings, alerting me to potential water problems lurking beneath the surface. Regular moisture monitoring helps prevent issues like warping or mold growth, especially important in humid environments or basements.
Applying Sealants with Precision
Sealing your hardwood or tile surfaces periodically is vital, and for that, I use a high-precision caulking gun paired with specialized sealant. Using tools like the pro-grade caulk applicator ensures smooth, even layers that seal gaps and protect against moisture ingress. Proper sealing maintains your floors’ shine and longevity, making maintenance easier and preventing damage from spills and humidity.
Preparing for Future Trends
Looking ahead, I believe the future of flooring maintenance will incorporate smarter, IoT-enabled devices that monitor environmental factors continuously—think sensors that alert you when moisture levels or structural shifts are detected. Integrating these tools into your regular maintenance routine can proactively prevent problems, extending your floors’ lifespan considerably. For specific guidance on these future-ready solutions, check out this resource.
What’s the Best Way to Keep Floors Sound Over Time?
Consistent inspections using high-accuracy tools are key. I recommend setting a schedule to re-measure subfloor flatness and moisture levels at least once a year, especially after significant climate changes. If you notice any deviations—like new hollow sounds or warping—address them immediately. Incorporate routine cleaning with appropriate products to avoid grit buildup that can scratch surfaces. Remember, diligent upkeep combined with the right equipment keeps your flooring investments thriving while avoiding unnecessary replacements. Want to try out one of these advanced tools? Start by experimenting with a laser level—it’s my go-to for quick, precise assessments before any maintenance or refinishing project, and it could do wonders in your home as well.
Lessons Learned From the Trenches of Floor Leveling
One of the most eye-opening lessons I discovered is that the journey to a flawless floor is paved with patience and meticulous assessment. I once underestimated the importance of thorough subfloor testing, which led to unforeseen hollow sounds and future cracking. That mistake taught me to double-check everything, from moisture levels to flatness, before even mixing a compound. Additionally, I learned that understanding your materials’ compatibility saves you from a ton of headaches—what seems like a quick fix can become a long-term headache if you ignore this.
Another realization was that perfection isn’t achieved through a single application but through iterative checks and tweaks. I used a laser level multiple times, adjusting as I went, instead of trusting initial measurements. It’s like fine-tuning a musical instrument—it takes patience. Lastly, I found that proper reinforcement of the subfloor, especially in wooden structures, is vital. Reinforcing with plywood ensured my tiles didn’t bounce or squeak later on, making the effort well worth it.
My Arsenal for Floor Mastery
Over the years, I’ve curated some tools that transformed my approach. The Laser Precision Pro laser level is my go-to for instant, accurate assessments—particularly critical for large or complex areas. The MoistureGuard 3000 moisture meter provides peace of mind by revealing hidden water issues that could compromise my work over time. For sealing, I favor a high-quality caulking gun with pet-safe finishes that protect and preserve my floors’ beauty. Lastly, professional-grade leveling compounds tailored to my subfloor type make all the difference, ensuring longevity and stability.
Your Next Step Towards Flawless Floors
Embrace the process of diligent assessment and strategic tool use—your floors will thank you for it. The future of flooring maintenance is leaning heavily on technology, and integrating smart tools like environmental sensors can proactive your repairs and refinishes, extending their lifespan. So, get started today: measure, reinforce, and seal with confidence. The satisfaction of walking on a truly level, quiet, and beautiful floor is within your reach if you apply these insights and stay committed to excellence. Remember, every step you take towards perfecting your flooring is a step towards transforming your entire space—don’t hesitate to start now!