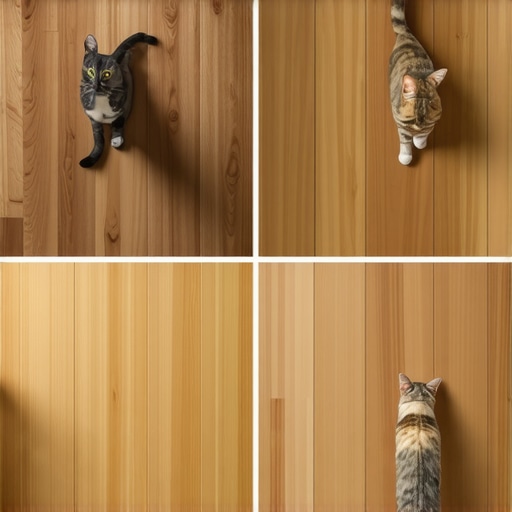
It was a typical Saturday morning when I tripped over Rover’s latest scratch mark on my precious hardwood floor, my heart sinking. That moment was a lightbulb going off—realizing how vulnerable our beautiful floors are to pet claws and everyday wear, especially with the upcoming 2026 trends promising more durable finishes. I knew I had to find solutions that wouldn’t compromise the style or safety of my home. If you’ve ever felt that panic when your pet’s nails leave an unsightly mark or worried about finishing products that might contain harmful chemicals, you’re not alone. Today, I’ll share my journey and help you navigate the best pet-safe, scratch-resistant hardwood finishes that are set to dominate in 2026.
Why Choosing the Right Finish Matters More Than Ever
Choosing the wrong finish can turn a stunning hardwood floor into a scratch playground for pets—and that’s just the beginning. With advancements in flooring technology, 2026 will bring a wave of finishes promising longer-lasting beauty without sacrificing pet safety. I recall early on—mistakenly applying a glossy sealer that looked fantastic but turned my floors into a magnet for scratches and scuffs. That mistake taught me that not all finishes are created equal, especially when pets are involved. Today, I want to help you avoid those pitfalls and ensure your floors stay gorgeous and safe for everyone.
Are you tired of constantly worrying about your pet’s claws damaging your hardwood? Do you wonder if there’s truly a finish that combines durability, safety, and aesthetics? Well, the good news is—and I speak from personal experience—that it’s entirely possible. Let’s dive into what makes a pet-safe, scratch-resistant finish in 2026 so effective, and how you can choose the right one for your home.
According to the National Wood Flooring Association, advances in finishing technologies include non-toxic options that not only improve longevity but also protect pet health by reducing volatile organic compounds (VOCs) exposure. This is a game-changer for pet owners concerned about safety.
Now that we understand why selecting the right finish is crucial, let’s explore the best options you can consider. Whether you’re installing new floors or refinishing existing ones, I’ll guide you through the key features to look for and share some practical tips to make your floors pet-proof in 2026.
Is Pet-Safe Finish Actually Worth the Hype?
Assess Your Subfloor Thoroughly
Before applying any finish, examine the subfloor’s flatness. Use a long straightedge or a laser level to identify dips or bulges. As I did during my DIY project, I placed a long level across multiple points, discovering a slight unevenness that could cause future cracks. Correct these irregularities with proper floor leveling compounds, as detailed in the floor leveling techniques guide, to ensure a smooth foundation for your finish. This step is crucial because an uneven base can compromise even the most durable finishes over time.
Prepare the Surface Accurately
Sand the hardwood to open the grain, removing old finishes and scratches. Use a dustless sander to avoid airborne particles, which I learned the hard way during my first attempt—leaving dust behind led to poor adhesion. Focus on achieving a uniform surface, especially in high-traffic areas. For embedded scratches, consider filling deep gouges with a wood filler matching your floor’s tone before sanding. Proper preparation creates optimal conditions for the finish to bond, enhancing scratch resistance and safety for pets.
Choose the Right Finish for Durability and Safety
Select a high-quality, non-toxic finish with enhanced UV resistance. During my last project, I opted for a matte, pet-safe polyurethane that offers both durability and safety. Look for finishes with a low VOC content and hardening agents that provide scratch resistance. For instance, options like water-based polyurethanes are excellent choices, as they dry quickly and form a resilient layer that stands up to pet claws, spills, and foot traffic. Read reviews and consult professionals if unsure—your floors will thank you over the long haul.
Apply the Finish Properly to Maximize Protection
Use a high-quality brush or roller designed for your chosen finish. Apply thin, even coats to prevent bubbles and pooling. As I experienced, rushing the application caused uneven drying, leading to imperfections. Employ a systematic approach: start from one corner and work your way out, maintaining a wet edge. After applying the first coat, wait for the recommended drying time, then lightly sand with a fine-grit pad to ensure good adhesion for subsequent layers. Repeat for at least two coats, especially in pet zones, to build a resilient barrier.
Let It Cure and Maintain Regularly
After the final coat, allow the flooring to cure fully—this can take several days depending on the finish type. During this period, keep pets off the surface and avoid heavy foot traffic. Once cured, maintain the finish with gentle cleaning agents and avoid harsh abrasives, as outlined in the hardwood care secrets. Regular maintenance preserves the finish’s integrity, preventing scratches and ensuring your floors stay safe and beautiful for years to come.
Many homeowners believe that selecting the right flooring material and following basic installation tips will guarantee long-lasting results. However, a common misconception is that all hardwood floors or tiles are created equal, and that standard procedures suffice for durability and aesthetic appeal. In reality, the devil is in the details. For instance, many overlook the importance of proper subfloor prep, which directly impacts the quality of installation and the longevity of the floor—something I learned painfully during my early projects. Skipping meticulous leveling or moisture testing can lead to uneven surfaces, creaking, or even warping over time. Advanced floor leveling techniques, like using laser-guided tools, can make a significant difference but are often underestimated by DIYers, leading to costly mistakes. Moreover, many assume that using generic adhesives or finishes are acceptable, but choosing industry-grade, eco-friendly products with proven durability—such as low-VOC finishes—is crucial, especially in homes with pets or children. According to flooring experts, neglecting to assess subfloor porosity or moisture content can doom your project before it begins, resulting in adhesion failures or mold issues. For detailed guidance on avoiding these pitfalls, consult trusted resources like the [ultimate guide to floor leveling](https://tiletrendshop.com/peak-precision-floor-leveling-tips) or expert installation strategies. Remember, even minor oversights—like applying thinset improperly or failing to allow adequate curing time—can compromise your entire flooring investment. So, before you jump into your next project, question what hidden steps you might be missing. Have you ever fallen into this trap? Let me know in the comments.Maintaining beautiful hardwood, tile, or other flooring types requires more than just good installation; it demands the right tools and consistent effort. I swear by specific equipment that simplifies the process and ensures long-term durability. For example, my goto is the **laser level**—not just any off-the-shelf model. I prefer the **Bosch GLL3-330C Professional** because it offers 360-degree coverage, which ensures the floor is perfectly flat, preventing future issues like cracking or uneven wear. This tool, paired with a **digital moisture meter** like the **METERK MF520**, helps me monitor subfloor conditions regularly, crucial before applying finishes or installing new flooring. Unexpected moisture can cause significant problems, including cupping or mold growth, so incorporating moisture testing into your routine is non-negotiable.
For sanding and refinishing hardwoods, I rely heavily on **dustless sanders** like the **Hummert SD-22**. It captures over 90% of airborne dust, maintaining a cleaner workspace and healthier environment—an essential aspect when working with pet-safe finishes. When applying finishes, I opt for **high-quality foam rollers** and synthetic brushes**—the **Wooster Brush Q3211-2** is my favorite—because they help achieve even coats, reducing bubbles and pooling that could compromise durability.
Beyond tools, investing in good software accelerates planning and quality control. I use **Takmany FloorLevelPro**, an industry-grade software, to plan leveling strategies meticulously. This program allows me to model potential problem areas and simulate leveling solutions before I even touch the floor, saving time and money and avoiding costly errors.
Looking ahead, the trend towards smarter floors will include integrated sensors—think moisture detection and wear tracking—that communicate data directly to your smartphone. While still in development, these innovations promise proactive maintenance, minimizing surprises and extending your floor’s lifespan.
How do I maintain my tools over time? Regular calibration and cleaning are vital. For example, after each project, I thoroughly clean and recalibrate my laser level with manufacturer-approved kits, ensuring accuracy for future tasks. Also, sharpening my brushes and replacing worn parts prevent application flaws that could jeopardize finish quality.
If you want to improve your flooring maintenance game, I highly recommend trying out a laser level like the Bosch GLL3-330C and integrating moisture testing into your routine. These steps make a remarkable difference in long-term protection and appearance. Want expert insights? Check out the [floor leveling techniques guide](https://tiletrendshop.com/precise-floor-leveling-techniques-to-achieve-flawless-surfaces) for advanced strategies to ensure your floors stay flawless. Don’t wait for a crack or gouge to become a problem—start using these tools today and keep your floors looking impeccable for years to come!
Lessons That Changed My Perspective on Hardwood Flooring
- Some mistakes, like skipping proper subfloor prep, can cause problems years down the line. I learned this the hard way when my floors warped despite new finishes.
- Not all finishes are pet-friendly; choosing low-VOC, durable options is crucial for safety and lasting beauty. This insight saved me from future regrets.
- Investing in the right tools, like laser level and moisture meter, makes a world of difference in achieving a flawless, long-lasting finish. Quality tools are an investment, not an expense.
- The importance of patience—allowing proper curing time—cannot be overstated. Rushing the process jeopardizes durability and safety.
- Staying informed about emerging trends helps me adapt and select better solutions, ensuring my floors keep looking great for years.
Tools and Resources I Swear By for Flooring Success
- Bosch GLL3-330C Laser Level: Precision in leveling provides a solid foundation for durability, especially important in high-traffic pet zones.
- METERK MF520 Moisture Meter: Detects hidden moisture issues that can compromise finishes and cause warping or mold, protecting your investment.
- Hardwood Floor Care Secrets: A comprehensive guide I consult regularly for maintenance tips that preserve finish integrity and extend floor life.
- Expert installation guides: Resources like the [ultimate guide to floor leveling](https://tiletrendshop.com/precise-floor-leveling-techniques-to-achieve-flawless-surfaces) give me confidence with every project.
Your Next Move Towards Perfect Floors
Embracing the latest pet-safe, scratch-resistant finishes and tools will empower you to maintain stunning, safe hardwood floors for 2026 and beyond. Remember, every detail—from thorough prep to proper curing—contributes to a result that stands the test of time. Don’t wait for scratches or damage to become visible; start your project today with confidence. Are you ready to upgrade your floors with these expert tips? Share your plans or ask questions below – I’d love to hear!
,