Imagine laying beautiful new tiles or installing a stunning hardwood floor, only to find out later that your floor isn’t quite as flat as you’d hoped. I’ve been there—trust me, nothing kills the excitement of a home upgrade faster than discovering uneven flooring after the fact. It wasn’t until I experienced cracked tiles and uneven surface issues that I realized a simple, quick test could have saved me a lot of trouble. That lightbulb moment changed everything.
The Crucial Step Before Tiling or Installing Hardwood: Check if Your Floor is Level
Before you start tearing into your floors with tile or hardwood, there’s a tiny, two-minute test I swear by—one that can prevent costly mistakes and endless frustration down the line. Think of it as a quick health check for your floors. It’s so straightforward, but surprisingly overlooked by many homeowners and even some pros.
By performing this simple test, you’ll gain clarity on whether your surface needs some leveling work or if you’re good to go. And let’s be honest: nothing is worse than investing time and money into beautiful flooring only to discover unevenness that causes tiles to crack or planks to wobble. I learned this the hard way early in my renovation projects, and I wish I had known about this test from day one.
In fact, according to flooring experts, identifying uneven surfaces before installation can significantly extend the lifespan of your flooring (more details can be found in our comprehensive guide on floor leveling techniques). It’s a small step that makes a huge difference.
So, have you noticed any room where the tiles seem to crack prematurely or where your hardwood planks wobble? If yes, this quick test can help you pinpoint whether the unevenness is a culprit. Grab a simple straightedge or a long level, and let’s see what your floors have to tell you—because catching problems early makes all the difference in achieving durable, beautiful results.
Gather Your Tools and Prepare for the Test
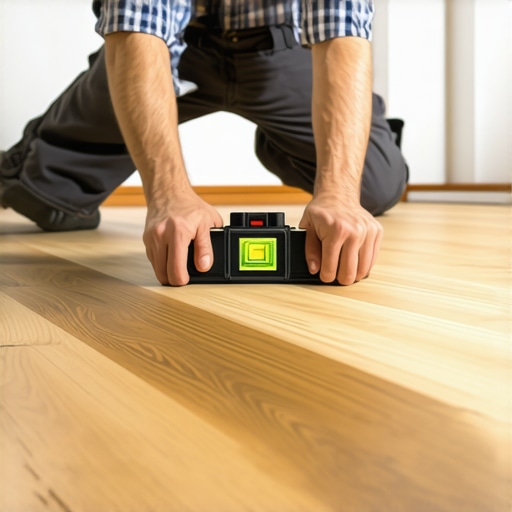
Start by collecting a reputable long level or straightedge—ideally 4 to 6 feet long—to accurately assess your floor. Clear the area of furniture and debris to ensure unobstructed access. Wearing comfortable work gloves can also help grip tools securely during testing. This initial setup mimics preparing your workspace before a painting project—it’s about getting everything ready for precision.
Identify the Key Spots for Measurement
Instead of randomly testing, focus on high-traffic or visually uneven areas—like near doorways or across expansive sections. These are the hotspots where unevenness will be most noticeable and problematic. Think of it as scanning for wrinkles on a bedsheet—you want to find the dips and bulges before laying your tiles or hardwood.
Perform the Level Check in Critical Sections
Place your straightedge or level across the surface, spanning several inches to a foot. Look for gaps between the tool and the floor—anything over 1/8 inch indicates a significant unevenness. If you spot a gap, mark it with painter’s tape or chalk for later reference. I remember one time, I found a persistent wobble in the living room corner that was hidden under furniture—this simple test revealed it clearly, saving me from future tile cracks.
What About Minor Irregularities?
If your test reveals small dips—less than 1/8 inch—they might not need major work. However, for larger dips or high spots, proceed with leveling techniques—like applying self-leveling compound or sanding down high spots. This is similar to trimming a lopsided picture frame—small adjustments yield a perfectly aligned surface.
Use Self-Leveling Compound for Major Dips
If the floor shows unevenness beyond recommendations, mix and pour a self-leveling compound according to manufacturer instructions. Spread the liquid mixture with a squeegee or trowel, working quickly before it sets. This process is akin to pouring wet concrete—smooth, fast, and decisive. It creates a flat surface ready for installation, dramatically reducing future problems.
Sand and Fill Minor Imperfections
For small bumps or uneven spots, use a coarse-grit sander or filler to create a smooth surface. Vacuum dust before applying any fill material to ensure adhesion. Think of this as buffing a scratched piece of wood—you want a flawless finish before applying your flooring materials.
Re-Check the Surface After Leveling
Once you’ve applied leveling solution or filled imperfections, allow it to cure fully per instructions. Then, redo your test—place the straightedge across the surface in the same spots. Confirm there are no gaps and the surface feels uniformly flat. This step ensures your efforts paid off and your future flooring will have a solid foundation.
Remember, investing a little extra time here pays off in long-term durability. Flawless floors can withstand the test of time and foot traffic, preventing cracks and wobbles. For detailed techniques, consider reviewing precise floor leveling methods and ensure your project success.
Many homeowners and even some professionals often believe that achieving a perfectly level floor is as simple as running a straightedge across the surface. However, this misconception overlooks critical nuances that can make or break your flooring’s longevity. Contrary to popular belief, minor unevenness—less than 1/8 inch—can sometimes be tolerated, especially if your subfloor has consistent dips or dips are localized. Relying solely on visual inspection or a basic level can be deceptive because these tools may not detect micro-dips or high spots that could cause issues over time. For instance, an uneven subfloor might seem acceptable, but under the veneer of the finished flooring, subtle imperfections can lead to tile cracking or hardwood buckling years later. Experts advise using precise, multi-point testing and professional-grade leveling compounds to address these hidden imperfections. Furthermore, a common myth is that once leveling is achieved, no further steps are necessary. In reality, even small irregularities can amplify when heavy furniture is placed or during temperature fluctuations, causing the floor to shift or crack. To truly ensure durability, it’s essential to understand the material-specific nuances—such as the different responses of tile and hardwood to minor shifts—and tailor your leveling approach accordingly. For example, tiles require a flat, solid base with minimal tolerances, while hardwoods can accommodate slight movements if installed properly. Missteps here often stem from oversimplified techniques, leading to costly repairs and reinstallation. The key isn’t just to level but to do so with an understanding of the substrate’s behavior and the materials involved. A professional-grade assessment, like a 3D laser scan or detailed dip-and-rise measurement, can reveal subtleties that basic tools miss. This is especially crucial for large or complex spaces where unnoticed dips can cause uneven wear or aesthetic issues over time. So, next time you plan a flooring project, remember that what you don’t see can harm you longer-term. Invest in detailed diagnostics and precise leveling methods, and you’ll save yourself headaches and expenses down the line. Want to dive deeper into expert floor leveling techniques? Check our comprehensive guide on floor leveling strategies. Have you ever fallen into this trap? Let me know in the comments.Maintaining beautifully installed floors requires more than just initial effort; it involves using the right tools and adopting consistent maintenance routines to ensure durability over time. As someone passionate about flawless flooring, I recommend investing in quality equipment from trusted brands like Bosch or Makita for subfloor preparation and finishing touches. A high-precision laser level, for example, is indispensable—its accuracy ensures your floors stay flat even after years of use, minimizing future repairs. Additionally, a durable drum sander, such as the Clarke American Sanders series, allows for easy removal of surface imperfections during refinishing, extending your hardwood’s lifespan. Regularly checking and calibrating your tools is vital; a poorly calibrated laser can give misleading readings, leading to subtle dips that cause problems down the line. To keep your floors looking pristine, I swear by soft microfiber mops and pH-balanced cleaners suited specifically for hardwood or tile, avoiding harsh chemicals that accelerate wear. Incorporating moisture meters like the Protimeter is also beneficial—monitoring humidity levels prevents wood from expanding or contracting excessively, which can compromise your installation. Looking ahead, I predict smart tools equipped with IoT connectivity will become more prevalent, providing real-time feedback on floor conditions and guiding maintenance schedules automatically. This synergy between traditional craftsmanship and modern technology promises even longer-lasting results. How do I maintain hardwood and tile floors over time? Simple routine checks, prompt repairs, and using the right cleaning tools make all the difference. For example, cleaning grout lines with a soft brush and natural cleaner helps prevent moisture buildup, reducing mold risk. Another tip is applying a quality sealant every few years to safeguard surfaces against stains and wear—more detailed techniques are outlined in our guide on hardwood floor care. Remember, a well-maintained floor not only preserves its beauty but also enhances your home’s value—so investing in the right tools today pays dividends tomorrow. Don’t forget, consistent attention to small details today helps avoid costly repairs in the future. For expert advice on flooring maintenance and advanced techniques, check out our comprehensive resources or contact us for personalized suggestions.
The Hardest Lesson I Learned About Floor Leveling and Flooring Installation
When I first started my DIY flooring projects, I underestimated the power of a meticulously leveled surface. I thought minor dips were negligible, but soon enough, cracked tiles and creaking hardwood floors reminded me that perfection begins beneath the surface. The biggest lightbulb moment was realizing that small imperfections amplified over time, causing costly repairs and frustrations.
Surprising Truths That Changed My Approach
I used to believe that a quick visual check was enough—big mistake. Precise multi-point measurements and using professional-grade leveling compounds transformed my projects. Additionally, I discovered that understanding each material’s unique response to slight unevenness helps in choosing the right leveling method, whether it’s self-leveling compounds or sanding techniques.
Tools and Resources That Elevated My Game
Investing in high-quality tools like laser levels from trusted brands and reading expert guides on floor leveling techniques made all the difference. These resources provided clarity and confidence, allowing me to address subtle imperfections that could compromise the longevity of my floors.
The Impact of a Level Floor on Durability
I’ve learned that a flat, well-leveled surface isn’t just about aesthetics; it’s about creating a foundation that withstands foot traffic, furniture weight, and temperature changes. Skipping this step can lead to cracks, buckling, and uneven wear—problems that are expensive and stressful to fix later.
Action Steps for Your Flooring Journey
Armed with these lessons, I encourage you to prioritize accurate leveling from the start. Use appropriate tools, understand your materials, and don’t rush the process. Remember, a small investment of time now saves significant headaches down the road. For more in-depth strategies, explore our expert tips on floor leveling to ensure your project is a success.
Keeping Floors Flawless: The Long Game
Finally, regular maintenance and inspections help preserve your floors’ integrity. Simple checks and timely repairs can prevent minor issues from turning into major headaches. Elevate your space with confidence—your long-lasting, gorgeous floors await.
Reading this post really resonated with me, especially because I once overlooked the importance of checking my subfloor before installing new hardwood. I also thought minor dips wouldn’t cause big issues, but I wound up with squeaky, uneven floors just a year later. Since then, I’ve learned that investing even a few minutes in that initial level check can save a lot of stress and money later on. I’d love to hear, has anyone tried using a laser level for a more comprehensive assessment? It seems like a game changer for larger spaces or detailed projects. I’m curious how others have handled tricky areas or stubborn dips—any tips on achieving a perfectly flat surface without professional help? Also, I wonder if there are simple tools for DIYers that still give accurate enough results for most home projects. Overall, this article emphasizes a crucial step many tend to skip, but it really does make all the difference in the durability and appearance of the finished floor. Thanks for sharing these practical insights!
This post really hits home because I’ve seen how even small dips in the subfloor can cause big problems later, especially with tile cracking or hardwood creaking. I agree — that quick check with a long level is such a simple yet vital step many overlook. What I found interesting is the advice on focusing on high-traffic areas for testing; I’ll definitely keep that in mind for my next project. Since I’m planning a big renovation soon, I’m contemplating investing in a laser level for a more detailed assessment of the subfloor’s condition. Has anyone here tried a laser level for large or complex spaces? Is it worth the extra cost? Also, I’ve learned that even minor irregularities, under 1/8 inch, can sometimes be tolerated if the material responds well, but I wonder if over time these small dips might still cause issues. It seems like understanding the specific material needs and meticulous testing can make a huge difference in durability. Thanks for outlining these practical tips—this ensures my next flooring project will start on a solid foundation!
Wow, this post really highlights how crucial that initial floor check is before starting a renovation. I remember rushing through the leveling process on my first hardwood install and ending up with creaky, uneven floors. It was a costly lesson, but now I totally agree that even a brief 2-minute test can save headaches later. I’ve been thinking about investing in a laser level for my upcoming project because I’ve heard it provides incredibly precise readings over large areas. Has anyone else had experience with laser levels in home projects? Did it really help identify tricky spots that simpler tools might miss? I also wonder, for those small dips under 1/8 inch, is it safe to ignore them depending on the material? Or do you recommend always fixing every imperfection to ensure longevity? It’s interesting how subtle details can make or break the durability of the finished floor. I think understanding these nuances is key, especially when working on larger spaces. Thanks for sharing these practical tips—definitely planning to incorporate a thorough level check from the start this time around!