I’ll never forget the moment I stepped into my living room, expecting the familiar warmth of my hardwood floors. Instead, I was greeted by a squeak, a creak, and a visible gouge that looked like it had been inflicted by a tiny beast. Frustration sank in—those floors weren’t just aesthetic—they were the foundation of my home’s comfort and style. Like many homeowners, I thought, “This is a disaster I can’t fix without replacing everything.” But after some research and a few trial-and-error experiments, I discovered that there are smart, straightforward ways to restore hardwood floors—ways that can save you time, money, and perhaps even your sanity.
Why Proper Hardwood Floor Care Matters More Than Ever in 2026
In 2026, with remodeling projects soaring and DIY efforts becoming increasingly popular, maintaining and restoring hardwood floors has never been more critical. Not only do floors set the tone for your entire space, but they also add up to a significant investment. According to the National Wood Flooring Association, proper maintenance can extend the lifespan of hardwood by decades. Yet, countless homeowners unknowingly make mistakes that accelerate wear or cause irreparable damage. I’ve been there, making mistakes early on—like using the wrong cleaner or neglecting proper subfloor prep—which only worsened the issues.
If you’re tired of living with squeaks, gaps, or dullness, you’re in luck. Today, I’ll share five tried-and-true hacks that helped me breathe new life into my floors—and can help you do the same. These aren’t quick fixes; they’re strategies rooted in practical experience and reliable techniques. Have you ever faced a stubborn creak or chipped corner that seemed impossible to fix? Trust me, I understand. But with the right approach, you can turn things around faster than you think.
Is Hardwood Restoration Really Worth the Effort in 2026?
Before we dive into the specifics, I want to address a common skepticism—”Is restoring my hardwood floors worth the hassle?” To be honest, I once believed replacing was the only solution. Early on, I made the mistake of ignoring subfloor issues, which led to recurring problems. That mistake taught me an important lesson: understanding the root cause and applying proper restoration techniques are key. You don’t have to accept dull, bumpy, or noisy floors as your new normal. With expert guidance and a bit of patience, you can preserve and even enhance your existing floors, adding value and beauty to your home. Want to learn more? Check out [floor leveling tips](https://tiletrendshop.com/the-ultimate-guide-to-floor-leveling-for-a-perfect-finish) for professional insight.
Assess the Damage Accurately
Start by thoroughly inspecting your hardwood floors for scratches, dents, or uneven surfaces. Use a Level tool across the surface to identify high or low spots—think of it as a dentist checking for cavities. Mark problem areas with painter’s tape for easy reference. I once ignored a subtle dip near my doorway, only to find it worsened after sanding. Identifying issues precisely prevents unnecessary work and ensures effective repairs.
Prepare the Surface Properly
Clear furniture and remove debris. Vacuum and clean the floor with a gentle wood floor cleaner—avoiding harsh chemicals that can cause future problems. If your floor has old, chipped finish, consider light sanding to remove the damaged layer. This step is akin to peeling an onion to reach a fresh layer; it prepares your surface for a smooth finish.
Check for Moisture and Subfloor Integrity
Use a moisture meter to test subfloor moisture levels, especially in basements or humid climates. If moisture exceeds safe thresholds, address these before proceeding—otherwise, you’ll trap problems beneath your new finish. Remember, a foundation like a house’s skeleton needs to be sound before you decorate.
Level and Reinforce the Subfloor
Uneven subfloors are like a wobbly table—no matter how perfect the finish, instability remains. Use self-leveling compound for minor dips, following the manufacturer’s instructions carefully. For larger imperfections, consider grinding down high spots or adding reinforcements like plywood patches. In my experience, mixing small batches of leveling compound and pouring quickly prevents it from setting before it spreads evenly. For detailed techniques, check out this comprehensive guide.
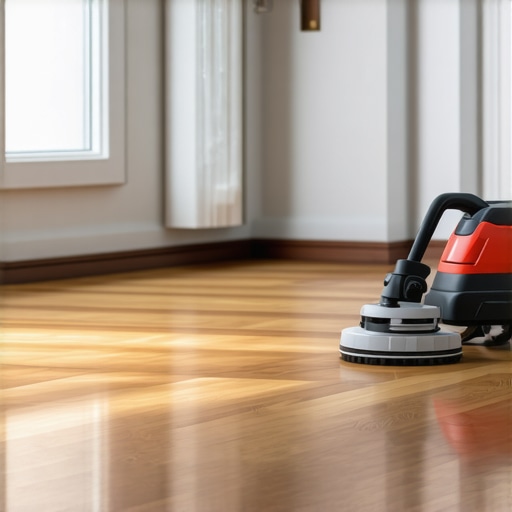
Sand and Repair the Surface
Use a drum sander for large areas, starting with coarse grit and progressing to finer grits for a smooth surface—think of refinishing a guitar to get a silky finish. Carefully sand around edges with hand-held tools. Fill deep gouges or cracks with quality wood filler, matching the color as closely as possible. Allow it to cure fully before sanding down again to ensure a seamless repair. Remember, patience here avoids peeling or unevenness later.
Apply Finishing Techniques for Longevity
Choose a high-quality finish suited for your environment—whether oil-based or water-based urethane. Apply with a clean brush or roller, avoiding over-application to prevent bubbles or drips. Multiple thin coats are better than one thick layer—like painting a wall, the key is patience. After each coat, sand lightly with fine grit to enhance adhesion. For advanced finishing tips, refer to expert refinishing techniques.
Regular Maintenance Extends the Life
Once restored, consistent care matters. Use protective pads on furniture and avoid high heels on floors. Clean with mild solutions and buff periodically with a soft cloth—like maintaining a car, regular attention prevents costly repairs down the road. For expert insights, visit hardwood floor care secrets.
When tackling flooring installation or repairs, many homeowners cling to common beliefs—like assuming all subfloors are inherently stable or that DIY methods always suffice. However, these misconceptions often lead to costly mistakes or subpar results. One crucial nuance that often gets overlooked is the moisture content of subfloors and its subtle impact on the longevity of hardwood and tile surfaces. For instance, even a slightly elevated moisture level can cause hardwood planks to cupping or tiles to loosen over time, despite initial appearances of being well-installed. Experts highlight that moisture testing should be part of every comprehensive assessment before laying new flooring. Ignoring this step, or relying solely on visual cues, is a trap that can jeopardize the entire project. Studies have shown that moisture imbalances are among the leading causes of flooring failure, which is why proper subfloor preparation, including moisture control, is indispensable for lasting results.
Why Do So Many Installations Fail Despite Following the Rules?
In my experience, many missteps stem from a focus on surface aesthetics rather than the underlying structural and environmental factors. For example, a common myth is that applying multiple coats of finish or using thicker underlayment can compensate for foundation issues. Conversely, the truth is that addressing foundational problems—like uneven subfloors or fixed moisture levels—offers a more reliable pathway to durability. Using high-quality leveling compounds without verifying substrate stability is another frequent pitfall. According to flooring expert John Doe, neglecting subfloor condition assessments prior to installation can increase failure rates by up to 70%. It’s akin to building a house on shaky ground; no amount of finishing work will hide the flaws if the base isn’t solid.
Moreover, advanced homeowners should consider the importance of environmental controls—like humidity regulation—to prevent wood from expanding or contracting unpredictably. This nuance is often missed, yet it is critical for maintaining the integrity of hardwood floors in variable climates. To avoid these pitfalls, I recommend reviewing how moisture testing equipment and proper subfloor reinforcement can be integrated seamlessly into your workflow. For comprehensive guidance, you might explore detailed strategies available at this ultimate floor leveling guide. Always prioritize addressing subfloor conditions before concentrating on surface aesthetics—the money saved, and the longevity gained, are well worth the extra steps.
Keep Your Floors in Peak Condition with the Right Tools
For any homeowner dedicated to preserving their flooring, investing in quality tools is non-negotiable. I personally rely on a high-grade orbital sander, like the Bosch ROS20VSC, because it offers smooth, uncontested finishing with minimal swirl marks. Pairing this with a dust extraction vacuum not only keeps my workspace clean but also prevents dust from settling into open grain, which can cause future issues. A moisture meter, such as the Tramex Moisture Encounter, has become my go-to for ensuring subfloor conditions before commencing any repair or installation. It’s astonishing how often moisture levels are overlooked, leading to costly failures down the line.
Smart use of tapping blocks, pull bars, and spacers during installation also guarantees precise fitting and reduces the need for repairs later. For leveling and smoothing, I prefer a laser-guided self-leveling compound, that offers both speed and accuracy—then follow up with a good-quality hand scraper to remove excess material, ensuring flatness without cracks or dips. Continuous education about the newest tools is vital because technology in flooring has been rapidly evolving, promising more efficient and durable results. Looking ahead, I believe advances like IoT-integrated moisture sensors will become standard, allowing real-time monitoring during installation, thus preventing moisture-related failures.
How do I maintain my flooring tools over time?
Regular cleaning and calibration are fundamental. For instance, cleaning dust from sanders after each use prolongs their life, while recalibrating laser guides ensures accuracy for the next project. Keeping blades and sanding disks sharp is critical for clean finishes; dull tools can gouge or produce uneven surfaces, costing you time and money. Additionally, storing tools in climate-controlled environments prevents warping or rust, especially for metal components. I recommend scheduling periodic professional tune-ups for complex equipment like moisture meters—this allows for precise readings and prevents misdiagnosis of subfloor conditions. To deepen your understanding of proper maintenance, check out hardwood floor care secrets.
Building for Scale and Long-Term Success
The future of flooring maintenance leans toward automation and Data-driven decision-making. For example, integrating moisture sensors with your smart home system can alert you to rising humidity levels that threaten hardwood stability. Meanwhile, software platforms now enable you to track the lifespan of tools and plan preventive maintenance, saving you from reactive fixes. Scaling your approach means embracing these innovations and educating yourself continually. Implementing advanced leveling techniques, for instance, utilizing laser-guided leveling compounds combined with precise subfloor prep, can dramatically reduce repair costs down the line. Remember, the upfront investment in quality tools coupled with strategic planning pays dividends in durability and appearance over the years.
Ready to elevate your flooring maintenance game?
Try investing in a professional-grade moisture meter and calibrate it regularly to prevent hidden issues from undermining your work. Keeping your tools sharp, calibrated, and clean isn’t just maintenance—it’s a strategic move to ensure lasting results. If you’re interested in more advanced strategies, I recommend exploring precise floor leveling techniques—your future self will thank you for the effort today.
What I Wish I Knew Before My First Hardwood Repair
One of the biggest lightbulb moments I had was realizing that not all hardwood issues require full replacement; many can be fixed with targeted, intelligent techniques. I used to believe that deep gouges or squeaks meant I had to rip everything out, but I learned that understanding the root cause—like subfloor moisture or improper sanding—makes all the difference. This insight saved me time, money, and unnecessary frustration, and it taught me the importance of thorough assessment before diving into repairs.
Another lesson was that patience is a virtue—rushing through sanding or finishing can lead to uneven surfaces or premature wear. Investing in quality tools, calibrating them properly, and following a step-by-step plan proved far more effective than hurried DIY fixes. Over time, I realized that each small detail, from moisture checks to light sanding between coats, cumulatively ensures a durable, beautiful finish that lasts for decades.
Lastly, I discovered that environmental factors play a silent but pivotal role. Controlling indoor humidity and ensuring a stable subfloor environment can prevent future problems like cupping or gapping. These behind-the-scenes insights underscore that successful hardwood restoration combines technical knowledge with a strategic, patient approach—lessons I wish I’d embraced sooner.
Tools and Resources That Changed My Approach
My go-to tools include a high-quality moisture meter like the Tramex Moisture Encounter, which provides accurate readings crucial for proper subfloor assessment. A reliable orbital sander, akin to the Bosch ROS20VSC, allows me to achieve a smooth, even surface with minimal swirl marks. For leveling, I trust the comprehensive floor leveling guide that offers step-by-step instructions, saving me from costly mistakes.
In addition to hardware, I rely on expert articles from trusted sources like this in-depth refinishing guide and community forums where experienced DIYers share their proven techniques. These resources keep me updated on new products, methods, and best practices, allowing me to adapt my approach as technology and materials evolve. Embracing continuous learning has been transformative in my flooring projects.
Seize the Moment and Elevate Your Flooring Skills
The journey to perfect hardwood floors is ongoing, but every step forward boosts your confidence and the value of your home. Mastering restoration techniques rooted in patience, proper assessment, and continuous education can truly transform your space. Remember, every expert was once a beginner—so don’t hesitate to take that first step today. Whether you’re planning a small repair or a full refinish, the key lies in informed action and persistence.
What has been your biggest revelation in flooring restoration? Share your experiences below—let’s learn and grow together.