
I remember the exact sound it made—a sickening, hollow ‘clack’ that echoed through my open-concept kitchen. I had dropped a heavy cast-iron skillet, and as I looked down, my heart sank. There it was: a jagged, thumb-sized crater right in the middle of my sleek, salt-and-pepper polished concrete. It felt like a massive blemish on a perfect face. I’d spent so much time obsessing over [precise floor leveling techniques to achieve flawless surfaces](https://tiletrendshop.com/precise-floor-leveling-techniques-to-achieve-flawless-surfaces), and now I had a hole that looked like it belonged on the moon. If you are staring at a chip or a divot right now, I know that mix of frustration and fear. You’re worried the patch will be a different color or that it will pop out the first time someone walks over it in heels. Today, I am going to show you how to fix that hole so it actually stays put and blends into the background of your life.
The Day My Kitchen Floor Met a Cast Iron Skillet
I’ve spent years [mastering floor leveling](https://tiletrendshop.com/mastering-floor-leveling-pro-secrets-for-perfect-installations), but concrete repair is a different beast entirely. When I first started messing with DIY repairs, I made a huge mistake: I thought I could just mix up some standard hardware store cement and call it a day. It looked terrible. The color was a dead, flat gray that didn’t match the vibrant aggregate of my floor, and within a month, it had shrunk and pulled away from the edges. It was one of those [flooring installation mistakes to avoid for lasting results](https://tiletrendshop.com/flooring-installation-mistakes-to-avoid-for-lasting-results) that I now warn everyone about. Polished concrete is unique because it isn’t just a material; it’s a finish. If you don’t treat the repair with the same respect as the original pour, it will always look like an eyesore. Have you ever tried a quick fix only to have it look worse than the original damage? Drop a comment and tell me your horror stories.
Will the patch always look like a weird dark smudge?
Many homeowners fear that any repair will be as obvious as a neon sign. It’s a valid concern. According to the Concrete Network, polished concrete is significantly denser than standard concrete, which means standard patches often fail to bond correctly. However, if you use a high-strength epoxy or a specialized polyurea filler and color-match it with the right pigments, you can get it nearly invisible. It’s a bit like being a dental surgeon for your house. You have to clean the ‘cavity,’ prep the edges, and fill it with something that expands and contracts at the same rate as the surrounding stone.
Why Most Concrete Patches Fail Miserably
The biggest reason patches fail isn’t the material; it’s the prep. Most people just blow the dust out and start filling. In my early days, I skipped the deep cleaning step and my [new floor was making a cracking sound](https://tiletrendshop.com/why-your-new-tile-floor-is-making-a-cracking-sound) as the patch broke loose underfoot. You need to create a mechanical bond. Think of it like [how to use a moisture meter before installing wood floors](https://tiletrendshop.com/how-to-use-a-moisture-meter-before-installing-wood-floors)—if you don’t know the conditions of your substrate, you’re just guessing. For concrete, that means removing every speck of dust and ensuring the edges of the hole aren’t ‘feathered’ but are instead vertical or even slightly undercut. It’s about creating a ‘lock’ for the new material to sit in. [image placeholder] We’re going to dive into the exact tools and chemicals you need to make this happen without calling in a $500 contractor.
Make the Hole Ready for a Permanent Bond
The biggest mistake I see DIYers make is treating a concrete chip like a hole in a drywall. With drywall, you just smear some spackle on and sand it flat. If you do that with polished concrete, the patch will fall out before the week is over. You have to create what I call a ‘mechanical lock.’ When I was first starting out, I tried to fill a small divot in a client’s hallway without properly prepping the edges. I thought the epoxy would just stick. Two weeks later, their robotic vacuum cleaner literally sucked the patch right out of the floor. It was a humbling lesson in physics. To avoid this, take a small hammer and a cold chisel and gently tap the edges of the hole so they are vertical or, ideally, slightly undercut—meaning the hole is wider at the bottom than at the top. This prevents the patch from popping upward. Once you’ve shaped the cavity, you must get every microscopic grain of dust out. Use a shop vac, then follow up with a denatured alcohol wipe. This is just as critical as knowing how to measure subfloor flatness before you start installing; if the foundation of your repair is contaminated, the finish doesn’t matter.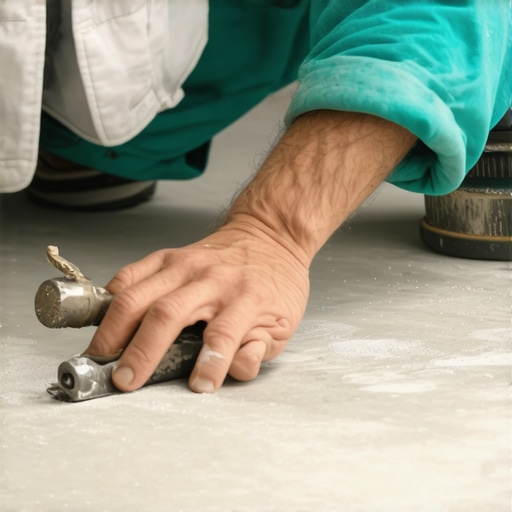
Mix Your Filler Like a Chemist to Avoid the Gray Blob Look
Standard cement is your enemy here because it shrinks. Instead, look for a two-part rapid-set polyurea or a high-modulus epoxy. These materials bond to the concrete on a molecular level and don’t pull away from the edges as they cure. The real challenge is the color. Polished concrete isn’t just gray; it’s a galaxy of whites, blacks, and tans. I keep a small kit of liquid pigments—black, sienna, and white—and mix them into my resin on a piece of cardboard before adding the hardener. A pro tip: always make your patch a hair darker than the floor. As you grind it down and it dries, it tends to lighten. If you leave it too light, it will look like a piece of chewed gum stuck to your floor. This attention to detail prevents issues where why your new concrete floor is dusting continuously due to poor material choice or surface degradation.
The Secret to a Flush Finish That Does Not Scuff
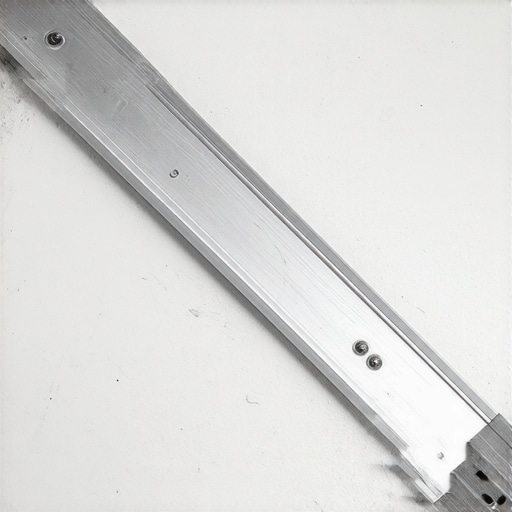
Once your filler is mixed, overfill the hole slightly. You want a small mound, like a tiny volcano, rising above the floor surface. Why? Because even the best epoxies can settle slightly. If you fill it perfectly flush while wet, you’ll end up with a concave dip once it cures. Let it get rock hard. If you’re using a rapid-set product, the reason your leveler is setting up too fast might be the ambient temperature, so work in small batches. When it’s fully cured, use a 120-grit diamond hand pad or a small orbital sander to bring the mound down to the level of the floor. Be careful not to tilt the sander; you want to stay perfectly flat to avoid creating a ‘halo’ of scuff marks around the repair. This is the same precision needed to avoid the sanding mistake that leaves swirl marks on your wood. Use a how to check for high spots with a 10-foot straightedge or even just a credit card to ensure the patch is perfectly level with the surrounding stone. If you can feel it with your fingernail, you aren’t done yet.
Most DIY guides tell you that ‘level’ is the holy grail. I’m here to tell you they’re wrong. In the world of high-end flooring, ‘flat’ is the only metric that matters. You can have a floor that is perfectly level according to a laser, but if it has a 1/8-inch dip every three feet, your tile will crack and your hardwood will squeak. When I’m prepping for a big job, I stop worrying about the bubble in the level and start focusing on how to check for high spots with a 10-foot straightedge. This distinction is what separates a professional finish from a weekend hack job. Have you ever spent hours getting something level only to realize it’s still wavy as the ocean? Let me know in the comments; I’ve definitely been there.
The Water Trap That Destroys Structural Integrity
The biggest ‘trap’ I see is the temptation to add just a splash more water to a self-leveling compound. People think it will help it flow better into those stubborn low spots. According to the American Society of Concrete Contractors (ASCC), altering the water-to-cement ratio even slightly can lead to ‘dusting’ or a complete failure of the compressive strength. When you over-water, the heavy aggregates sink to the bottom and the weak, watery ‘laitance’ rises to the top. This is exactly why your floor leveler pitted during the drying process or why it feels soft under a fingernail. If you want mastering floor leveling to be your reality, you must follow the bag instructions like it’s a pharmaceutical prescription.
Why does my patch change color when I stand in different parts of the room?
This is a phenomenon called metamerism. Your patch might look like a perfect match under your work lights, but the moment the sun hits it at a 45-degree angle, it turns into a dark smudge. This happens because the texture of your patch doesn’t match the light-refractive index of the original polished surface. To fix this, you need to graduate your sanding grits just like you would for hardwood floor care secrets to longevity and shine. If the floor was polished to a 1500-grit shine, your patch needs to be too. Otherwise, the ‘profile’ of the surface will scatter light differently than the rest of the floor. Achieving the secret to mixing leveler for a glass smooth finish isn’t just about the pour; it’s about how you treat the surface after it hardens. Have you ever fallen into this trap? Let me know in the comments.
The Specialized Gear That Makes a 20-Year Repair Possible
If you think you can finish a high-end patch with a piece of sandpaper from your junk drawer, you are in for a world of hurt. I only use electroplated diamond hand pads for these jobs. Specifically, I carry a set of four—ranging from 100 to 800 grit. Why? Because resin-bonded pads often clog too quickly on fresh epoxy patches. These diamond pads allow me to achieve the secret to mixing leveler for a glass smooth finish without leaving those dreaded swirl marks. I remember one job where I tried to shortcut the process with a standard orbital sander and ended up scuffing the surrounding 2000-grit factory finish so badly I had to re-polish the entire room. Don’t be that guy. Use a rigid backer for your diamond pads to ensure you stay perfectly flat; this is the same level of care I recommend when mastering hardwood floor refinishing or working with delicate stone. 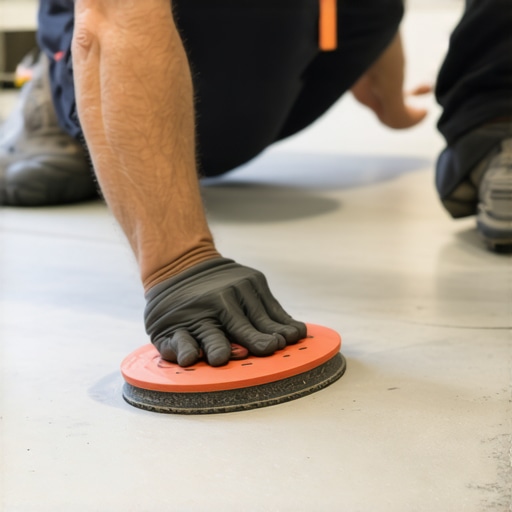
How Do I Keep My Repaired Floor Looking Like New for Years?
The repair itself is only half the battle. If you go back to your old cleaning habits, that patch will eventually stand out. I always tell my clients to throw away their citrus-based or vinegar cleaners immediately. According to the American Concrete Institute (ACI) 302.1R Guide, acidic cleaners can micro-etch the surface of polished concrete, eventually dulling the shine and weakening the bond of your epoxy patch. This is exactly why you should never use acid-based cleaners on natural stone or any polished cementitious surface. Instead, use a pH-neutral cleaner with a high-quality microfiber mop. If you’re worried about long-term durability, consider applying a lithium-based densifier to the patch area once a year. It penetrates the pores and chemically hardens the repair, ensuring it doesn’t become the ‘weak link’ in your flooring. This proactive approach is the same logic behind hardwood floor care secrets to longevity and shine.
The Future of Concrete Tech is Self-Healing
Looking ahead, I suspect the DIY market is about to be disrupted by ‘self-healing’ crystalline sealers. We’re already seeing these in commercial bridge decks, where moisture triggers a chemical reaction that fills micro-cracks automatically. For homeowners, this will mean fewer ‘clack’ moments and less time spent with a chisel. It’s a massive jump from the one step people skip during waterproof flooring installation which usually involves basic membranes. My advice? Start practicing your color-matching skills now with a small test board. Try mixing three slightly different shades of your filler and letting them cure side-by-side. Seeing how the light hits different pigment concentrations is the single best way to graduate from a ‘handyman’ repair to a ‘surgical’ restoration.
Hard-Earned Lessons from the Bottom of a Skillet-Sized Crater
Over the years, I’ve realized that the ‘perfect’ repair isn’t about being a magician; it’s about respecting the chemistry of your floor. One thing I learned the hard way is that texture usually beats color. If your color match is 90% there but your finish is perfectly flush and matches the surrounding grit, the human eye will skip right over it. However, if the patch is a different sheen, it will glow under your kitchen lights like a beacon. Also, never underestimate the power of a vertical edge. A feathered edge is just a countdown to a patch failure, much like how flooring installation fundamentals leveling for a seamless look require a solid, well-prepped base to succeed.
The Gear That Separates My Masterpieces from My Messes
I don’t go into any repair without a specific set of tools that I’ve come to trust after dozens of trial-and-error sessions. First, get yourself a set of electroplated diamond hand pads; they are far more forgiving on fresh resin than standard sandpaper and help you avoid the common the sanding mistake that leaves swirl marks on your wood. Second, I always keep a high-modulus epoxy on hand because it’s engineered to handle the slight shifts in your home’s foundation without cracking. Finally, once the job is done, I only recommend using a microfiber system and specialized soap, because why you should never use standard mops on natural stone applies just as strictly to your polished concrete. These aren’t just gadgets; they are the difference between a five-minute fix and a twenty-year solution. [image placeholder]
Take the Leap and Save Your Floor Today
Repairing a polished concrete floor can feel intimidating, but remember that even the most seasoned pros started with a single messy bucket and a nervous prayer. By taking the time to prep the cavity and match the light-refractive index of your surface, you’re doing more than just fixing a hole—you’re mastering the art of mastering floor leveling and surface restoration. Don’t let a small chip dictate the beauty of your home. You have the tools, the chemistry, and now the knowledge to make that crater a distant memory. Have you ever accidentally dropped a heavy tool and had that heart-in-your-throat moment when you saw the damage? Let me know your repair wins or your most frustrating fails in the comments below!