
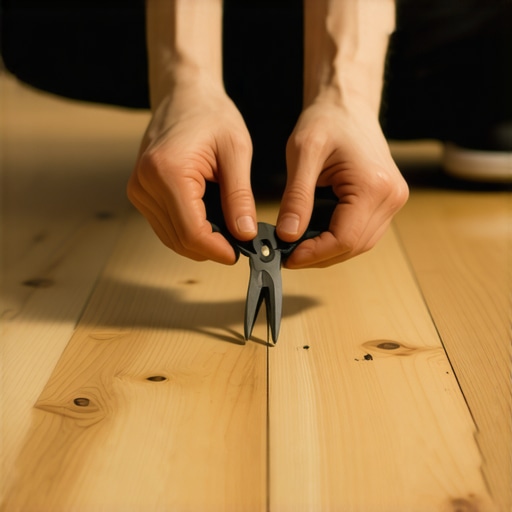
The dust was still settling in the room, a fine grey powder that tasted like 1994 and old dog dander. I had just hauled the last heavy roll of beige carpet to the curb, feeling like a DIY champion. Then I looked down. It wasn’t just a few staples; it was a silver carpet of its own, thousands of jagged little U-nails anchored deep into the heart of my subfloor. I grabbed a pair of pliers and started tugging. Within ten minutes, my back was screaming, and I’d managed to remove exactly twelve staples. There were at least five hundred more to go. I was so desperate I almost considered installing tiles like a pro right over the mess just to avoid the labor. But I knew if I wanted to succeed at mastering hardwood floor refinishing, those staples had to come out properly. My back-breaking struggle ended when I finally stopped working hard and started working smart. Today, I am going to show you how to clear a room of staples in a fraction of the time without needing a chiropractor on speed dial. [image_placeholder]
Stop Fighting the Subfloor and Use the Right Leverage
Pulling staples shouldn’t feel like a wrestling match. My biggest mistake early on was trying to ‘manhandle’ the floor with a flathead screwdriver and a prayer. Not only did I gouge the wood, but I also strained my wrist so badly I couldn’t hold a hammer for a week. This is one of those classic flooring installation mistakes to avoid if you want your project to go smoothly. You need tools that use physics to your advantage, not your raw strength. Whether you are prepping for a new install or trying to rescue original oak, measuring subfloor flatness is much easier once you have a clean, staple-free surface.
Will a specialized staple puller actually save your afternoon?
Many folks ask me if they really need to buy a specific tool for this one job. The short answer is a resounding yes. A dedicated staple puller or a high-quality end-cutting nipper provides a fulcrum that does the heavy lifting for you. According to the Occupational Safety and Health Administration (OSHA), repetitive awkward postures and forceful exertions are primary risk factors for musculoskeletal disorders, which is exactly what happens when you spend hours hunched over a floor with the wrong pliers. By using a tool with a curved head, you can roll the staple out in one smooth motion. Have you ever spent more time pulling staples than actually laying the new floor? Tell me your ‘carpet renovation’ horror stories in the comments! Once you clear the deck, you can finally focus on hardwood floor care secrets that make your home shine.
Grab the Right Tools for the Job
Pulling five hundred staples with a standard pair of needle-nose pliers is like trying to mow a lawn with a pair of scissors. You’ll get there eventually, but you’ll lose your mind in the process. The secret weapon in my kit is always a pair of 8-inch end-cutting nippers. Think of these as a rocking chair for metal teeth. The rounded head acts as a built-in fulcrum, allowing you to grip the staple and simply roll it out of the wood. If you find yourself dealing with debris from an old kitchen remodel, knowing the best way to remove thinset from a plywood subfloor is equally important, but for staples, leverage is king. I once spent an entire Saturday morning in a cramped hallway with a flathead screwdriver until a contractor friend tossed me a pair of nippers. I finished the rest of the house before lunch. 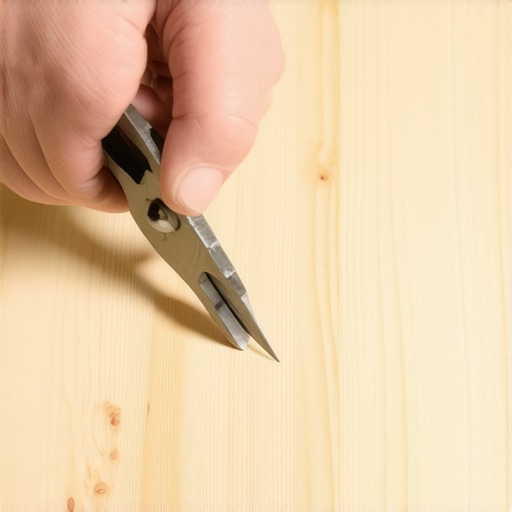
The Rocking Motion That Saves Your Back
Instead of pulling upward, which requires pure brute force and often snaps the staple heads off, use the ‘pinch and roll’ technique. Position the nippers so the jaws are biting the staple as close to the wood as possible. Instead of yanking toward the ceiling, roll the tool to the side. The curved head of the nipper presses against the subfloor, creating a mechanical advantage that pops the staple out like a loose tooth. This method is vital for mastering hardwood floor refinishing because it minimizes the damage to the wood fibers. If you pull too hard and gouge the floor, you’re just creating more work for yourself later when you have to fill those holes. For those who are moving toward a fresh start, following a step-by-step guide to flooring installation and leveling success ensures that these small metal hazards don’t cause bumps in your new planks.
Tackle the Stubborn Broken Staples Early
You will inevitably run into staples that are rusted or driven so deep that the heads snap off when you try to pull them. Do not leave these behind! A single protruding staple leg can slice through a moisture barrier or cause a click-lock floor to squeak every time you step on it. For these ‘stubs,’ I use a small pry bar or a cat’s paw. I remember working on a particularly stubborn hickory floor where every third staple snapped. I had to learn that the hard way when I tried to rush and ended up with a ruined sanding belt. This is one of the most common flooring installation mistakes to avoid. Use the tip of your tool to dig slightly into the wood—just enough to grab the metal—and flick it out. It’s better to have a tiny divot in the subfloor than a sharp piece of steel waiting to puncture your new investment.
Prep for a Perfectly Level New Surface
Once the metal forest has been cleared, it is time to look at the bigger picture. A clean subfloor allows you to see the high and low spots that were previously hidden by the carpet padding. Before you move on to laying any new material, you must ensure everything is flat. This is the stage where precise floor leveling techniques to achieve flawless surfaces become your best friend. Take a long straightedge and sweep it across the room. If the staples are gone but the floor is wavy, your new hardwood or tile won’t sit right. I always make sure to measure subfloor flatness before you start installing because once that first row of wood goes down, there is no turning back.
Most people assume that ‘self-leveling’ means you just dump the bucket and walk away while physics handles the rest. Let’s dig deeper, because that assumption is exactly why so many DIY floors end up with ‘ghost bumps.’ In my professional experience, self-leveling compound is more like a stubborn assistant; it needs guidance. If you don’t use a gauge rake to spread it evenly, the surface tension of the liquid will cause it to mound in the center of the room rather than seeking the lowest point. This is why understanding the secret to mixing the perfect bucket of self-leveler every time is vital. If your water-to-powder ratio is even slightly off, the product won’t reach the ‘glassy’ state required to find the true low spots. This lack of fluidity is also why your self-leveler is bubbling over plywood; the mixture is too viscous to let air escape freely from the wood pores.
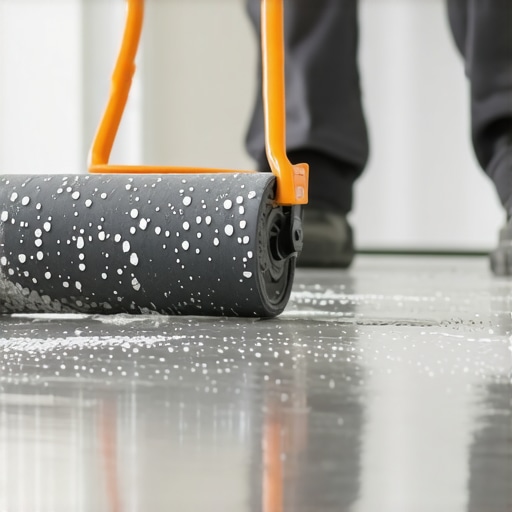
There is also a critical nuance between ‘level’ and ‘flat’ that most beginners miss. A floor can be sloped (not level) but still perfectly flat, which is often what you want in older homes where the foundation has settled naturally. For installing tiles like a pro, flatness is the ultimate priority. The Tile Council of North America (TCNA) specifies in their handbook that for any tile with at least one edge 15 inches or longer, the substrate cannot vary more than 1/8 inch in 10 feet. If you ignore this, you’re looking at massive lippage issues where one tile edge sticks up higher than its neighbor. To prevent this, I always use how to use a spiked roller for the perfect leveling pour to help the material ‘knit’ together across the floor. This tool breaks the surface tension and eliminates the small ridges that a traditional rake might leave behind.
Can you skip the primer if your subfloor looks brand new?
The short answer is never. This is the biggest ‘oops’ factor in the industry. I’ve seen homeowners pour expensive leveler over brand-new, clean-looking plywood, thinking it’s ready to bond. But plywood is essentially a giant wooden sponge. Without a dedicated primer, the wood will drink the water out of your compound before it has a chance to cure chemically. This results in a brittle, ‘pitted’ surface that won’t hold the weight of your new floor. Before you start your pour, make sure to how to achieve flawless floor levelness before tile laying to ensure your substrate is properly sealed. If you’ve already encountered issues with your pour, check out mastering floor leveling pro secrets for perfect installations for ways to troubleshoot a failed bond. Have you ever fallen into the ‘it looks flat enough’ trap? Let me know in the comments!
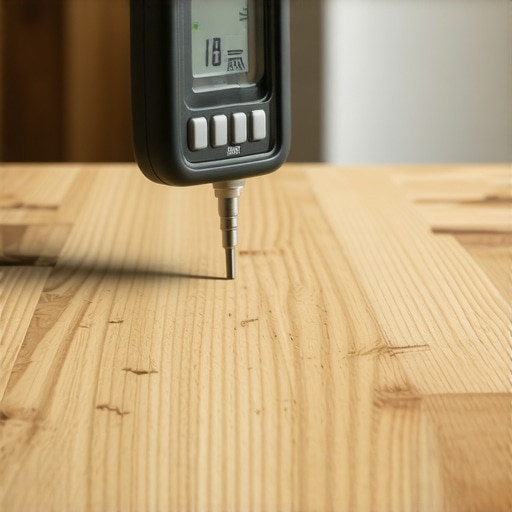
Once you have achieved that glass-smooth surface with your leveler, you might think the hard part is over. But honestly, the real work starts when you try to keep that floor perfect for the next twenty years. I have seen too many homeowners spend thousands on materials only to watch their investment fail because they skipped the data-driven steps of the install. One of my non-negotiable tools is a pinless moisture meter. I personally use the Wagner Meters Orion series because it doesn’t leave holes in my expensive planks. I never trust my gut or the weather forecast; I always how to use a moisture meter before installing wood floors to ensure the subfloor and the wood are within 2% to 4% of each other. If you ignore this, you are basically inviting your floor to cup or gap the second the seasons change.
Trust Your Moisture Meter and Forget the Guesswork
Data beats intuition every time in flooring. According to the National Wood Flooring Association (NWFA) Technical Manual, wood flooring performs best when the indoor environment is controlled between 60 to 80 degrees Fahrenheit and 30% to 50% humidity. If you live in a place with heavy winters, you absolutely need to know how to keep your hardwood floors from gapping in the winter. I’ve seen beautiful white oak floors ruined in a single January because the homeowner didn’t have a humidifier. It’s a painful sight, and usually, it leads to people searching for mastering hardwood floor refinishing expert tips for 2025 much sooner than they expected.
How do I maintain my floor’s shine for the next decade?
Maintenance is where the ‘steam mop’ marketing trap claims most victims. I cannot stress this enough: why you should never use a steam mop on click-lock floors or hardwood is because that pressurized vapor forces moisture into the seams, blowing out the core of the board. For long-term hardwood floor care secrets to longevity and shine, stick to a microfiber mop and a pH-neutral cleaner. If you are dealing with transitions, keep a close eye on the joints. Often, the reason your vinyl plank is separating at the thresholds isn’t the glue—it’s the lack of an expansion gap under the molding. In the next few years, I predict we will see more ‘smart flooring’ with embedded sensors that alert your phone if moisture levels spike behind a baseboard, but for now, your best defense is a keen eye and the right cleaning habits. If you want to elevate your project, try this pro move: use a pinless moisture meter on three different areas of your room today and record the average—it’s the only way to truly know if your home is ready for hardwood.
Hard-Learned Truths from a Metal-Staple Survivor
Looking back at my first few renovation projects, the biggest ‘lightbulb moment’ wasn’t about the power tools; it was about the patience required for prep. If you try to rush through the staple removal, you are essentially building a house on a bed of needles. One thing the experts won’t always tell you is that your subfloor tells a story. If you see a cluster of staples in one spot, there was likely a seam or a repair there—pay extra attention to those areas for flatness. Also, never trust your eyes alone in a dimly lit room. I always bring a side-lighting work lamp to cast long shadows; it makes every missed staple and high spot stand out like a mountain range. It is much easier to fix these issues now than to search for mastering hardwood floor refinishing expert tips for 2025 when your topcoat is already drying.
The Reliable Tools I Keep in My Truck
I don’t believe in buying every gadget at the hardware store, but these three items are non-negotiable for a professional result. First, the 8-inch end-cutting nippers I mentioned earlier—they are the only way to save your wrists and your sanity. Second, a 10-foot straightedge is your best friend when you need to how to check for high spots with a 10-foot straightedge before the first plank is laid. Finally, a high-quality pinless moisture meter. It’s the only way to be certain that your wood won’t swell or shrink the moment you turn on the heater. These tools transform a stressful DIY job into a precise, calculated success.
[image_placeholder_final]
Go Ahead and Peel Back That Old Carpet
It’s easy to feel overwhelmed when you see the state of a subfloor after thirty years of neglect, but remember that every staple you pull brings you one step closer to a home you’re proud of. Always use precise floor leveling techniques to achieve flawless surfaces and take your time with the small details. You have the strategy now to revamp your home with expert flooring installation tips that actually stand the test of time. Don’t be afraid of the hard work ahead; the reward of a solid, silent, and beautiful hardwood floor is worth every minute of the grind. Did you find any ‘buried treasure’ or a total nightmare under your old carpet? Let me know in the comments below!