
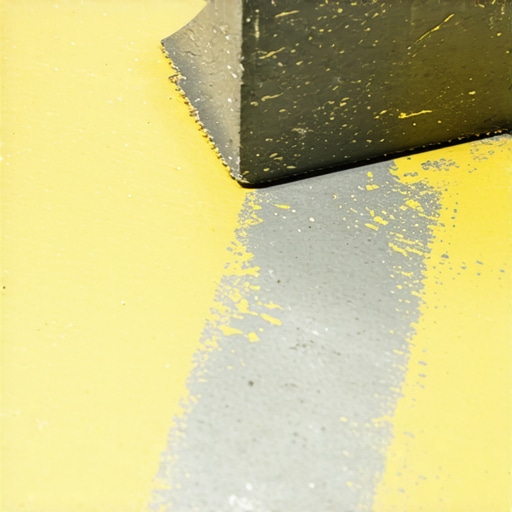
There I was, sweat stinging my eyes and my back screaming, staring down a sea of stubborn, yellowed carpet adhesive that felt more like cured epoxy than glue. I had just ripped up some hideous 1970s shag, dreaming of a sleek new finish, but the concrete underneath looked like a battlefield. I tried a hammer and a cold chisel. I tried a generic floor scraper from the bargain bin. Nothing worked. It was the moment I realized that the best way to prep a dusty concrete floor for adhesive starts with the right demolition strategy, not just brute force. My initial failure cost me two days and a lot of ibuprofen, but it taught me a vital lesson: you cannot outwork the wrong tool. Today, I am going to save you those two days by breaking down exactly what you need to clear that slab without losing your mind.
Stop Fighting Your Floor and Use the Right Gear
Most of us think we can muscle through it with whatever is in the garage. I certainly did. I spent an entire Saturday morning hacking away with a manual scraper, only to realize I was barely scratching the surface of the old mastic. It was a classic flooring installation mistake to avoid if you want results that actually last. If you are planning on installing tiles like a pro, that slab needs to be perfectly smooth. If it is not, you will eventually see telegraphing from the subfloor, where every lump of old glue shows through your beautiful new vinyl or laminate. I once made the mistake of trying to use chemical strippers first without realizing they can soak into the pores of the concrete, which often causes floor primer to peel off like a sunburn later on. Trust me, mechanical removal is almost always the cleaner, safer bet for a long-term bond.
Does a specialized scraper actually save that much time?
You might be skeptical. You might be thinking, “Can I just sand it off with my orbital sander?” My answer is a hard no. Here is the big mistake I made early in my career: I tried a high-speed belt sander on old yellow glue. The heat from the friction just melted the adhesive, turned it into a gummy mess that clogged the paper instantly, and sent a nasty smell through the whole house. According to the Resilient Floor Covering Institute, many older adhesives used before the mid-80s can contain asbestos, which is why dry-sanding or aggressive grinding without proper HEPA filtration is not just difficult—it is a genuine health hazard. Have you ever started a ‘quick’ floor project only to find a layer of mystery goo that refused to budge? I want to hear about your DIY struggles in the comments below. Stick with me, and I will show you the exact heavy-duty scrapers and blade types that turn a ten-hour grind into a two-hour breeze.
Grab a Heavy-Duty Scraper That Actually Bites
Removing adhesive is like trying to peel a sun-baked sticker off a car windshield; you need the right angle and a lot of leverage. If you skip this part, your new floor is essentially built on a foundation of rubbery sponges. For a standard residential room, I always recommend a long-handled floor scraper with a replaceable 4-inch steel blade. It allows you to use your body weight to drive the blade under the glue. If you are dealing with a whole house, though, do not be a hero. Rent a power floor stripper. I remember doing a 1,500-square-foot basement where the glue was so thick it felt like I was shoveling wet clay. I resisted the rental for four hours, made zero progress, and finally caved. The machine cleared the rest of the floor in ninety minutes. When doing heavy demo like this, remember the 10-yard dumpster weight limit secret for heavy tile demo—glue and debris add up fast. 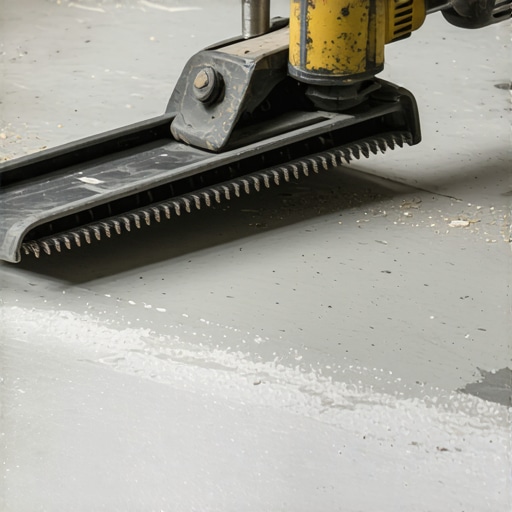
The Secret to Blade Geometry
Not all blades are created equal. For thick, brittle black mastic, you want a rigid blade that won’t flex. If you use a thin, flexible blade on thick stuff, it will just skip over the top like a stone on a pond. However, if you are cleaning up a thin film of yellow adhesive, a flexible blade is your best friend because it contours to the slight dips in the concrete. Keep the blade at a 30 to 45-degree angle. Too high and you will gouge the concrete; too low and you will slide right over the adhesive. Getting the slab back to its raw state is the first part of a step-by-step guide to flooring installation and leveling success. I once tried to ‘eyeball’ the flatness after a half-hearted scrape, and when I went to lay my boards, they clicked and groaned with every step because a few stubborn ridges of glue were holding them up.
Keep a Sharpening File in Your Back Pocket
A dull blade is your worst enemy. I learned this on a job in a tight hallway once; I was exhausted and let the blade get blunt. I ended up slamming the scraper so hard against a stubborn patch that I lost my grip and put a hole in the drywall with the handle end. Now, I sharpen the blade every fifteen minutes. It takes thirty seconds with a metal file but saves twenty minutes of physical labor. You want that edge to be sharp enough to slice through the bond, not just mash it. This mechanical cleaning is vital because if the old glue stays, it creates a bond-breaker for anything you put on top.
Watch Out for Painted Concrete Overlays
One thing that catches people off guard is finding paint under the glue. You might think you can just pour leveler over it, but why most floor levelers fail on top of painted concrete is a lack of a proper mechanical bond. If that glue is stuck to paint, and the paint isn’t stuck to the concrete, your whole floor is going to lift. You have to scrape until you see the grey pores of the slab. This is especially true if you are aiming for the secret to getting a flat floor for large format tiles, where even a 1/8-inch deviation can cause disastrous lippage. I learned this the hard way on a kitchen remodel where I didn’t scrape deep enough, and two weeks later, the self-leveler started cracking like a dry lake bed because it never actually gripped the slab.Once the old glue is gone, most people jump straight to the pour. But here is the nuance that separates the weekend warriors from the pros: ‘self-leveling’ compound is a total misnomer. Manufacturers love that term because it sells buckets, but if you just dump it and walk away, you will end up with a wavy mess. In my experience, the compound is more like ‘self-smoothing.’ You still have to guide it, gauge it, and respect the chemistry of the mix. If you have ever poured a bag only to see it sit there like a stagnant pond instead of a flat mirror, you know exactly what I mean. Have you ever fallen into this trap where the ‘self-leveling’ didn’t actually level? Let me know in the comments. To truly succeed, you need to follow the ultimate guide to floor leveling for a perfect finish, which involves more than just pouring. You need to actively move the product to the low spots using a gauge rake and then use a spiked roller to release surface tension. This is the roller selection that prevents air bubbles in leveler, ensuring your floor doesn’t look like Swiss cheese once it cures.
Why did your brand-new leveler turn into a spiderweb overnight?
This is the ‘oops’ factor that ruins more DIY projects than anything else: the water ratio. People treat leveler like pancake batter, adding a little extra water to make it ‘flow better.’ This is a catastrophic mistake. According to the Tile Council of North America (TCNA), exceeding the manufacturer’s water-to-powder ratio destroys the polymer chain, leading to low compressive strength and chalking. When the water evaporates, the surface shrinks too fast, which is why your self-leveler developed spiderweb cracks overnight. If you see those tiny cracks, your bond is compromised, and your new floor will likely fail within a year. 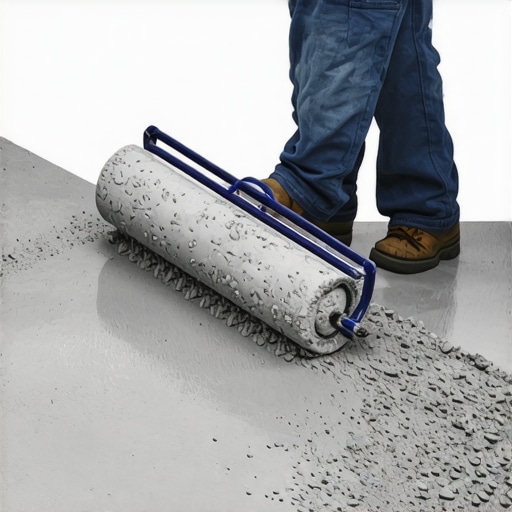 Always use a dedicated measuring bucket. Even half a cup of extra water can be the difference between a rock-hard slab and a crumbling mess. If you are struggling with a difficult layout, mastering floor leveling pro secrets for perfect installations often means working in teams—one person mixing, one person pouring, and one person smoothing—because why your self-leveler is drying faster than you can pour it is usually due to high ambient temperatures or a thirsty, unprimed concrete slab. Don’t skip the primer; it seals the pores of the concrete so the air doesn’t escape into your leveler, creating those dreaded pinholes. Prepping like a pro isn’t about working harder; it’s about respecting the science of the materials you are using.Once the leveler has cured and your planks or tiles are down, you might think the hard work is over. I used to believe that too, until I went back to a job site a year later and saw a beautiful oak floor starting to cup. The culprit? The homeowner was using a steam mop every single day. If you want to protect your investment, you have to realize that moisture and pH balance are your new best friends. I personally stopped using generic sprays years ago. Now, I only recommend pH-neutral cleaners that won’t eat away at the finish. You have to be especially careful with stone; avoiding the vinegar mistake that eats through your natural stone tiles is step one in any long-term care plan. To really get those hardwood floor care secrets to longevity and shine, you need a microfiber system that barely uses any water at all.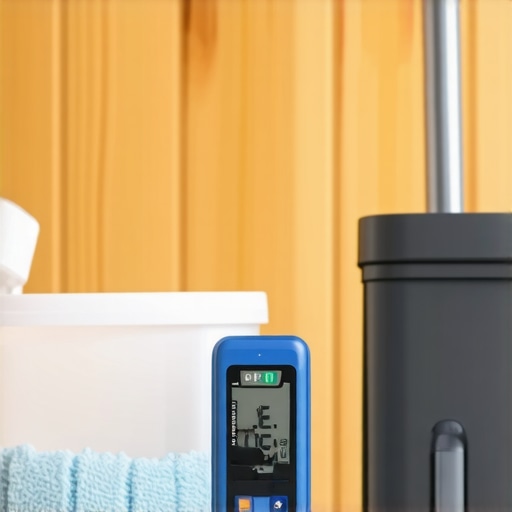
The One Tool That Separates Amateurs From Pros
If you ask me what the most important tool in my bag is, it isn’t the expensive saw or the laser level. It is my moisture meter. I use a Wagner Meters Orion 950 because it gives me deep-scan readings without poking holes in the wood. According to the National Wood Flooring Association (NWFA) Technical Manual, the moisture content between a wood subfloor and solid strip flooring should stay within a 4 percent margin. If you ignore this, you are inviting gaps and squeaks. Knowing how to use a moisture meter before you lay wood floors is the absolute best insurance policy you can buy for your home. I’ve seen $20,000 installations ruined because someone was in a rush and didn’t check the slab’s RH (Relative Humidity) levels. Using precise floor leveling techniques to achieve flawless surfaces is pointless if you trap a gallon of water under your leveler.
How can I keep my floor stable for the next twenty years?
The secret to a twenty-year floor is consistent climate control. Wood and tile move at different rates, and even a perfectly leveled floor can suffer if your home’s humidity swings from 20% in the winter to 80% in the summer. I always install a humidistat in my own projects to keep the air between 35% and 55% humidity. This prevents the subfloor from expanding and contracting, which is a major cause of flooring installation mistakes to avoid. If you are dealing with an older home, you might even consider mastering hardwood floor refinishing expert tips for 2025 to add a modern, more flexible sealer that handles seasonal shifts better than the old-school brittle lacquers.
AI and Laser Tech are Changing the Leveling Game
The industry is moving fast. We are already seeing the rise of 360-degree robotic laser scanners that can map a room’s topography in seconds and beam a 3D heat map to your phone, showing you exactly where the low spots are. In the next few years, I expect we will see ‘smart’ self-leveling compounds that change color when they reach the perfect moisture-to-polymer ratio. For now, we still rely on manual skill, but these tools are making the margin for error much smaller. My advice? Don’t just guess where the floor is unlevel. Before you lay your first plank, grab a moisture meter and verify your slab—it’s the one tool that separates a pro from a disaster.
The Reality of Leveling That No YouTube Video Shows You
Over the years, I have learned that ‘level’ and ‘flat’ are two very different animals. You can have a floor that slopes half an inch from one side of the room to the other but is perfectly flat—and that is usually fine for most modern materials. However, a floor that is level but has a hump in the middle will ruin your hardwood floors in a heartbeat. One major lightbulb moment for me was realizing that floor leveling challenges common mistakes and how to avoid them usually boil down to checking the subfloor’s structural integrity first. If the plywood or concrete underneath is moving, no amount of compound will save you.
- Don’t chase a bubble on a spirit level at the expense of a smooth surface.
- Always look for ‘ghost’ adhesive—residue that looks dry but reacts with new primers.
- The best tile jobs happen on floors that were prepped for three days and laid in one.
What I Pack in My Truck for Every Install
I don’t leave for a job without a few non-negotiables. First is a heavy-duty straight edge; it is the only way to find those hidden dips before they become flooring installation disasters. I also keep the leveling secret for installing plank flooring over tiles in mind, which often involves high-bond primers that most big-box stores don’t even carry. I trust the TCNA Handbook more than any salesperson’s advice—it is the gold standard for the industry. Having these tools ensures that how to achieve flawless floor leveling before tile laying isn’t just a goal, but a repeatable process.
#IMAGE_PLACEHOLDER_E#
Your Foundation Defines Your Final Finish
At the end of the day, your new floor is only as good as the sweat you put into the slab. It is tempting to cover up the mess and hope the underlayment hides the sins, but true quality is invisible. When you take the time to respect flooring installation fundamentals leveling for a seamless look, you aren’t just laying a floor; you are building a legacy for your home. Don’t be afraid to slow down, sharpen that blade one more time, and wait for the primer to get perfectly tacky. You’ve got this. Have you ever poured self-leveler and watched it disappear into a gap you forgot to plug? Let me know your biggest prep-work ‘oops’ in the comments below!