
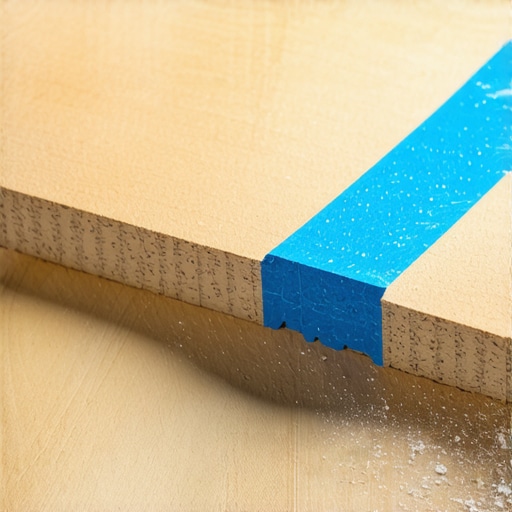
There I was, standing in my half-finished hallway at 11:00 PM, staring at a laminate plank that looked like it had been through a woodchipper. I’d spent good money on these boards, yet every time my miter saw came down, the decorative top layer would explode into tiny, jagged shards. It was heartbreaking. I’d tried taping it, I’d tried going slower, but I was just making a mess. It felt like I was throwing cash straight into the scrap pile because I couldn’t get a single edge to look clean.
Stop Ruining Your Planks and Start Cutting Like a Pro
If you have ever felt that sinking feeling when you hear the “crack” of a splintering board, you are not alone. Cutting laminate is tricky because it isn’t just wood; it is a pressurized sandwich of resin, fiberboard, and a fragile photograph of wood on top. If you treat it like a standard 2×4, it will fight back. In my early days, I made the classic blunder of using a coarse-tooth construction blade, thinking brute force would win the day. It didn’t. I ended up with gaps so wide I tried to hide them with extra-thick baseboards—a move that definitely falls under flooring installation mistakes to avoid for lasting results. Today, I want to show you exactly how to bypass that frustration. We are going to dive into the physics of the cut, the “tape trick,” and why the direction of your saw blade is the difference between a professional finish and a DIY disaster. Trust me, once you see how easy it is to get a factory-clean edge, you will never look at your jigsaw the same way again.
Does a specialized blade actually make a difference?
You bet it does. Most people grab whatever blade is already on their saw and hope for the best. However, the North American Laminate Flooring Association (NALFA) notes that laminate’s high-density core and aluminum oxide top coat require specific carbide-tipped blades to prevent premature dulling and chipping. Using a blade with a high Tooth Per Inch (TPI) count—typically 60 to 80 for a miter saw—is non-negotiable for a smooth finish. Have you ever tried to power through a project only to realize your tools were working against you? Drop a comment and tell me about your most frustrating “tool fail.”
Why Your Saw Direction Is Probably Backwards
The absolute biggest secret to a splinter-free cut is understanding where the saw teeth enter the material. On a standard miter saw, the teeth are cutting on the downward and backward stroke. This means the “clean” side of the cut is where the teeth enter. I learned this the hard way after ruining an entire box of premium planks because I was cutting them upside down. If you are using a jigsaw, the teeth usually cut on the upstroke, which means you should actually flip your board over and cut from the back. This simple pivot prevents the blade from pulling the decorative layer away from the core. Even if you are dealing with tricky spots, like figuring out how to fix a soft spot in the middle of a laminate floor, having clean edges makes the re-installation process so much smoother. If you aren’t careful, you might end up with the rubber mallet mistake that ruins tongue and groove joints, especially if splintered debris gets caught in the locking mechanism. Getting the cut right the first time is the foundation of the whole project.I remember a specific Saturday afternoon in McCordsville when I was rushing to finish a guest bedroom. I skipped the “extra” steps because I thought my experience would carry me through. I laid out a beautiful wide-plank laminate, pulled my miter saw down, and *snap*—the decorative layer peeled back like a banana skin. I had skipped the tape, and I was using a standard 40-tooth blade. That one mistake cost me a trip back to the store and three hours of wasted time.
The blue tape trick that saves your sanity
Let’s talk about the blue tape trick. It’s not just for painting walls. When you wrap the intended cut line in high-quality painter’s tape, you are essentially providing a sacrificial layer that holds the wood fibers in place as the blade passes through. It creates a “sandwich” effect that prevents the top melamine layer from vibrating upward and snapping. This is particularly vital if you are trying to avoid 5 mistakes that make cheap lvp look even cheaper. By marking your pencil line directly on the tape, you also get a much higher-contrast guide than marking the dark wood grain.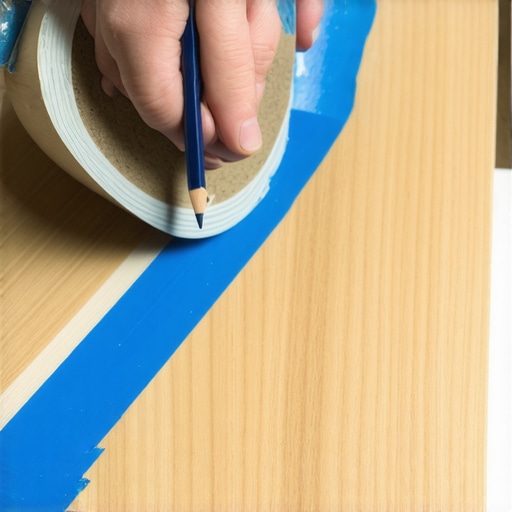
High tooth count is non-negotiable
If your blade looks like it belongs on a lumber yard circular saw, keep it away from your flooring. You need a carbide-tipped blade with at least 60 to 80 teeth. A high tooth count means each individual tooth takes a smaller “bite,” which significantly reduces the impact force on the fragile surface. I’ve seen people try to use a 24-tooth “all-purpose” blade, and the result is always a jagged mess that looks like a beaver chewed through it. If you are using a jigsaw for those tricky notches, look for “reverse-tooth” blades which cut on the downstroke, keeping the pressure against the subfloor rather than pulling away from it.
Master the scoring technique for a fault line
Sometimes a motorized saw isn’t even the best tool for the job. For straight cross-cuts, a professional-grade laminate shear is the gold standard because it produces zero dust. But if you’re sticking to a utility knife for small notches, you must score the decorative side multiple times with a straight edge. This creates a “fault line” that the break will naturally follow. If you don’t have a perfectly flat surface to work on, you’ll find that your planks might crack elsewhere. This is why learning the ultimate guide to floor leveling for a perfect finish is so important before you even open your first box of flooring.
Why flat floors make for better cuts
It sounds counterintuitive, but if your subfloor isn’t level, your cuts won’t matter in the long run. If the floor dips, the tongue-and-groove joints will flex and eventually snap at the cut ends. I once ignored a 1/4-inch dip in a hallway, thinking the laminate would “bridge” it. Within a month, the beautiful clean cut I’d made at the transition strip started to gap because the plank was bouncing. Now, I always check for floor leveling challenges common mistakes and how to avoid them before I even pick up a saw. If you are going over an existing surface, the the leveling secret for installing plank flooring over tiles can save you from a lot of shattered edges later.
Stop fighting the door jambs
Doorways are where DIYers often lose their focus. Instead of trying to cut the plank into a complex shape to fit the trim, use an undercut saw to trim the bottom of the door casing itself. This allows the laminate to slide *under* the wood, hiding the cut edge entirely. If you try to jigsaw a “U” shape around the casing, you’ll likely end up with a gap that looks amateur. Even if you’re following a step-by-step guide to flooring installation and leveling success, this one trick of cutting the trim instead of the plank is what separates a luxury-look floor from a weekend project gone wrong.While everyone focuses on the saw, the real pros are looking at the floor before the first box is even opened. There is a common myth in the DIY world that self-leveling compound is a magic liquid that finds its own level automatically. You pour it out, and physics does the rest, right? Wrong. In my experience, relying on gravity alone is the fastest way to end up with a floor that looks like a topographical map of the Ozarks. If you do not use a gauge rake or a spiky roller to break the surface tension, the material often stops flowing before it is truly flat. This is exactly why your self-leveling pour looks like a topographical map even after you spent a fortune on materials. 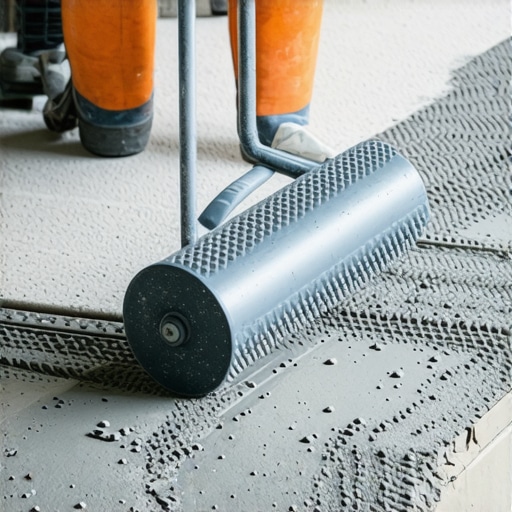
The “Magic Liquid” myth that ruins subfloors
The Tile Council of North America (TCNA) Handbook states that for large-format tiles, the substrate deviation must not exceed 1/8 inch in 10 feet. Gravity alone rarely meets this rigorous standard because of the viscosity of the mix. Most people assume the compound will find its own way, but you have to physically guide it into the corners and manage the thickness. If you are preparing for a high-end look, how to achieve flawless floor leveling before tile laying requires more than just pouring; it requires active manipulation of the product while it is in its fluid state.
Why does my leveler look like a moon crater?
This is the “Oops” factor that most beginners miss until it is too late. The culprit is almost always your drill speed. If you use a high-RPM mixing paddle, you are essentially whipping meringue. You are folding millions of tiny air bubbles into the mix that pop once the leveler is on the floor, leaving behind a weak, porous surface full of pinholes. Using the mixing paddle speed that ruins your leveling compound can turn a quick prep job into a weekend-long disaster of patching and sanding. Always keep your mixer under 650 RPM to ensure a dense, structural pour that will actually support your new flooring.
Don’t let your drill ruin the mix
Another nuance people miss is the “structural divorce” between the subfloor and the leveler. You cannot just pour over old residue. Many people skip the primer, but why most floor levelers fail on top of painted concrete is due to a total lack of mechanical bond. Without a proper primer, the dry concrete or wood subfloor will suck the moisture out of the leveler too quickly, causing it to crack and delaminate before it even cures. If you’re aiming for a premium finish, mastering floor leveling pro secrets for perfect installations means treating the primer as the most important step of the entire process. When you’re browsing tile selection tips for elegant hardwood floors in 2025, remember that the beauty of those materials depends entirely on the flat surface beneath them. Even the most expensive tile will suffer if the floor isn’t prepped correctly, potentially leading to the secret to installing large format tile without lippage being your only way to save a bad job. Have you ever fallen into this trap and had to scrape up wet concrete? Let me know in the comments below.I have spent thousands on equipment over the years, but the one tool that lives in my pocket—not the toolbox—is my pinless moisture meter. I personally swear by the Wagner Orion series because it doesn’t leave unsightly holes in my expensive oak planks. The biggest mistake I see in home renovations isn’t a bad cut; it is a failure to respect acclimation. If you don’t know how to use a moisture meter before you lay wood floors, you are basically playing Russian roulette with your investment. According to the National Wood Flooring Association (NWFA) Technical Publication No. A100, the moisture content differential between your subfloor and your solid wood planks shouldn’t exceed 4% for narrow strips. If it does, those planks will swell and buckle, ruining all the hard work you put into flooring installation fundamentals leveling for a seamless look.
Stop the silent floor killer hiding in your closet
Maintenance is where the real long-term victory is won or lost. I see so many people spend a fortune on LVP only to destroy it with a steam mop within six months. The heat and pressurized moisture delaminate the wear layer and warp the core. Understanding why you should never use a steam mop on luxury vinyl is the first step in protecting your warranty. Instead, I always recommend a pH-neutral cleaner and a microfiber pad. It’s a simple shift that adds a decade to your floor’s life. 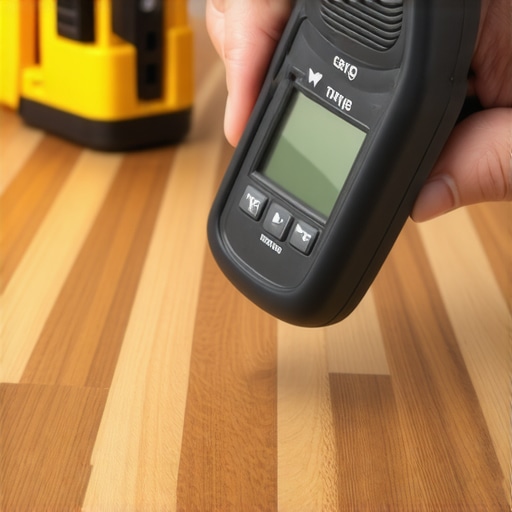
How do I maintain my hardwood’s deep shine for decades?
The secret to longevity isn’t a magic wax; it is preventing the abrasion that eats through the finish. Think of your floor’s finish like the clear coat on a car. If you let grit and sand sit there, every footstep is like using 80-grit sandpaper. I use high-quality walk-off mats at every entrance and felt pads on every single piece of furniture. If you’re looking at hardwood floor care secrets to longevity and shine, you’ll find that dry-mopping daily is more effective than any liquid chemical. And please, avoid the kitchen-cupboard “hacks.” I’ve seen the vinegar mistake that eats through your natural stone tiles and hardwood finishes alike—the acid simply dissolves the protective seal.
The future of DIY flooring is high-tech
Looking ahead, I predict we are going to see a massive shift toward 3D laser-scanning apps for our smartphones that will map subfloor deviations before we even buy our first bag of leveler. We are already seeing “smart levels” that sync with your phone to show you exactly where to pour. This tech will make mastering hardwood floor refinishing expert tips for 2025 much more accessible for the average homeowner. For your next project, I challenge you to go beyond the saw: invest in a quality pinless moisture meter and actually document your readings. It is the single most “pro” move you can make to ensure your floor stays as flat and beautiful as the day you installed it.
What the Instruction Manuals Forget to Mention
After a decade of kneeling on subfloors, I’ve realized that the “standard” advice only gets you 80% of the way. The real magic—the part that prevents those annoying clicks and creaks—happens in the silence before the first plank is laid. One of my biggest lightbulb moments was realizing that acclimation is a chemical process, not just a waiting game. If you don’t control the humidity in the room, the boards will move the moment you leave. Another hard-earned lesson: never trust your eyes alone. I now use a high-powered flashlight held at a low angle across the subfloor to find the tiny ridges that cause major gapping later. This simple trick reveals imperfections that would otherwise lead to a frustrating flooring installation experience.
The Gear I Keep in My Truck Bed
You don’t need a warehouse full of tools, but you do need the right ones. For every project, I rely on a pinless moisture meter because it helps me master how to use a moisture meter before you lay wood floors with zero damage to the planks. I also never start a self-leveling pour without a spiky roller; it’s the spiky roller secret for a mirror-smooth pour that eliminates the air bubbles that ruin a leveler’s structural integrity. Finally, I always keep a roll of premium painter’s tape for those precise cuts—it is essentially the same logic as the blue tape secret for perfectly straight grout lines, providing that sacrificial layer that keeps your edges crisp and professional.
Your Floor is the Foundation of Your Home’s Story
I know it feels daunting when you’re looking at a pile of boxes and a bare subfloor. But remember, every professional was once a beginner staring at a splintered plank. By taking the extra ten minutes to tape your lines, check your moisture, and verify your level, you aren’t just performing a flooring installation; you are crafting a space that will hold your family’s footsteps for years to come. Don’t rush the prep, and the finish will reward you. If you follow a solid step-by-step guide to flooring installation and leveling success, you will be amazed at the professional results you can achieve on your own. Once the last plank is in, protecting your investment is key, so make sure to study hardwood floor care secrets to longevity and shine to keep that new-floor feeling for decades. Have you ever had a “victory moment” where a difficult notch around a door jamb finally clicked perfectly into place? Let me know in the comments below!