
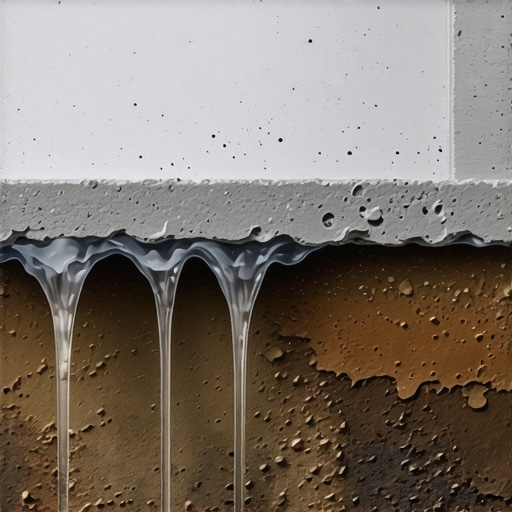
I’ll never forget the smell of damp earth that greeted me six months after I finished my first “perfect” basement remodel. I had checked that concrete floor a dozen times. It felt like a desert under my palms. I figured a moisture barrier was just an upsell from the big-box store—a way to squeeze an extra fifty bucks out of a DIYer. I was wrong. I skipped it, laid my beautiful planks, and felt like a king. Then came the cupping. Then came the musty odor. I realized too late that concrete is basically a hard sponge that never stops breathing moisture from the soil below. Today, I want to help you avoid that same heartbreak and explain exactly how to protect your investment from the ground up.
The Hidden Science of Vapor Emission
Most of us think that if there isn’t a puddle, there isn’t a problem. But even if your slab looks like a sun-baked rock, ground moisture is constantly moving upward through capillary action. When you put a floor over that concrete, you’re essentially putting a lid on a simmering pot. That moisture has nowhere to go but into your flooring material. This is where clicking sounds in your LVP often start, as the planks begin to struggle against the trapped humidity. It doesn’t matter if the house is fifty years old or five; the earth is always trying to share its dampness with your home.
Is a moisture barrier actually worth the extra cost?
I get it. You’re already over budget, and adding another layer feels like a chore. You might be thinking, “My basement hasn’t flooded in twenty years, why start now?” The truth is, it’s not about floods; it’s about the microscopic vapor that can lead to mold growth under your floorboards before you even see a spot on the surface. According to the International Association of Certified Home Inspectors (InterNACHI), nearly all basements will experience some form of moisture penetration through the slab at some point in their lifespan because concrete is naturally porous. If you are doing flooring installation and leveling, skipping the barrier is like building a house on shifting sand.
My Expensive Lesson in Good Enough Prep
Back when I was first starting out, I made the classic rookie mistake of trusting my eyes instead of a tool. I thought I could save time by ignoring the subfloor’s hidden chemistry. I didn’t bother to use a moisture meter to prevent floor failure, and it cost me thousands in ripped-up materials. Have you ever noticed a weird “old house” smell in a basement that looked perfectly fine? That’s the exact ghost we’re trying to bust today. If you want to avoid mistakes that ruin your luxury vinyl plank installation, you have to treat that concrete like a living, breathing entity that needs a shield. Tell me, have you ever felt that suspicious dampness on your socks even though there wasn’t a leak in sight?
Get the Surface Ready or Your Barrier Will Fail
Before you even unroll that plastic, you need to deal with the grit. If you’ve ever tried to stick a piece of tape to a dusty garage floor, you know it’s a losing battle. Why your concrete subfloor is dusting and how to stop it is the first question you should answer. I remember a job in a 1920s bungalow where the floor was so chalky I could write my name in the dust with my finger. I thought a quick sweep was enough. It wasn’t. The primer didn’t bond, and the whole leveling layer ended up sounding like a bag of potato chips when walked on. You have to vacuum—not just sweep—and then why you must prime concrete before every leveling job becomes obvious once you see how that primer locks down the dust and creates a “glue-ready” surface.
Seal Out the Dampness Without Skipping Steps
#IMAGE_PLACE_HOLDER_B#
Once the floor is clean, it’s time for the actual barrier. For most LVP or laminate projects, you’re looking for a 6-mil polyethylene film. Think of this as a raincoat for your floor. If there are holes or gaps, the raincoat is useless. I always overlap my seams by at least six inches. Don’t be stingy here. I then use a high-quality moisture-resistant tape to seal every single joint. This is a critical part of step-by-step guide to flooring installation and leveling success. If you leave even a tiny gap, vapor will find it. It’s like a pressurized leak; the moisture will concentrate in that one spot, potentially causing a localized failure that makes your planks warp or buckle.
Does Your Slab Pass the Professional Test?
You can’t just guess if the floor is dry. You need to use a moisture meter to prevent floor failure before you commit to the install. I once worked with a guy who swore he could “smell” moisture. He was wrong. The slab looked bone dry, but the meter showed 90% relative humidity. If we had ignored that, his beautiful new floors would have been ruined within a month. This is one of the most common 7 mistakes that ruin your luxury vinyl plank installation. If the readings are too high, you might need a more robust liquid-applied vapor retarder instead of just a plastic sheet.
Seal the Perimeter Properly to Prevent Edge Rot
The most overlooked area is where the floor meets the wall. I always run my moisture barrier about two inches up the wall behind where the baseboards will go. It looks a bit messy during the process, but it ensures that moisture doesn’t “wick” up the edges of your flooring. When you finally do the right way to undercut baseboards for a clean flooring finish, you can trim the excess plastic for a tight, professional look. This simple step keeps the perimeter of your room as dry as the center, preventing that musty smell from creeping out from the edges.
Let’s dig deeper into what actually happens when people try to ‘fix’ a subfloor with a bag of compound. The most common belief is that self-leveler is a ‘pour and forget’ solution that fixes every sin of a bad subfloor. In my experience, that mindset is exactly why projects fail. People think that if the product is ‘self-leveling,’ they can just dump it on the floor and let gravity do the work. It’s actually more of a ‘self-smoothing’ tool, and without the right preparation, you’re just pouring money down the drain. If you don’t address the underlying floor leveling challenges and common mistakes, you’ll end up with a brittle shell that crumbles the moment you step on it. One of the biggest traps is the ‘more water is better’ myth. I’ve seen DIYers add an extra quart of water to make the mix runnier, thinking it will flow into the corners easier. What actually happens is that you weaken the polymer bonds, and three days later, you’ll wonder why your self-leveling compound is cracking like a dry lake bed.
Why does your leveler crack even when the floor is flat?
It’s not just about how flat the floor is; it’s about how much the floor moves. This is the nuance that separates the pros from the weekend warriors. You can have a floor that is level to the sixteenth of an inch, but if there is deflection (bounce) in your joists, your tile or hardwood will fail. According to the Tile Council of North America (TCNA) Handbook, the substrate must meet strict rigidity standards—specifically L/360 for ceramic and L/720 for natural stone—before a single drop of leveler is poured. If your subfloor flexes, your leveler will snap. This is why learning how to achieve flawless floor leveling before tile laying requires you to first stabilize the structure. #IMAGE_PLACE_HOLDER_C#
Stop treating your thinset like a filler
Another massive mistake I see is people trying to ‘build up’ thinset to compensate for a low spot they missed. Thinset is an adhesive, not a structural filler. When you use too much of it, it shrinks as it cures, which can pull your tiles out of alignment or create ‘lippage’ where one edge is higher than the other. This often leads to the trowel size error that leads to hollow sounding tiles. If you hear that ‘clack-clack’ sound when you walk, you’ve likely missed a spot during the leveling phase and tried to cheat the system with extra glue. If it’s already happened, you might need to figure out how to fix a hollow sounding tile without tearing it up, but prevention is always cheaper than the cure. Have you ever fallen into this trap? Let me know in the comments.I spent years dragging a six-foot straightedge across concrete before I realized I was working way too hard. If you want to graduate from amateur to expert, you need to stop eyeballing your subfloor. My personal go-to is a high-accuracy rotary laser. When I am setting up, I use the laser level move for perfectly straight hallways to find the absolute high point of the room. From there, I use height-adjustable leveling pins—essentially tiny, adhesive-backed rulers—that I stick to the floor every two feet. I snip them to the exact height the laser indicates. This way, when I pour the compound, I am not guessing; I am just filling until the pins disappear. This is the gold standard for 7 tools you actually need for a professional DIY hardwood install.#IMAGE_PLACE_HOLDER_D#
How do I keep my leveled floors from shifting years later?
The secret to longevity isn’t just the install; it is the climate. Even a perfectly leveled floor can fail if you treat it like a sidewalk. According to the National Wood Flooring Association (NWFA) Technical Manual, wood and even many luxury vinyl products require a stabilized environment between 60 and 80 degrees Fahrenheit. If you let your house freeze in the winter or bake in the summer, those polymers in the leveler and the adhesive will eventually fatigue. To maintain that high-end look, hardwood floor care secrets to longevity and shine involve more than just a mop; you need a dedicated hygrometer to monitor your room’s humidity. If it drops below 30%, you will see gaps. If it spikes, you will see cupping.
Don’t Let Your Hard Work Rot Under the Surface
After the dust settles, you have to be meticulous about the cleanup. I have seen homeowners ruin a beautiful satin finish within a week because they did not know how to clean hardwood floors after a major renovation. That fine white dust from the leveling compound is basically liquid sandpaper. If you start mopping before you have vacuumed with a soft-bristle head, you are literally grinding the grit into your floor. For those planning long-term, mastering hardwood floor refinishing expert tips for 2025 will save you from a full replacement if the surface starts to dull. If you ever hear a suspicious hollow spot later on, do not panic; you can often learn how to fix a hollow sound under your luxury vinyl with a simple injection kit rather than ripping up the whole row.
Where Flooring Technology is Heading in 2025
Looking ahead, the industry is moving toward intelligent substrates. We are already seeing the emergence of self-healing leveling compounds that can bridge micro-cracks caused by minor settling. In the next few years, I expect wireless moisture sensors to become standard in high-end underlayments, allowing you to catch a subfloor issue before it ever reaches your planks. For now, focus on the fundamentals. My challenge for you is this: for your next project, ditch the bubble level and try the leveling pin method. It will change the way you see your floors forever.
Hard Truths from a Decade of Floor Failures
After years of repairing buckled planks and cracked tiles, I have realized that the best flooring pros are actually experts in physics and chemistry first. One lightbulb moment for me was realizing that moisture isn’t a guest; it is a permanent resident under your slab. If you don’t trap it, it will eventually ruin even the most expensive materials. Another hard lesson is that ‘flat’ and ‘level’ are not the same thing. You can have a perfectly flat floor that slopes two inches across the room, which will still cause issues with kitchen cabinets. To avoid these headaches, I always review flooring installation mistakes to avoid for lasting results before starting a new job. Lastly, remember that the prep work usually takes three times longer than the actual flooring install. If you are rushing the prep, you are essentially scheduling a repair for two years from now.
The Kit I Never Leave the Truck Without
To achieve professional-grade results, you need more than just a hammer and a saw. I swear by my digital moisture meter; it is the only way to truly know if a subfloor is ready. You can learn how to use a moisture meter to prevent floor failure to save yourself thousands in material costs. My second essential is a high-quality 6-mil vapor barrier and moisture-resistant seam tape. For the leveling phase, I always keep a box of adhesive leveling pins and a rotary laser level in my kit. These are part of the 7 tools you actually need for a professional DIY hardwood install if you want to avoid the ‘guessing game’ that leads to bouncy spots and uneven transitions. I also recommend keeping a HEPA-filter vacuum on site because, as we discussed, dust is the enemy of a good bond.
Your Floor Deserves the Extra Hour
It is tempting to cut corners when you are at the end of a long renovation, but your subfloor is the foundation of your home’s comfort. Taking that extra hour to double-check your moisture readings, vacuum one last time, or re-verify your leveler pins makes the difference between a floor that lasts five years and one that lasts fifty. When you revamp your home with expert flooring installation tips, you aren’t just improving the look; you are protecting your health by preventing mold and ensuring a stable walking surface. Don’t be afraid to take it slow. A perfect flooring installation is a marathon, not a sprint. Have you ever discovered a hidden subfloor disaster after pulling up an old carpet? Let me know your horror stories in the comments below.